Step-by-Step Guide to Put a Border on Your Quilt
If you’ve ever struggled to give your quilt that polished, finished look, you’re not alone. Many quilters find adding a border to be tricky—whether it’s choosing the right fabric, measuring accurately, or making those seams lay flat.
The good news? There are simple, effective techniques that can help you master this quilting milestone, and plenty of products out there to make the process even smoother.
To add a border to your quilt, start by choosing fabric that complements your quilt’s colors and themes.
Measure your quilt carefully, cutting your border strips to size.
Attach the borders with precision, using creative designs to improve the look.
Make certain you press your seams for a flat finish.
Finally, finish your quilt with binding that ties everything together.
If you want to uncover more techniques and tips, keep exploring the steps ahead!
Key Takeaways
- Choose a border fabric that complements your quilt’s theme and color palette for a harmonious look.
- Accurately measure your quilt’s dimensions from the center. This helps ensure the border will fit properly.
- Cut border strips with precision using a rotary cutter, and make sure your fabric is squared up.
- Attach the border using precise sewing techniques. You can consider single or multiple borders for added depth.
- Select a binding fabric that enhances the quilt’s overall appearance, and miter the corners for a polished finish.
Choosing the Right Fabric for Your Quilt Border
When you’re selecting fabric for your quilt border, what factors should you consider?
First, think about the overall theme and color palette of your quilt.
Your border fabric should complement the existing fabrics, enhancing the design without overwhelming it.
Consider different fabric patterns; a subtle print might work well with a busy quilt center, while a bold pattern could add a striking contrast.
Next, choose your border styles wisely.
A wide border can create a dramatic frame, while a narrow one offers a more delicate finish.
Don’t forget to take the fabric’s texture into account.
A soft cotton can provide a cozy feel, while a stiffer fabric might add structure.
Ultimately, aim for a balance that highlights your quilt’s beauty, ensuring that the border fabric ties everything together harmoniously.
Your choice can elevate your quilt from simple to stunning!
Measuring Your Quilt for the Perfect Border Fit
To get that perfect border fit for your quilt, you’ll want to have a few key tools nearby. It really makes a difference! Measuring accurately is super important, so knowing exactly how to measure your quilt can save you a lot of time—and definitely some frustration, too. Let’s take a look at what you’ll need and how you can make sure your measurements are spot-on.
Essential Tools Needed
Measuring your quilt accurately is essential for achieving a perfect border fit, and having the right tools can make all the difference.
Start with a reliable measuring tape, which should be at least 60 inches long for larger quilts.
A rotary cutter and cutting mat are also essential supplies, ensuring you can trim your borders cleanly and precisely.
Don’t forget about a straight ruler to help you line up your measurements perfectly.
For marking, fabric chalk or a pencil will allow you to make temporary lines without damaging your fabric.
Finally, consider a quilt square or level to check for any uneven edges.
These tools overview will set you up for success in your border application.
Accurate Measurement Techniques
Accurate measurements are essential for ensuring your quilt borders fit perfectly. Even small discrepancies can lead to misalignments, so it’s important to take your time.
To achieve accurate calculations, follow these simple techniques:
- Use a clear measurement tool: A quilting ruler or measuring tape works best for precise readings.
- Measure multiple times: Take measurements from different sections to confirm consistency across your quilt.
- Document your findings: Write down your measurements to avoid confusion later on.
Cutting Your Border Fabric: Tips and Techniques
Cutting your border fabric is an essential step in quilt-making that can greatly impact the final look of your project. First, choose the right border fabric types, whether you prefer a solid color for a classic look or a patterned fabric for added interest.
Once you’ve selected your fabric, lay it flat and use a rotary cutter for precision. Measure carefully, verifying you’ve got the correct width and length based on your quilt’s dimensions.
Utilize cutting techniques like squaring up your fabric before cutting strips to avoid distortion. Always cut with a sharp blade for clean edges.
If your border requires multiple strips, stack your fabric to cut several layers at once, which saves time. Finally, double-check your measurements before cutting, as accurate borders improve your quilt’s overall appearance and guarantee a professional finish.
Happy cutting!
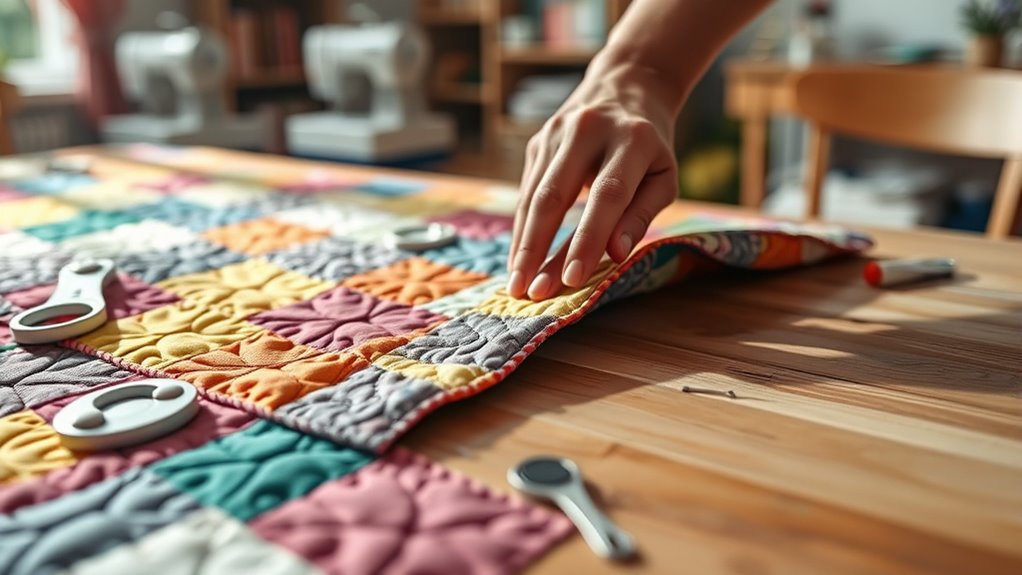
Getting Your Quilt Top Ready for Borders
Getting your quilt top ready for borders is an important step that can improve your project’s overall design.
Before you attach those borders, consider a few vital elements that contribute to quilt aesthetics.
- Border Styles: Choose from various styles like pieced, solid, or scalloped to complement your quilt design.
- Fabric Types: Select fabrics that coordinate well with your main quilt top, considering fabric textures and durability.
- Color Combinations: Pick colors that harmonize with your existing palette, guaranteeing pattern coordination and balance.
Once you’ve made your selections, focus on border placement. Measure your quilt top carefully to determine the correct dimensions for your chosen border styles.
This attention to detail will make a significant difference in your quilt finishing. By utilizing effective sewing techniques, you can guarantee a polished look that improves your quilt’s overall appeal.
Enjoy this creative process as you prepare for your next steps!
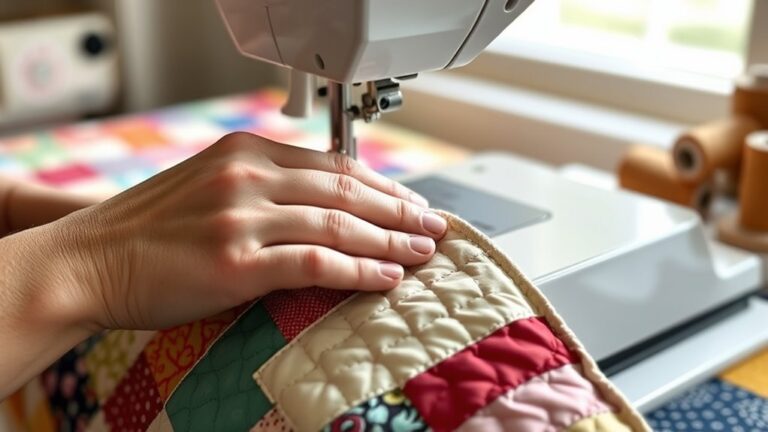
Let’s Attach Your First Quilt Border Together
Attaching your first quilt border is an exciting step that brings your project closer to completion. Start by selecting your border design, ensuring it complements your quilt aesthetics.
Choose fabric patterns that harmonize with your quilt top. Pay attention to color combinations that improve the overall look.
Selecting fabric patterns that complement your quilt top enhances the overall aesthetic, creating a harmonious and visually appealing masterpiece.
Cut your border strips according to the quilt’s dimensions. Use precise sewing techniques for a clean finish.
Consider various border styles, such as single or multiple borders, to add depth and interest. As you sew the strips, keep an eye on the fabric textures since they can greatly affect the quilt’s feel and appearance.
Once the borders are attached, take a moment to admire your work. These finishing touches not only frame your quilt but also reflect your quilting traditions and personal style.
Let this border inspiration guide you as you continue your quilting journey!
Enhance Your Quilt With Additional Borders
Adding extra borders is a great way to give your quilt even more personality. When you’re picking fabric colors, try to choose ones that go well with your main design—it can really make everything pop. And don’t forget to measure your border widths carefully; it makes a big difference in how polished your finished quilt will look.
Let’s take a closer look at how these simple choices can completely transform your quilt into something truly stunning.
Choosing Fabric Colors
While choosing fabric colors for your quilt borders, it’s essential to contemplate how they elevate the overall design.
Using principles of color theory can guide you in selecting the perfect fabric combinations.
Consider these options to improve your quilt:
- Contrast choices: Pair bold colors with softer hues for visual balance.
- Seasonal palettes: Choose colors that reflect the season, like warm tones for fall or cool shades for winter.
- Pattern mixing: Blend different textures and patterns to add depth and interest.
Measuring Border Widths
How do you determine the ideal width for your quilt borders? Start by considering your overall border design and the quilt’s size.
A good rule of thumb is to keep the width proportional to the quilt itself. For instance, a wide quilt might benefit from wider borders.
Think about the border styles you want to incorporate. Are they simple or intricate?
Measure your quilt top and decide how much of the quilt you want to frame. For a balanced look, aim for widths between 2 to 6 inches, depending on your design.
After measuring, cut your fabric accordingly, and make sure to keep your edges straight for a polished finish.
This thoughtful approach will improve your quilt’s overall aesthetic and cohesiveness.
How to Properly Press Your Quilt Borders
Pressing your quilt borders correctly sets the stage for a polished final product. Using effective border pressing techniques guarantees your quilt lies flat and looks professional.
Here are a few key points to remember:
- Press seams open: This reduces bulk and helps your borders lay flat against the quilt top.
- Follow fabric grain considerations: Always press in the direction of the grain to avoid distortion, especially when working with bias-cut borders.
- Use steam wisely: A little steam can help set your seams and remove stubborn wrinkles, but too much can warp the fabric.
After pressing, take a moment to check that your borders are even and smooth.
This attention to detail will pay off when you quilt your project, assuring that your hard work shines through.
Happy pressing!
Quilting Techniques to Enhance Your Border
Enhance your quilt’s aesthetic by incorporating creative quilting techniques into your borders.
Experiment with different border styles and fabric weights to achieve design balance and visual impact.
Use color theory to choose hues that complement your quilt, ensuring the borders don’t overpower the main design.
Consider pieced borders for added texture and interest.
Mixing patterns can uplift your project, making it feel modern and dynamic.
Incorporate border motifs that reflect quilting trends, like geometric shapes or floral designs, to keep your quilt fresh.
Here’s a quick reference table to guide you:
| Technique | Description |
|---|---|
| Color Theory | Use complementary colors for impact |
| Pieced Borders | Combine different fabrics for texture |
| Border Motifs | Select patterns that enrich the theme |
| Fabric Weights | Balance lighter and heavier fabrics |
| Pattern Mixing | Blend various designs for uniqueness |
These techniques will truly uplift your quilt borders!
Binding Your Quilt: Final Steps Explained
Binding your quilt is one of the final steps that brings your project together beautifully. Choosing the right binding techniques can improve both functionality and border aesthetics.
Binding your quilt is a crucial step that enhances both its function and visual appeal, adding a beautiful finishing touch.
Here’s how to get started:
- Select your binding fabric: Pick a fabric that complements your quilt’s colors and patterns.
- Cut and prepare your strips: Cut your binding strips to 2.5 inches wide for a sturdy finish. Then sew them together to create one long strip.
- Attach and finish: Fold the binding in half lengthwise, press, and attach it to the quilt edges. You can use a sewing machine or hand stitch for a polished look.
Pay attention to the corners. Mitering them will provide a crisp finish.
Finally, take a moment to admire how the binding frames your quilt, adding that perfect touch of professionalism. You’re now ready to enjoy your stunning creation!
Common Border Challenges and How to Solve Them
When you’re working on quilt borders, you’ll probably run into a few challenges along the way. For example, choosing the right fabric or measuring your lengths accurately can sometimes feel a bit overwhelming. It really helps to address these issues early on—that way, you can avoid a lot of frustration down the road.
Let’s talk about fabric selection first. Picking a fabric that complements your quilt can make a big difference in the overall look. After that, there’s measuring; getting those lengths right is key, so it’s worth taking a little extra time here. And finally, you’ll want to match your quilting techniques to the style of your border. Doing this gives your quilt a polished, cohesive finish.
Fabric Selection Dilemmas
How do you choose the right fabric for your quilt borders without feeling overwhelmed?
Start by narrowing down your options based on a few key factors.
Consider these elements to guide your fabric selection:
- Color combinations: Make sure your border complements the quilt’s primary colors.
- Fabric textures: Mix textures for added interest, but keep it cohesive.
- Print patterns: Opt for prints that echo your quilt theme or seasonal vibes.
Measuring Border Lengths
Measuring border lengths can be tricky, especially if you’re new to quilting. To tackle this, start by determining your border design and the fabric patterns you want to use.
Different border styles, like single or double borders, will affect your measurements. Always measure from the center of your quilt to guarantee measurement accuracy; this helps avoid any puckering or distortion when you attach the borders.
Use a reliable ruler or measuring tape, and don’t forget to account for seam allowances. If you’re unsure, cut your borders slightly longer; you can always trim them down later.
Accurate measurements are key to achieving a polished finish, so take your time and double-check before cutting.
Matching Quilting Techniques
After confirming your border lengths are accurate, you might encounter common challenges when matching quilting techniques.
Different border styles and quilting patterns can create visual discrepancies that may frustrate you.
Here are some issues to look out for:
- Misaligned seams: Verify that your seams align perfectly to maintain a cohesive look.
- Inconsistent fabric weight: Mixing heavier and lighter fabrics can distort the border, so choose wisely.
- Pattern mismatch: Pay attention to how quilting patterns interact; they should complement, not clash.
Frequently Asked Questions
What Types of Borders Are Best for Beginner Quilters?
For beginner quilters, simple borders work best. You can start with straight borders, like a single solid fabric that complements your quilt’s colors.
Fabric choices like stripes or polka dots can add fun without overwhelming your design. Make sure to measure carefully and cut your fabric accurately for a clean finish.
As you gain confidence, you can experiment with wider or pieced borders, but keep it simple to start!
Can I Use Leftover Fabric for My Quilt Borders?
Absolutely, you can use leftover fabric for your quilt borders! Mixing and matching fabric combinations not only saves resources but also adds a unique touch to your project.
Experiment with different border techniques to highlight your creativity. Whether you opt for pieced borders or simple strips, using leftovers lets you express your style while minimizing waste.
How Do I Choose a Contrasting Color for My Border?
To choose a contrasting color for your border, start by understanding color theory.
Look at the main colors in your quilt and select hues that sit opposite on the color wheel, like blue and orange.
This creates a vibrant contrast.
When selecting fabric, consider the intensity and pattern of your chosen fabric.
A solid color often works best to frame your design without overwhelming it.
Trust your instincts.
Experiment and see what feels right!
What Tools Are Essential for Adding Quilt Borders?
For fabulous finishes, you’ll need a few essential tools for adding quilt borders. Grab your rotary cutter for precision, a cutting mat for safety, and a ruler for accuracy.
Don’t forget your sewing machine for seamless stitches! Your fabric selection is vital; choose materials that complement your border techniques.
Finally, keep pins handy to secure everything in place. With these tools, you’ll be ready to create a stunning quilt border that stands out!
How Can Borders Affect the Overall Quilt Design?
Borders can dramatically affect your quilt’s overall design by introducing border styles that improve its visual balance.
When you choose a bold border, it can draw attention to the center, while a subtle one can create harmony and unity.
By carefully selecting colors and patterns, you can either frame your quilt or add contrast, making your design more dynamic.
Ultimately, the right border can raise your quilt from simple to stunning!
Conclusion
Now that you’ve successfully added borders to your quilt, you can truly see your hard work come to life.
Remember, a quilt isn’t just a blanket; it’s a labor of love that tells your story.
If you hit any bumps in the road, don’t fret. Every quilter faces challenges along the way.
Just keep your chin up and enjoy the process! With your new skills for adding a border on your quilt, your quilts will shine brighter than ever.
Happy quilting!