How to Quilt on a Regular Sewing Machine
If you’ve ever dreamed of making beautiful quilts but worried you need a fancy machine, you’re not alone. Many people struggle with how to quilt on a regular sewing machine, feeling unsure about where to start or if it’s even possible.
The good news? With the right tips and tools, quilting at home can be accessible and enjoyable for everyone.
You can quilt on a regular sewing machine by adjusting settings and using the right tools.
Start by picking the right fabric and preparing your layers. Make sure to check your machine’s tension and use a walking foot for better control.
Practice basic stitching techniques like zigzag or free motion. Always baste your layers to keep them in place.
If you want to learn how to address common issues and finish your quilt, keep going!
Key Takeaways
- Familiarize yourself with your machine settings, including stitch length and needle type, for optimal quilting performance.
- Layer your quilt top, batting, and backing neatly. This will help ensure stability while sewing.
- Use a walking foot or free-motion foot. These tools help you manage multiple fabric layers effectively.
- Baste quilt layers using techniques like pin basting or spray basting. This keeps all the layers aligned during quilting.
- Test thread tension and machine settings on scrap fabric. Doing this helps you achieve clean, professional-looking stitches.
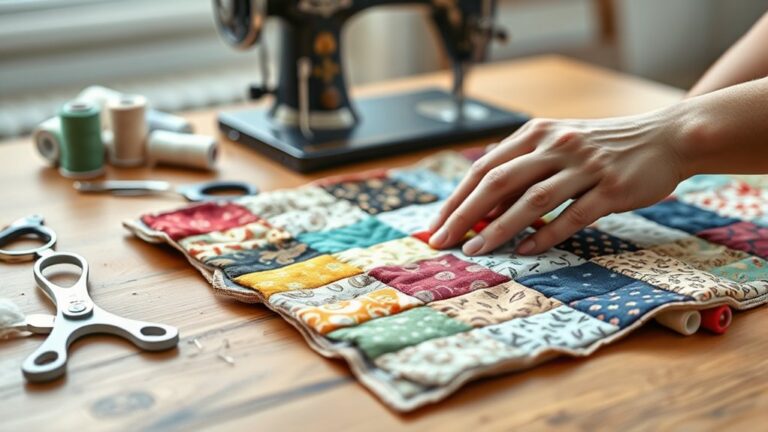
Getting Started With Machine Quilting
Getting started with machine quilting can feel overwhelming, but with just a few essential tools and techniques, you’ll be on your way to creating beautiful quilts.
First, familiarize yourself with your machine settings, adjusting the stitch length to suit your quilting techniques. Experiment with different needle types to find what works best for your fabric choices.
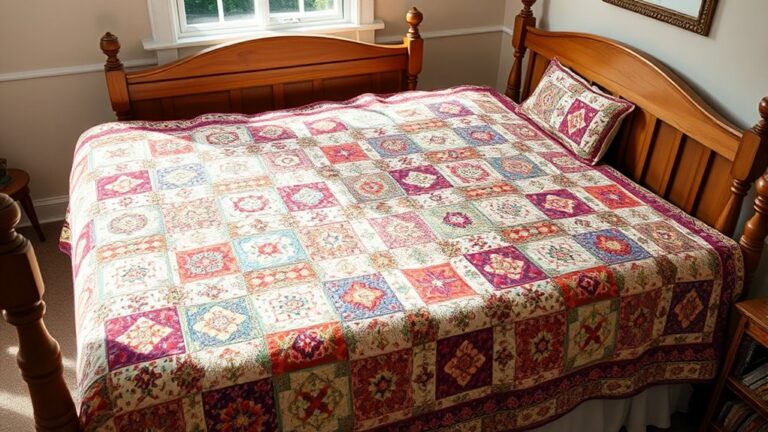
When planning your quilt designs, consider various quilting patterns that improve your overall look. Make sure you have a spacious quilting area to maneuver your fabric easily.
Fabric layering is vital, so stack your quilt top, batting, and backing neatly. Pay attention to your quilting speed; quilting too fast can lead to mistakes, while going too slow might limit your creativity.
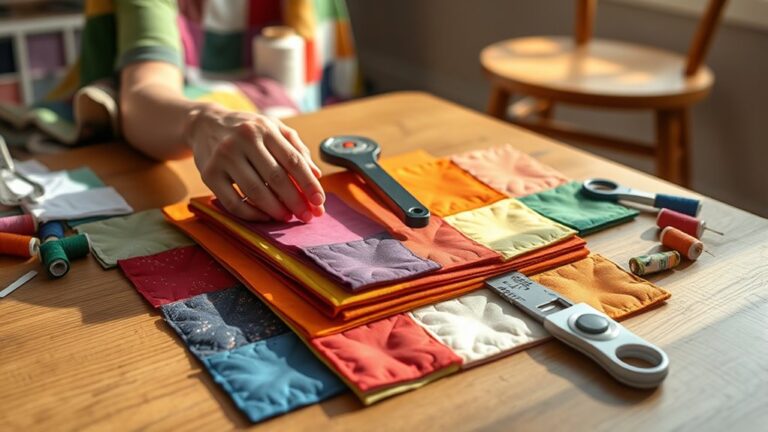
Choosing the Right Fabric for Your Quilt
After you’ve set up your machine and practiced some basic techniques, the next step involves selecting the right fabric for your quilt.
Start by exploring different fabric types like cotton, linen, or blends, as they each offer unique qualities. Consider fabric weight too; for instance, lightweight fabrics work well for delicate designs while heavier fabrics provide durability.
When it comes to color combinations, aim for harmony and contrast to improve your quilt’s visual appeal. Don’t forget about texture considerations. Mixing smooth and textured fabrics can add depth.
Before cutting, pre-wash fabrics to prevent shrinkage later. Look for printed designs that resonate with your theme, ensuring they’ll stand out beautifully.
For quilt backing, choose a fabric that complements your front design. Fabric sourcing is essential, so visit local shops or online stores to find the perfect materials that inspire you.
Happy quilting!
Essential Tools and Supplies for Quilting
To create a beautiful quilt, you’ll need some essential tools and supplies that streamline the process and improve your crafting experience.
Start with a sharp rotary cutter and a cutting mat for precise fabric cuts. You’ll also want a good ruler to measure your fabric accurately.
Having a variety of quilting tools, like pins and clips, will help keep your layers in place while sewing.
Don’t forget quality thread that matches your chosen fabric types. This guarantees durability and elevates the overall look of your quilt.
An iron is essential for pressing seams flat, giving your quilt a polished finish.
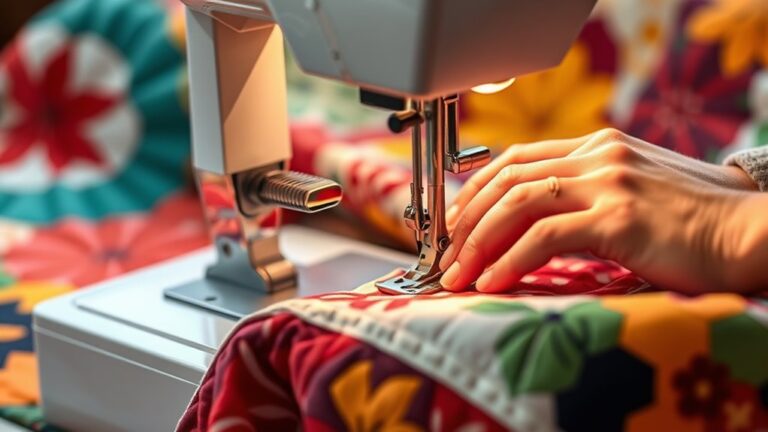
Finally, consider a walking foot for your sewing machine. It helps move multiple layers of fabric smoothly.
With these tools in hand, you’re ready to plunge into the exciting world of quilting!
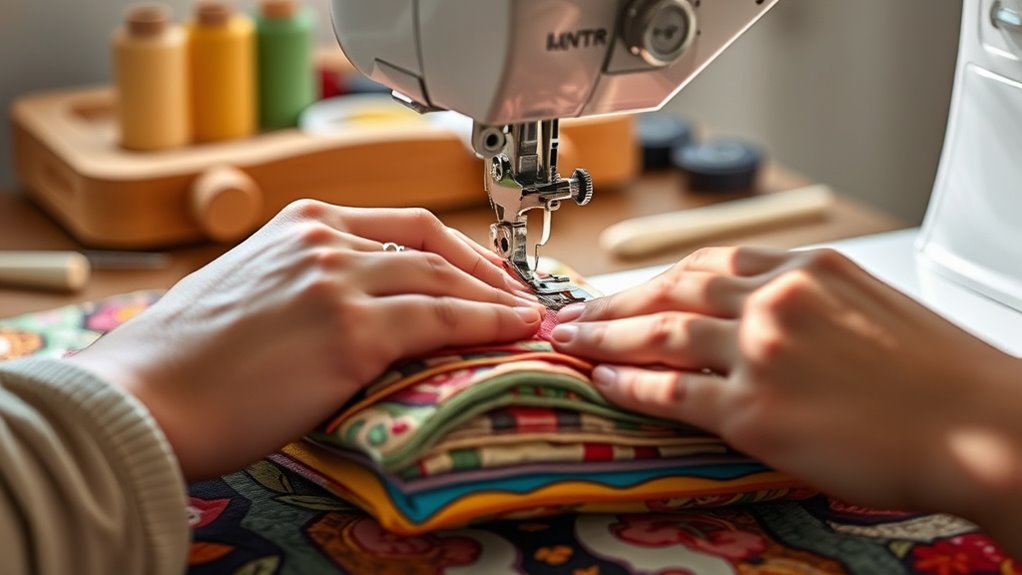
Preparing Your Sewing Machine for Quilting
Before you plunge into quilting, it’s vital to confirm your sewing machine is ready for the task.
Start by checking your machine settings. Make certain you’ve selected a straight stitch and adjusted the stitch length to around 2.5 to 3.0 for stability.
You’ll also want to lower the feed dogs, which helps when maneuvering your quilt sandwich.
Next, don’t forget to use a walking foot or a free-motion foot. These are key for managing multiple layers.
If your machine has a quilting needle, swap that in for better results.
Always test your settings on a scrap piece of your quilt sandwich to verify everything runs smoothly.
Finally, make sure your thread tension is balanced, as uneven tension can lead to frustrating puckering.
With these preparations, you’ll be set to tackle your quilting project with confidence!
Master Basic Quilting Techniques
To master basic quilting techniques, you’ll want to have the right tools and learn a few essential stitching skills. First things first—gather all your supplies. It really helps to have everything you need within reach, so you’re not scrambling for something in the middle of a project.
Once you’re set up, you can start focusing on your stitching techniques. Take your time practicing, and before you know it, your results will start looking stunning.
Essential Tools Needed
While diving into quilting, having the right tools can greatly improve your experience and results.
Start with essential quilting accessories like a rotary cutter, cutting mat, and rulers. These tools guarantee precise fabric selection and cutting, making your piecing more accurate.
Don’t forget to invest in a walking foot for even feed and quilting accuracy.
A good quality needle and thread are vital, too; they can make a significant difference in your project’s durability.
Finally, keep a seam ripper handy. Mistakes happen! With these tools in your arsenal, you’ll be well-equipped to tackle any quilting project and enjoy the process as you create beautiful pieces.
Happy quilting!
Basic Stitching Techniques
Mastering basic stitching techniques is essential for successful quilting. You’ll want to start with a few key concepts to guarantee your projects come out beautifully.
Pay attention to your stitch patterns and practice making tension adjustments for consistent results. Here are some techniques to focus on:
- Straight Stitch: The foundation of most quilting.
- Zigzag Stitch: Adds flexibility and can prevent fabric fraying.
- Free-Motion Quilting: Allows for creative designs; practice is key!
- Basting Stitch: Temporarily holds layers together for easy quilting.
Tips for Accurate Cutting and Piecing
Accurate cutting and piecing really make a difference if you want your quilt to look polished. It helps to have the right cutting tools on hand, so investing in quality equipment is a great place to start. Once you’ve got your tools, learning some precise piecing techniques will make sure every part of your quilt fits together just right. Let’s take a closer look at how these simple steps can help you step up your quilting game.
Essential Cutting Tools
Cutting tools are the backbone of any successful quilting project, ensuring your fabric pieces are uniform and precise. To achieve this, consider incorporating these essential tools into your workspace setup:
- Cutting mats: Protect your surfaces and provide a grid for accurate measurements.
- Rotary cutters: Use them for quick, clean cuts. Just remember to handle them with safety blades.
- Fabric scissors: Invest in a good pair for trimming and detail work.
- Quilting rulers: These help you measure and cut straight lines easily.
Utilizing effective cutting techniques and keeping your tools organized will greatly improve your quilting experience.
Make sure your workspace is set up for efficiency, as it’ll save you time and frustration in the long run.
Precise Piecing Techniques
When you aim for precision in quilting, the way you piece your fabric together is just as essential as how you cut it.
Start by consistently using the correct seam allowance, which is typically a quarter inch. This small detail guarantees that your pieces fit together perfectly.
Before you sew, double-check that your fabric edges are aligned. Even a slight misalignment can throw off your entire pattern.
Additionally, understanding color theory can improve your design. Choose fabrics that complement each other to create a cohesive look.
When piecing, press your seams open or to one side, depending on your pattern. This helps minimize bulk and achieve sharper points.
These techniques will help you create beautiful, precise quilts that you’ll be proud to display.
Best Quilting Stitches for Your Machine
Choosing the right quilting stitches for your sewing machine can boost your projects and improve your overall quilting experience.
Different stitch techniques can refine various quilting patterns, making your work stand out. Here are some of the best stitches to evaluate:
- Straight Stitch: Perfect for outlining and basic patterns, it’s a must-have for every quilter.
- Zigzag Stitch: Ideal for raw edges and decorative elements, it adds versatility to your designs.
- Free Motion Stitching: This technique lets you create intricate designs and patterns, providing artistic freedom.
- Walking Foot Stitch: Great for straight lines and even feeding of layers, it helps prevent puckering.
Experimenting with these stitches can boost your quilting game.
Remember, the right stitch not only improves your design but also contributes to the durability of your quilt.
Happy quilting!
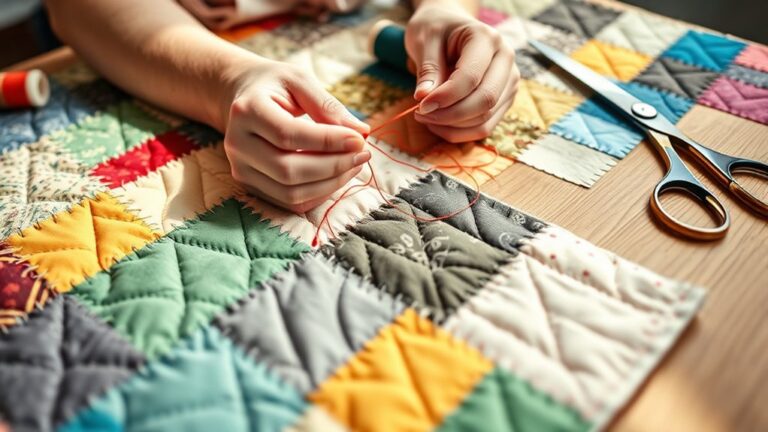
Basting Your Quilt Layers
After selecting the perfect stitches for your quilting projects, the next step is basting your quilt layers. Basting is essential for keeping everything in place while you quilt.
You can choose from several basting techniques, like traditional pin basting or using a long stitch to temporarily hold layers together. If you prefer a quicker method, spray basting is a popular choice.
Just spray the adhesive on one layer and press the others down, ensuring everything aligns perfectly. Before you start basting, make sure your quilt layer preparation is thorough.
Trim any excess fabric and smooth out wrinkles to achieve a flat surface. If you want to investigate basting alternatives, consider using quilt basting clips or even hand basting with large stitches.
Whichever method you choose, ensuring your layers are secure will make your quilting experience smoother and more enjoyable.
How to Fix Common Quilting Problems?
When you’re quilting, it’s totally normal to run into a few annoying problems, like thread tension acting up or your fabric bunching where it shouldn’t. But don’t stress—these little hiccups happen to everyone, and with a few simple tweaks, you can usually fix them pretty quickly.
Let’s chat about how picking the right needle and thread can make a big difference, and then we’ll dive into some easy solutions for those stubborn quilting issues.
Thread Tension Issues
As you plunge into quilting on your sewing machine, you might encounter thread tension issues. These can lead to frustrating results if not addressed.
Tension troubleshooting is essential for achieving smooth stitches. It helps ensure your quilting looks clean and professional.
Here’s how to fix common problems:
- Check the thread path: Verify your thread is correctly threaded through the machine.
- Adjust the tension settings: Start by tweaking the upper tension. A little change can make a big difference.
- Use the right needle: A dull or incorrect needle can affect tension.
- Test on scraps: Always test your adjustments on fabric scraps before quilting.
Taking these simple steps can make your quilting experience much smoother and more enjoyable.
Fabric Bunching Problems
Fabric bunching can be frustrating, especially when you’re aiming for smooth, even stitches in your quilt.
This issue often arises from improper fabric tension or using the wrong presser foot. If your fabric isn’t moving smoothly, check the tension settings on your sewing machine.
Too tight or too loose can lead to bunching causes. Make sure you’re using a walking foot for thicker layers, which helps feed the fabric evenly.
Furthermore, keep your fabric flat and guide it gently as you sew. Don’t pull or push too hard.
If you notice bunching, stop and adjust your setup. With these tips, you’ll be on your way to achieving a beautifully quilted project without the hassle of fabric bunching.
Needle and Thread Choices
Choosing the right needle and thread can make all the difference in your quilting project.
Understanding needle types and thread weights helps you avoid common problems.
Here are some tips to keep in mind:
- Needle Types: Use a universal needle for most fabrics. You might want to try a quilting needle if you’re working with thicker layers.
- Thread Weights: Opt for a 40-weight thread for standard quilting. Lighter threads can lead to breakage, so keep that in mind.
- Needle Size: Use a size 80/12 for standard piecing. If you’re sewing with thicker fabrics, go for a larger size.
- Thread Material: Cotton threads are great for quilting. Polyester is a good choice if you want extra durability.
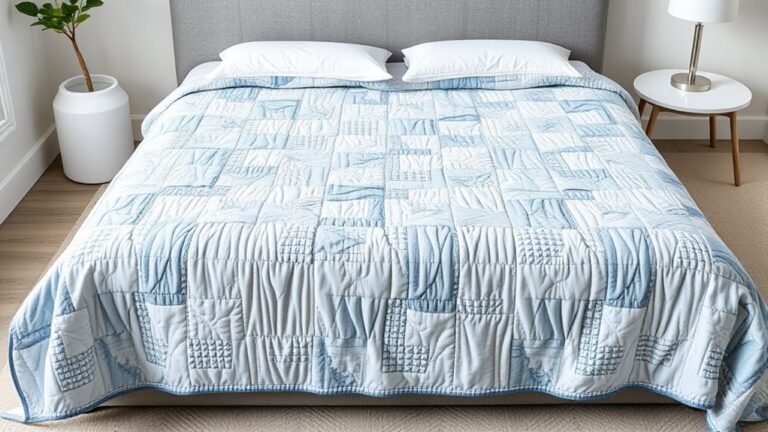
Finishing Touches: How to Bind and Care for Your Quilt
Binding and caring for your quilt are essential steps that can improve your project from good to great.
Start by choosing your binding techniques, such as straight grain or bias binding. Cut your strips accordingly, then fold and press them for a clean finish.
Attach the binding to the quilt edge, making sure it’s evenly distributed. When you reach the corners, use mitered corners for a polished look.
Once your quilt’s bound, it’s time for quilt care. Wash your quilt gently in cold water with a mild detergent.
Avoid harsh chemicals to preserve the fabric’s colors and integrity. Air drying is best, but if you prefer using a dryer, select a low heat setting.
Store your quilt in a cool, dry place, away from direct sunlight to prevent fading. With proper binding techniques and quilt care, you’ll guarantee your quilt lasts for years to come!
Frequently Asked Questions
Can I Quilt Without a Walking Foot Attachment?
Yes, you can quilt without a walking foot attachment! You’ll just need to use free motion quilting techniques.
Lower the feed dogs on your machine and adjust your stitch length. This allows you to control the fabric handling more freely.
Practice moving the fabric smoothly while guiding it under the needle. It might take some time to get the hang of it, but with patience, you can create beautiful quilts without a walking foot!
How Do I Choose the Right Thread for Quilting?
Choosing the right thread for quilting is like picking the perfect paint for a masterpiece.
You’ll want to contemplate thread materials. Cotton is great for its durability, while polyester offers strength and sheen.
In terms of color matching, aim for a shade that complements your fabric palette. This enhances the overall design without overpowering it.
Trust your instincts; the right thread can transform your quilt into a true work of art.
What Is the Best Needle Type for Quilting?
For quilting, you’ll want to use a quilting needle, often labeled as “quilting” or “patchwork.”
These needles have a tapered point that easily penetrates multiple layers of fabric.
Needle sizes typically range from 75/11 to 90/14, depending on your fabric type.
If you’re working with thicker layers, go for a larger needle size.
Make sure to match your needle type and size to your thread and fabric for the best results!
How Do I Prevent Fabric Bunching While Quilting?
To prevent fabric bunching while quilting, keep your fabric tension balanced and use proper quilting techniques.
Start by adjusting your tension settings. Too tight can cause puckering and make your quilt look uneven.
Use a walking foot to help move multiple layers evenly. This makes a big difference for smooth stitching.
Don’t pull the fabric as you sew. Instead, guide it gently and let the machine do the work.
Finally, use quality thread. This reduces friction and helps improve your overall quilting experience.
Can I Quilt Multiple Layers With a Regular Machine?
Yes, you can quilt multiple layers with a regular machine! To guarantee layer stability, use a walking foot and adjust your machine settings for thicker fabrics.
Start with a basting stitch to hold everything in place before you begin quilting. Keep your fabric taut but not stretched, and take your time to guide it smoothly through the machine.
With practice, you’ll master quilting multiple layers effortlessly!
Conclusion
Now that you’ve navigated the world of machine quilting, you’re ready to create your masterpiece. It’s much like a painter transforming a blank canvas into a stunning work of art.
With the right tools, techniques, and a bit of practice, your quilts will not only keep loved ones warm but also tell stories that linger like whispers of a cherished memory.
So, welcome your creativity and let your sewing machine become your trusted companion on this colorful journey.
Remember, learning how to quilt on a regular sewing machine opens up endless possibilities for your projects and helps you enjoy every step of the process.