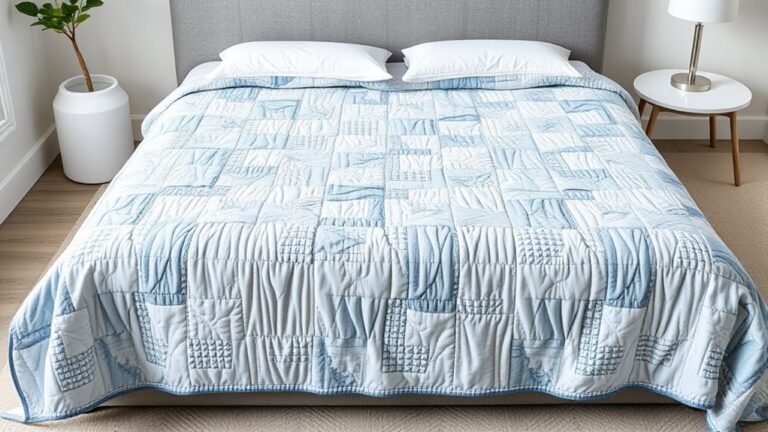
Mastering the Basics of Sewing a Quilt Step-by-Step
If you’ve ever felt overwhelmed trying to learn how to sew a quilt, you’re not alone. Many people struggle with figuring out where to start, what tools to use, or how to get those crisp, beautiful seams they see in finished quilts.
It can seem daunting, but with the right guidance, anyone can master the basics of sewing a quilt step-by-step. In this article, we’ll break down the essentials to help you get started with confidence.
To master the basics of sewing a quilt, you start by choosing fabrics and batting that fit your vision. Gather essential tools like a rotary cutter and a reliable sewing machine for smooth stitching.
Next, piece together your quilt top with precision, and arrange fabric layers carefully.
Don’t forget to bind your quilt for a neat finish and learn about proper care to guarantee longevity.
Keep exploring to uncover tips and techniques that can improve your quilting journey.
Key Takeaways
- Choose complementary fabrics and batting based on the warmth, texture, and color combinations you want. This will help enhance the overall look and feel of your quilt.
- Use essential cutting tools like rotary cutters and mats. Pair these with a reliable sewing machine for more efficient and accurate quilting.
- Carefully arrange your fabric layers, making sure everything is aligned and smooth. Pin them in place to prevent any shifting as you quilt.
- Stick to a consistent quarter-inch seam allowance when piecing your fabric together. This helps ensure accuracy and gives your quilt a polished finish.
- Pick the right binding materials and follow proper techniques to finish your quilt edges securely. Doing so will add durability and a neat appearance.
Choosing the Right Fabrics for Your Quilt
Choosing the right fabrics for your quilt can make all the difference in its final look and feel. Start by exploring fabric color combinations that resonate with your vision.
Think about the mood you want to create, whether that’s warm and inviting or cool and calming. Don’t be afraid to mix patterns and solids, just make certain they complement each other.
Next, consider fabric texture considerations. Different textures can add depth and interest to your quilt.
For instance, pairing soft cotton with a textured linen can create a beautiful contrast. Keep in mind that some fabrics may behave differently during the quilting process.
Always test your fabric choices together by making a small swatch. This way, you’ll see how colors and textures interact before committing.
Your fabric selections will set the stage for a quilt that not only looks stunning but feels great to snuggle under.
Essential Tools Every Quilter Needs
To make a beautiful quilt, it really helps to have the right tools on hand. First off, you’ll want to gather some good cutting tools—these will make your fabric prep a whole lot easier. Next, don’t forget about the essentials for your sewing machine, since a well-equipped machine can make stitching much smoother. And of course, there are all those handy quilting notions that can help with everything from measuring to pinning. Having these must-haves nearby can truly enhance your quilting experience, making the whole process more enjoyable and a lot less stressful.
Cutting Tools Must-Haves
Every quilter knows that having the right cutting tools is vital for achieving clean, precise edges and smooth seams.
A rotary cutter is a must-have; it slices through fabric quickly and accurately. However, don’t forget about rotary cutter safety. Always use a cutting mat and keep your fingers clear of the blade.
Pair your rotary cutter with a reliable ruler to guarantee straight lines.
Mastering fabric cutting techniques will enhance your quilting game. Invest in quality scissors for trimming threads and intricate shapes.
A fabric marker or chalk is also handy for marking your cutting lines.
With these essential tools, you’ll make every cut count, setting a solid foundation for your quilting project.
Happy cutting!
Sewing Machine Essentials
A reliable sewing machine is one of the top essentials for any quilter. Understanding sewing machine types and features will help you choose the right one.
Regular sewing machine maintenance guarantees longevity. Proper setup is vital for success.
Don’t forget essential sewing machine accessories, from feet to bobbins, as they improve your quilting experience.
Here’s a quick reference table for your sewing journey:
| Tool | Purpose |
|---|---|
| Sewing Machine Feet | Help with various stitch types |
| Tension Adjuster | Controls stitch tightness |
| Maintenance Kit | Keeps your machine running smoothly |
| Brand Recommendations | Guide for reliable options |
| Troubleshooting Guide | Assists with common issues |
Master these sewing machine basics, and you’ll be set for quilting success!
Quilting Notions Overview
Having the right sewing machine sets a solid foundation for your quilting journey, but it’s just the beginning. To truly excel, you’ll need essential notions.
Familiarize yourself with various fabric types and textures, as they influence your quilt styles and sewing techniques. Understanding color theory improves your design choices, while exploring quilt history and quilting traditions can spark unique pattern inspirations.
Join quilting communities or attend sewing workshops to share ideas and gain insights from fellow enthusiasts. Tools like rotary cutters, rulers, and quilting mats are indispensable for precision.
Investing in quality threads and needles will also boost your projects. With these essentials, you’re well on your way to mastering the art of quilting!
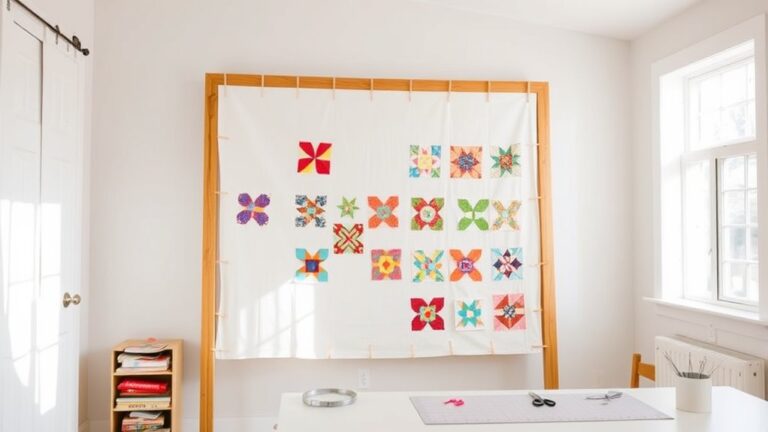
Deciphering Quilt Patterns: Your Guide to Design
Understanding quilt patterns can transform your sewing experience, making it more enjoyable and less intimidating. As you investigate the world of quilting, you’ll uncover that quilt symbolism plays a significant role. Each pattern often carries a story or meaning, connecting you to tradition and culture.
When you examine pattern variations, you’ll find an endless array of designs, from classic to contemporary. Don’t hesitate to combine different patterns for a unique look. Mixing and matching can lead to stunning results.
As you interpret these patterns, pay attention to color choices and fabric textures, since they can dramatically change the overall feel of your quilt.
Start with simpler designs to build your confidence, then gradually tackle more complex patterns as you gain experience.
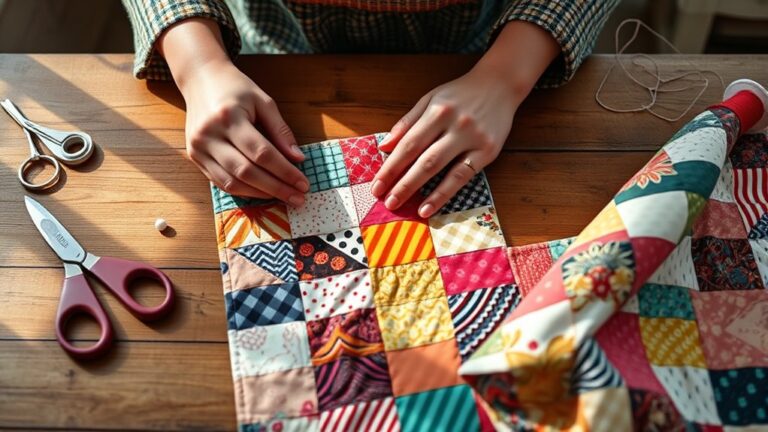
Cutting Fabric: Techniques and Tips
Cutting fabric is a crucial step that can make or break your quilting project. To guarantee cutting accuracy, use a rotary cutter and a self-healing mat.
Align your fabric neatly on the mat, paying attention to your fabric layout. It’s important to press your fabric before cutting, as wrinkles can throw off your measurements.
When measuring, always double-check your dimensions. Use a clear ruler to guide your cuts, and remember to cut in straight lines for the best results.
If you’re working with multiple layers, be mindful of shifting. Pins or weights can help keep everything in place.
Don’t rush this process. Taking your time will lead to better results.
Keep your workspace organized, and label your pieces if necessary. A little preparation goes a long way in achieving precision and guaranteeing your quilt comes together beautifully.
Happy cutting!
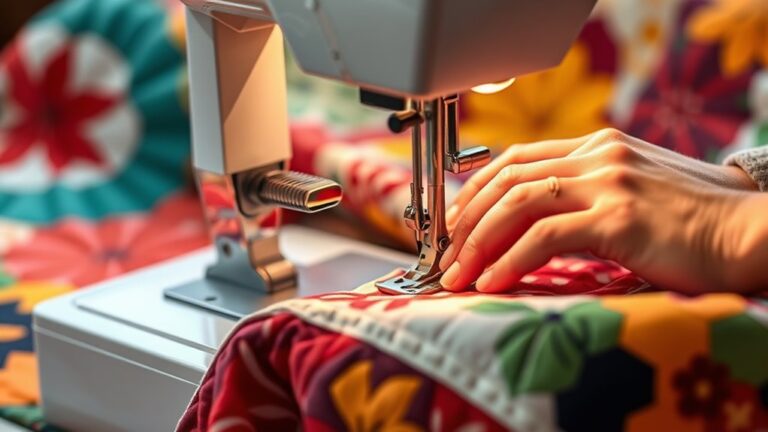
How to Piece Your Quilt Top Together
Start piecing your quilt top together by laying out your fabric pieces in the desired arrangement. Consider color theory as you position your fabrics. Balance bold colors with softer tones to create a harmonious look.
Once you’re satisfied, start sewing the pieces together. Use a quarter-inch seam allowance for accuracy, and press your seams open or to one side, depending on your fabric textures.
Begin with the first row, aligning the edges neatly. After sewing, check for any puckering, and adjust if necessary.
Move on to subsequent rows, ensuring the seams align properly for a seamless design. If you’re working with different textures, think about how they’ll interact. Mixing smooth and textured fabrics can add depth to your quilt.
Keep your workspace organized to maintain focus, and don’t hesitate to step back and reassess your layout as you go. Happy sewing!
Layering Your Quilt: A Simple How-To
Now that you’ve finished piecing your quilt top, let’s talk about getting everything ready for quilting. The first thing you’ll want to do is pick the right batting—the stuff that goes in the middle and gives your quilt its warmth and softness. There are lots of options out there, so choose what feels best for your project.
Once you’ve got your batting, it’s time to lay out your layers. Start with the quilt back, making sure it’s nice and smooth. Then, spread your batting evenly on top, and finally, add your quilt top, right side up. You want everything to be as flat and wrinkle-free as possible, so take your time here.
After your layers are stacked, you’ll need to pin them together to keep everything from shifting. You can use safety pins or special quilting pins—just space them out evenly across the quilt. This step really helps keep your quilt stable while you work on quilting it, and it’ll make the whole process much smoother.
Choosing Quilt Batting Material
When selecting quilt batting material, it’s essential to contemplate how it will impact the overall look and feel of your quilt. There are various batting types to choose from, including cotton, polyester, and wool, each offering distinct insulation properties.
Cotton provides breathability and a natural feel, making it great for warmer climates. Polyester, on the other hand, is lightweight and offers excellent durability, ideal for everyday use.
Wool offers the best insulation, keeping you warm without overheating. Think about your quilt’s purpose and the desired warmth level, as this will guide your choice.
Arranging Fabric Layers Properly
To guarantee your quilt layers come together seamlessly, begin by laying out your backing fabric right side down on a flat surface. Choose a quilt backing option that speaks to your style.
Next, lay your batting on top, smoothing out any wrinkles as you go.
Finally, arrange your quilt top, making sure all edges align with the layers beneath.
Here are a few fabric layering techniques to improve your quilting experience:
| Technique | Description |
|---|---|
| Basting | Temporary hold for all layers |
| Tacking | Quick method for keeping layers steady |
| Spray Adhesive | Provides a secure bond between layers |
Pinning for Stability
After arranging your fabric layers, pinning them together is the next step to guarantee stability during the quilting process. Start by ensuring proper fabric alignment; the top layer should match the backing and batting underneath.
Use straight pins or safety pins, depending on your preference, to secure the layers. For effective pinning techniques, place pins every few inches, especially around seams and corners where movement is likely.
This helps prevent any shifting while you sew. Remember to avoid overcrowding your pins, since too many can make sewing cumbersome.
Once everything’s pinned securely, you’re set to move on to the quilting phase with confidence, knowing your layers are stable and ready for stitching.
Mastering Your Quilt Techniques
As you plunge into quilting, mastering your techniques can lift your projects from ordinary to extraordinary. Focus on your fabric selection and combinations to create visually stunning quilts.
Understanding color theory and how different fabric textures interact will enhance your work. It’s amazing how much just a little knowledge of color can transform a quilt.
Experiment with various quilting techniques and stitch patterns to find your signature style. This is your chance to let your creativity shine through.
- Investigate traditional quilting history for design inspiration.
- Incorporate creative quilting methods, like appliqué or paper piecing.
- Use contrasting fabrics to highlight specific elements in your design.
- Practice sewing techniques regularly to improve your precision and speed.
Bind Your Quilt: Steps for a Neat Finish
Binding your quilt adds the perfect finishing touch, ensuring your hard work stands out beautifully.
Start by choosing your binding fabric, typically a 2.5-inch wide strip cut on the bias for flexibility.
Next, you’ll need to sew the strips together to create one long continuous piece.
Press the strip in half lengthwise, wrong sides together.
Now, attach the binding to the quilt’s edge using your preferred binding techniques, whether that’s machine or hand-stitching.
If you’re using a sewing machine, be sure to sew with a consistent quarter-inch seam for a neat finish.
Once you’ve sewn all around the quilt, fold the binding over the raw edges and secure it with clips or pins.
Finally, stitch it down on the back side for a clean look.
With these steps, you’ll create a polished edge that beautifully showcases your quilt, adding those essential finishing touches!
Quilt Care: Essential Maintenance Tips
Taking care of your quilt doesn’t have to be complicated, but it’s definitely important if you want it to look its best. First off, try to stick to regular washing guidelines so your quilt stays fresh without getting worn out. When you’re not using it, storing your quilt properly makes a big difference—think cool, dry places instead of cramped closets.
And sometimes, quilts get a little worn or torn. Don’t worry! If you learn a few basic repair tricks, you’ll be able to fix up any damaged spots and keep your quilt going strong. With just a bit of ongoing care, your quilt can stay a favorite piece in your home for years to come.
Regular Washing Guidelines
Regarding keeping your quilt in top shape, following regular washing guidelines is crucial.
Proper care not only maintains its beauty but also guarantees longevity.
Always pre wash fabrics to prevent shrinkage and improve color fastness before sewing.
Here are some washing tips to keep in mind:
- Use cold water and a gentle cycle to protect the quilt’s fibers.
- Opt for mild detergent to avoid harsh chemicals that can fade colors.
- Avoid bleach, as it can damage the fabric and affect color fastness.
- Air dry or tumble dry on low to prevent excessive wear.
Proper Storage Techniques
After ensuring your quilt is clean, proper storage techniques play a significant role in preserving its quality. Start by choosing a cool, dry place with good humidity control to prevent mold and mildew.
Avoid storing your quilt in damp basements or attics where temperature fluctuations can occur. Use breathable cotton or muslin fabric to wrap your quilt, since plastic can trap moisture.
For quilt organization, consider folding your quilt neatly and placing it in a designated storage bin or on a shelf. Avoid hanging it, as this can distort its shape over time.
It’s also a good idea to periodically check on your quilt, ensuring it remains in good condition. Take the time to air it out, especially after long periods of storage.
Repairing Damaged Areas
Repairing damaged areas of your quilt can restore its beauty and extend its lifespan.
You’ll want to assess the damage and choose appropriate patching techniques to guarantee a seamless repair.
Begin by selecting fabric choices that match or complement your quilt’s design.
Here are some tips to guide you:
- Identify the Damage: Look for rips, stains, or worn areas needing attention.
- Choose Fabrics Wisely: Use similar materials for patches to maintain consistency.
- Select Patching Techniques: Consider methods like appliqué or simple stitching to mend the damage.
- Secure the Edges: Make sure all edges are secured to prevent further fraying.
With a little time and care, your quilt can look as good as new!
Troubleshooting Common Quilting Problems
When you immerse yourself in quilting, it’s not uncommon to encounter a few hiccups along the way.
Fabric puckering often results from improper thread tension or uneven stitches, so check those settings first.
If you notice quilt distortion, verify your seam allowance is consistent throughout the project.
Selecting the right needle is vital. A dull or incorrect needle may cause fabric fraying or uneven stitching.
If you’re facing batting shrinkage after washing, consider pre-washing your batting to prevent surprises later.
To address any puckering, you might need to re-sew sections, adjusting the tension as needed.
Always keep an eye on your fabric as you sew to catch any issues early.
Frequently Asked Questions
How Long Does It Typically Take to Complete a Quilt?
Typically, quilt completion can take anywhere from a few days to several weeks, depending on your skill level and the quilt’s complexity.
If you manage your time well and break the project into smaller tasks, you’ll find it easier to stay motivated.
Setting aside regular sewing sessions will help you make steady progress.
Can I Quilt Without a Sewing Machine?
Yes, you can absolutely quilt without a sewing machine! Imagine the rhythmic motion of hand stitching, the soft fabric sliding through your fingers, and the satisfaction of creating each stitch with care.
Using traditional quilt techniques, you’ll feel connected to the craft. You can welcome the process, take your time, and enjoy every moment.
What Is the Best Batting Material for Beginners?
For beginners, the best batting material is usually cotton or a cotton blend. These batting types are easy to work with and provide a nice drape.
You should look for a medium thickness, around 80/20 cotton/polyester blend, as it offers warmth without being too heavy. This thickness helps prevent bunching and makes your quilting process smoother.
Plus, it’s forgiving if you make a few mistakes along the way!
How Do I Choose the Right Thread for Quilting?
To choose the right thread for quilting, you’ll want to contemplate thread types like cotton or polyester, as each offers different strengths and finishes.
Cotton thread is great for a traditional look, while polyester provides durability.
Pay attention to thread tension, too. Too tight or loose can affect your stitches.
Always test your chosen thread on a scrap piece to guarantee it works well with your fabric and machine before starting your quilt.
Are There Any Online Resources for Quilt Patterns?
You can find plenty of quilt pattern sources online. Websites like Pinterest and Craftsy offer a wealth of free quilting resources, showcasing a variety of styles and techniques.
You can also check out quilting blogs, where many enthusiasts share their original patterns for free.
Don’t forget to investigate forums or social media groups, too. They often feature unique patterns and tips from fellow quilters who are enthusiastic to share their creativity!
Conclusion
As you stitch the final seams and prepare to reveal your quilt, the anticipation builds.
Will your careful choices in fabric and technique come together in harmony?
Each quilt tells a story, waiting to be uncovered.
By mastering the basics, you’ve laid the groundwork.
But honestly, the true magic lies in what comes next.
So, take a deep breath, step back, and get ready to appreciate the beauty of your creation.
Because when it comes to sewing a quilt, the best is yet to be found.