How Do Beginners Make a Quilt?
If you’ve ever dreamed of wrapping yourself in a cozy, homemade quilt, but felt overwhelmed by where to start, you’re not alone. Many beginners struggle with choosing the right tools, fabrics, and techniques when learning how to make a quilt from scratch.
It can feel confusing, especially when you just want to create something beautiful and meaningful. Luckily, with a few simple steps and the right guidance, anyone can get started and enjoy the process.
To make a quilt as a beginner, you’ll first need essential tools like a rotary cutter, cutting mat, ruler, and sewing machine.
Choose durable 100% cotton fabrics that complement each other in color and pattern.
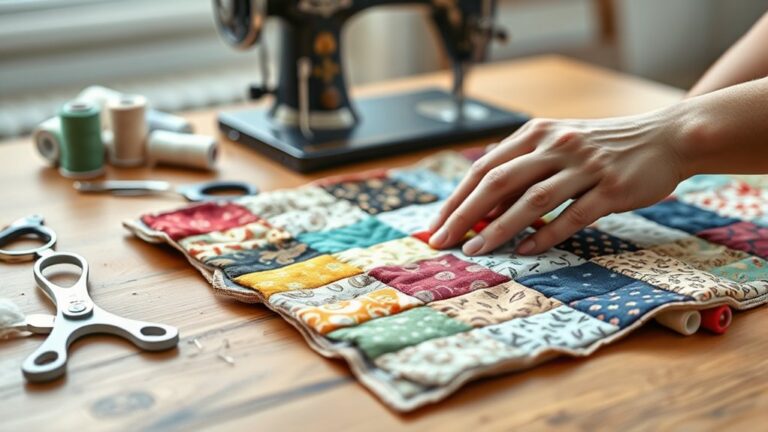
Start with simple quilt patterns, like patchwork, and practice basic stitching techniques, such as running and straight stitches.
Don’t forget to prepare your fabrics properly and select batting and backing wisely.
Keep going, and you’ll uncover even more tips and tricks along the way.
Key Takeaways
- Gather essential tools like quilt kits, rotary cutters, cutting mats, rulers, pins, and a sewing machine for successful quilting.
- Pre-wash and iron fabrics to remove chemicals. This helps ensure accurate cuts before you begin your quilt.
- Choose 100% cotton fabrics with similar weights, mixing prints and textures for a more interesting quilt design.
- Start with simple patchwork patterns. Practice basic stitching techniques like running and backstitching for strong, durable seams.
- When you’re ready to assemble your quilt, plan the layout first. Sew pieces into rows, then baste the layers together for a polished finish.
What Are the Basic Tools for Quilting?
To kick off your quilting journey, you’ll need a few essential tools. First, consider investing in quilt kits, which often include pre-cut fabric and patterns. These make it easier for beginners like you to get started.
Quilt kits save time and help you focus on learning the basics.
Next, a rotary cutter is a must-have. It allows you to cut fabric with precision, ensuring clean edges and accurate shapes.
A rotary cutter is essential for precise fabric cutting, ensuring clean edges and accurate shapes for your quilting projects.
Pair your rotary cutter with a cutting mat to protect your surfaces and keep your blades sharp.
You’ll also want a good ruler for measuring and cutting straight lines. Don’t forget about pins and a sewing machine, which will help you piece your quilt together seamlessly.
With these tools in hand, you’ll be well on your way to creating beautiful quilts. Enjoy the process and let your creativity shine!
How to Choose Fabrics for Your Quilting Project
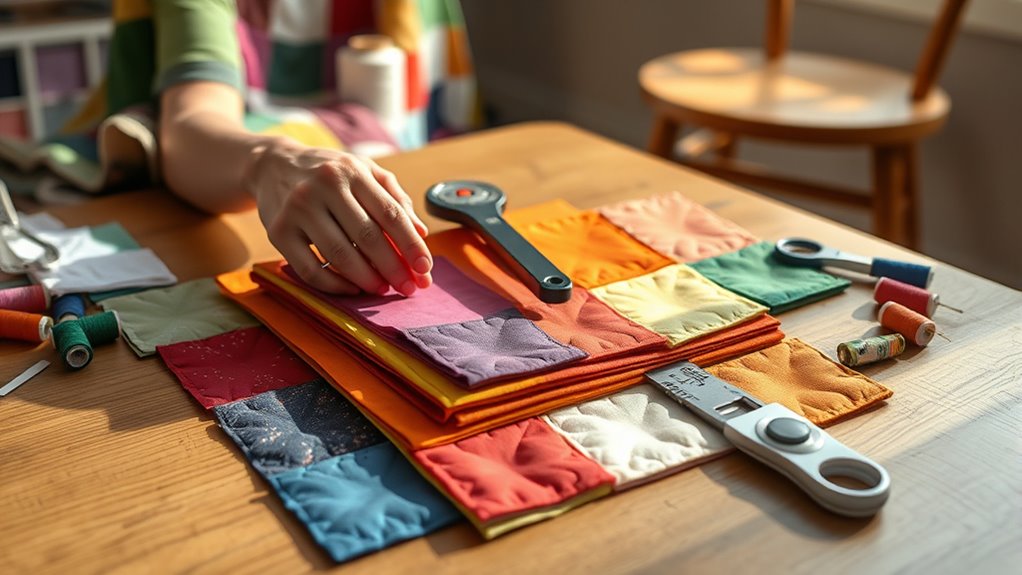
Picking out fabrics for your quilting project is one of the most exciting steps, and it really shapes how your finished quilt will look. First, think about the colors you want to use—do you picture something bold and vibrant, or maybe soft and subtle? It helps to lay out a few options and see which combinations feel right to you.
Next, there are different types of fabrics to consider. Most quilters go for 100% cotton because it’s easy to work with and holds up well over time, but don’t be afraid to explore other textures if you’re feeling adventurous. Just make sure all your fabrics have a similar weight so your quilt comes together smoothly.
Finally, patterns can totally change the vibe of your project. Try mixing large prints with smaller ones, or balancing busy designs with solids to create visual interest. The key is to choose patterns that play nicely together—that way, every piece of your quilt feels like it belongs. With a little experimenting, you’ll end up with a quilt that’s uniquely yours and absolutely stunning.
Color Combination Techniques
When selecting fabrics for your quilt, understanding color combinations can make all the difference in achieving a harmonious look. Use the color wheel to identify complementary colors for striking contrast balance.
Think about harmony principles to create a cohesive design that flows. Seasonal palettes can inspire your choices; warm tones evoke summer, while cool hues call to mind winter.
Don’t forget about texture mixing, because combining different fabric textures adds depth and interest. Ascertain your choices align with theme coordination, whether you’re aiming for a cozy or modern feel.
Finally, consider color psychology, since colors can influence mood setting and impact how your quilt resonates emotionally. By combining these techniques, you’ll create a quilt that’s visually stunning and meaningful.
Fabric Types Overview
Selecting the right fabric is essential for your quilting project, as it can greatly influence both the look and feel of your quilt.
Start with 100% cotton, which is popular for its durability and ease of handling. Cotton blends, combining cotton with polyester or other fibers, can offer unique textures and added strength.
Pay attention to fabric weights; lighter fabrics are great for intricate piecing, while heavier ones provide stability for larger quilts.
Consider the purpose of your quilt, whether it’s decorative or functional, as this will guide your fabric choice.
Don’t forget to pre-wash your fabrics to prevent shrinking and color bleeding.
Pattern Selection Tips
Finding the perfect pattern for your quilt can make all the difference
in your project’s success.
To choose fabrics that complement your design, consider these tips
for pattern inspiration:
1. Color Palette: Start with a color scheme that speaks to you. Use
design resources like color wheels or online palettes to find harmonious
combinations.
2. Fabric Types: Mix and match different textures, like cotton and
flannel, to add depth to your quilt. This variation can really make
your design pop.
3. Theme: Think about a theme, whether it’s seasonal, floral, or
geometric. This focus can help guide your fabric choices and make
the process easier.
What Quilt Patterns Are Best for Beginners?
When you’re just getting started with quilting, picking the right pattern really matters. It’s a lot easier and more fun when you don’t have to wrestle with complicated designs right away. That’s why simple patchwork quilts, patterns with straight lines, and basic geometric shapes are perfect for beginners.
These types of patterns let you practice your skills and get comfortable with the process. Plus, they help you build confidence as you go, so quilting feels enjoyable and not overwhelming.
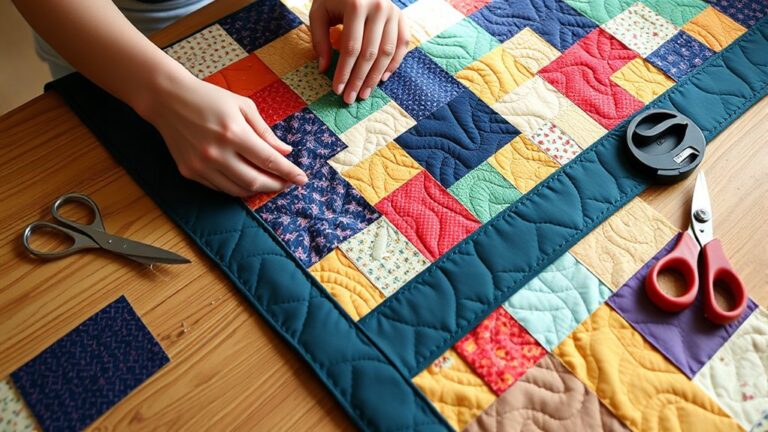
Simple Patchwork Designs
While diving into quilting, simple patchwork designs can be the perfect starting point for beginners.
These designs allow you to investigate quilt block variations without overwhelming yourself.
Here are three great options to kick off your quilting journey:
- Nine-Patch: This classic pattern consists of nine squares, making it easy to piece together.
- Four-Patch: A straightforward design with four squares that can be arranged in various ways.
- Rail Fence: This pattern uses strips of fabric and creates a lovely zigzag effect.
As you experiment, watch out for common beginner mistakes like uneven seams or mismatched fabrics.
With these simple patchwork designs, you’ll build confidence and skills in no time!
Straight Line Patterns
After exploring simple patchwork designs, you might be ready to try your hand at straight line patterns. These designs are perfect for beginners because they involve straightforward sewing techniques and minimal complexity.
Straight line patterns allow you to focus on mastering your sewing skills without getting overwhelmed. You can create striking quilts using just a few long, straight seams, making it easier to achieve a polished look.
Begin with beginner patterns like diagonal stripes or grid layouts. These patterns not only help you practice your accuracy but also let you experiment with color and fabric combinations.
As you gain confidence, you can play with varying widths and angles, adding your personal touch to each project. Happy quilting!
Basic Geometric Shapes
Basic geometric shapes are a fantastic starting point for beginner quilters looking to build their skills.
These shapes form the foundation of many quilt designs, allowing you to investigate various geometric patterns and shape variations.
Here are three great patterns to try:
1. Squares:
Simple and versatile, squares can create countless designs like checkerboards or patchwork quilts.
2. Triangles:
Use triangles to form classic designs like the flying geese or half-square triangles for a dynamic look.
3. Diamonds:
Diamonds add a unique twist to your quilts, perfect for creating eye-catching layouts.
Starting with these basic shapes helps you gain confidence while mastering the art of quilting.
Once you’re comfortable, you can experiment with more complex geometric patterns!
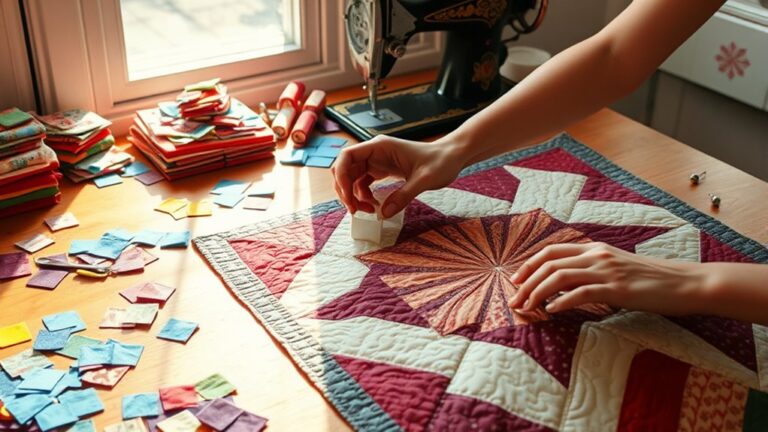
How to Prepare Fabrics for Quilting
Preparing your fabrics is an essential first step in quilting that sets the foundation for a successful project.
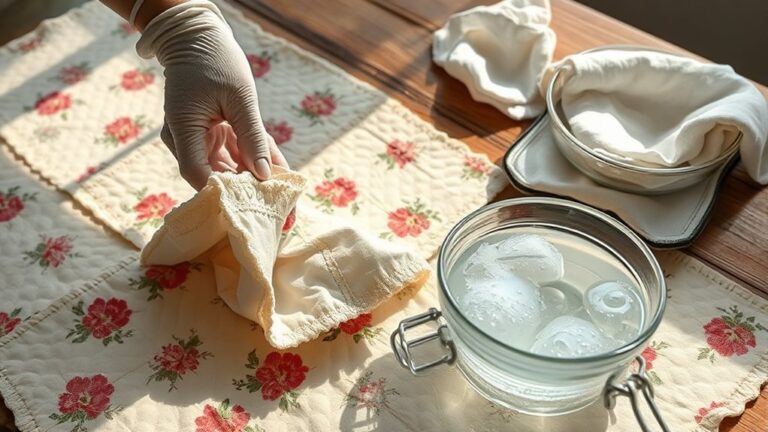
Start by washing your fabric to remove any sizing or chemicals. This prevents shrinkage later on.
Use a gentle cycle and mild detergent, then tumble dry or hang to dry.
Next, you’ll want to press your fabric to eliminate wrinkles and guarantee accurate cutting.
Here’s a quick guide to keep in mind:
| Step | Action | Purpose |
|---|---|---|
| Fabric Washing | Wash before cutting | Removes chemicals |
| Drying | Tumble or air dry | Prevents shrinkage |
| Fabric Pressing | Iron flat | Guarantees accurate cuts |
| Cutting | Use a rotary cutter | Precise fabric pieces |
Essential Sewing Techniques You’ll Love to Learn
When you’re just getting started with quilting, picking up a few essential sewing techniques really helps. It’s a good idea to get familiar with basic stitching first, since that’s the foundation of almost every quilt. And don’t forget about cutting your fabric—being precise here makes a huge difference in how your quilt pieces fit together. Once you’ve got these basics down, you’ll find the rest of the process comes together much more smoothly, and you’ll be able to enjoy seeing your quilt take shape.
Basic Stitching Techniques
While diving into the world of quilting, mastering basic stitching techniques will set you up for success.
You’ll find that both hand stitching and machine stitching have their own charm and benefits.
Here are three essential techniques to get you started:
- Running Stitch: A simple hand stitching technique, perfect for piecing blocks together or adding decorative touches.
- Backstitch: This hand stitching method creates a strong seam, making it ideal for areas needing durability.
- Straight Stitch: The foundation of machine stitching, it’s useful for assembling quilt layers and securing edges.
Fabric Cutting Essentials
Once you’ve grasped the stitching techniques, it’s time to focus on cutting your fabric accurately. Accurate cutting is essential for achieving those perfect fabric shapes that make your quilt pop.
Start by investing in a reliable rotary cutter and a self-healing mat. They’ll make your cutting process smoother.
Use a clear ruler to measure and mark your fabric before cutting. This helps ensure you have the right dimensions.
Always double-check your measurements to maintain cutting accuracy. When cutting, keep your hands steady and follow straight lines.
Practice makes perfect, so don’t hesitate to experiment with different shapes and sizes. With precise cuts, you’ll create a solid foundation for your beautiful quilt.
Happy cutting!
How to Assemble Your Quilt Top
Assembling your quilt top is an exciting step that brings your creative vision to life.
You’ll see your fabric pieces come together, transforming your design into a beautiful quilt top.
Here are some quilt assembly tips to help you along the way:
1. Plan Your Layout:
Before you start sewing, lay out your pieces on a flat surface.
This helps you visualize your quilt layout ideas and adjust as needed.
2. Sew in Rows:
Begin by sewing your pieces into rows.
Make sure to press your seams as you go; this keeps everything neat and helps with alignment.
3. Join Rows:
Finally, sew your rows together, aligning seams carefully.
Double-check for any misalignments and adjust before the final seams.
Following these steps will make the assembly process smoother.
This way, your quilt top will be both beautiful and well-constructed.
Enjoy every moment!
Choosing Batting and Backing for Quilting
Choosing the right batting and backing is essential for creating a quilt that not only looks good but also feels cozy and durable.
When selecting batting types, consider cotton for breathability, polyester for durability, or a blend for the best of both worlds. Each type offers unique benefits, so think about how you want your quilt to feel and function.
For backing materials, cotton is a popular choice due to its softness and availability in various prints. You can also opt for flannel if you prefer a warmer touch.
Remember, the backing should complement your quilt top, so choose colors and patterns that harmonize.
Don’t overlook the importance of quality in both batting and backing. Investing in good materials will guarantee your quilt stands the test of time, providing warmth and comfort for years to come.
Happy quilting!
How to Baste Your Quilt for Easy Sewing
Before you plunge into sewing your quilt, basting is an essential step that secures everything stays in place.
Basting is crucial before sewing your quilt, ensuring all layers stay securely in place.
This process not only helps with quilt safety but also makes your sewing experience smoother.
Here are three effective basting techniques to take into account:
1. Pin Basting: Use safety pins to secure your layers together.
This method is quick and allows for easy adjustments.
2. Spray Basting: Apply a temporary adhesive spray between layers.
It’s fast and provides a strong hold, but be sure to work in a well-ventilated area.
3. Basting Stitch: Sew long, loose stitches by hand or machine around the edges.
This technique is reliable but can be time-consuming.
Whichever method you choose, make certain that all layers are flat and smooth to avoid puckering.
Proper basting sets the foundation for a successful quilt, so take your time with this vital step!
What Stitching Techniques Can You Use for Quilting?
With your quilt layers securely basted, you’re ready to investigate the different stitching techniques that can bring your quilt to life.
One popular method is hand quilting, where you use a needle and thread to sew through all layers. This technique offers a personal touch, allowing you to control the stitch size and design.
You can create beautiful patterns while enjoying a meditative process.
Another approach is appliqué techniques, where you sew one fabric piece onto another, adding dimension and character to your quilt.
You can choose from various styles, like needle-turn or raw-edge appliqué, to fit your design vision.
Each technique has its charm and can uplift your quilt’s aesthetic.
Experiment with these stitching methods, and don’t hesitate to mix and match. The right technique will improve your quilt and make your project distinctly yours!
How to Finish and Care for Your Completed Quilt?
Completing your quilt is an exciting milestone, but it’s important to finish it properly and guarantee it stays beautiful for years to come.
Here are some quilt maintenance tips to help you care for your creation:
- Washing Instructions: Use cold water and a gentle cycle when washing your quilt. Avoid bleach, as it can damage the fabric and colors.
- Drying: Air dry your quilt flat or use a low-heat setting in the dryer. This helps preserve the fabric’s integrity and prevents shrinkage.
- Storage: Store your quilt in a cool, dry place, preferably in a cotton bag. Avoid plastic, as it can trap moisture and cause mildew.
With a little care, your finished quilt will remain a cherished piece for years to come.
Frequently Asked Questions
How Long Does It Take to Complete a Quilt?
It usually takes anywhere from a few days to several weeks to complete a quilt, depending on the project complexity.
If you’re tackling a simple design, you might finish it in a weekend. However, more intricate patterns can stretch your quilting timeline to weeks or even months.
Set realistic goals, enjoy the process, and keep in mind that each quilt is a unique journey, reflecting your creativity and time investment.
Happy quilting!
Can I Quilt Without a Sewing Machine?
Absolutely, you can quilt without a sewing machine! Think of it like crafting a beautiful tapestry by hand, a practice as old as time.
Start with your fabric selection; pick colors and patterns that inspire you. Then, immerse yourself in hand quilting, where you stitch each layer alongside one another with care.
It takes patience, but the personal touch makes your quilt unique. Plus, it’s a great way to unwind and express your creativity.
What Should I Do if I Make a Mistake?
If you make a mistake, don’t panic! You can easily correct it.
First, assess the error. Sometimes, a simple trim or re-stitch will do.
If it’s a larger issue, consider using different fabric options to cover or blend the mistake.
You might even turn it into a design feature!
Remember, every quilter makes mistakes, and they can lead to unique, creative outcomes.
Welcome the process, learn, and keep going!
How Do I Choose a Quilting Class for Beginners?
When choosing a quilting class for beginners, consider class types offered at local shops or online options.
Check the instructor’s experience; an experienced teacher can make a big difference.
Look into material costs, as some classes provide supplies while others don’t.
Furthermore, think about class duration. Shorter sessions might suit you better if you’re busy.
Are There Online Resources for Beginner Quilters?
Yes, there are plenty of online resources for beginner quilters! You can find excellent online tutorials on platforms like YouTube that guide you step-by-step.
Furthermore, quilting forums offer a supportive community where you can ask questions and share your progress. Joining these forums allows you to connect with experienced quilters who can provide tips and encouragement.
Immerse yourself, and you’ll find a wealth of knowledge at your fingertips!
Conclusion
As you wrap up your first quilt, keep in mind that every stitch tells a story. Many believe quilting is just about sewing fabric together, but it’s really about creating a piece of art filled with memories and emotions.
So, don’t stress over perfection. Welcome the process and let your creativity shine.
With each quilt, you’re not just honing your skills. You’re weaving a tapestry of experiences that you’ll cherish for years to come.
Happy quilting, and remember, this is how beginners make a quilt—one heartfelt stitch at a time.