How to Quilt a T-Shirt Quilt
If you’ve ever opened your closet and felt a pang of guilt over the stack of old tees you can’t bear to toss, you’re not alone. Many people struggle with finding a way to preserve those cherished memories without letting beloved shirts gather dust.
That’s why learning how to quilt a T-shirt quilt is such a game-changer—it’s a creative and practical solution to a common dilemma.
To quilt a T-shirt quilt, start by selecting shirts that hold special memories and coordinating colors. Cut the shirts into squares, stabilizing them with fusible interfacing.
Create a design layout that balances the prints and sizes. Assemble your quilt top by sewing the squares together, then layer it with batting and backing.
Choose a stitching style that suits your personality. Finally, finish it with binding for a polished look.
There’s even more to explore about personalizing your quilt!
Key Takeaways
- Choose T-shirts with sentimental value, ensuring a mix of colors and designs for visual interest and emotional significance.
- Stabilize T-shirt fabric with fusible interfacing. This helps maintain shape during cutting and sewing, so your pieces stay neat.
- Experiment with layouts for the quilt top. Try balancing graphic arrangements and distribute designs evenly for the best look.
- Use appropriate stitching techniques, like straight lines or free-motion quilting. This can really enhance the quilt’s personality and style.
- Finish with a well-executed binding technique. Miter the corners for a clean, professional look that brings everything together.
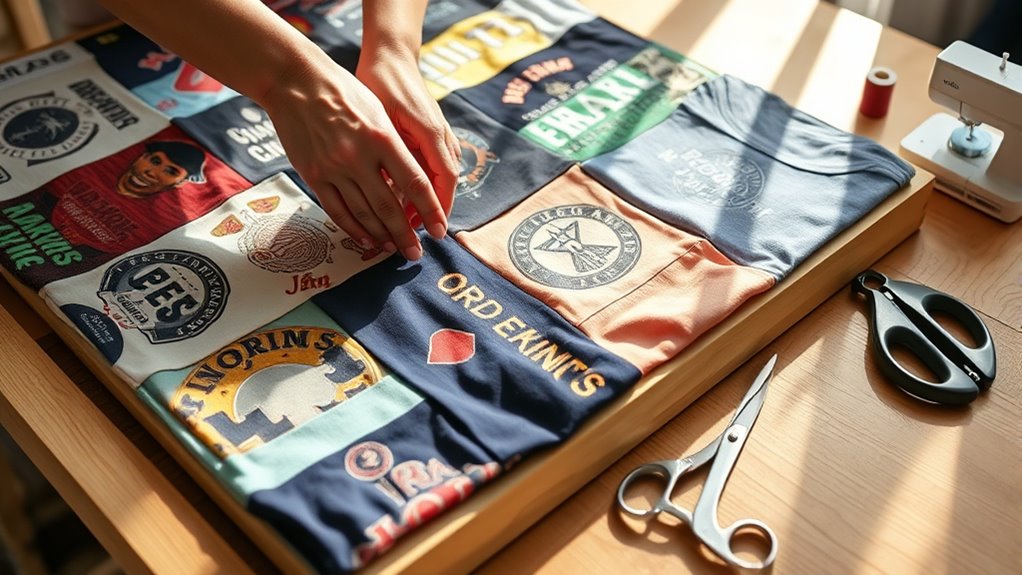
Gather Your T-Shirts: Choosing the Best Ones
When you’re ready to plunge into your T-shirt quilt, the first step is choosing which shirts to include. Start by considering the sentimental value each shirt holds for you.
Maybe it’s that concert tee from years ago or a favorite sports shirt. As you sift through your collection, think about fabric selection; different fabric types can affect your quilt’s overall look and feel.
Next, pay attention to color coordination. You’ll want your quilt to have a harmonious appearance, so select shirts that complement each other.
Aim for design balance by mixing larger prints with smaller ones to create visual interest.
Ultimately, this process isn’t just about fabric. It’s about memory preservation.
Each shirt tells a story, and by carefully curating your selection, you’ll create a quilt that’s not only functional but also filled with cherished memories.
How to Cut and Stabilize Your T-Shirts for Quilting
Great, you’ve picked out your favorite T-shirts—now it’s time to get them ready for your quilt! First, look for designs that really mean something to you. You’ll want to make sure you have your cutting tools handy before you start.
Once you’ve chosen your shirts, the next step is stabilizing the fabric. This part is super important because it helps your quilt stay in shape and last a long time. Let’s walk through the process together and make sure your T-shirt quilt turns out just the way you want!
Choose T-Shirt Designs Wisely
Choosing the right T-shirt designs is essential for creating a visually appealing quilt. The fabric’s quality and imagery will greatly influence the final product, so keep that in mind.
Look for designs that have personal significance and evoke an emotional connection. This is how your quilt will truly tell a meaningful story.
| Design Type | Emotional Connection | Design Significance |
|---|---|---|
| Sports Teams | Team pride | Memories of games |
| Concerts | Nostalgic moments | Favorite artists |
| Travel Destinations | Adventure memories | Places you’ve loved |
Prepare Cutting Tools
Gather your cutting tools to guarantee a smooth quilting process.
Start with a sturdy cutting mat to protect your surfaces and improve precision.
A rotary cutter will slice through your T-shirts effortlessly, while fabric scissors are great for any detailed trimming.
Familiarize yourself with safety rules. Always cut away from your body and keep your blades sharp.
Use measuring tools to confirm you’re cutting accurate dimensions.
Remember to apply effective cutting techniques for clean edges.
To keep everything organized, set up your workspace with designated areas for your tools and fabric.
This way, you’ll minimize clutter and maximize efficiency, making your T-shirt quilt journey enjoyable and productive.
Happy cutting!
Stabilize Fabric Effectively
As you plunge into quilting your T-shirt quilt, stabilizing the fabric is essential for guaranteeing your pieces hold their shape during cutting and sewing.
Start by selecting appropriate interfacing options that provide adequate fabric support. Lightweight fusible interfacing works well, offering t-shirt durability without adding bulk.
Cut your interfacing slightly smaller than your T-shirts to avoid excess stiffness at the edges. Iron it onto the back of your fabric, making sure it adheres well for maximum stitching stability.
This step improves quilt longevity, preventing distortion during the quilting process. For added support, consider layering your T-shirts with a stabilizer when you begin sewing.
Following these tips guarantees your quilt remains beautiful and intact for years to come.
Choose the Best Materials: Batting, Backing, and Thread
Selecting the right materials is essential for a successful T-shirt quilt.
Your choices in batting, backing, and thread can make a big difference in the final product.
Selecting the right batting, backing, and thread is crucial for achieving a high-quality T-shirt quilt.
Here’s what you should consider:
1. Batting Types:
Opt for warm, lightweight batting like cotton or bamboo blends.
These provide good insulation and softness without adding bulk.
2. Backing Options:
Choose a fabric that complements your T-shirts. Popular choices include flannel for warmth or cotton for durability.
Make certain it’s pre-washed to prevent shrinkage later.
3. Thread Weights:
Use a mid-weight or all-purpose thread for sewing the quilt.
This guarantees strong seams and works well with various fabric blends.
Create Your Design Plan: Layout Ideas for Your Quilt
When you’re planning your t-shirt quilt, start by thinking about your fabric colors. You want them to look good together, so choose shades that complement each other. Next, try arranging your t-shirt graphics in a way that really shows off what’s special about each one. This can help guide the eye across your quilt and make each shirt stand out.
Also, don’t be afraid to play around with the sizes of your shirts. Mixing up the sizes can add a lot of visual interest and help balance out your overall design. Just have fun with it and see what layout feels right to you!
Choose Fabric Colors Wisely
Choosing fabric colors wisely can improve your T-shirt quilt, ensuring it reflects your personal style.
Consider these key aspects when selecting your fabrics:
1. Color Combinations: Use complementary colors to create visual interest.
Think about color psychology; warm tones evoke energy, while cool tones provide calm.
2. Fabric Patterns and Textures: Incorporate various patterns and textures to add depth.
A mix of solids and prints can help avoid color fading and keep the quilt lively.
3. Seasonal Colors: If your quilt has a theme, seasonal colors can tie everything together.
Balance contrast to make each T-shirt graphic pop, aligning with your personal preferences.
Arrange T-Shirt Graphics Creatively
After you’ve selected your fabric colors, it’s time to think about how to arrange your T-shirt graphics. Start by considering graphic placement; mix large and small designs to create visual interest.
You want to avoid overcrowding one area, so distribute the graphics evenly across the quilt.
Next, pay attention to color balance. If you’ve got a bright graphic, pair it with more neutral tones around it to let it stand out.
You can also create a flow by arranging colors in a gradient, shifting from light to dark or from cool to warm shades.
Take your time to experiment with different layouts until you find a combination that feels harmonious and reflects your personal style.
Consider Size Variations Strategically
While planning your T-shirt quilt, consider how size variations can elevate your design. Mixing sizes not only adds visual interest but also helps balance your quilt and makes it more dynamic.
Here are some size considerations to help you create unique, creative layouts:
- Large Graphics: Use oversized T-shirts as focal points. They draw attention and can create a centerpiece for your quilt.
- Medium Squares: Incorporate medium-sized pieces to complement the larger graphics. These help fill in gaps while maintaining harmony.
- Small Sections: Add smaller segments, like pocket designs or logos. These playful details enrich the overall composition and bring extra character to your quilt.
Assemble Your Quilt Top: Piecing It Together
Start piecing your quilt top together by arranging your T-shirt squares in a layout that appeals to you. Consider how the colors and designs interact to create a cohesive look.
Once you’re satisfied with your arrangement, it’s time to utilize some effective piecing techniques. Begin by sewing your squares together in rows.
Use a quarter-inch seam allowance to guarantee accuracy and consistency throughout your quilt top. Press the seams open or to one side, depending on your preference, to reduce bulk.
After finishing the rows, join them to create the full quilt top. Make sure to align the seams carefully to maintain a neat appearance.
Don’t hesitate to adjust squares as you go; flexibility in your design can lead to unexpected and delightful results.
Take your time during this process. A well-assembled quilt top really sets the stage for a beautiful finished product.
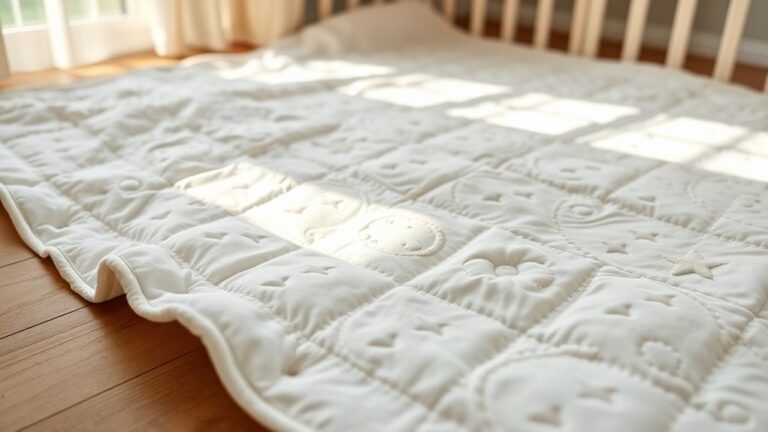
Baste Your Quilt Layers for Stability
Baste your quilt layers to guarantee everything stays in place during the quilting process.
Proper basting techniques are essential for quilt stability. They help prevent any shifting or puckering as you sew.
Here’s how to effectively baste your t-shirt quilt layers:
1. Choose Your Method:
You can use safety pins, basting spray, or long stitches. Each method has its benefits, so just pick what works best for you.
2. Layer It Up:
Start with your backing, then add your batting, and finally, lay your quilt top on top.
Make sure all the layers are smooth and flat before you move on.
3. Secure the Layers:
If you’re using pins, space them about 4–6 inches apart. For spray, lightly mist the batting and press the layers together.
If you’re stitching, use long, loose stitches to hold everything in place.
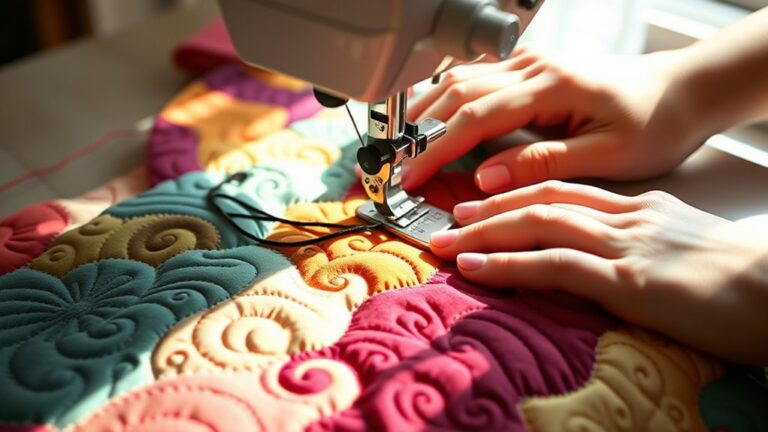
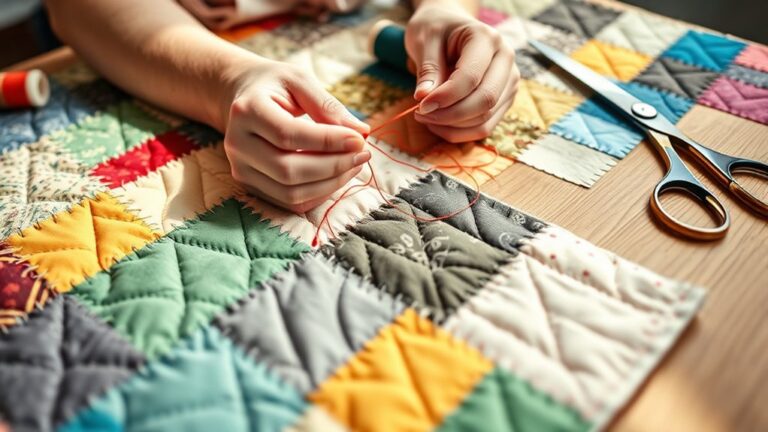
Stitching Techniques: Choosing Your Quilting Style
With your quilt layers securely basted, it’s time to decide how you want to stitch your t-shirt quilt.
Consider incorporating various quilting motifs to improve the overall design. You might opt for straight lines for a modern look, or playful swirls for a more fanciful feel.
Applique techniques can add an extra dimension to your quilt.
You can showcase specific t-shirt designs by stitching around them, creating a framed effect that draws attention.
Alternatively, if you want a more uniform appearance, you can use a free-motion quilting style.
This allows for creativity in your stitching while still keeping the quilt cohesive.
Think about the weight and drape of your quilt, too.
Heavier stitches might require a sturdier backing, while lighter stitches could keep the quilt soft and pliable.
Ultimately, choose a style that reflects your personality and complements the t-shirts you’ve selected.
Common Stitching Problems and Solutions
When you’re quilting a T-shirt quilt, it’s pretty normal to run into some stitching problems along the way. You might notice issues like thread tension not quite being right, the fabric stretching more than you expected, or your stitch length ending up a little uneven. These little hiccups can make a big difference in how your project turns out, but don’t worry—there are ways to handle them. Let’s go through these challenges together so you can get that smooth, polished finish you’re aiming for.
Thread Tension Issues
As you immerse yourself in quilting your T-shirt quilt, thread tension issues can arise. This often leads to frustrating stitching problems.
Here are some troubleshooting tips to help you make the necessary tension adjustments:
- Check the Thread: Verify you’re using the right type and weight of thread for your T-shirt fabric. A mismatch can cause tension problems.
- Adjust the Tension Settings: Start with the manufacturer’s recommended settings. Then, gradually adjust until you achieve a balanced stitch.
- Inspect the Bobbin: A poorly wound bobbin can lead to uneven tension. Make sure it’s properly wound and seated in the machine.
Fabric Stretching Problems
Sometimes, quilters encounter fabric stretching issues, especially with T-shirt material. This can lead to fabric distortion, making your quilt look uneven.
To tackle this, start by ensuring you use the right needle and thread for knits. A walking foot can help prevent stretching as it feeds the fabric evenly.
If you notice distortion while sewing, consider making tension adjustments on your machine. Lowering the top thread tension often helps, and you might need to experiment until you find the perfect balance.
Moreover, stabilize your T-shirt pieces with interfacing before cutting. This step can help maintain their shape and keep everything looking crisp.
With these strategies, you can minimize fabric stretching and create a beautiful T-shirt quilt that stands the test of time.
Uneven Stitch Length
Uneven stitch length can disrupt the overall look of your T-shirt quilt. It often makes the finished piece appear less professional than you’d like.
To tackle this issue, it’s important to find out what’s causing it and make the right adjustments to your stitching.
Here are three common reasons for uneven stitches:
- Incorrect Tension: If your thread tension is too loose or too tight, you may notice uneven stitches popping up.
- Needle Type: Using the wrong needle for T-shirt fabric can cause skipped or uneven stitches. For best results, stick with a ballpoint needle.
- Sewing Speed: Going too fast while sewing can easily lead to uneven stitches. Try slowing down so you can maintain better control and consistency.
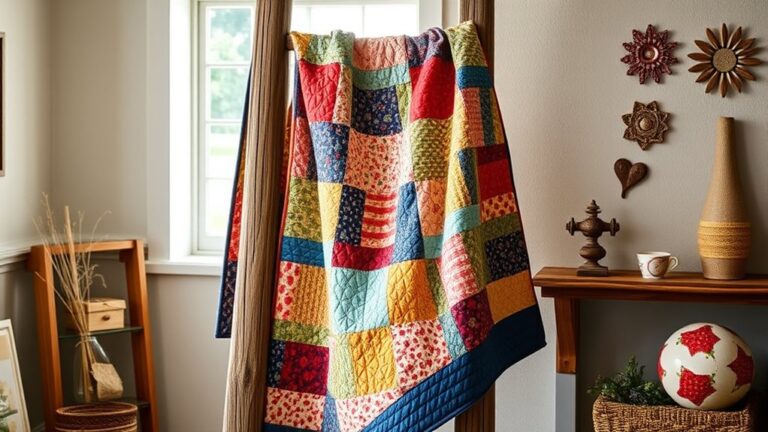
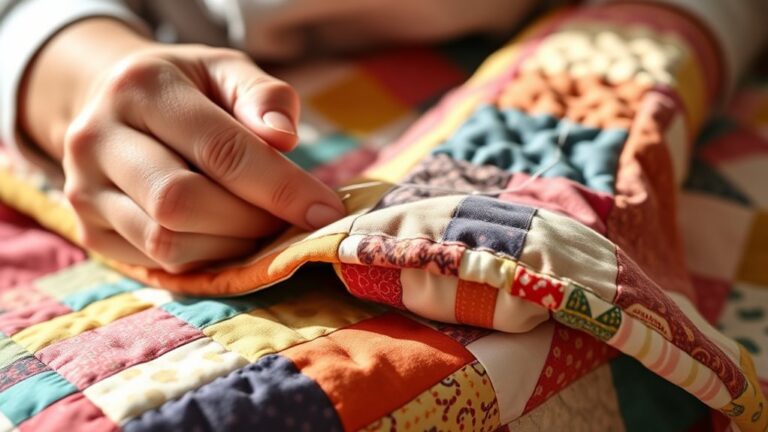
Finish the Edges: Binding Your T-Shirt Quilt
Binding your T-shirt quilt is the finishing touch that transforms it from a collection of memories into a polished piece of art.
To start, choose a binding technique that suits your style, whether it’s straight, bias, or a double-fold binding. Each method has its own charm and durability, so pick one that resonates with you.
Next, cut your binding strips, making certain they’re long enough to cover all edges. Attach the binding to the quilt’s edge, folding it over and securing it with pins.
As you sew, keep your stitches even for a clean look. Don’t forget to miter the corners for a professional finish; it really makes a difference.
Finally, press the binding to guarantee it lays flat, adding those essential finishing touches.
With the binding complete, your T-shirt quilt is now ready to showcase those cherished memories in style!
Creative Ideas for Personalizing Your T-Shirt Quilt
Personalizing your T-shirt quilt can truly transform it from a simple keepsake to a unique work of art.
Transform your T-shirt quilt into a unique work of art with thoughtful personalization.
Here are some creative ideas to make your quilt even more special:
1. Incorporate Personal Messages:
Add quotes or phrases that hold significance to you or the wearer.
These can be stitched or printed directly onto fabric squares.
2. Use Memory Symbols:
Include symbols representing important events or milestones, like a small heart for love or a star for achievement.
These elements can make each square a mini-memorial.
3. Select Unique Fabrics:
Mix in fabrics that reflect your personality or interests.
Try coordinating colors or patterns that represent hobbies, travels, or favorite places.
With just a few thoughtful touches, your quilt will become a cherished piece full of personal meaning.
Frequently Asked Questions
How Long Does It Typically Take to Complete a T-Shirt Quilt?
It typically takes you about 10 to 30 hours to complete a t-shirt quilt, depending on your t-shirt selection and quilting techniques.
If you’re experienced, you might finish quicker, but if you’re new, it could take longer as you learn the ropes.
Don’t rush the process; enjoy picking out your favorite shirts and experimenting with different patterns.
The result will be a cherished keepsake that reflects your personal style and memories.
Can I Use Different Fabric Types in My Quilt?
Absolutely, you can mix different fabric types in your quilt! Think of it as a dance, where fabric compatibility leads to a beautiful performance.
Just keep in mind how they layer together; heavier fabrics might weigh down lighter ones. When you’re piecing it all together, make certain they’ll play nicely in both texture and durability.
What Is the Best Way to Store My Quilt After Completion?
To store your quilt properly, fold it neatly and place it in a breathable cotton bag or acid-free box.
This quilt storage method keeps it protected from dust and light, preventing fabric damage.
Avoid plastic bags, as they can trap moisture and lead to mold.
If you’re concerned about pests, consider using lavender sachets for added protection.
Regularly check on your quilt to guarantee it stays in great condition for years to come.
How Do I Care for My T-Shirt Quilt?
To keep your t-shirt quilt in tip-top shape, cherish careful care! For t-shirt preservation, always wash it gently in cold water using a mild detergent.
Avoid bleach and fabric softeners to prevent fading. Hang it to dry or tumble dry on low heat.
For quilt cleaning, spot clean stains immediately, and consider dry cleaning for tough spots.
Regular maintenance will help your quilt stay vibrant and cherished for years to come!
Are There Any Specific Tools I Need for T-Shirt Quilting?
Yes, you’ll need a few specific tools for t-shirt quilting. Start with a rotary cutter and cutting mat for precise cutting techniques.
A ruler helps guarantee your t-shirt selection is uniform. You’ll also want a sewing machine, quality thread, and needles designed for knits.
Consider using fusible interfacing to stabilize the t-shirt fabric. These tools will make your t-shirt quilt project smoother and more enjoyable.
Happy quilting!
Conclusion
Now that you’ve transformed your cherished t-shirts into a beautiful quilt, it’s more than just fabric. It’s a tapestry of memories stitched together.
Each piece tells a story, wrapping you in warmth and nostalgia. As you snuggle under your creation, remember that every stitch is a thread connecting you to the moments that made you smile.
So, take pride in your work. Your t-shirt quilt isn’t just a quilt—it’s a patchwork of your life’s journey, with every shirt and every stitch capturing a piece of your story.