Mastering Mitered Corners in Quilt Binding
Have you ever found yourself frustrated trying to get neat, professional-looking corners on your quilts? You’re not alone—many quilters struggle with getting quilt binding just right, especially when it comes to mastering mitered corners.
If you’ve ever wished for a smoother, easier way to achieve crisp, beautiful edges, we’re here to help. Let’s explore some of the best tips and tools that can turn this tricky task into a breeze.
Mastering mitered corners in quilt binding can truly enhance your quilts. Start by accurately cutting your binding strips and pinning them securely at corners.
Fold the binding at a 45-degree angle for a perfect seam, and press to maintain crisp edges. Use quality tools like a rotary cutter and pressing iron for best results.
Pay attention to alignment and seam allowances to avoid common pitfalls.
Keep going to uncover creative variations and techniques that make your quilts shine even brighter!
Key Takeaways
- Cut binding strips to 2.5 inches wide and make sure your cutting is accurate. This helps your quilt corners align precisely.
- When you reach a corner, fold the binding at a 45-degree angle. Pin it securely before moving on to the next edge.
- Before you start attaching the binding, give it a good press. This helps you get flat corners and really enhances the finished look.
- Use quality tools for the best results. A rotary cutter, a cutting mat, and some clips can make a big difference.
- Try out different decorative stitching techniques. Personalizing your mitered corners can really elevate the visual appeal of your quilt.
How to Create Mitered Corners in Quilt Binding
Creating mitered corners in quilt binding can improve your project, giving it a polished look.
To get started, choose your quilt binding styles, ensuring they complement your quilt design. First, cut your binding strips to the desired width, typically around 2.5 inches.
As you approach the corner, stop sewing about a quarter-inch from the edge. Fold the binding up, forming a 45-degree angle, and then fold it back down to create the mitered corner. Pin it in place.
Next, continue sewing along the next edge, ensuring the binding stays aligned. Repeat this process for all corners, using various mitered corner techniques to achieve neat finishes.
Finally, fold the binding over the quilt edge and stitch it down, either by hand or machine. By mastering these steps, you’ll add a professional touch to your quilt, making it truly stand out.
Why Mitered Corners Make Your Quilts Shine
Mitered corners really have a way of making your quilts shine. They give your projects that polished, professional look that can be hard to achieve otherwise. And honestly, when you get them just right, the difference is easy to see—they instantly boost your quilt’s overall appearance.
What’s great is that these corners add a special finishing touch that helps your work stand out from the crowd. It’s the kind of detail that can take your quilting to the next level, making everything look more cohesive and thoughtfully made.
Enhanced Visual Appeal
Quilt binding can transform a simple project into a stunning masterpiece, and mitered corners play an essential role in that transformation.
By paying attention to color contrast and fabric selection, you can improve the overall visual appeal of your quilt.
Mitered corners not only provide a polished look but also guarantee perfect pattern alignment, showcasing your design’s intricate details.
This technique allows for seamless edge finishing, creating a clean border that ties everything together.
When you achieve design harmony through mitered corners, you create a sense of visual balance that draws the eye.
Your quilts will not only look professional but also reflect your unique style and attention to detail, making them truly shine.
Professional Finishing Touch
There’s something special about finishing a quilt with mitered corners
that elevates your project to a whole new level. These binding techniques
not only provide a polished look but also showcase your attention to detail.
Here are a few reasons why mitered corners make your quilts shine:
1. Professional Aesthetic: Mitered corners create a seamless appearance,
enhancing your quilt’s overall design.
2. Durability: Properly executed mitered corners reinforce the binding,
ensuring it withstands wear and tear.
3. Finishing Details: They highlight your craftsmanship, making your quilt
a standout piece in any collection.
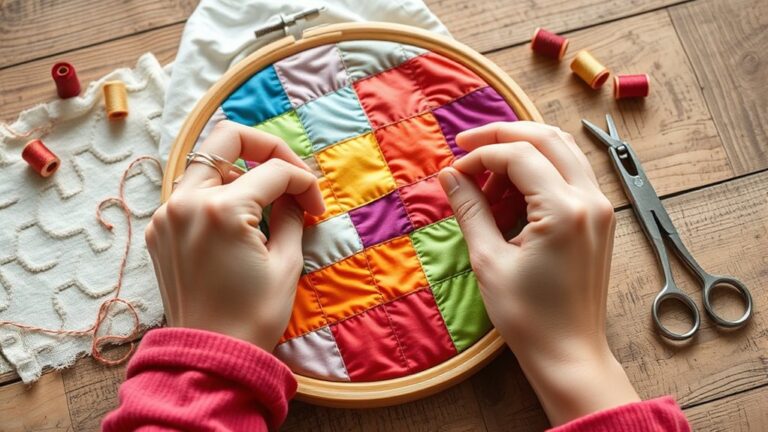
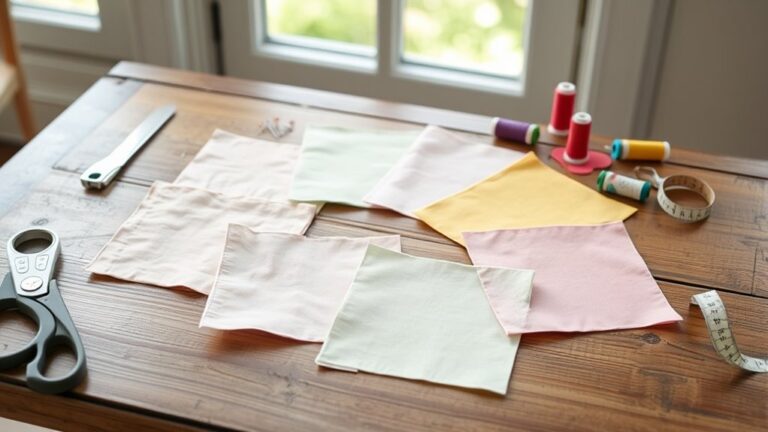
Essential Tools for Mitered Corners
To achieve perfect mitered corners, you’ll need a few essential tools at your side. First, invest in a quality rotary cutter and mat; they’ll help you make precise cuts for your binding strips.
Next, a good ruler is vital for measuring and cutting accurately, ensuring your fabric selection complements your quilt design.
You might also want a pressing tool, like a hot iron, to create crisp edges that improve those binding techniques.
A seam ripper is handy for fixing any mistakes, so keep one within reach.
Finally, consider using clips or pins to hold your binding in place while you sew. This makes it easier to achieve those sharp corners you desire.
With these tools, you’ll be well-equipped to tackle mitered corners and raise your quilt’s professional finish.
Happy quilting!
Step-by-Step Guide to Mitered Corners
Now that you’ve got all your essential tools ready, let’s move on to prepping and cutting your fabric for those perfect mitered corners. Don’t worry, it’s easier than it sounds! We’ll walk through the steps together so you can be sure everything lines up just right. Ready? Let’s make those corners look clean and professional!
Essential Tools Needed
Creating mitered corners requires the right tools to guarantee a polished finish.
To master binding techniques and make certain your fabric selection complements your quilt, gather these essential tools:
- Rotary Cutter – A sharp rotary cutter makes clean, precise cuts, essential for accurate corners.
- Cutting Mat – A self-healing cutting mat protects your surfaces and provides a grid for alignment.
- Ruler – A clear acrylic ruler helps you measure and cut fabric accurately, making sure your mitered corners are spot on.
With these tools at your side, you’ll find it easier to create beautiful mitered corners.
Investing in quality tools not only improves your sewing experience but also contributes to the overall look of your finished quilt.
Happy quilting!
Preparation and Cutting
Mastering mitered corners starts with careful preparation and precise cutting. Begin by selecting your fabric types; cotton is often best for ease of handling.
Measure your quilt’s edges and cut your binding strips to the appropriate width, typically 2.5 inches. Use a rotary cutter and mat for accuracy.
When cutting, try techniques like cutting on the bias for more flexibility, especially around corners.
Confirm your strips are long enough to accommodate the mitered corners, and remember to take seam allowances into account.
As you prepare, press your fabric strips with an iron to create crisp edges. This attention to detail in preparation will set you up for success in achieving those flawless mitered corners in your quilt binding.
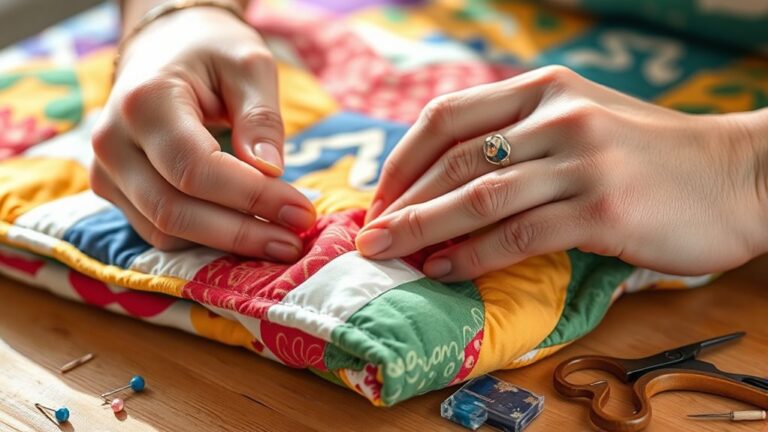
Step-by-Step Assembly
To successfully assemble mitered corners in your quilt binding, follow these straightforward steps.
Mastering these binding techniques will improve your corner finishes and boost your quilt’s overall appearance.
1. Align the Binding:
Position the binding along the quilt edge, making sure it’s even. Pin it in place for stability.
2. Create the Miter:
When you reach the corner, fold the binding at a 45-degree angle. Then bring it down along the next side and pin it securely.
3. Sew the Binding:
Stitch along the edge, stopping about ¼ inch from the folded corner. This precision will guarantee clean mitered corners.
Common Mistakes and How to Avoid Them
While tackling mitered corners can be rewarding, it’s easy to stumble into common pitfalls that can derail your project. One frequent mistake is not cutting your binding strips accurately.
Verify your strips are the right width; otherwise, it can affect both the fit and quilt aesthetics.
Another error is misaligning your binding when you sew it on. Take the time to pin properly, so your corners meet neatly.
If you rush this step, it can lead to uneven edges that detract from your quilt’s overall look.
Lastly, don’t forget to press your corners as you go. Skipping this step can result in bulky seams that ruin your binding techniques.
Don’t skip pressing your corners; it prevents bulky seams and ensures smooth, professional binding results.
By paying attention to these details, you’ll avoid frustrations and create beautifully mitered corners that improve your quilt’s charm.
Keep these tips in mind, and you’ll be well on your way to mastering this essential skill.
Tips for Mastering Mitered Corners
Achieving perfect mitered corners can really improve your quilt’s appearance. A few key tips will help you get there.
Mastering these binding techniques will take your corner finishes up a notch. Your quilt will end up with a polished look.
- Precision Cutting: Make certain your fabric strips are cut accurately. Uneven edges can cause awkward mitered corners that don’t align properly.
- Pressing Techniques: Always press your binding before applying it. This helps your corners lay flat and ensures clean edges, making it easier to get that perfect miter.
- Pinning: Don’t skimp on pins. Secure your binding in place as you work, since this prevents shifts and allows for more accurate mitered corners.
Creative Variations of Mitered Corners for Distinctive Quilts
If you’re looking to make your quilts stand out, why not play around with unique fabric combinations at your mitered corners? Mixing things up like this can really catch the eye. And don’t forget, adding some decorative stitching here and there can take those simple corners to a whole new level. Suddenly, what was once just a basic join becomes a real focal point.
Let’s take a closer look at how these creative twists can give your quilts that extra distinctive touch. It might just be the detail that turns your project from ordinary into something truly special.
Unique Fabric Combinations
Exploring unique fabric combinations can transform your mitered corners from standard to stunning. This gives your quilts a distinctive flair.
By experimenting with various elements, you can create eye-catching designs that really showcase your creativity. Here are three ideas to inspire you:
- Bold Color Contrasts: Pair vibrant, playful prints with softer, muted backgrounds. This creates striking visual interest.
- Texture Combinations: Try mixing smooth fabrics with textured ones. This adds depth and makes your corners pop.
- Seasonal Themes: Incorporate fabrics that reflect the season. It’s a fun way to enhance your quilt’s overall aesthetic.
These fabric pairings and pattern mixing techniques not only enhance your mitered corners, but also add personalized touches. That’s what makes each quilt truly unique.
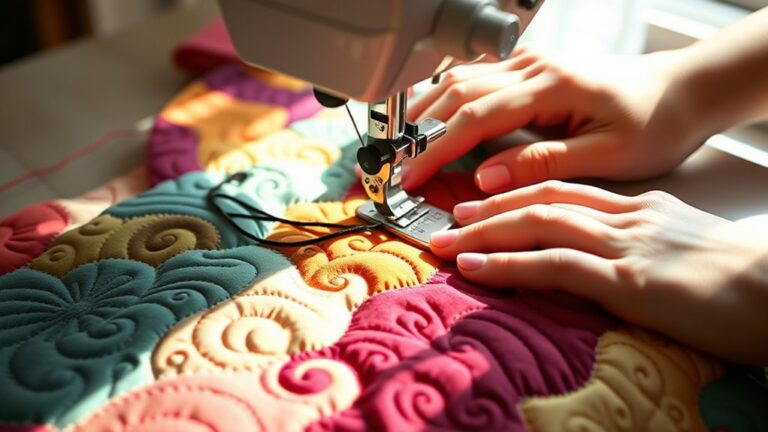
Decorative Stitching Techniques
Building on those unique fabric combinations, decorative stitching techniques can improve your mitered corners to an entirely new level. By incorporating various decorative stitches, you’ll create eye-catching details that boost your quilt’s overall aesthetic.
Experiment with different stitching patterns to find the ones that best highlight your fabrics.
Here’s a quick reference table to inspire you:
| Stitch Type | Effect |
|---|---|
| Zigzag | Adds movement |
| Satin Stitch | Creates a polished look |
| Shell Stitch | Introduces texture |
Try these techniques to personalize your quilts. Each stitch adds personality, making your mitered corners truly distinctive and showcasing your creativity.
Enjoy the process of playing with these decorative elements!
Troubleshooting Mitered Corner Mistakes
Even the most experienced quilters can run into mitered corner issues, so knowing how to troubleshoot them is vital.
Here are three common problems and their solutions:
1. Binding Errors:
If your mitered corners don’t align well, double-check your cutting precision.
Confirm your fabric pieces are cut accurately and that seam allowances are consistent.
2. Corner Alignment:
Misaligned corners often stem from improper pressing methods.
Make certain to press your seams flat before folding the corners, which helps maintain a crisp finish.
3. Fabric Bias:
If your corners appear distorted, evaluate your fabric choice.
Some fabrics can stretch, especially along the bias.
Opt for sturdier materials that hold their shape better during stitching techniques.
Incorporating Mitered Corners Into Different Quilt Styles
After addressing common mitered corner mistakes, it’s time to contemplate how to incorporate these techniques into various quilt styles.
In modern quilt styles, mitered corners can add a sleek, contemporary finish, improving your quilt’s overall look. Choose bold fabrics to make those corners pop and help create visual balance.
For traditional quilt styles, mitered corner techniques can seamlessly integrate with classic patterns. This adds a polished touch without compromising the design’s integrity.
Try experimenting with quilt binding variations to see how they affect your quilt’s appearance. A contrasting binding can really uplift the visual appeal.
Pay attention to fabric choices since harmonious colors make it easier to blend in design elements nicely.
With these tips, you’ll find that mitered corners not only complete your quilt but also enrich its beauty, making it a standout piece in your collection.
Resources for Learning and Inspiration
While mastering mitered corners can be a challenge, plenty of resources are available to help you improve your skills and find inspiration.
Here are some valuable options to investigate:
- Online Tutorials: Websites like YouTube and specialized quilting platforms offer step-by-step guides, ensuring you see techniques in action.
- Quilting Workshops: Local and virtual workshops provide hands-on experience, allowing you to practice mitered corners under expert guidance.
- Community Forums: Engage with fellow quilters in forums where you can share your progress, ask questions, and participate in design challenges.
Don’t forget to check out inspirational galleries featuring various fabric selections. You might also enjoy watching expert interviews for tips on perfecting your technique.
Frequently Asked Questions
Can I Use Mitered Corners on Non-Quilted Projects?
Yes, you can definitely use mitered corners on non-quilted projects! They’re a fantastic way to add decorative edges to items like tablecloths, pillowcases, or even curtains.
By employing this finishing technique, you’ll give your projects a polished, professional look. Just make sure to measure carefully and stitch securely.
You’ll create beautiful corners that boost your work. Don’t hesitate to experiment, as mitered corners can improve various fabric projects!
What Fabric Types Work Best for Mitered Corners?
For mitered corners, cotton blends and decorative fabrics work best. Cotton blends provide flexibility, making it easier to achieve crisp corners without bulk.
They also hold their shape well. Decorative fabrics, like cotton sateen or canvas, add flair to your projects, but make sure they’re not too thick or stiff.
You’ll find that a medium weight fabric strikes the perfect balance, allowing you to create those neat, sharp mitered corners effortlessly.
How Do I Maintain Mitered Corners After Washing?
To maintain mitered corners after washing, follow these corner maintenance tips.
First, wash your quilt on a gentle cycle with cold water. Avoid harsh detergents that could weaken the fabric.
After washing, lay it flat to dry instead of using a dryer. The dryer can distort corners.
If you notice any warping, gently reshape the corners while the fabric’s damp.
Regular post-wash care helps keep those mitered corners looking sharp and neat!
Are Mitered Corners Suitable for Beginner Quilters?
Are mitered corners suitable for beginner quilters? Absolutely! While they might seem tricky at first, you can master them with practice.
Focus on beginner techniques like precise cutting and accurate sewing. Common mistakes include not measuring correctly or misaligning the fabric, but don’t worry, everyone makes them!
As you gain confidence, you’ll find that mitered corners add a polished touch to your projects. So, grab your fabric and give it a try!
Can I Use Mitered Corners on Larger Quilts?
Yes, you can definitely use mitered corners on larger quilts! Just keep a few larger quilt considerations in mind.
Mitered corner techniques can add a polished look to your quilt’s edges, but make sure you have enough fabric to work with.
It’s also helpful to practice on smaller pieces first. Once you feel confident, you’ll find that mitered corners can improve the overall design of your larger quilts beautifully!
Conclusion
Mastering mitered corners can truly raise your quilting game. Did you know that quilts with mitered corners can increase the overall visual appeal by up to 30%?
By incorporating these sharp, clean edges, you not only improve the design but also showcase your skills. So, grab your tools and start practicing!
With patience and creativity, you’ll transform your quilts into stunning works of art that stand out in any room. Happy quilting, and enjoy mastering mitered corners in quilt binding!