Quick Guide to Hand Tie Your Quilt With Ease
Struggling to finish your quilt because you’re unsure how to secure those layers without fancy equipment? You’re not alone. Many quilters find themselves overwhelmed when it comes to hand tying a quilt, wondering if their hard work will hold up to use and time.
For a quick guide to hand tie your quilt with ease, gather sturdy scissors, a quilting needle, and a comfortable thimble. Choose durable cotton or polyester thread that complements your fabric.
Layer your backing, batting, and quilt top, then pin them secure. Cut 18-inch thread lengths and start tying at intervals of 4 to 6 inches.
Experiment with different knot styles like square or bow knots.
You’ll uncover tips on maintaining your quilt’s beauty and functionality next!
Key Takeaways
- Gather essential tools like scissors, quilting needles, and a thimble. Having these ready makes the hand-tying process much smoother.
- Prepare your quilt layers by aligning the backing, batting, and quilt top. Once they’re lined up, secure them together with pins to keep everything in place.
- Cut thread lengths of about 18 inches. For a balanced look, space your ties every 4 to 6 inches across the quilt.
- You can use different knotting techniques. Try square knots for extra strength, or go with decorative bow knots if you want some visual appeal.
- Watch out for common mistakes like inconsistent spacing or ignoring the fabric grain. Paying attention to these details helps maintain the overall quality of your quilt.
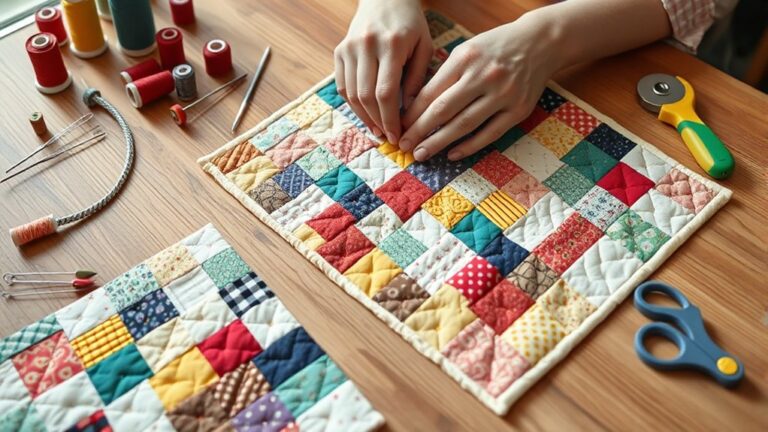
Essential Tools for Hand Tying Your Quilt
When you’re ready to plunge into your quilt, having the right tools makes all the difference. You’ll want a sturdy pair of scissors, a needle specifically designed for quilting, and a comfortable thimble.
These essentials not only improve your efficiency but also amplify the hand tying benefits, such as creating a cozy texture and allowing for creativity in your design.
A common misconception is that hand tying is only for beginners. In reality, it’s a valuable technique for quilters of all levels.
With the right tools in hand, you can easily achieve a beautiful finish. Additionally, consider using a ruler or fabric marker to help you space your ties evenly, ensuring a professional look.
Investing time in gathering these tools will make your hand tying experience smoother and more enjoyable.
Get ready to immerse yourself in this rewarding process with confidence!
Choosing the Right Thread and Knot Style
When you’re picking out the right thread and knot style for your quilt, it really helps to think about what kind of fabric you’re working with. The type of thread you choose can make a big difference in how your quilt turns out, both in terms of strength and appearance.
It’s also a good idea to look into different knot techniques. Some knots are better for keeping everything secure, while others help your quilt look nice and tidy. You’ll want to find one that does both, so your hard work holds up over time and looks great, too.
And of course, don’t overlook thread colors! The color you pick can really change the whole vibe of your quilt. Whether you want your stitches to blend in or stand out, choosing the right shade adds a personal, finishing touch to your design.
Thread Types Overview
Choosing the right thread and knot style is essential for a sturdy, beautiful quilt. When you’re selecting thread, consider thread durability factors like fiber content.
Cotton and polyester threads are popular choices. Cotton offers breathability, while polyester provides strength.
Next, think about thread weight considerations. A heavier thread works well for bold designs, while a lighter thread is ideal for delicate fabrics.
Make certain your thread complements your fabric to guarantee seamless stitching.
Opt for a thread that matches your quilt’s purpose, whether it’s for everyday use or a special keepsake.
The right combination of thread type and weight will improve your project’s overall look, while making sure it withstands the test of time.
Happy quilting!
Ideal Knot Techniques
While selecting the right knot technique is essential for securing your quilt layers, understanding the nuances can improve your craftsmanship. You’ll want to investigate various knot variations to find what works best for your project.
For instance, the double knot provides extra security, while the square knot lies flat and can be easily adjusted.
Experiment with tying techniques like the slip knot for quick adjustments or the French knot for a decorative touch. Each method influences the look and durability of your quilt, so take the time to practice.
Thread Color Considerations
Selecting the right thread color can uplift your quilt’s design and improve its overall appeal.
Think about color psychology; different hues evoke various feelings.
For instance, warm colors like reds and oranges can energize your quilt.
Cool colors such as blues and greens provide a sense of calmness.
It helps to consider seasonal palettes too.
Spring brings pastel shades, summer favors vibrant tones, autumn showcases earthy hues, and winter often includes deep jewel tones.
Here’s a quick reference table to help you decide:
| Season | Color Palette | Mood |
|---|---|---|
| Spring | Pastels (pink, mint) | Freshness |
| Summer | Brights (yellow, teal) | Energy |
| Autumn | Earthy (brown, rust) | Warmth |
| Winter | Jewel tones (navy, emerald) | Calmness |
Choose wisely!
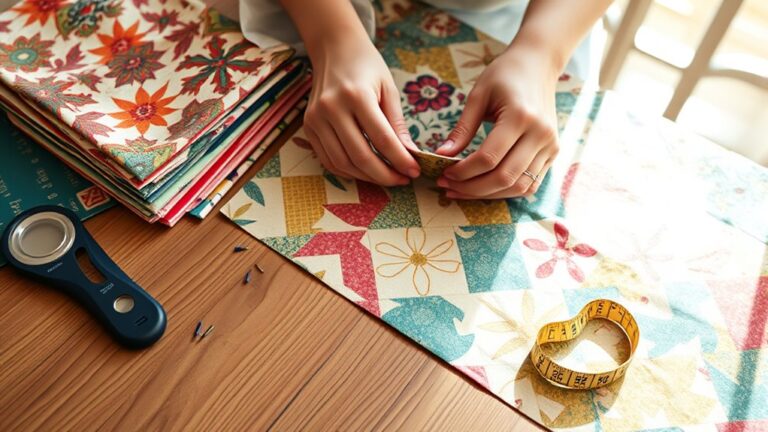
Preparing Your Quilt Layers for Hand Tying
Preparing your quilt layers for hand tying is essential for achieving a neat and durable finish. Start by laying out your backing fabric on a flat surface, ensuring it’s smooth and wrinkle-free.
Next, place your batting on top, followed by your quilt top. Make sure everything aligns properly, as layer alignment is vital. Misaligned edges can lead to uneven tying and an unprofessional look.
Ensure your batting is centered on the backing before adding the quilt top, as proper alignment is crucial for a polished finish.
Once everything is lined up, it’s time for fabric preparation. Trim any excess batting and backing fabric to match the quilt top, but leave a little extra for movement.
Pin or baste the layers together so they stay in place during the tying process. This step not only stabilizes your quilt but also helps you keep an even tension with your ties.
With your layers prepared, you’re now ready to move on to the next part of hand tying. You’re well on your way to creating that beautiful finish you’re aiming for!
Step-by-Step Instructions for Hand Tying Your Quilt
Once your quilt layers are securely pinned together, it’s time to immerse yourself in the hand tying process.
Start by choosing a contrasting thread that improves your quilt aesthetics.
Cut lengths of thread about 18 inches long.
Thread your needle and make a small knot at the end.
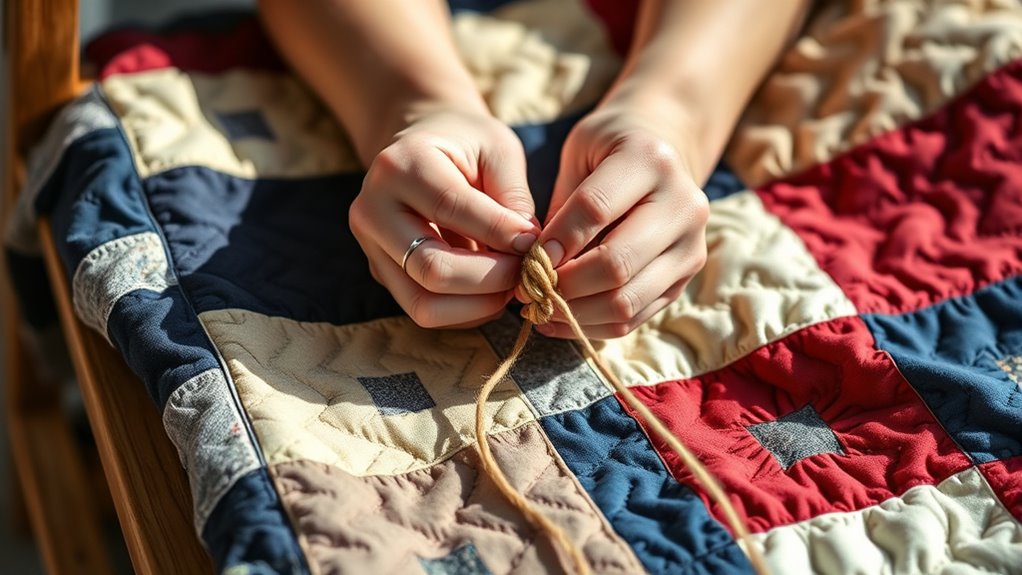
Begin in a corner or center, pushing the needle through all layers of the quilt.
Pull it through until the knot catches.
Create a loop with the thread, then tie a simple double knot to secure the layers together.
Repeat this process every 4 to 6 inches across the quilt, ensuring ties are evenly spaced for a balanced look.
Once you’ve tied all sections, trim any excess thread to your desired length.
You’ll love how hand tying adds a personal touch and unique character to your quilt, making it both functional and beautiful.
Enjoy the rhythm of this satisfying craft!
How to Keep Ties Consistent
To guarantee your ties remain consistent throughout your quilt, consider using a ruler or measuring tape as a guide. Start by marking the desired tie placement on your quilt top, confirming you maintain consistent spacing between each tie.
To ensure uniformity in your quilt ties, use a ruler to mark placements and maintain consistent spacing.
A good rule of thumb is to keep about 6 to 8 inches apart, depending on the quilt’s size and fabric type.
As you tie, use the marked points to help you stay on track. This method not only keeps the ties evenly distributed but also improves the quilt’s overall appearance.
When you’re ready to make a tie, double-check the spacing before pulling the thread tight. It’s easy to get carried away, so take your time to confirm each tie aligns with your marks.
Top 5 Mistakes to Avoid in Hand Tying Quilts
While hand-tying quilts can be a rewarding process, many crafters stumble upon common pitfalls that can compromise their work.
By being aware of these mistakes, you’ll enhance your quilting game.
Here are some beginner tips to keep in mind:
- Inconsistent Tie Spacing: Confirm your ties are evenly spaced to maintain a uniform look.
- Ignoring Fabric Grain: Tying against the grain can lead to puckering. Always check your fabric’s direction.
- Using Too Thick a Thread: Thick thread can create bulky knots, so opt for a finer thread for a neater finish.
- Neglecting to Secure Ties: Make sure your ties are tight enough to hold everything together, but not so tight that they distort the fabric.
Avoiding these common pitfalls will help you create beautiful, well-constructed quilts that you’ll be proud to showcase!
Finishing Up: How to Secure Your Ties
Now that you’ve finished your hand-tying, let’s make sure your ties are secure. Choosing the right thread is important here, and learning a few handy knotting techniques will really help your quilt last. Also, don’t forget—trying out different tying patterns can make your quilt not only stronger but also more attractive.
Choosing The Right Thread
Choosing the right thread is essential for securing your ties effectively, as it not only affects the durability of your quilt but also improves its overall appearance.
Consider these factors to guarantee you make the best choice:
Thread Material: Opt for cotton or polyester for excellent thread durability.
Thread Weight: Choose a weight that matches your fabric to maintain proper thread tension.
Color Matching: Select a thread color that complements your fabric for a polished look.
Length: Ascertain you have enough thread to complete all ties without running short.
Knotting Techniques Explained
To secure your ties effectively, mastering various knotting techniques is essential.
Start with the simple square knot, which provides strong hold and is easy to adjust.
You can also investigate other knot variations like the bow knot, which adds a decorative touch while remaining functional.
Pay attention to knot tension; it’s vital for ensuring your ties don’t come undone or create uneven bunching in your quilt.
When tying, pull the threads firmly but not excessively to avoid damaging your fabric.
Experiment with different knots to see which ones work best for your project.
With practice, you’ll gain confidence in your knotting skills, making your quilt both secure and visually appealing.
Happy tying!
Tying Patterns To Consider
While you investigate various tying patterns, consider how each can improve both the functionality and aesthetics of your quilt.
Choosing the right tying techniques can boost durability and visual appeal, ensuring your quilt stands the test of time.
Examine these pattern variations to find what resonates with your style:
- Diagonal Lines: Creates a modern look while securing layers effectively.
- Grid Patterns: Offers a classic appearance and distributes tension evenly.
- Random Ties: Adds a playful touch, allowing for creative expression.
- Circular Patterns: Softens the overall look and provides unique texture.
Using Decorative Ties in Hand Tying
When you want to add a personal touch to your quilt, using decorative ties can improve its aesthetic appeal.
Consider incorporating decorative materials like ribbons, yarns, or even fabric scraps that complement your quilt’s color scheme.
These elements not only serve a functional purpose but also add visual interest.
For tie placement, think about how the ties will interact with your quilt’s design.
You can space them evenly for a uniform look or cluster them for a more playful effect.
Experiment with different styles, such as bows or knots, to find what resonates with you.
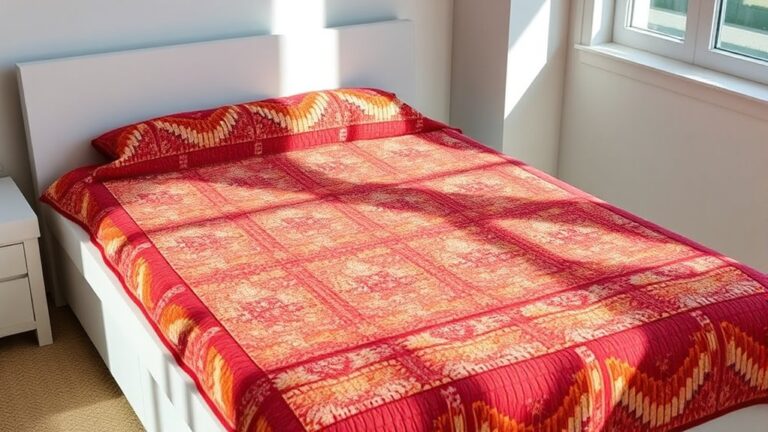
Caring for Your Hand-Tied Quilt After Completion
After adding decorative ties to improve your quilt’s charm, caring for your hand-tied quilt is the next step to guarantee it remains beautiful and functional.
Here are some quilt maintenance tips to keep in mind:
- Wash gently: Use a delicate cycle with cold water to prevent damage.
- Dry properly: Air-dry whenever possible or use a low-heat setting to avoid shrinking.
- Store wisely: Keep your quilt in a cool, dry place. Try to avoid direct sunlight, since that can cause fading over time.
- Avoid heavy items: Don’t place anything heavy on top of your quilt during storage. This helps maintain its shape.
Implementing these storage solutions will assure your quilt stays in great shape for years to come.
Why Choose Hand Tying for Your Quilting Projects?
Choosing hand tying for your quilting projects can improve both the aesthetic and tactile qualities of your work. One of the standout hand tying benefits is its ability to create a charming, textured finish that adds character to your quilt.
Unlike machine quilting, hand tying lets you connect fabrics in a way that feels more personal and intimate. It echoes quilting traditions passed down through generations, making your work special.
You’ll find that hand tying is also a quicker and simpler method, making it perfect for beginners or those pressed for time. It requires minimal tools, so you can easily take your project on the go.
Plus, you have the freedom to choose colorful ties that can uplift your design. Ultimately, hand tying allows you to express creativity while honoring the rich history of quilting.
Immerse yourself, and experience the satisfaction that comes from this traditional technique!
Frequently Asked Questions
How Long Does It Take to Hand Tie a Quilt?
Hand tying a quilt usually takes a few hours, depending on the size and complexity. With effective hand tying techniques, you can speed up the process.
Using the right tying tools, like a needle and thread, can also make a difference. If you’re working on a larger quilt, it might take longer, but breaking it into sections can help.
Enjoy the process, and soon you’ll have a beautifully tied quilt!
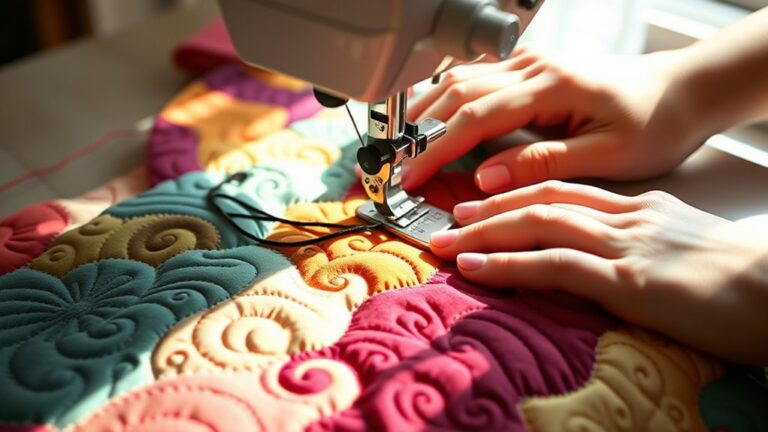
Can I Use a Sewing Machine for Part of the Process?
Absolutely, you can use a sewing machine for part of the process! Think of it as the trusty compass guiding you through a fabric forest.
Sewing machine tips include using it for piecing your quilt top and securing layers before hand-tying. This blend of quilting techniques not only saves time but also adds strength.
Just remember, the heart of your quilt still beats in those hand-tied knots, connecting each stitch with love.
What Types of Fabric Work Best for Hand Tying?
For hand tying, you’ll want to choose fabric that’s sturdy yet flexible. Cotton and cotton blends are great fabric choices because they hold up well and have enough give for tying techniques.
Avoid slippery fabrics like silk, which can be tricky. Also, consider flannel for its cozy feel and ease of handling.
Ultimately, pick what feels right for your project, ensuring it’ll withstand the tying process beautifully.
Is Hand Tying Suitable for All Quilt Sizes?
Hand tying is suitable for most quilt sizes, but you should consider a few factors.
Smaller quilts often benefit from hand tying, as it allows for more intricate designs.
For larger quilts, you’ll need to guarantee your tying technique is consistent to maintain even tension.
How Do I Fix Uneven Ties After Completing My Quilt?
To fix uneven ties after completing your quilt, you can make tie adjustments by loosening the knots slightly.
Use knot techniques like the slip knot to pull the shorter ties up to the desired length. If necessary, you can re-tie any knots that feel too tight.
Just guarantee all ties are consistent in length for a balanced look. Don’t hesitate to experiment until you’re satisfied with the results!
Conclusion
As you weave your ties, think of each knot as a tiny anchor, holding together not just fabric, but memories and dreams.
Just like a ship needs its sails to navigate, your quilt needs these ties to stand strong through the seasons of life.
Welcome the artistry of hand tying. It’s not just a technique; it’s a journey.
With each stitch, you’re crafting a cherished treasure, ready to warm hearts for years to come.
So go ahead—embrace the process of hand tying your quilt. You’re not only finishing a project, but creating something truly special with every knot. Happy quilting!