Mastering Quilt Binding: Step-by-Step Guide to Join
If you’ve ever felt frustrated by puckered edges or uneven corners while finishing your quilt, you’re not alone. Many quilters find that mastering quilt binding is one of the trickiest parts of the whole project.
But don’t worry—whether you’re a beginner or looking to improve your technique, there are helpful solutions out there.
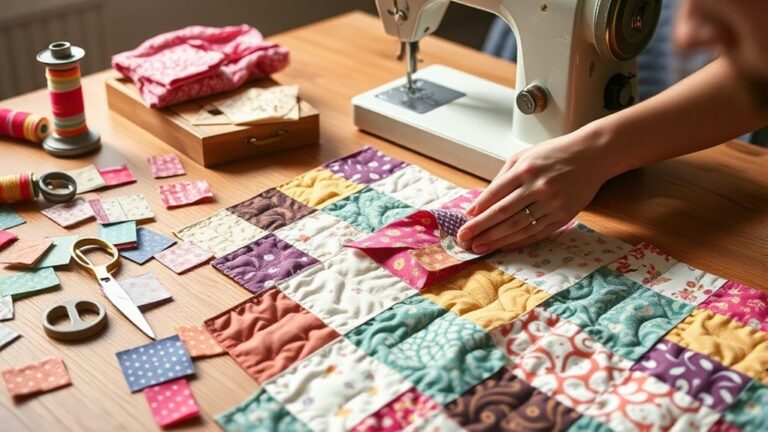
To master quilt binding, start by choosing fabric that complements your quilt’s colors and textures while ensuring durability.
Prepare your quilt by pressing it and trimming any uneven edges.
Cut 2.5-inch strips for binding and join them with careful seams.
Attach the binding, miter corners for a polished look, and decide between hand-stitching for detail or machine-stitching for efficiency.
Finally, troubleshoot common issues for a flawless finish.
There’s more advice to help you perfect your technique!
Key Takeaways
- Choose binding fabric that complements or contrasts with the quilt. Opt for solid colors or subtle prints if your quilt design is busy.
- Cut binding strips 2.5 inches wide. Make sure your cuts are clean and straight for precise edges and a consistent seam allowance.
- Attach the binding carefully, aligning it with the quilt edges. Use consistent tension while sewing to prevent any warping.
- When you reach the corners, miter them by folding the binding at a 45-degree angle. This creates neat creases and gives your quilt a polished finish.
- Finally, decide if you want to hand-stitch for detail or machine-stitch for efficiency. Check that your corners are tidy and all edges are securely fastened.
Choosing the Right Fabric for Quilt Binding
In regard to choosing the right fabric for quilt binding, you’ll want to take into account a few key factors to guarantee a polished finish.
First, consider the fabric color. It should either complement or contrast with your quilt’s main tones.
Texture contrast can add visual interest, so think about how different fabrics feel together. For example, a smooth binding can work beautifully with a textured quilt.
Next, pay attention to print patterns. If your quilt is busy, opt for a solid or subtle print to avoid overwhelming the design.
Fabric weight is essential, too. Lighter fabrics can fray, while heavier ones might add bulk.
Seasonal fabrics can evoke specific moods, aligning with your personal style. Choose what feels right for your project.
Finally, confirm you choose fabric durability, as binding needs to withstand wear and tear.
Coordinating colors and textures will ultimately enhance your quilt’s overall aesthetic.
Preparing Your Quilt for Binding
Before you plunge into binding your quilt, it’s essential to guarantee it’s properly prepared.
Start by confirming your quilt top is clean and pressed. This step makes a world of difference in the final look.
Next, check the edges for any loose threads or uneven seams; trim them as needed.
When it comes to choosing colors for your binding, think about how they’ll complement your quilt top.
A binding in a contrasting color can add a striking finish, while a matching tone can provide a subtle frame.
For fabric preparation, pre-wash your binding fabric to prevent any shrinking later on.
Iron it to remove wrinkles and confirm smooth edges.
Once you’ve completed these steps, your quilt will be in prime condition, ready for the binding process.
Take your time now, and you’ll enjoy a polished finish later!
Cutting Binding Strips for Your Quilt
When you’re cutting binding strips for your quilt, it’s important to start by picking a fabric that’s both durable and stylish—you want your quilt to last and look great. Once you’ve got your fabric, think about how wide you want your strips to be. The width really makes a difference in how your finished binding will look and feel, so take a moment to decide what works best for your project.
After that, it’s all about the cutting technique. If you take your time and focus on making clean, straight cuts, you’ll end up with nice, precise edges. That little bit of extra care can really make your quilt look polished and professional.
Choosing Fabric Type
How do you choose the right fabric for your quilt binding?
Start by considering several key factors to guarantee your binding complements your quilt perfectly.
– Fabric Durability:
Choose materials that can withstand wear and tear.
– Color Coordination:
Match your binding with your quilt’s colors for a cohesive look.
– Texture Variety:
Experiment with different textures to add visual interest.
– Print Selection:
Consider solids or prints. Each tells a different story and can change the feel of your quilt.
– Weight Consideration:
Lighter fabrics often work better for binding, providing a smooth finish.
Don’t forget to think about seasonal themes and budget options, too.
These choices will help you create a beautiful and functional quilt binding that improves your overall design!
Determining Strip Width
Choosing the right fabric for your quilt binding sets the stage for determining the strip width you’ll need. First, consider your quilt aesthetics; a wider strip can add a bold look, while a narrower one offers a subtle finish.
Typically, a strip width of 2.5 inches works well for most quilts, balancing binding durability with ease of application. Confirm fabric compatibility by using the same fabric type for the binding as the quilt top, which improves the overall design.
Don’t forget measurement accuracy. Precise cuts prevent fraying and guarantee a clean finish.
Keep design considerations in mind. If your quilt has intricate patterns, a narrower strip might showcase them better.
Ultimately, choose a width that complements your quilt’s style and functionality.
Cutting Techniques Overview
Cutting binding strips accurately is essential for a polished quilt finish.
To achieve cutting accuracy, you’ll want to focus on a few key techniques.
Using a rotary cutter and cutting mat simplifies the process.
Proper ruler alignment guarantees straight edges.
Here are some tips to improve your cutting technique:
- Bias cutting: This helps your binding stretch, allowing it to curve around corners smoothly.
- Strip cutting: Cut multiple strips at once for efficiency.
- Fabric grain: Always pay attention to the fabric grain for the best results.
- Rotary cutter: Invest in a sharp rotary cutter for clean cuts.
- Ruler alignment: Double-check your ruler placement to maintain straight lines.
With practice, these skills will raise your quilt’s overall look!
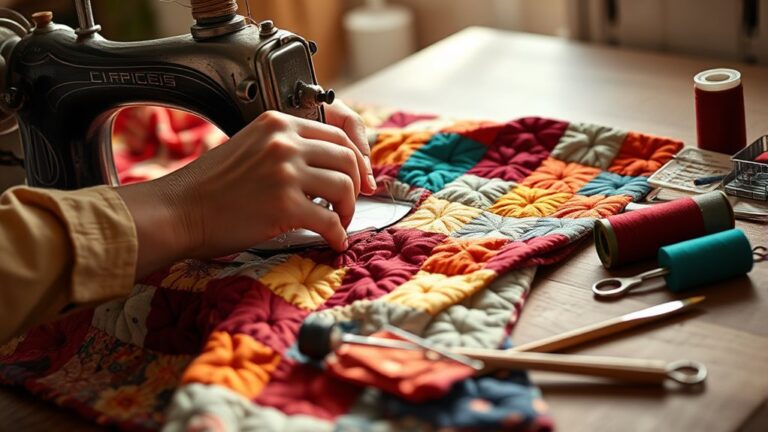
Joining Binding Strips for a Seamless Finish
Now that you’ve cut your binding strips, let’s talk about how to join them for a seamless finish. It’s important to pick the right fabric and make sure your strips are cut accurately—this really helps everything come together smoothly.
When you’re ready to start joining the strips, there are a few sewing techniques you can try that will make your binding look polished and professional. Let’s take a look at some simple ways to get that clean, finished edge you’re after.
Selecting Binding Fabric Types
Selecting the right fabric for your quilt binding can make a significant difference
in both aesthetics and durability. You’ll want to reflect on various binding
fabric textures and how they coordinate with your quilt’s colors.
Here are a few tips to help you choose:
- Cotton: Durable and easy to work with, ideal for most quilts.
- Flannel: Soft and cozy, perfect for warmer quilts.
- Silk: Adds elegance but can be tricky to handle.
- Bias Tape: Great for curves, provides a smooth finish.
- Printed Fabrics: Use them to add a pop of color or pattern.
Cutting Strips Accurately
When you’re preparing your quilt binding, accurately cutting strips is essential for achieving a seamless finish.
Start by selecting the right cutting tools, like a rotary cutter and cutting mat, to guarantee precision.
Use measuring techniques to mark your fabric according to the strip layout you’ve planned.
Pay close attention to fabric alignment and the fabric grain. Cutting against the grain can lead to distortion.
Follow a cutting order that maximizes efficiency, making sure to store your strips neatly to avoid tangling.
Keep in mind that accuracy is important here, since imprecise cuts can affect the final appearance of your quilt.
With these steps, you’ll create beautiful, uniform strips ready for joining.
Sewing Techniques Explained
Joining your binding strips seamlessly is essential for a polished quilt finish.
To achieve this, focus on effective binding techniques and thoughtful fabric selection.
Here’s how to get it right:
– Choose compatible fabrics:
Verify your binding and quilt fabrics blend well.
– Pin carefully:
Use pins to hold strips in place while sewing.
– Sew with a consistent seam:
Aim for a ¼-inch seam allowance for uniformity.
– Press as you go:
Iron your seams open to reduce bulk.
– Trim excess fabric:
Cut away any overhang for a clean look.
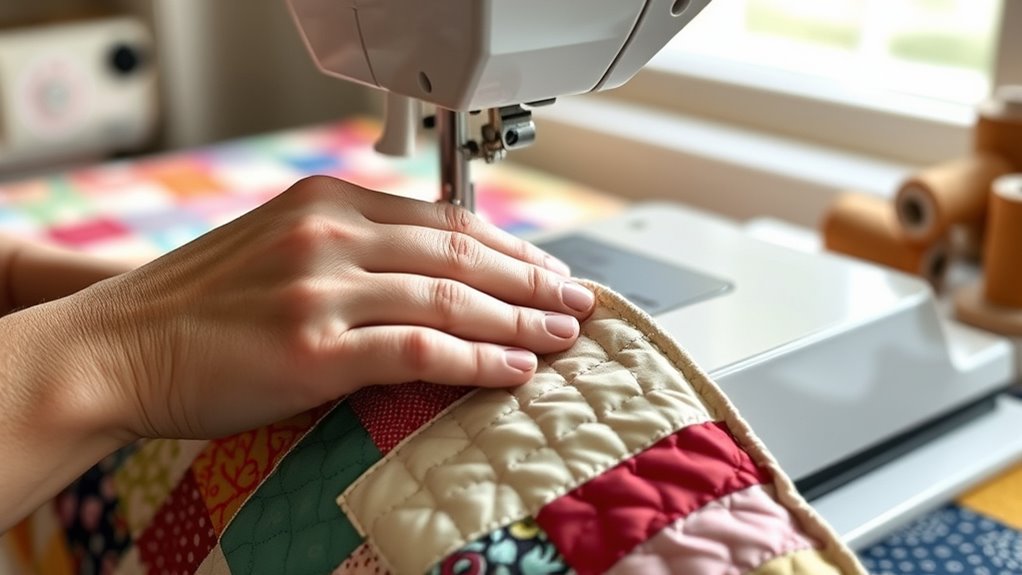
Attaching Binding to Your Quilt Edge
Attaching binding to your quilt edge is an essential step that improves both its durability and appearance.
By using effective binding techniques, you can create a polished finish that boosts your quilt’s design.
Here’s a simple overview of the process:
| Step | Action |
|---|---|
| 1. Prepare | Cut your binding strips to size |
| 2. Align & Pin | Match the binding to the quilt edge |
| 3. Sew | Stitch the binding in place |
Start by preparing your binding strips, ensuring they’re long enough to wrap around your quilt’s edges.
Align the binding with the quilt edge, pinning it securely.
As you sew, keep a consistent seam allowance for a clean look.
This initial step sets the stage for the finishing touches that’ll uplift your quilt’s overall appeal.
With practice, you’ll master these techniques, making your quilts not only beautiful but also sturdy.
Mitering Corners for a Professional Look
To get that polished, professional finish on your quilt, mitering the corners really makes a difference. You don’t need a ton of tools—just a few basics will do the trick. Let me walk you through a simple, step-by-step process that makes mitering feel much less intimidating.
Along the way, I’ll also point out some common mistakes people run into, so you know what to watch out for. That way, you can build your confidence and really perfect your technique as you go.
Tools You Will Need
Mitering corners can improve your quilt binding from ordinary to extraordinary, and having the right tools makes all the difference.
Here are some essential supplies you’ll need to achieve that professional look:
- Rotary cutters for precise cuts
- Cutting mats to protect your surfaces
- Ruler guides to guarantee accuracy
- Fabric scissors for detailed trimming
- Sewing clips to secure your bias tape
Don’t forget your iron press for crisp edges and safety pins to hold everything in place while you sew.
With these binding tools at your disposal, you’ll be well-equipped to tackle mitered corners like a pro.
Happy quilting!
Step-by-Step Process
With your tools gathered and ready, mitering corners is the next step to improve your quilt binding.
Start by folding your binding strip at a 45-degree angle at the corner, aligning the edges. Pin it in place, then fold the binding down along the next side, creating a neat crease.
This binding technique not only secures the corners but also adds a polished look to your quilt.
Next, verify the fabric textures blend well. Contrasting textures can boost your design.
Stitch along the edge, making sure your corners are crisp and even.
Repeat this process for each corner, and you’ll achieve a professional finish that showcases your hard work beautifully.
Happy quilting!
Common Mistakes To Avoid
While you may think mitering corners is straightforward, several common mistakes can undermine your efforts and affect the overall look of your quilt.
Pay attention to these pitfalls to achieve that professional finish you desire:
- Not considering fabric bias, which can cause distortion if stretched.
- Ignoring binding tension; if it’s too tight, it can warp corners, but if it’s too loose, it can look sloppy.
- Failing to press seams properly, which can result in uneven folds.
- Cutting corners too aggressively, and that can lead to frayed edges.
- Neglecting to pin securely, which may cause misalignment during sewing.
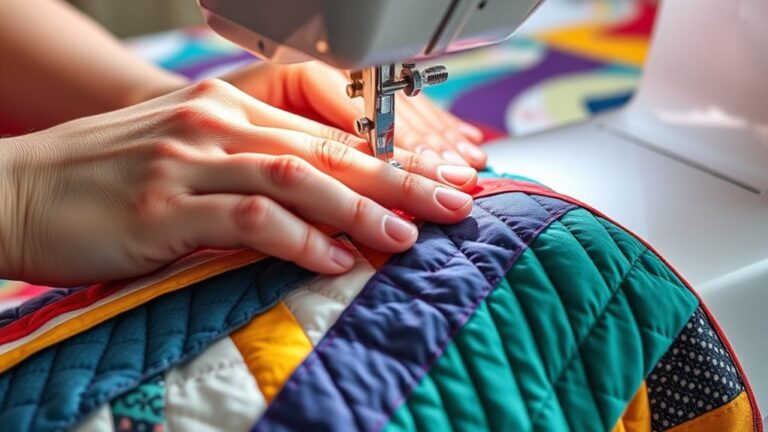
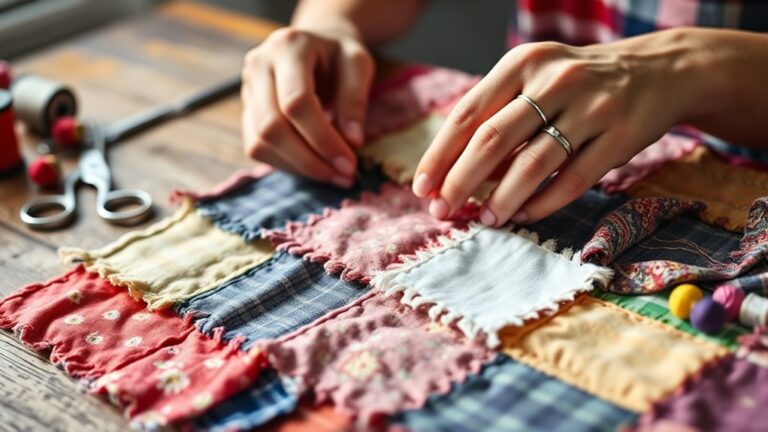
Choosing Between Hand-Stitching and Machine-Stitching Quilt Binding
How do you choose between hand-stitching and machine-stitching quilt binding? Both methods have their unique advantages.
Hand stitching benefits include a personal touch and the ability to work on your quilt anywhere, allowing for a more relaxed pace. It’s also perfect for intricate details, giving you full control over the stitches.
On the other hand, machine stitching efficiency can’t be overlooked. It saves time, especially if you’re completing multiple quilts.
Machine stitching creates strong seams and provides a uniform look, which some quilters prefer.
Consider your priorities: if you value craftsmanship and enjoy the meditative process of handwork, go for hand stitching. But if you’re short on time or have a busy schedule, machine stitching might be the way to go.
Ultimately, your choice depends on your sewing style and the project at hand.
Final Steps in Securing Your Quilt Binding
After deciding on your binding method, it’s time to focus on securing your quilt binding.
Once you’ve chosen your binding method, it’s essential to concentrate on securing your quilt binding effectively.
This is where you add those final touches that really make your quilt shine.
Whether you chose hand-stitching or machine-stitching, these binding essentials will help you finish strong.
- Check Your Corners: Confirm they’re crisp and neatly folded.
- Press Your Binding: A quick press helps everything lay flat.
- Secure the Edges: Use a few stitches to hold the binding in place before finishing.
- Trim Excess Fabric: Make sure there’s no bulk at the seams.
- Inspect for Gaps: Look for any missed spots along the binding.
How to Troubleshoot Common Quilt Binding Issues?
Wondering why your quilt binding isn’t laying flat or looks uneven? You might be dealing with a few common issues.
First, check for binding tension issues. If it’s too tight, it can cause puckering. On the other hand, loose binding might lead to gaps.
Next, inspect your fabric edges. Uneven fabric edges can result from cutting mistakes or not aligning properly during sewing.
If you notice fabric fraying problems, make sure you’re using a quality fabric that won’t unravel easily. Try to trim any frayed edges before binding, too.
Finally, misaligned seams can create noticeable bumps in your binding. Confirm your seams are aligned correctly and press them well to help them lay flat.
Tips for Perfecting Your Quilt Binding Skills
Addressing common binding issues sets a solid foundation for perfecting your quilt binding skills. To improve your technique, focus on the following tips. These will raise your quilt’s finishing techniques and guarantee beautiful binding patterns.
Choose the right fabric for your binding, something that complements your quilt and adds a finished look.
Press your binding strips well to create crisp edges. This step makes it much easier to sew everything in place.
Use a walking foot to prevent fabric from shifting during sewing. This also helps assure even stitches along the edge.
Pin or clip your binding in place before sewing. Doing this reduces the chance of puckering and keeps everything lined up.
Practice hand-stitching the binding on the back for a polished, professional finish. It really makes a difference in the final appearance.
Frequently Asked Questions
What Type of Thread Should I Use for Quilt Binding?
For quilt binding, you should use a strong, durable thread like cotton or polyester. These binding thread types provide the stability your quilt needs.
When choosing, consider thread weight. A medium weight, like 40-weight, balances strength and flexibility, making it perfect for binding.
You’ll want to match the thread color to your fabric for a seamless look. Always test a few stitches to guarantee it works well with your sewing machine.
How Do I Choose Colors That Complement My Quilt?
To choose colors that complement your quilt, think of a sunset, where hues blend seamlessly. Start with color theory: select a dominant shade, then choose analogous or complementary colors.
Consider your fabric patterns. If they’re busy, opt for solid colors to balance things out.
Alternatively, if your quilt’s muted, a vibrant binding can add sparkle. Remember, it’s all about creating harmony, so trust your instincts and let your creativity flow!
Can I Use Pre-Made Binding Instead of Making My Own?
Yes, you can definitely use pre-made binding instead of making your own! Pre-made options offer several binding advantages, like saving you time and ensuring consistent quality.
They come in various colors and patterns, making it easier to find something that complements your quilt. Plus, you won’t have to worry about cutting and sewing your own strips.
Just choose a binding that fits your style, and you’re good to go!
How Often Should I Replace My Rotary Cutter Blade?
You should replace your rotary cutter blade every 3 to 6 months, depending on how often you sew.
Dull blades can lead to jagged edges and increase the risk of accidents, so regular blade maintenance is essential.
Always handle your cutter safely, keeping it away from children and ensuring it’s closed when not in use.
What’s the Best Way to Store Leftover Binding Strips?
To store leftover binding strips, you’ll want to keep them organized for easy access. Use fabric storage solutions like clear bins or labeled bags, separating strips by color or length.
Coincidentally, this method not only saves space but also helps you find what you need quickly. You can even wrap strips around cardboard to prevent tangling.
With a little organization, your binding strip collection will always be ready for your next project!
Conclusion
Now that you’ve mastered the art of quilt binding, you might find yourself unexpectedly inspired.
Imagine this: as you stitch the final edge of your quilt, the sun breaks through the clouds, illuminating your handiwork. It’s as if the universe is celebrating your achievement with you.
With each finished quilt, you’re not just creating a beautiful piece; you’re weaving together memories and moments.
Welcome the journey, and let your newfound quilt binding skills shine in every project you tackle!