How to Quilt as You Go: A Step-by-Step Guide
Have you ever felt overwhelmed by the thought of quilting a large project all at once? If so, you’re not alone. Many quilters struggle with managing bulky layers, keeping stitches even, or just finding the time to finish a quilt from start to finish.
The good news is that there’s a technique designed to make quilting less stressful and more enjoyable for everyone.
The Quilt as You Go method simplifies your quilting process by letting you piece and quilt blocks individually. You’ll need essential tools like a rotary cutter and a sewing machine, and it’s best to choose durable fabrics like cotton.
Start by preparing your quilt blocks, then use techniques like sashing or stitching to join them.
Don’t worry about common challenges—there are solutions for bunching and uneven stitching.
Keep exploring for more tips and project ideas to improve your quilting journey!
Key Takeaways
- The Quilt as You Go method allows for piecing and quilting sections individually. This makes it easier for beginners to manage projects.
- Essential tools include a rotary cutter, cutting mat, quilting ruler, and sewing machine. These help ensure accurate and efficient quilting.
- Prepare quilt blocks by accurately cutting and pressing fabric. Then, lay out pieces before sewing to avoid shifting.
- Joining techniques like sashing and invisible seams enhance the quilt’s design and structure. These details give your finished project a polished look.
- Troubleshoot common challenges by maintaining consistent tension and checking stitch quality. Correct mistakes promptly to ensure a professional appearance.
What Is the Quilt as You Go Method?
The Quilt as You Go method simplifies the quilting process by allowing you to piece and quilt sections of your project individually. This innovative approach combines various quilt techniques, enabling you to manage larger projects more easily.
Instead of tackling a whole quilt at once, you can focus on smaller blocks, which helps maintain consistency and reduces the overwhelm often felt by quilters.
Quilting history shows that this method has evolved over time, adapting to the needs of modern quilters. You’ll find that it’s particularly beneficial for beginners, as it breaks down the process into manageable steps.
By mastering this technique, you can create stunning quilts while honing your skills. Plus, it allows for greater creativity, as you can experiment with different fabrics and designs for each section.
Adopt the Quilt as You Go method, and you’ll find quilting becomes a more enjoyable and rewarding experience.
Essential Tools and Materials for Quilt as You Go
To get started with the Quilt as You Go method, having the right tools and materials makes all the difference.
You’ll need a few essentials to guarantee a smooth quilting experience.
Here’s a quick overview of what to gather:
| Tool/Material | Purpose | Fabric Types |
|---|---|---|
| Rotary Cutter | For precise cutting | Cotton, Batik |
| Cutting Mat | Protects surfaces while cutting | Flannel, Linen |
| Quilting Ruler | Assures accuracy in measurements | Polyester, Silk |
| Sewing Machine | For stitching quilt pieces together | Various blends |
Mastering the right cutting techniques will make your project more efficient and enjoyable.
With these tools on hand, you’re ready to plunge into your Quilt as You Go journey!
Selecting Fabrics for Your Quilt as You Go Project
Choosing fabrics for your Quilt as You Go project can set the tone for your entire quilt, so it’s important to pick wisely.
Start by considering color coordination; choose a color palette that resonates with you.
Consider color coordination carefully; selecting a palette that speaks to you is key to a stunning quilt.
Think about how different shades and patterns will interact.
You might go for a monochromatic scheme for a subtle look or a vibrant mix for something eye-catching.
Next, pay attention to fabric types.
Cotton is a popular choice due to its durability and ease of handling, but don’t shy away from blends or specialty fabrics if they fit your design.
Keep in mind the weight and drape of your chosen materials; they should complement each other when pieced together.
Remember, selecting the right fabrics not only improves the visual appeal but also guarantees your quilt holds up over time.
Happy fabric hunting!
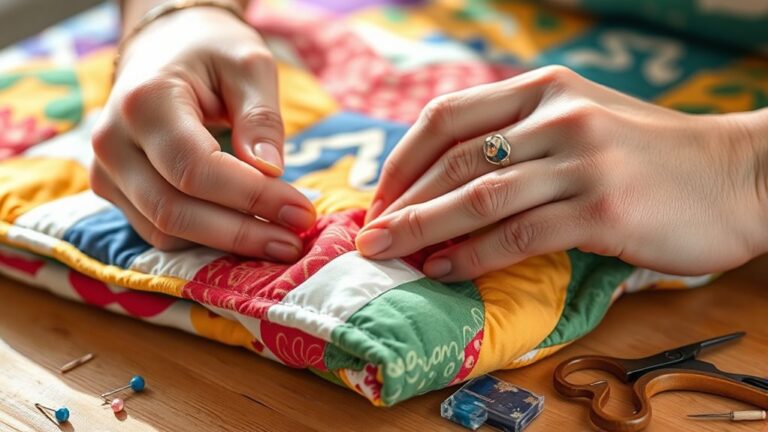
Preparing Your Quilt Blocks for Assembly
Now that you’ve selected the perfect fabrics for your Quilt as You Go project, it’s time to prepare your quilt blocks for assembly.
Effective block preparation is essential for a polished finish. Here’s how to get started:
- Cut your fabric: Make sure all pieces are accurately measured and cut according to your design.
- Press your fabric: Use a hot iron to remove any wrinkles. Fabric pressing helps in achieving clean seams.
- Assemble your blocks: Lay out your pieces in the desired arrangement before sewing them together.
- Pin or clip: Secure the edges with pins or clips to avoid shifting while you sew.
Taking the time to meticulously prepare your blocks will make the quilting process smoother.
You’ll appreciate the difference in the final look of your Quilt as You Go project!
Quilting Your Blocks: A Step-by-Step Approach
As you engage in the quilting process, it’s essential to approach each block with care to guarantee a cohesive and beautiful final product. Start by selecting your quilt block designs, making sure they’re compatible in style and color.
Lay out your fabric layers. These typically consist of the backing, batting, and your quilt top. Next, secure the layers together using safety pins or basting spray. This step helps prevent shifting while you quilt.
Choose a quilting technique that complements your block designs, whether it’s straight-line stitching or free-motion quilting. Begin quilting from the center of the block and work your way outward to avoid puckering.
Be mindful of maintaining even stitches—this will improve the overall appearance. Continue this process for each block, taking your time to appreciate the artistry involved.
Once finished, you’ll have beautifully quilted blocks ready for assembly into your stunning quilt.
How to Join Your Quilt Blocks Together
Joining your quilt blocks together is an essential step that can greatly influence the overall look of your quilt.
Choosing the right joining techniques and pondering your block layout will help you create a seamless finish.
Here are some methods to contemplate:
- Sashing: Use strips of fabric between blocks for a defined look.
- Stitching: Join blocks directly with straight seams for a more traditional approach.
- Lattice: Create a grid effect by placing blocks diagonally with fabric strips.
- Invisible seams: Use a hand-stitching technique for a nearly undetectable join.
Experiment with these techniques to see which complements your design best.
Remember, your block layout can improve the visual appeal, so take your time to arrange them before finalizing your joins.
With patience and practice, you’ll achieve a beautiful quilt ready for the next steps!
How to Choose and Attach Quilt Borders
When you’re ready to add borders to your quilt, first take some time to pick out fabrics that go well with your quilt’s design. Think about colors and patterns that will really make your quilt pop. Once you’ve chosen your border fabrics, grab your measuring tape and carefully measure your quilt. This step is important because you want those borders to fit just right—no puckering or stretching.
After you’ve measured everything, it’s time to attach the borders. Go slowly and make sure each edge lines up nicely. A little extra attention here will give your quilt a polished, finished look that really pulls the whole project together.
Selecting Border Fabrics
Choosing the right border fabric can make all the difference in your quilt’s overall look. It’s essential to evaluate both color and pattern.
Here are some key factors to take into account:
- Border Color: Select a color that complements or contrasts with your quilt’s main palette.
- Texture Contrast: Choose fabrics that offer a different texture for added depth and interest.
- Pattern Scale: Verify the scale of the border pattern harmonizes with your quilt’s existing patterns. Remember, larger borders can sometimes overpower smaller ones.
- Fabric Weight: Match the weight of the border fabric to your quilt for better draping and durability.
Measuring for Borders
Measuring for borders is essential to achieving a polished finish on your quilt. Start by laying your quilt top flat on a large surface.
Measure the width and length of your quilt, noting these border measurements carefully. When choosing border styles, consider how they’ll improve your quilt’s overall design.
For a balanced look, opt for borders that complement the colors and patterns of your quilt. You might choose a simple solid fabric or a more intricate print, depending on your vision.
Once you have your measurements and styles selected, cut your border strips accordingly, ensuring they’re the right length to fit your quilt.
Taking these steps will set you up for success in your quilting journey.
Attaching Borders Properly
Attaching borders properly can improve your quilt from good to stunning,
so it’s vital to follow a few key steps.
Choose your border styles wisely,
as they can set the tone for your quilt.
Use accurate measuring techniques
to guarantee a perfect fit.
Here’s how to get it right:
- Select the right fabric: Consider colors and patterns that complement your quilt.
- Measure twice, cut once: Always double-check your measurements before cutting fabric.
- Sew with precision: Use a consistent seam allowance to maintain uniformity.
- Press diligently: Iron your borders flat before attaching to avoid puckering.
Identifying Common Challenges in Quilt as You Go
When you try quilt as you go, it’s pretty normal to run into a few bumps along the way. Maybe your fabric starts bunching up, or your stitching doesn’t look quite as even as you hoped. Sometimes, the seams just refuse to line up the way you want, and that can make the whole process feel a bit more stressful than enjoyable.
But don’t worry—these issues are really common, and there are some straightforward ways to handle them. Let’s take a closer look at what causes these problems and how you can fix them, so your quilting stays fun and your finished project turns out just the way you imagined.
Fabric Bunching Issues
While you might be excited to plunge into the Quilt as You Go (QAYG) technique, fabric bunching can quickly dampen your enthusiasm.
This issue often pops up because of improper fabric tension or not adjusting your backing well enough. Here are some common causes to watch for:
- Inconsistent fabric feed through your machine
- Insufficient pinning or basting before sewing
- Wrong needle size for your fabric type
- Uneven pressure on the quilt sandwich
To tackle these challenges, make sure your fabric layers are secured properly and try to keep even tension as you sew.
It also helps to adjust your backing to prevent it from pulling or bunching up. With a little care and attention, you can keep your QAYG project moving smoothly and avoid frustration.
Uneven Stitching Problems
Uneven stitching can derail your Quilt as You Go (QAYG) project, leaving you frustrated and dissatisfied with the final outcome.
Common culprits include uneven tension and lack of stitch consistency. If your stitches are too tight, they can pull the fabric, leading to puckering.
On the other hand, loose stitches may fail to hold the layers together properly. To avoid these issues, regularly check your tension settings and practice on scrap fabric before diving into your project.
Pay attention to your hand movements; a steady, even pace helps maintain stitch consistency. If you notice problems, don’t hesitate to adjust and re-stitch as needed.
Addressing uneven stitching early on will save you time and improve your overall quilt quality.
Battling Seam Alignment
As you plunge into your Quilt as You Go (QAYG) project, battling seam alignment can become one of your biggest challenges.
Proper seam matching and effective alignment techniques are essential for achieving a polished finish.
Here are some common issues you might face:
- Misaligned seams: This happens when pieces don’t line up correctly.
- Bulky intersections: Thick seams can create uneven surfaces.
- Wavy edges: Lack of tension can lead to distorted shapes.
- Inconsistent spacing: Uneven distances between patches can disrupt your design.
To tackle these challenges, take your time during the cutting and piecing stages.
Pinning your fabric before sewing can also help guarantee everything aligns perfectly.
With practice, you’ll find your rhythm and enjoy the process!
How to Fix Quilting Mistakes Like a Pro?
Mistakes happen, even to the best quilters, but knowing how to fix them can turn a potential disaster into a masterpiece.
Even the best quilters make mistakes; knowing how to fix them can transform a potential disaster into a stunning masterpiece.
If you notice puckering, start by gently steaming the area, then press it flat. For correcting tension issues, re-thread your machine and test on scraps until it’s just right.
Adjusting seams can also help; if they’re too tight, consider ripping them and sewing again with a slightly looser stitch.
If you’ve got excess fabric, don’t stress! Trimming away the surplus can help align your blocks better.
Always remember to step back and assess your work after making any fixes. Sometimes, a small adjustment can lead to a big improvement.
Welcome these moments as learning experiences, and don’t hesitate to experiment. With practice, you’ll handle mistakes like a pro and improve your quilting skills along the way!
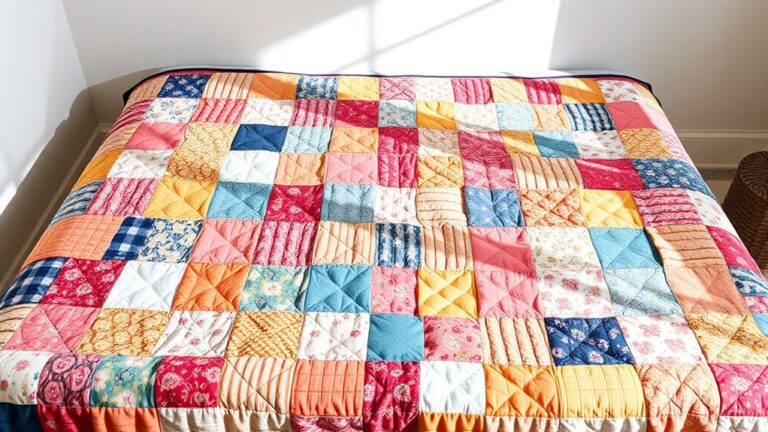
Inspiring Quilt as You Go Project Ideas
Whether you’re a seasoned quilter or just starting out, quilt as you go (QAYG) projects can spark your creativity and simplify the quilting process.
Here are some inspiring ideas to get you started:
- Seasonal Themes: Create quilts that reflect the seasons, using vibrant color combinations for spring or warm tones for fall.
- Quick Projects: Try smaller QAYG projects like table runners or pillow covers. These are perfect for honing your skills and experimenting with fabric choices.
- Texture Contrasts: Mix different fabrics, like cotton and flannel, to add depth and interest to your quilts.
- Layout Inspiration: Investigate various layouts, from traditional patchwork to modern designs, to improve your QAYG creations.
Whether you’re using beginner tips or advanced techniques, these project ideas can help you utilize QAYG to express your unique style.
Jump in and enjoy the process!
Frequently Asked Questions
Can I Use Any Sewing Machine for Quilt as You Go?
Yes, you can use various sewing machine types for quilt as you go, but it’s important to take into account fabric thickness.
A machine with a strong motor and good feed dogs will handle multiple layers better. If you’re working with thick fabrics, make sure your machine can accommodate them without jamming.
For best results, look for a walking foot or quilting foot to help manage those layers smoothly while you sew.
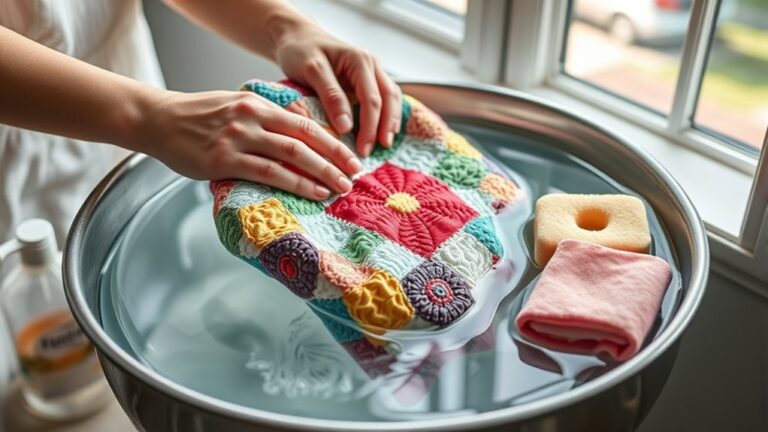
How Do I Care for a Quilt Made With This Method?
Caring for your quilt made with this method isn’t rocket science. Unless you’re using a rocket for a washing machine!
For quilt maintenance, stick to gentle washing techniques. Use cold water and a mild detergent, and skip the bleach unless you’re aiming for a tie-dye masterpiece.
Air dry or tumble dry on low. Remember, your quilt’s not a superhero; it doesn’t need extreme temperatures to save the day!
Treat it right, and it’ll cozy up with you for years.
Is Quilt as You Go Suitable for Beginners?
Yes, quilt as you go is perfect for beginners! It lets you tackle smaller sections, making the process less overwhelming.
Start with beginner tips like using pre-cut fabric and keeping your seams straight.
Watch out for common mistakes, like not measuring accurately or skipping pressing your seams.
Don’t be afraid to experiment; it’s all part of learning.
Enjoy the journey, and you’ll quickly gain confidence in your quilting skills!
What Are the Benefits of Using This Quilting Method?
Using the quilt-as-you-go method offers several benefits. You’ll enjoy greater flexibility in fabric selection, allowing you to mix and match your favorite patterns easily.
Plus, project planning becomes more manageable since you can tackle smaller sections at a time, making it less overwhelming.
This method also saves time, as you can finish each block individually and join them later.
Can I Use Pre-Cut Fabric for Quilt as You Go Projects?
Absolutely, you can use pre-cut fabric for quilt as you go projects! In fact, pre-cut advantages make your fabric selection easier and quicker.
You’ll save time on cutting and can focus on creativity. Plus, pre-cuts often come in coordinated colors and patterns, ensuring your quilt looks cohesive.
Just choose the right size for your blocks, and you’ll be well on your way to a beautiful quilt without the hassle of cutting individual pieces.
Conclusion
Now that you’ve revealed the secrets of the Quilt as You Go method, you’re ready to weave your own tapestry of creativity. Like a master painter layering colors, each block you create adds depth and character to your quilt.
Welcome the challenges, fix your mistakes with grace, and let your imagination soar. Remember, every stitch tells a story, and your quilt will be a beautiful narrative of your journey through fabric and thread.
Most importantly, enjoy every moment of the Quilt as You Go process. Happy quilting!