DIY Guide to Make a T-Shirt Quilt
Have a stack of old t-shirts you just can’t bear to toss, but don’t know what to do with them? You’re not alone—many people struggle to find a meaningful way to preserve those special memories without letting clutter take over.
If you wish there was an easy, creative solution to transform your favorite tees into something useful and beautiful, this guide is for you.
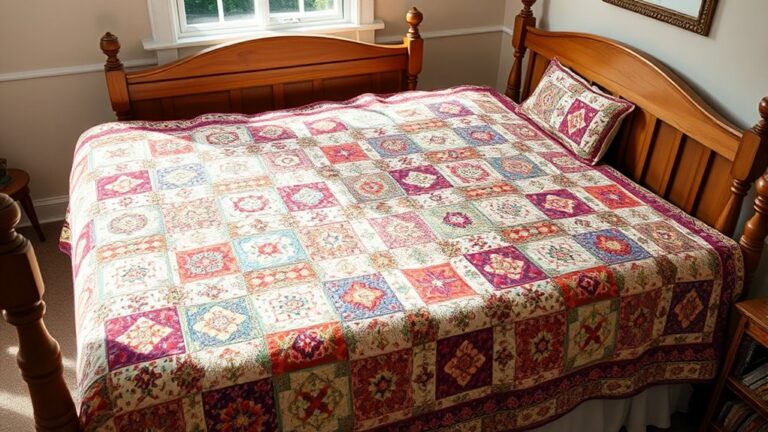
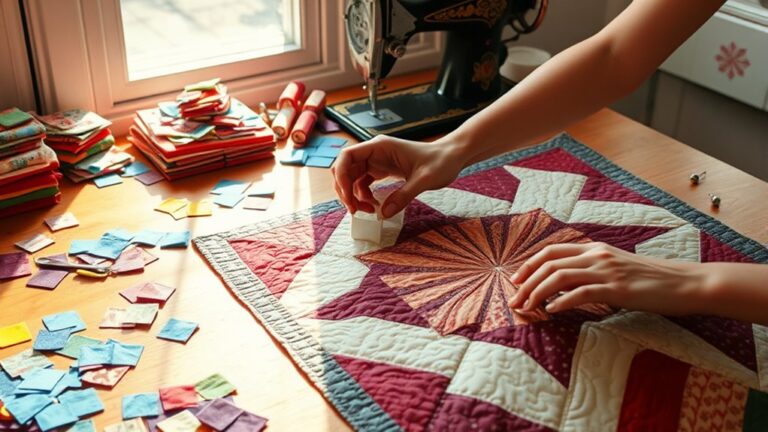
Creating a t-shirt quilt is a fun way to turn cherished memories into a cozy keepsake.
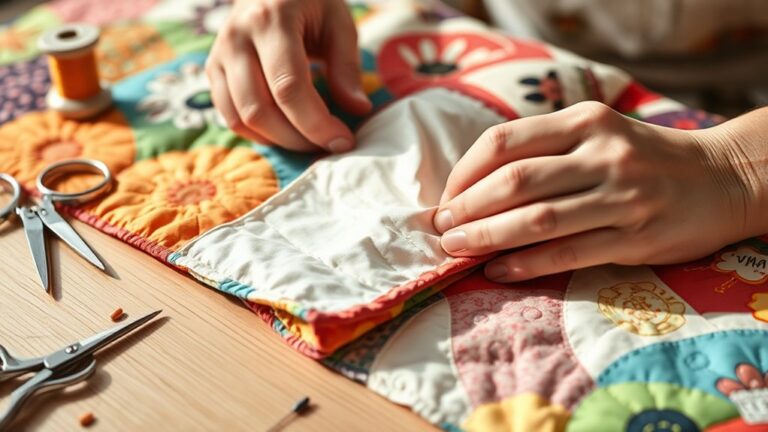
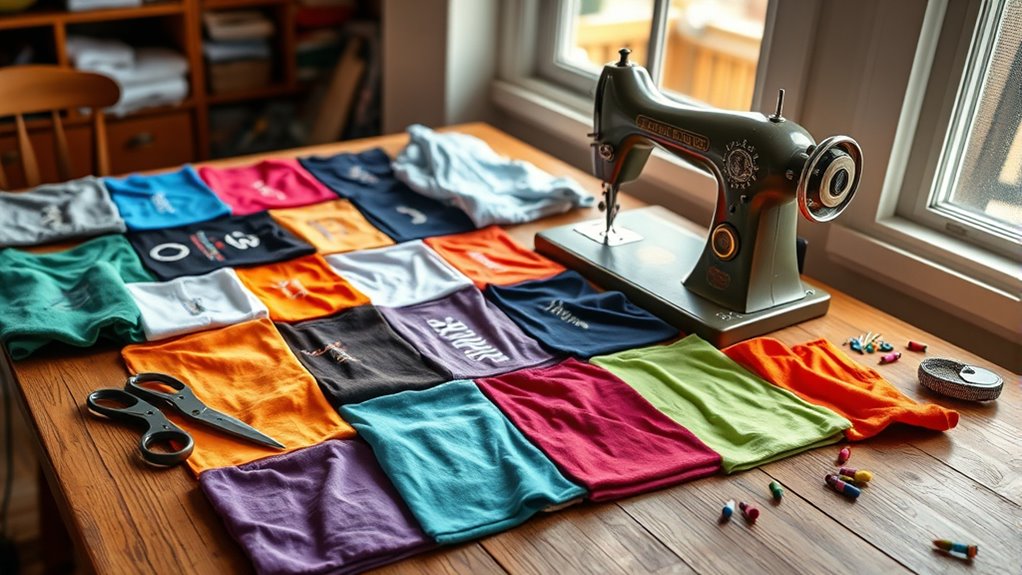
Start by selecting cotton blend t-shirts with sentimental value. Gather your sewing tools and prepare the shirts by cutting them into equal squares while preserving designs.
Arrange your layout for balance, then sew the squares together and add batting and backing for thickness.
Finish with binding for a polished edge.
Stick around to discover more tips and techniques for your quilt!
Key Takeaways
- Choose cotton blend t-shirts with sentimental value and balanced colors. This helps create a quilt that’s both meaningful and visually appealing.
- Gather essential tools like a sewing machine, scissors, rotary cutter, and fusible interfacing. The interfacing will help stabilize the t-shirt fabric.
- Cut t-shirt squares to 12-15 inches, being careful to avoid seams and logos so you maintain the design integrity of each shirt.
- Try out different layouts and color schemes before sewing. This lets you find a balanced and satisfying arrangement for your quilt.
- Finish with binding and care instructions. Wash your quilt gently in cold water and store it away from sunlight to preserve its colors.
Choosing the Right T-Shirts for Your Quilt
When you’re selecting the right t-shirts for your quilt, what should you keep in mind?
First, think about the fabric selection. Choose shirts made from cotton blends for durability and comfort.
Avoid heavy or stretchy materials, as they can distort your quilt’s overall shape.
Next, consider the sentimental value of each t-shirt.
Consider the sentimental value of each t-shirt; these pieces hold memories that make your quilt truly special.
You might have shirts representing milestones, like concerts or family gatherings, that hold special memories.
These pieces will not only make your quilt visually appealing but also meaningful.
Lay out your chosen shirts and visualize how they’ll come together.
Balance colors and designs to create an eye-catching pattern.
Don’t hesitate to include a few shirts that spark joy, even if they don’t fit the theme perfectly.
Ultimately, your quilt should reflect your personality and cherished moments, making it a unique treasure for years to come.
What You’ll Need to Get Started Sewing
To kick off your t-shirt quilt project, you’ll need a few essential supplies. Start by gathering the right fabric types and sewing tools to make your sewing experience smooth and enjoyable.
Here’s a quick overview to get you started:
| Fabric Types | Sewing Tools |
|---|---|
| T-shirt fabric | Sewing machine |
| Cotton backing | Scissors |
| Fusible interfacing | Rotary cutter & mat |
Make sure to choose a sturdy sewing machine that can handle multiple layers of fabric. You’ll also want sharp scissors or a rotary cutter for precise cutting.
Don’t forget fusible interfacing to stabilize your t-shirts and prevent stretching. With these supplies in hand, you’re well on your way to creating a cozy and memorable t-shirt quilt that showcases your favorite designs!
Preparing Your T-Shirts: Cutting and Sizing Tips
Start by gathering your t-shirts and preparing them for cutting. Lay each shirt flat on a clean surface to inspect the fabric types, like cotton, blends, and more.
Decide which designs you want to feature and think about how you’ll cut around them.
Use sharp cutting tools like fabric scissors or a rotary cutter for clean edges. Measure and mark your desired square or rectangle sizes, typically around 12 to 15 inches, depending on your quilt’s layout.
Use sharp fabric scissors or a rotary cutter for precise edges, measuring 12 to 15 inches for your quilt pieces.
Remember, it’s best to avoid cutting through seams or logos to maintain the integrity of the designs.
Once you’ve cut the t-shirts, you can easily stabilize the fabric by using interfacing, especially if they’re stretchy. This step guarantees your quilt pieces hold their shape during sewing.
With your t-shirts prepped, you’re ready to move on to the fun part: designing your quilt layout!
Designing Your Quilt Layout: Patterns and Arrangements
When you’re designing your quilt layout, start by thinking about the color schemes that really bring your T-shirts to life. It’s a good idea to play around with different combinations until you find something that feels balanced and vibrant. Arranging the blocks in a way that spreads out your colors and designs will help highlight your favorite shirts, and it also gives you the freedom to experiment with unique patterns.
As you go, don’t be afraid to move things around until it feels just right. It’s all about creating a layout that’s both eye-catching and meaningful to you. By taking a little extra time with your arrangement, you’ll end up with a quilt that truly tells your story—and looks stunning, too!
Choosing Color Schemes
Choosing a color scheme for your DIY t-shirt quilt can make all the difference in creating a cohesive and visually appealing design.
To achieve color harmony, consider how different hues interact with each other.
You want to balance bold colors with softer tones and incorporate varied fabric textures to add depth.
Here’s a simple guide to help you choose:
| Color Choice | Fabric Texture |
|---|---|
| Bright & Bold | Smooth Cotton |
| Pastel Shades | Soft Fleece |
| Earth Tones | Textured Jersey |
| Monochrome | Quilted Fabric |
Using this table, you can mix and match colors and textures to create a quilt that feels harmonious and inviting.
Enjoy the creative process!
Arranging T-Shirt Blocks
Arranging your t-shirt blocks sets the stage for a stunning quilt, and a thoughtful layout can improve the overall design.
Start by considering block placement. Lay your blocks on a flat surface so you can visualize different arrangements.
Mix and match colors and designs to create visual balance. Placing similar shades or patterns next to each other can enrich the overall harmony of your quilt.
Experiment with various configurations, like a grid or more organic shapes, until you find one that feels right.
Don’t hesitate to step back and view your layout from a distance. This can help you spot any imbalances.
Once you’re satisfied with the arrangement, take a photo for reference before you start sewing!
Incorporating Unique Patterns
While you’re designing your quilt layout, incorporating unique patterns can improve your creation beyond the ordinary.
Start by considering pattern blending, like mixing different designs such as stripes, polka dots, or graphics from various T-shirts.
This fusion creates visual interest and breaks up monotony. Experiment with fabric mixing too; try combining lightweight fabrics with heavier ones to add texture.
Balance your layout by placing bold patterns next to subtle ones, letting each block shine.
Don’t shy away from asymmetrical arrangements, since they can create dynamic movement in your quilt.
It also helps to consider color schemes that tie your patterns together, ensuring everything looks cohesive.
With these techniques, your quilt will not only be functional but also a stunning piece of art that tells your story.
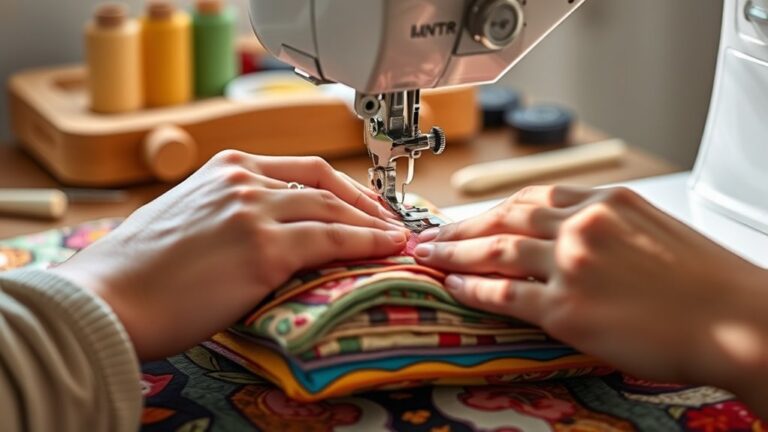
Sewing T-Shirt Quilt Squares Together
Now that you’ve come up with your quilt layout, let’s start sewing those T-shirt squares together. Take a moment to look at your arrangement and make sure everything flows the way you want—it’s much easier to move things around before you start stitching.
As you begin sewing, pick a technique that feels comfortable and will help your quilt last, like using a sturdy straight stitch with a slight stretch. If you’re not sure where to start, try sewing the squares into rows first, then join the rows together. This keeps everything lined up nicely.
And if you want to give your quilt a polished look, think about adding borders around the edges. Borders can help tie everything together and add a nice finishing touch. Plus, they can make your quilt just a little bit bigger if you need it to be!
Choosing Your T-Shirt Layout
How do you envision your t-shirt quilt coming together? Choosing the right layout is essential for achieving visual balance and making your quilt pop.
Start by arranging your squares on a flat surface. Consider layout inspiration from various patterns, like alternating colors or creating a gradient.
Here’s a simple table to visualize:
| T-Shirt 1 | T-Shirt 2 | T-Shirt 3 |
|---|---|---|
| T-Shirt 4 | T-Shirt 5 | T-Shirt 6 |
| T-Shirt 7 | T-Shirt 8 | T-Shirt 9 |
| T-Shirt 10 | T-Shirt 11 | T-Shirt 12 |
| T-Shirt 13 | T-Shirt 14 | T-Shirt 15 |
Experiment with different arrangements until it feels just right. This is your quilt, so let your creativity shine while ensuring each square complements the others!
Sewing Techniques For Squares
Ready to bring your t-shirt squares together? Start by laying out your squares to guarantee proper square alignment. This step’s essential; it helps you visualize the final design and catch any mismatches early.
Use patchwork techniques to sew the squares together, making certain to maintain a consistent seam allowance, usually about a quarter inch.
Pin your squares securely before sewing to avoid any shifting. As you stitch, keep an eye on the edges, making sure they line up perfectly for a clean finish.
If you’re using different fabrics, consider adjusting your tension settings for even stitching.
Once you’ve sewn your rows, press the seams flat with an iron for a polished look. Now you’re one step closer to your cozy t-shirt quilt!
Adding Borders And Finishing
Once you’ve sewn your squares together, adding borders can improve the look of your t-shirt quilt.
Choose from various border styles, like a simple straight edge or a more intricate scalloped design.
The right border can frame your quilt and really make the t-shirt squares pop.
To determine the quilt dimensions, measure the total size of your squares first.
Then, add the desired width of your borders to these measurements.
Cut strips of fabric for your borders, making sure they’re long enough to fit the quilt’s edges.
Attach the borders with a straight seam, pressing them flat afterward.
This finishing touch not only adds visual interest but also stabilizes the quilt, making it ready for layering and quilting.
Add Batting and Backing for Warmth
To create a cozy and inviting t-shirt quilt, adding batting and backing is essential.
Start by choosing the right batting materials. Cotton or polyester blends work well for warmth and comfort. Cotton batting offers breathability. Polyester provides durability and resilience.
Next, consider your backing options. You can use a solid fabric that complements your t-shirts, or opt for a fun print to add personality.
Make sure your backing is at least the same size as your quilt top. This helps ensure a smooth finish.
Once you have your materials, lay the t-shirt top face up. Place the batting on top, followed by the backing fabric, face down.
This sandwich creates a cozy layer that’ll keep you warm and looks great. Smooth out any wrinkles to prepare for the next steps.
Your quilt will not only be functional but also a cherished keepsake!
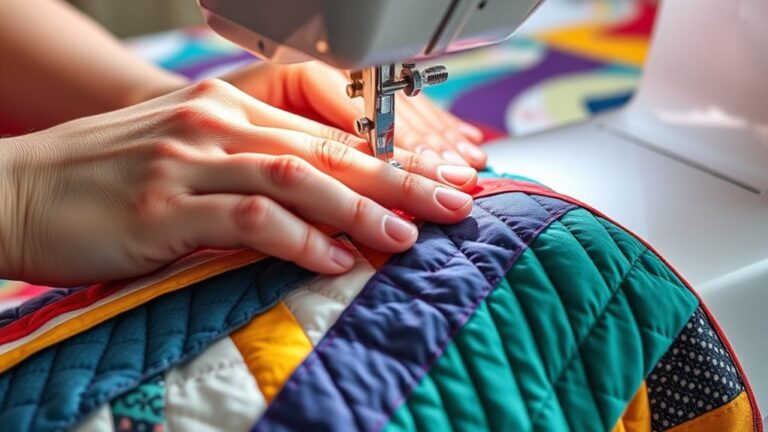
Quilting Techniques: Stitching Everything Together
As you immerse yourself in the quilting process, it’s crucial to choose the right stitching technique to hold your t-shirt quilt together securely.
You can opt for hand stitching, which allows for more control and a unique finish. This technique lets you connect the layers with precision, ensuring every t-shirt square is firmly attached.
However, hand stitching can be time-consuming, so if you’re looking for speed, machine quilting might be your best bet.
With machine quilting, you can quickly cover larger areas, using a straight stitch or a decorative pattern to improve your quilt’s appearance.
Just make sure your machine is equipped with the right needle and thread for t-shirt fabric to avoid snags.
Whichever technique you choose, focus on consistent spacing and tension to achieve a polished look.
Your quilt will come together beautifully, reflecting your creativity and effort.
Finishing Touches: Binding Your Quilt Edges
Now that your quilt is all stitched together, let’s talk about those finishing touches—specifically, binding the edges. This is where you really get to add a little extra personality, so go ahead and pick a fabric that either complements or adds a fun pop to your quilt’s design. After you’ve made your choice, you’ll want to attach the binding carefully, making sure it’s nice and secure.
Once you’ve got it all sewn on, take a look at those edges—they should look crisp and polished. With just a bit of attention here, your quilt will look beautifully finished and ready to show off!
Choosing Your Binding Fabric
Choosing the right binding fabric can improve your DIY t-shirt quilt from good to great.
When selecting your binding fabric options, consider how it complements your quilt’s colors and overall design.
Effective fabric color coordination will guarantee the binding improves rather than distracts from your quilt.
Here are some tips to help you choose:
- Solid Colors: Opt for a solid that matches a prominent color in your t-shirts for a cohesive look.
- Patterns: Choose a subtle pattern that ties together various elements of your quilt without overwhelming it.
- Contrasting Shades: A contrasting color can create a striking border, adding depth and visual interest.
With thoughtful choices, your quilt’s edges will look polished and professional.
Attaching The Binding
Attaching the binding is the final step that transforms your t-shirt quilt into a finished masterpiece. Start by choosing a binding technique that suits your style, whether it’s a simple straight stitch or a more decorative method.
Lay your quilt flat and align the binding strips along the edges, ensuring they cover the raw edges. Pin or clip them in place for stability.
As you sew, keep your fabric choices in mind. A contrasting color can add flair, while a matching hue creates a cohesive look.
Don’t forget to miter your corners for a polished finish! Once you’ve stitched all around, press the binding away from the quilt, and you’re ready to enjoy your cozy creation.
Finalizing The Edges
Finalizing the edges of your t-shirt quilt is crucial for a polished look.
Choosing the right edge treatments not only improves the quilt’s durability
but also adds a personal touch.
Here are a few fabric choices to think about for binding:
- Cotton: Offers durability and a wide range of prints.
- Minky: Adds a soft texture, perfect for cozy quilts.
- Fleece: Provides warmth and a unique look.
When you attach the binding, be sure to align it carefully with the quilt edges.
This guarantees a clean finish, preventing fraying.
Take your time to sew it down securely, and you’ll have a beautifully finished quilt
that showcases your hard work and creativity.
Enjoy the final product. It’s a labor of love!
Caring for Your T-Shirt Quilt
Caring for your T-shirt quilt is essential to keep it looking vibrant and lasting for years. To guarantee its longevity, follow some key quilt maintenance tips.
First, wash your quilt gently in cold water using a mild detergent. Avoid bleach, as it can fade the colors and damage the fabric.
When drying, opt for air drying or a low-heat setting to prevent shrinkage.
Store your quilt in a cool, dry place, away from direct sunlight, which can fade those cherished designs.
If you notice any stains, treat them promptly with a gentle stain remover, testing it on a hidden area first.
Creative Gift Ideas: Using Your Quilt
A T-shirt quilt can be the perfect, personalized gift for friends and family, showcasing cherished memories in a cozy format. Not only does it serve as a functional piece, but it also offers significant memory preservation and sentimental value.
Here are a few creative ways to use your quilt as a gift:
- Milestone Celebrations: Surprise a loved one on their birthday or anniversary with a quilt made from shirts that reflect memorable moments in their life.
- Graduation Keepsake: Collect T-shirts from their school years, turning them into a quilt that celebrates their educational journey and achievements.
- Comfort during Hard Times: Gift a quilt to someone going through a tough time, reminding them of joyful memories and providing warmth and comfort.
With these ideas, you’ll give a gift that’s not just practical but also deeply meaningful.
Frequently Asked Questions
How Many T-Shirts Do I Need for a Quilt?
You’ll need about 12 to 20 t-shirts for a standard quilt, depending on the size you want.
For a twin-size quilt, aim for around 16 shirts. A larger queen-size might require 24 or more.
When selecting your t-shirts, consider fabric weight and design. Lighter fabrics are easier to work with.
Keep quilt size in mind, as more shirts can add both warmth and visual interest to your final piece.
Can I Use Non-Cotton T-Shirts in My Quilt?
Yes, you can use non-cotton t-shirts in your quilt! About 60% of t-shirts are made of cotton, but blends like polyester and rayon can work too.
Just keep in mind that fabric types affect durability. Non-cotton fabrics might not hold up as well over time, leading to potential wear and tear.
If you love those shirts, go ahead and include them, but consider mixing with cotton for better longevity.
What Is the Best Way to Wash My Quilt?
The best way to wash your quilt is to use cold water and a gentle cycle. This helps preserve the fabric care and keeps your quilt looking great.
Avoid bleach and opt for a mild detergent instead. If you can, air dry it or use a low heat setting in the dryer.
Always check the care label for specific instructions, and consider using a mesh laundry bag for added protection.
Happy washing!
How Long Does It Take to Complete a T-Shirt Quilt?
It usually takes about 10 to 20 hours to complete a t-shirt quilt, depending on your fabric selection and quilting techniques.
Imagine cutting those vibrant shirts into squares, each telling a story, then piecing them together like a puzzle. You’ll spend time sewing, layering, and quilting, transforming memories into a cozy masterpiece.
Can I Add Patches or Other Embellishments to My Quilt?
Yes, you can definitely add patches or other embellishments to your quilt! Just think about patch placement carefully to guarantee it improves your design.
You might use embellishment techniques like embroidery or fabric paint to personalize it further. Adding these details not only makes your quilt unique but also allows you to showcase your creativity.
Conclusion
Now that you’ve crafted your t-shirt quilt, you’ve not only created a cozy keepsake but also a conversation starter!
Did you know that quilts can hold stories, reflecting memories and experiences? By using your favorite shirts, you’ve woven a narrative that’s distinctly yours.
So, cherish your creation. Each stitch tells a tale.
Whether it’s for you or a special gift, your t-shirt quilt is more than just fabric. It’s a cherished piece of history, ready to be shared!