How to Piece Quilt Backing: A Step-by-Step Guide
If you’ve ever found yourself frustrated with quilt backs that bunch, wrinkle, or just don’t look as beautiful as your quilt top, you’re not alone. Many quilters struggle to achieve a flawless finish on the back of their quilts.
It can feel overwhelming to figure out how to piece quilt backing so it’s smooth, balanced, and complements your hard work on the front.
To piece quilt backing, start by choosing medium-weight fabric that complements your quilt top.
Measure your quilt accurately, adding seam allowances.
Prepare your fabric by washing, ironing, and cutting it neatly.
Lay out and arrange your fabric scraps for balance before sewing them alongside straight seams.
Align edges carefully and press seams for a polished finish.
Finally, trim excess batting and square your corners.
Keep going to uncover more tips for a flawless quilt backing!
Key Takeaways
- Choose medium-weight fabric that complements the quilt top without overpowering it. This helps ensure both durability and visual harmony.
- Measure the quilt top accurately and add a 1/4 inch seam allowance before cutting the backing fabric.
- Experiment with fabric layouts on a flat surface so you can achieve a balanced and pleasing design.
- Align seams precisely and press them for a polished finish. This ensures your quilt backing looks neat.
- Trim excess batting and square up corners before binding for a professional final touch.
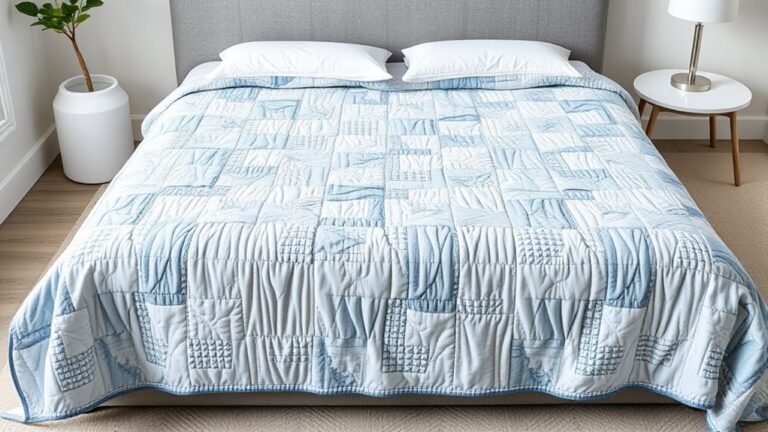
What Is Quilt Backing and Why Does It Matter?
Quilt backing is the fabric that forms the underside of your quilt, and it plays a significant role in both aesthetics and functionality.
Choosing the right fabric types can dramatically affect the overall look and feel of your quilt. Whether you opt for cotton, flannel, or a specialty fabric, each type brings unique qualities that improve your project.
Choosing the right backing fabric enhances your quilt’s appearance and texture, adding unique qualities that elevate your project.
Using various quilting techniques, you can create interesting patterns and textures on the backing. This can make it just as visually appealing as the front.
Think about how the backing interacts with your batting and top layer. It should complement them, not overpower them.
A well-chosen quilt backing can add durability and warmth. This helps ensure your quilt lasts for years to come.
Remember, it’s not just an afterthought. It’s a fundamental component that ties your entire quilt together.
Choosing the Right Fabric for Quilt Backing
When you’re picking out fabric for your quilt backing, it’s a good idea to think about both the weight of the fabric and the design. Heavier fabrics can make your quilt sturdier and help it last longer, which is always a plus. At the same time, choosing the right color or pattern can really enhance the way your quilt looks overall. So, let’s talk a bit more about how these things can affect your final decision and help you end up with a quilt you really love.
Fabric Weight Considerations
Choosing the right fabric weight for your quilt backing is essential, especially since it impacts both the drape and durability of your finished piece.
You’ll want to evaluate weight balance to guarantee your backing complements the quilt top. Lightweight fabrics may drape beautifully but can lack durability.
On the other hand, heavier options provide stability but might make your quilt feel stiff. Aim for a medium-weight fabric, which often strikes the best balance between comfort and strength.
Furthermore, check for fabric stability; fabrics that shift or stretch can lead to uneven seams. By selecting the appropriate weight, you’ll improve the overall quality of your quilt, guaranteeing it lasts for years while maintaining a pleasant drape.
Color and Pattern Choices
After settling on the right fabric weight, the next step is selecting colors and patterns that improve your quilt’s overall design. Aim for color harmony; choose shades that blend well with your quilt’s top.
Think about how the backing color complements or contrasts with the front. For instance, a solid color can ground a busy top, while a patterned backing can add interest if your quilt top is simpler.
When it comes to pattern balance, make sure the backing doesn’t overpower the quilt top. Use smaller, subtler patterns if your top is bold.
Conversely, if your quilt top is more subdued, a striking pattern on the backing can create a dynamic look. Finding this balance amplifies the beauty of your finished quilt.
How to Measure Your Quilt Top for Perfect Backing
To make sure your quilt has the perfect backing, start by measuring the length and width of your quilt top as accurately as possible. Once you have those numbers, remember to add a little extra for the seam allowance—this helps everything fit together just right. Taking these simple steps now will make piecing your quilt much easier later on.
Measuring Quilt Top Dimensions
When you’re ready to piece your quilt backing, accurately measuring your quilt top is essential for a perfect fit.
Start by laying your quilt top flat on a clean, dry surface. Use measuring tools like a tape measure or a quilt ruler for precision.
Measure the width and length of your quilt top, ensuring you take the measurements at the widest points. Record these quilt dimensions carefully, as they’ll guide your backing fabric selection.
If your quilt top has any irregular shapes, take additional measurements to capture those details.
Double-check your figures to avoid mistakes. With accurate measurements in hand, you’re one step closer to creating a beautiful quilt backing that fits seamlessly.
Adding Seam Allowance
As you prepare to piece your quilt backing, it’s vital to add the right seam allowance to guarantee everything fits perfectly.
Start by measuring your quilt top dimensions accurately. Most seam allowance techniques suggest adding at least 1/4 inch to each side for a secure fit.
If your quilt top is, say, 60 inches by 80 inches, you’ll need to adjust those dimensions to 60.5 inches by 80.5 inches. This extra fabric accommodates the seams and guarantees you won’t run short.
Remember, precise measurements and adjustments are key to achieving a professional look.
Once you’ve added your seam allowance, you’re ready to cut your backing pieces and start piecing them together. Happy quilting!
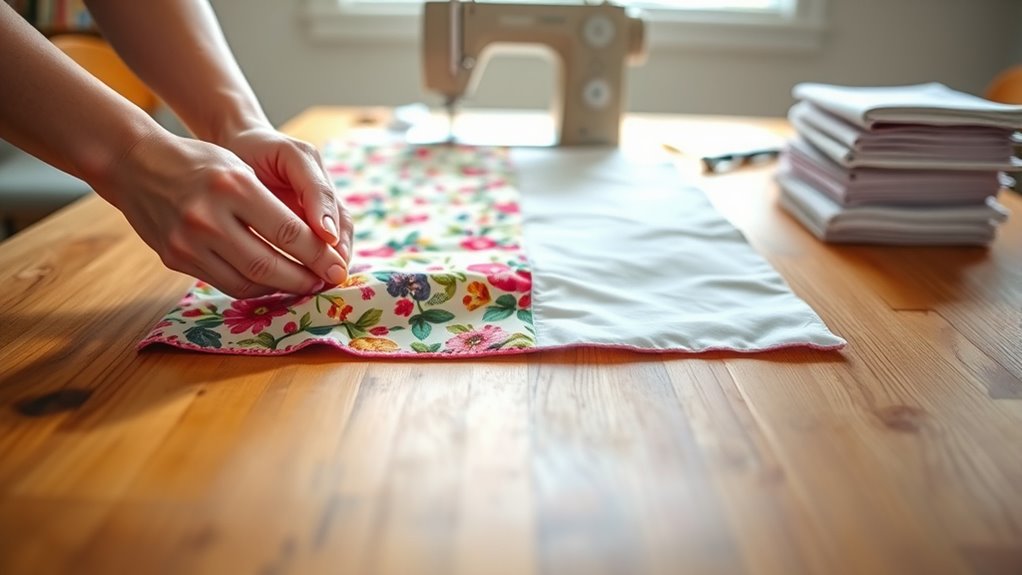
Prepare Your Fabric: Wash, Iron, Cut
Start by washing your fabric to remove any chemicals or dirt from the manufacturing process.
This step is essential for proper fabric preparation, ensuring your quilt stays vibrant and doesn’t shrink unexpectedly.
Use effective washing techniques to maintain the fabric’s quality.
Choose a gentle detergent. Wash in cold water to prevent fading.
Avoid fabric softeners that can leave residue. Dry on low heat or hang to avoid distortion.
Iron your fabric to eliminate wrinkles for easier cutting.
Once your fabric is clean and smooth, it’s time to cut it into the desired sizes.
Measure carefully, ensuring you account for seam allowances.
Precise cutting leads to a more professional finish and makes piecing your quilt backing easier.
Techniques for Piecing Fabric Scraps Together
When you’re piecing fabric scraps together, it’s a good idea to start by picking out fabrics that look good together and feel right for your project. Take a little time to play around with your layout—moving the pieces around until you get a combination that feels balanced and pleasing to your eye. Once you’re happy with the arrangement, you can jump in and start sewing. Sticking to simple piecing techniques will make the whole process go more smoothly and help you enjoy the creative journey even more.
Selecting Compatible Fabrics
Selecting compatible fabrics for quilt backing can greatly improve the overall aesthetic of your quilt.
To achieve the best results, consider these key factors:
- Fabric types: Choose a mix of cotton, linen, or flannel for texture and durability.
- Color coordination: Stick to a cohesive color palette that complements your quilt top.
- Scale of prints: Combine large and small patterns for visual interest.
- Weight and drape: Confirm fabrics have similar weights to avoid bunching.
- Personal style: Incorporate your favorite colors and patterns to make it distinctly yours.
Planning Your Layout
Planning your layout for quilt backing can make a significant difference in the final look of your project. Effective layout planning involves thoughtful fabric arrangement, ensuring your colors and patterns work harmoniously together.
Start by laying out your fabric scraps on a flat surface. Try experimenting with different configurations to see what combinations you enjoy.
Here’s a simple table to help you visualize your layout options:
| Fabric Type | Quantity |
|---|---|
| Solid Colors | 3 |
| Patterns | 4 |
| Stripes | 2 |
| Dots | 3 |
| Textured | 2 |
As you play with combinations, think about balance and contrast. Adjust until you find a pleasing arrangement that complements your quilt’s design.
Happy quilting!
Using Simple Techniques
To create a cohesive quilt backing, you’ll want to use simple techniques for piecing fabric scraps together. Focus on the following tips to improve your project:
- Fabric Selection: Choose a variety of colors and textures. This will enrich your quilt’s visual balance and make it more interesting.
- Piecing Techniques: Try using straight seams for better sewing precision. This also helps add durability to your quilt.
- Backing Stability: Make certain your pieces are securely stitched. This step is important to prevent any shifting during use.
- Design Coordination: Align your fabric scraps in a way that supports your overall design vision. Taking a moment here ensures your finished quilt is both attractive and harmonious.
- Quilt Longevity: Use high-quality materials so your quilt withstands time and use. Investing in good fabric really pays off in the long run.
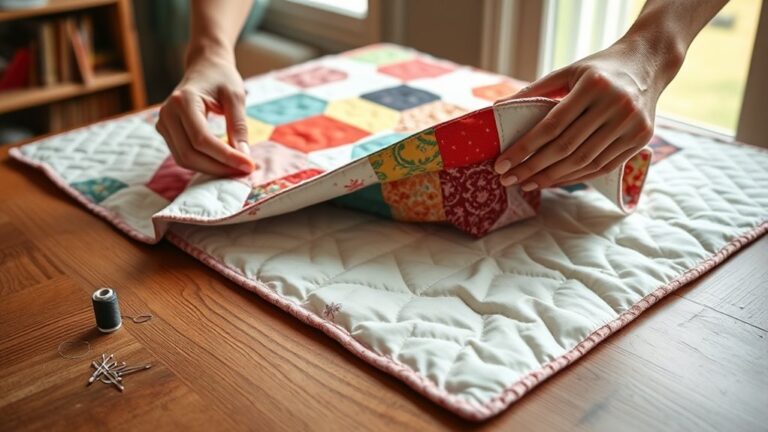
Align Your Seams for a Smooth Finish
Aligning your seams is essential for achieving a polished quilt backing. To start, lay out your fabric pieces on a flat surface.
Make sure that the edges are aligned perfectly; this sets the stage for effective seam alignment. When you pin the seams together, place the pins perpendicular to the seam line.
Ensure perfect edge alignment to set the stage for effective seam matching, using pins placed perpendicular to the seam line.
This helps keep everything in place as you sew. As you sew, keep an eye on your fabric edges, adjusting as needed to maintain smooth shifts between pieces.
If you notice any puckers or misalignments, don’t hesitate to unpick and redo those sections. It’s better to take your time now than to fix issues later.
Once you’ve sewn all your pieces together, press the seams open or to one side, depending on your preference.
This final step guarantees that your quilt backing looks neat and professional, ready for the next stage of your quilting project.
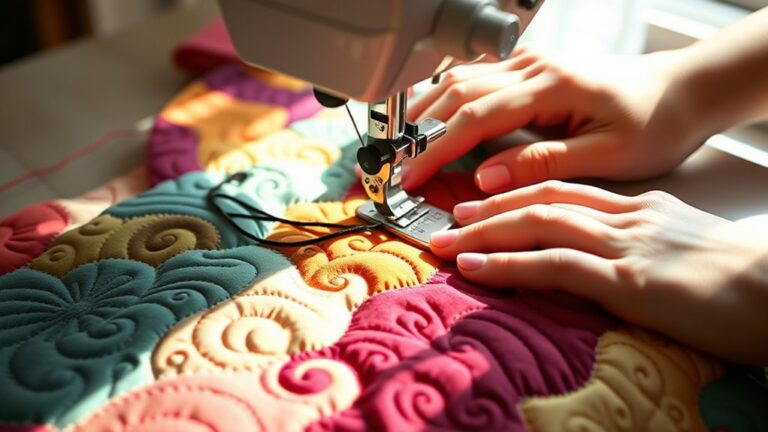
Step-by-Step Instructions for Sewing Quilt Backing
Now that your seams are aligned and pressed, you’re ready to sew your quilt backing together.
Follow these step-by-step instructions to guarantee a smooth finish using effective sewing techniques:
– Choose the Right Fabric Types: Select fabrics that complement your quilt top.
Make sure they are durable enough for backing.
– Lay Out Your Pieces: Arrange your fabric on a flat surface.
Keep the right sides facing each other as you do this.
– Pin Your Seams: Use pins to hold the fabric layers together.
This will help keep everything in place as you sew.
– Sew with Precision: Use a consistent seam allowance, typically ¼ inch.
This helps maintain uniformity throughout your backing.
– Press Your Seams Again: After sewing, press the seams to one side for a neat finish.
This also makes it easier to work with your quilt later on.
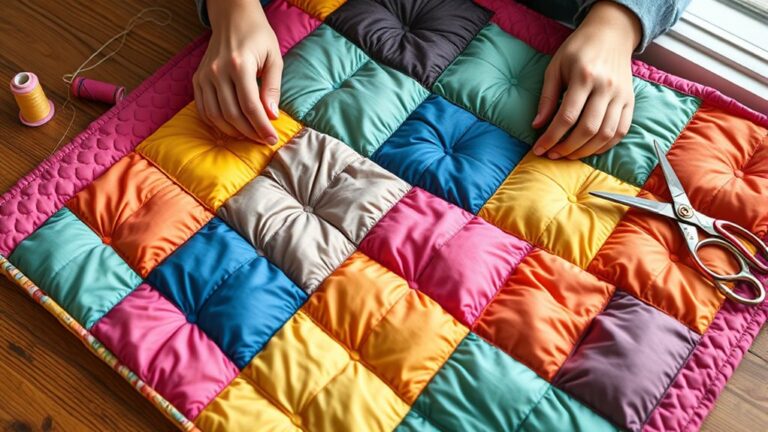
Adding Extra Layers With Batting and Stabilizers
While adding extra layers with batting and stabilizers might seem challenging, it’s essential for achieving the desired warmth and stability in your quilt.
Choosing the right batting types and stabilizer options can improve your quilt’s overall quality and durability.
Here’s a quick reference table to guide your choices:
| Batting Types | Stabilizer Options | Best For |
|---|---|---|
| Cotton | Fusible Web | Easy application and adhesion |
| Polyester | Tear-Away | Lightweight projects |
| Wool | Cut-Away | Heavier fabrics and stability |
| Bamboo | No-Show Mesh | Delicate fabrics and smoothness |
When selecting your batting, consider your quilt’s intended use.
For example, cotton provides breathability, while polyester offers durability.
Stabilizers help maintain the quilt’s shape during quilting.
Take your time to investigate these options for the best results!
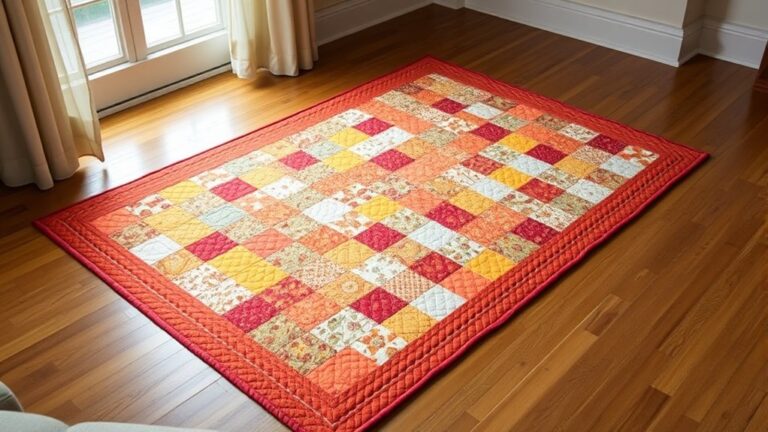
Finishing Touches: Trim and Press Your Quilt
As you near the finish line of your quilting project, trimming and pressing your quilt is essential for achieving that polished look.
This step not only improves the final appearance but also prepares it for binding techniques.
Here’s how to effectively trim and press your quilt:
- Trim excess batting to match your quilt top.
- Press seams open to reduce bulk and create a flatter surface.
- Use a hot iron to press the quilt, making sure to avoid scorching your fabric.
- Check for any wrinkles or creases to guarantee a smooth finish.
- Carefully square up corners for a neat and clean edge.
Once you’ve trimmed and pressed, your quilt is ready for binding, assuring proper quilt care.
This final touch can uplift your project and make it truly stand out!
Tips to Avoid Common Piecing Mistakes
Even the most experienced quilters can encounter pitfalls when piecing their quilts, but avoiding common mistakes can save you time and frustration.
First, verify you’re using compatible fabric types. Mixing stretchy fabrics with stiffer ones can lead to puckering, so always check your materials.
Next, pay close attention to your sewing techniques. Use a consistent seam allowance, typically ¼ inch, to maintain accuracy in your piecing. If you’re unsure, practice on scrap fabric first.
Always press your seams open or to one side as you go. This helps keep everything flat and reduces bulk.
Lastly, double-check your measurements before cutting. It’s easy to miscalculate, and one wrong cut can ruin your entire backing.
By focusing on these tips, you’ll improve your piecing process and create a quilt backing you can be proud of.
Happy quilting!
Frequently Asked Questions
Can I Use Multiple Fabric Types for Quilt Backing?
Yes, you can use multiple fabric types for quilt backing! Just make certain the fabrics are compatible in weight and texture to guarantee backing durability.
Mixing cotton with a little polyester can work well, but avoid drastic differences that might affect the quilt’s overall feel.
Always pre-wash your fabrics to prevent shrinkage, and consider how the different fabrics will wear over time for a lasting finish.
Enjoy your creative process!
How Do I Choose Colors for Quilt Backing?
Choosing colors for quilt backing involves considering the overall theme of your quilt. Look at the color combinations in your top fabric and select a backing that complements or contrasts effectively.
Don’t shy away from bold fabric patterns if they align with your design. Experiment with swatches to see what resonates with you.
Ultimately, trust your instincts. Your backing should elevate your quilt’s beauty and reflect your personal style.
What Is the Best Thread for Quilt Backing?
Think of your quilt as a beautiful tapestry, where the right thread weaves everything together.
For quilt backing, you’ll want a thread type that’s sturdy yet flexible, like cotton or polyester blends.
A thread weight of 40 or 50 is ideal, as it offers strength without overwhelming your fabric.
Choosing the right thread guarantees your backing stays strong and complements your quilt’s design, creating a masterpiece that stands the test of time.
Can I Use Leftover Quilt Top Fabric for Backing?
Yes, you can definitely use leftover quilt top fabric for backing! Just make certain the fabric compatibility matches your quilt design to guarantee a cohesive look.
Mixing different fabrics can add visual interest, but keep in mind the overall aesthetic. If your leftover pieces are large enough, they’ll work beautifully.
Plus, using scrap fabric is a great way to be resourceful and reduce waste, making your quilt even more special!
How Much Extra Fabric Should I Allow for Piecing?
Think of your quilt backing as a canvas waiting for a masterpiece.
When piecing fabric, you should allow an extra 4 to 6 inches beyond the required backing width for seams and adjustments.
Accurate fabric calculations guarantee you’ve got enough to work with, preventing any last-minute scrambles.
Conclusion
Now that you know how to piece quilt backing, you’re just a few steps away from transforming your quilt top into a cozy masterpiece.
Imagine the satisfaction of seeing your hard work come together, stitch by stitch.
But what if you encounter a tricky mistake or an unexpected challenge? Don’t worry, you’re equipped with the right tips to navigate any bumps along the way.
Immerse yourself and let your creativity unfold. Your quilt is just waiting to come to life, and with your new skills in how to piece quilt backing, you’re ready to finish with confidence!