Hand Stitch a Quilt: A Step-by-Step Guide
Struggling to get your quilt just right by hand? You’re not alone—many people find hand stitching a quilt to be both exciting and overwhelming.
Whether you’re craving a unique touch or just want your creation to last, it’s easy to feel lost about where to start or how to tackle common challenges. That’s why we’ve rounded up the best tips, tools, and must-haves to make your hand quilting journey smoother and much more enjoyable.
Hand stitching a quilt is a rewarding process that lets you showcase your style.
Start by choosing the right fabrics and preparing your quilt layers carefully.
Master essential hand stitching techniques and then practice unique stitch patterns for added flair.
Don’t forget to troubleshoot common stitching problems and care for your finished quilt properly.
With a few creative ideas, you’ll improve your project even further.
There’s so much more to discover as you refine your quilting skills!
Key Takeaways
- Choose fabrics by considering color combinations, textures, and weights to reflect your personal style.
- Layer your quilt smoothly. Use batting and secure the layers with pinning or basting before you start stitching.
- Master essential stitches like running stitch, backstitch, and whip stitch. These will help you create strong and even seams.
- Try out unique stitch patterns and decorative borders. This is a great way to add depth and personal flair to your quilt.
- Address common stitching issues, such as thread tension and fabric fraying. Be sure to care for your quilt properly once it’s finished.
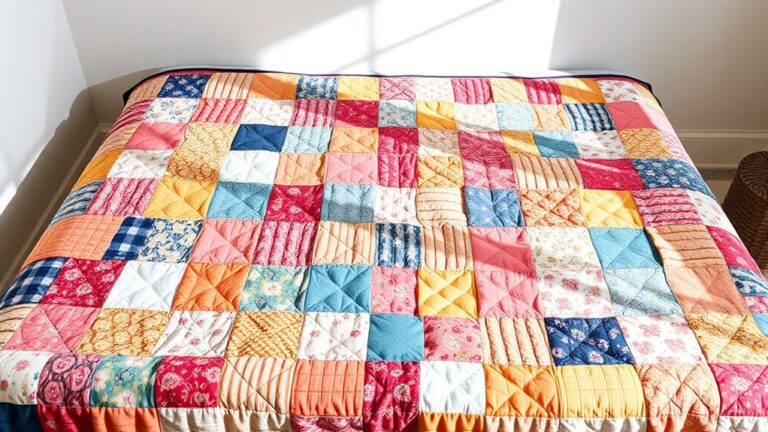
Choose the Right Fabrics for Your Quilt
Choosing the right fabrics for your quilt is crucial to its overall look and feel.
Start by reflecting on fabric color combinations that resonate with your style.
Whether you prefer bold, contrasting colors or soft, harmonious hues, picking the right palette can enhance your quilt’s aesthetic.
Choosing a color palette that reflects your style can elevate your quilt’s beauty and character.
Next, think about fabric texture selection.
Different textures can add depth and interest to your quilt.
For example, pairing smooth cotton with a cozy flannel can create a beautiful contrast, enriching both the visual and tactile experience.
Don’t forget to contemplate the weight of the fabrics; lighter materials can give a quilt a delicate appearance, while heavier fabrics can add warmth and durability.
By thoughtfully choosing your fabrics, you’ll not only create a stunning quilt but also guarantee it meets your practical needs.
Take your time to enjoy the selection process, and let your creativity shine through!
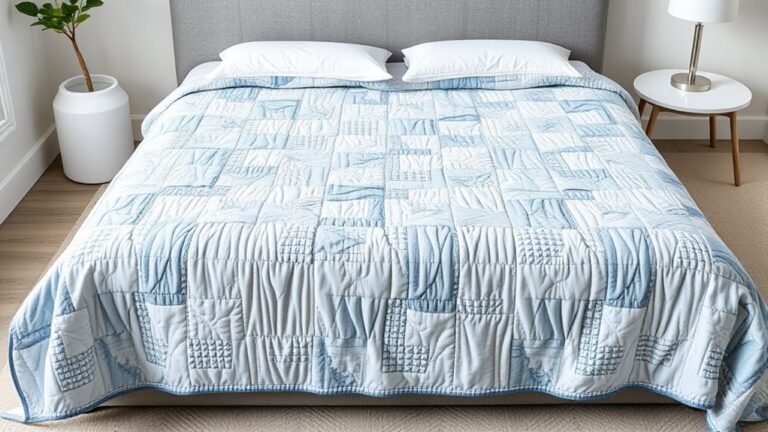
Prepare Your Quilt Layers: Sandwiching Basics
Now it’s time to get your quilt layers ready by making a cozy sandwich. First, think about what kind of batting will work best for your project—some batting is lighter, while others add more warmth and weight. Once you’ve picked your batting, lay out your fabric layers, making sure everything is nice and smooth.
It’s important to align the layers carefully so nothing shifts around while you work. Taking a little extra time with this step really pays off, because a well-prepared quilt sandwich helps your finished quilt look beautiful and last longer!
Choosing Your Quilt Batting
Selecting the right quilt batting is essential for achieving the desired look and feel of your finished project.
You’ll find various batting types, each offering unique properties.
Cotton batting provides a soft, natural feel and is ideal for hand stitching, while polyester batting offers durability and is lightweight.
If you’re after warmth without added weight, consider a wool batting.
Next, think about batting thickness.
Thinner batting gives a more delicate finish, perfect for intricate designs, while thicker batting adds loft and warmth, making it great for colder climates.
Evaluate your project’s needs and select batting that complements your fabric choices and intended use.
This way, you’ll ensure your quilt turns out just the way you envision.
Aligning Fabric Layers Properly
Properly aligning your fabric layers is essential for a successful quilt, as it guarantees your stitches are even and your quilt lays flat.
Start by laying your backing fabric right side down and smoothing out any wrinkles. Next, place your batting on top, making sure it extends slightly beyond the edges of your backing.
Finally, add your quilt top, right side up, and align it carefully with the batting.
Use fabric alignment techniques like pinning or basting to hold everything in place. Check for any shifts before you start stitching.
Layering precision tips, such as working from the center outwards, can help prevent puckering.
With these methods, you’ll set the foundation for a beautifully hand-stitched quilt.
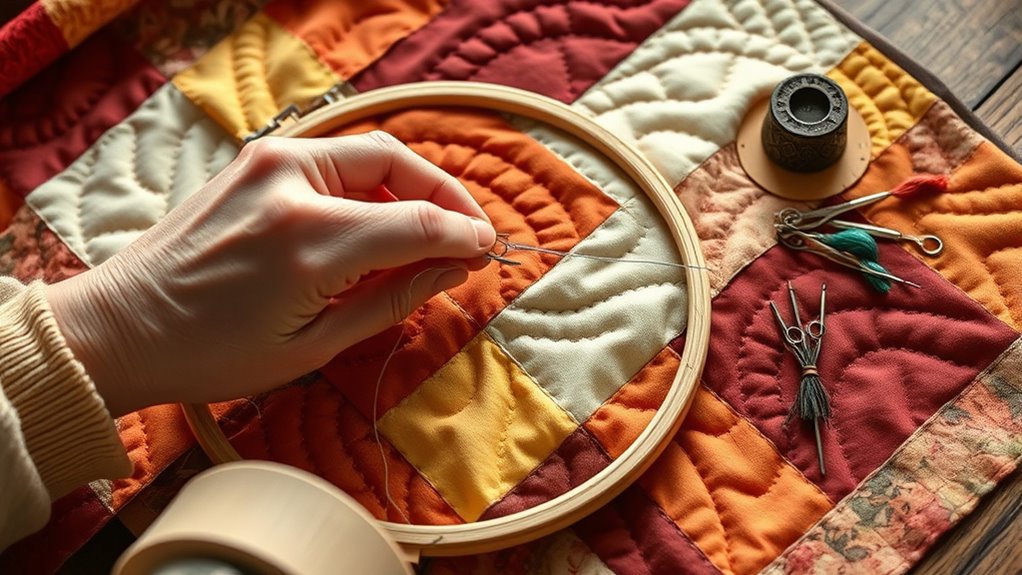
Master Essential Hand Stitching Techniques First
Before you jump into stitching your quilt, it really helps to master a few basic hand stitching techniques first. Understanding different kinds of stitches and making sure you have the right tools handy can make the whole process a lot smoother—and honestly, way more fun. So, let’s take a look at the essentials you’ll want to know before you get started.
Basic Hand Stitch Types
While mastering hand stitching techniques, it’s crucial to familiarize yourself with the basic stitch types that form the foundation of quilting.
Understanding these basic stitch variations will help you create beautiful quilts with precision.
Here are four fundamental stitches to start with:
- Running Stitch: The simplest form, ideal for basic seams and gathering.
- Backstitch: Provides a strong seam, perfect for areas needing durability.
- Whip Stitch: Great for attaching layers, especially binding edges.
- Blind Stitch: Offers a nearly invisible finish for hems.
When practicing these stitches, keep stitch length considerations in mind. Consistent lengths will improve your quilt’s overall appearance and strength.
Happy stitching!
Tools For Hand Stitching
In the domain of hand stitching a quilt, having the right tools makes all the difference. You’ll want to focus on the specific needle types and thread choices that suit your project.
Here’s a quick reference table to help you choose wisely:
| Tool | Description | Best For |
|---|---|---|
| Hand Needles | Various sizes for different fabrics | General hand stitching |
| Embroidery Needles | Larger eye for thicker threads | Decorative stitching |
| Quilting Thread | Strong and durable | Piecing and quilting |
With the right needle and thread, your quilt will not only look great but also stand the test of time.
Invest in quality tools, and you’ll see the difference in your stitching.
Happy quilting!
Start Quilting: Your First Stitches
Plunge into quilting by mastering your first stitches! As you start, focus on achieving the right thread tension and stitch spacing.
These elements are essential for a sturdy and beautiful quilt. Here’s how to get started:
Essential elements for a sturdy and beautiful quilt are the foundation of your quilting journey.
- Choose Your Thread: Select a quality thread that complements your fabric. This guarantees durability and improves your design.
- Set Up Your Needle: Thread your needle, making sure it’s securely knotted at the end. A good knot prevents unraveling.
- Practice Stitch Spacing: Aim for even spacing between each stitch. Consistency creates a polished look.
- Adjust Thread Tension: Verify your thread isn’t too tight or too loose. Proper tension allows for smooth stitching and prevents puckering.
As you stitch, remember to relax and enjoy the process. Your first stitches are just the beginning of your quilting journey!
Master Hand Stitches for Unique Effects
Mastering hand stitches can really turn your quilt into a true work of art. With a few essential techniques under your belt, you’ll be able to add amazing texture and depth that brings your fabric to life. And here’s the fun part—experimenting with unique stitch patterns lets you express your own style and creativity every time you sew.
Essential Hand Stitch Techniques
Hand stitching a quilt opens up a world of creativity,
letting you add unique textures and personal touches to your projects.
Mastering essential hand stitch techniques will really enhance your quilt,
especially when you bring in applique techniques and patchwork designs.
Here are four key techniques to perfect:
1. Running Stitch:
The foundation for many quilt designs, it’s quick and versatile.
2. Slip Stitch:
Ideal for invisible hems in your applique work.
3. Backstitch:
Offers strength and durability, perfect for joining patchwork pieces.
4. Whip Stitch:
Perfect for securing layers and adding decorative flair.
Creating Texture and Depth
Transform your quilt by creating stunning textures and depth
with hand stitches. Using various texture techniques, you
can enhance your depth design and make your quilt truly unique.
Here are some effective techniques to reflect on:
| Texture Technique | Effect |
|---|---|
| Running Stitch | Subtle texture |
| Whip Stitch | Defined edges |
| Cross Stitch | Raised patterns |
| Backstitch | Strong lines |
| Sashiko Stitch | Decorative patterns |
Experimenting with these stitches will bring new life to your quilt,
adding both visual interest and a personal touch. Try mixing different
techniques to see how each one plays a role in the overall look.
Let your creativity guide you as you explore the possibilities of
texture and depth in your quilting projects.
Unique Stitch Patterns Explained
Stitch patterns can improve your quilt, adding unique effects that draw the eye and spark conversation.
Mastering these patterns allows you to create fanciful motifs and striking geometric designs.
Here are some unique stitch patterns to reflect on:
- Potholder Stitch: This creates a cozy, textured look perfect for fanciful designs.
- Chevron Stitch: Ideal for geometric patterns, it adds a modern touch.
- Sashiko: A Japanese technique featuring repetitive patterns, it’s great for adding depth.
- Cross-Stitch: This versatile stitch can be used for both motifs and geometric designs, lending charm to any quilt.
Experimenting with these stitches not only improves your quilt but also showcases your creativity.
Immerse yourself and let your imagination guide your needle!
Add Decorative Borders and Final Touches to Your Quilt
Adding decorative borders and final touches to your quilt brings a personal flair that elevates your creation. Start by choosing border styles that complement your quilt’s design.
You might prefer a simple straight border or a more intricate scalloped edge. Measure your quilt’s edges accurately, cutting your fabric accordingly.
Once you’ve selected your borders, consider using decorative trims like lace, rickrack, or pom-poms to add dimension. Pin the borders to the quilt top, ensuring they’re evenly aligned, then hand stitch them in place.
This not only secures the borders but also showcases your stitching skills.
Finally, don’t forget to add any last-minute embellishments, such as buttons or embroidered accents. These small details can transform your quilt into a unique piece of art.
Step back, admire your work, and prepare to share your handmade treasure with friends or family!
How to Fix Common Hand Stitching Problems?
Hand stitching a quilt can sometimes lead to frustrating problems that disrupt your creative flow.
To keep your project on track, here are some common issues and how to fix them:
1. Thread Tension:
If your stitches are too loose or too tight, adjust the thread tension on your needle. This helps guarantee stitch consistency across your quilt.
2. Needle Selection:
Choose the right needle for your fabric weight. A heavier fabric requires a sturdier needle, while delicate fabrics need a finer one.
3. Fabric Fraying:
To prevent fabric fraying, use a zigzag stitch or finish edges with pinking shears before you start hand stitching.
4. Pattern Alignment:
If your pattern isn’t aligning correctly, check your stitch length. Shorter stitches can help maintain better alignment throughout your quilt.
Care and Maintenance of Your Finished Quilt
Taking care of your finished quilt is essential for preserving its beauty and longevity. Start with proper quilt storage. Use a breathable cotton bag or a clean, dry place to prevent dust accumulation.
Proper quilt storage is key to preserving its beauty—opt for a breathable cotton bag or a clean, dry place.
For regular cleaning, gently hand wash or use a mild detergent. Avoid harsh chemicals that can harm fabric preservation.
If you encounter stains, tackle them promptly with gentle stain removal techniques. This helps prevent permanent damage.
Control humidity in your storage area to avoid mold and mildew. Also, limit sunlight exposure, as UV rays can fade colors over time.
To maintain shape and avoid creases, practice quilt rotation by displaying different sides periodically. When not in use, fold your quilt properly. Make sure no sharp creases form, since these can weaken the fabric.
With these simple steps, you’ll keep your quilt looking beautiful for years to come.
Get Inspired: Creative Ideas for Your Next Quilt
After ensuring your quilt stays in top condition, it’s time to spark your creativity for your next project.
Investigate these ideas to ignite your imagination:
1. Color Palettes: Experiment with bold, contrasting colors or stick to soothing pastels.
The right palette sets the mood for your quilt.
2. Quilt Themes: Consider seasonal themes like autumn leaves or winter snowflakes.
Themes can tie your design elements together beautifully.
3. Fabric Combinations: Mix textures and patterns.
Combining florals with stripes or solids can create a striking visual appeal.
4. Stitch Patterns: Play with various stitch patterns to add depth.
From simple running stitches to intricate quilting designs, your choice will improve the overall look.
Don’t forget to seek inspiration sources like nature, art, or even favorite memories.
Each element can guide your design, making your quilt a unique expression of your creativity!
Troubleshooting Hand Stitching Issues
While you immerse yourself in hand stitching your quilt, you might encounter a few common issues that can disrupt your process.
First, check your thread tension. Too tight or too loose can ruin stitch consistency.
If your stitches look uneven, consider your needle selection. Using the wrong needle type can lead to fabric fraying or misalignment.
Knot issues can also arise, so make sure you’re tying secure knots to prevent unraveling.
If you notice alignment errors, take a moment to realign your fabric before continuing.
Pattern repetition might seem tedious, but it’s essential for a cohesive look.
Finally, be mindful of thread colors. Mismatched threads can distract from your design.
Frequently Asked Questions
What Tools Do I Need for Hand Quilting Beyond Needles and Thread?
Beyond needles and thread, you’ll need a few essential tools for hand quilting. Start with a rotary cutter and cutting mat for quilt preparation, ensuring precise fabric selection.
A ruler helps you measure accurately, while safety pins keep layers together. Don’t forget a thimble to protect your fingers and scissors for trimming threads.
A comfortable work surface will make the process easier, so set up a spot where you can focus on your quilting.
How Long Does It Typically Take to Hand Stitch a Quilt?
When you’re stitching a quilt, it can feel like time flies, but it usually takes anywhere from a few weeks to several months.
Your time management skills play a big role here. If you apply effective quilting techniques and dedicate regular hours, you’ll see progress.
Balancing your schedule with consistent stitching sessions helps you enjoy the process while creating something beautiful.
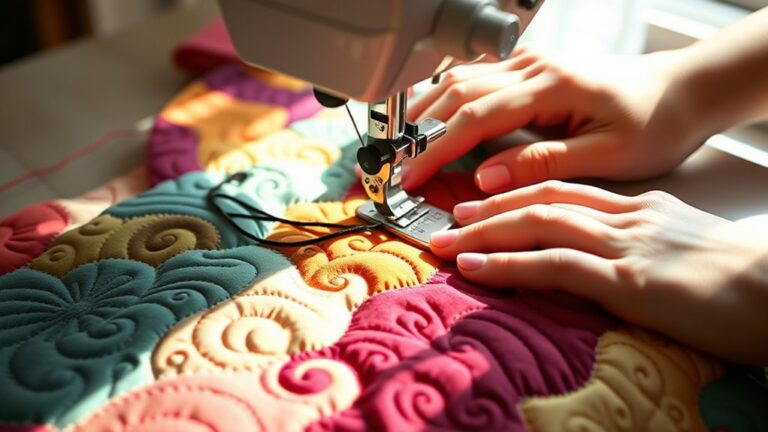
Can I Use My Sewing Machine for Hand Quilting Techniques?
Yes, you can use your sewing machine for hand quilting techniques! Many quilters enjoy combining machine quilting with hand quilting to save time while adding unique textures.
Your machine can easily create beautiful stitches that mimic hand quilting, allowing you to achieve that cozy, handcrafted look.
Just make sure to adjust your machine settings and choose the right stitch to get the desired effect. Don’t hesitate to experiment and find your perfect balance!
What Is the Best Type of Thread for Hand Quilting?
Choosing the right thread for hand quilting is like picking the perfect paint for a masterpiece.
For the best results, opt for a cotton thread, as it’s strong and blends well with fabrics. A thickness of 40 to 50 weight is ideal, giving you durability without bulk.
You might also consider polyester for extra strength.
Whatever you choose, make sure it complements your quilt’s design while maintaining that cozy, handcrafted feel.
How Do I Choose a Quilting Pattern for My Design?
To choose a quilting pattern for your design, start by exploring pattern inspiration that resonates with you.
Think about the design themes you love, like floral, geometric, or abstract. Consider the fabrics you’re using, since they can help guide your choice.
Sketch a few ideas and see how they flow together. Don’t hesitate to mix different styles; it’ll add character.
Trust your instincts, and remember, there are no rules. Just make it distinctly yours!
Conclusion
As you wrap your hands around your finished quilt, you’re not just holding fabric. You’re cradling your creativity and perseverance.
Each stitch is a heartbeat, a moment woven into a tapestry of memories. Remember, every quilt is a journey, filled with both triumphs and challenges.
So, when you drape it over your shoulders or gift it to a loved one, know you’ve stitched together not just fabric, but a story.
This story, created as you hand stitch a quilt, will keep you warm for years to come.