How to Do a Quilt: A Step-by-Step Guide for Beginners
Starting your first quilt can feel overwhelming. With so many fabrics, tools, and techniques to choose from, it’s easy to get stuck before you even begin. If you’ve ever stared at a pile of fabric and wondered how to turn it into a beautiful quilt, you’re not alone—many people struggle with knowing where to start.
The good news is, with the right guidance and tools, quilting can be an enjoyable and rewarding journey.
To start quilting, choose fabrics that mix colors and textures while considering weight and print scale.
Gather essential tools like a rotary cutter and scissors.
Prepare your fabric by washing and pressing, then cut it accurately with a ruler.
Layer your quilt sandwich with the backing down, batting in the middle, and the quilt top up.
Decide between hand or machine quilting, then finish with binding for a polished look.
There’s much more to uncover!
Whether you’re brand new or looking to refresh your skills, this step-by-step guide for beginners will help you find the best quilting products to make your project a success.
Key Takeaways
- Choose a variety of fabrics, considering color combinations, textures, and print scales to create a visually appealing quilt design.
- Use essential tools like a rotary cutter and quality scissors for precise fabric cutting and trimming during the quilting process.
- Prepare your fabric by washing and pressing it. This helps prevent shrinkage and gives your quilt a more professional finish.
- Construct a quilt sandwich by layering the quilt top, batting, and backing fabric. Make sure everything is properly aligned, then secure the layers with pins or basting.
- Select a quilting method, such as hand or machine quilting, and finish with high-quality binding for both durability and aesthetic appeal.
Choosing Fabrics: What to Look For
In regard to choosing fabrics for your quilt, the right material can make all the difference.
Start with fabric color combinations that reflect your theme. Whether you’re going for a cozy fall look or a bright summer vibe, seasonal fabric choices can improve your design.
Consider fabric color combinations that capture your theme, enhancing your design with seasonal choices for a cozy or vibrant feel.
Texture considerations are also key; mixing smooth and textured fabrics adds depth. Don’t forget about fabric weight factors. Lighter fabrics work well for intricate piecing, while heavier ones provide sturdiness.
When selecting prints, keep print scale tips in mind. Large patterns can overwhelm, while small prints add subtlety.
For budget-friendly fabrics, investigate sales and remnants without sacrificing quality.
Finally, remember fabric care tips. Pre-washing your materials prevents shrinking later.
Choose wisely, and your quilt will not only look beautiful but also stand the test of time. Happy quilting!
Must-Have Quilting Tools for Beginners
As you start your quilting journey, having the right tools can make all the difference. First things first, you’ll want to pick up some essential cutting tools—these will help you create clean, precise pieces every time. Don’t forget about fabric, either! Choosing the best fabric types makes your project go much more smoothly and keeps frustration at bay. So, let’s chat about what you actually need to get started and make quilting fun right from the beginning.
Essential Cutting Tools
Getting started with quilting means having the right tools, and essential cutting tools are at the top of the list.
A rotary cutter is a must-have for precise cuts, especially when working with multiple layers of fabric. Understanding rotary cutter basics, like maintaining a sharp blade and using a cutting mat, will improve your quilting experience.
On the other hand, fabric scissors are important for trimming threads and making intricate cuts. When considering a fabric scissors comparison, note that good-quality scissors can make a significant difference in accuracy and ease.
Both tools serve unique purposes, so invest in both to set yourself up for success in your quilting journey. Happy cutting!
Recommended Fabric Types
Choosing the right fabric is essential for a successful quilting project.
You’ll want to focus on materials that offer durability and ease of use.
Here are some recommended fabric types to contemplate:
- Cotton Blends: They combine softness and strength, making them perfect for beginners.
- Cotton Muslin: A lightweight option that’s great for practice and backing.
- Quilting Cotton: This fabric has a medium weight and is available in countless patterns.
- Batting: Essential for creating that cozy, quilted effect. Choose the right thickness based on your project.
Beginner-Friendly Quilt Patterns You Can Try
Now that you’ve gathered your tools, let’s take a look at some beginner-friendly quilt patterns you can try. If you’re just starting out, simple patchwork designs are a great way to build your confidence. You might also enjoy striped quilt patterns—they’re super straightforward and come together quickly.
Don’t worry if you’re feeling a little unsure at first. These patterns are designed to be easy to follow, so you can focus on having fun and watching your quilt come to life. Let’s dive in and see just how simple and satisfying it can be to create a beautiful quilt, even as a beginner!
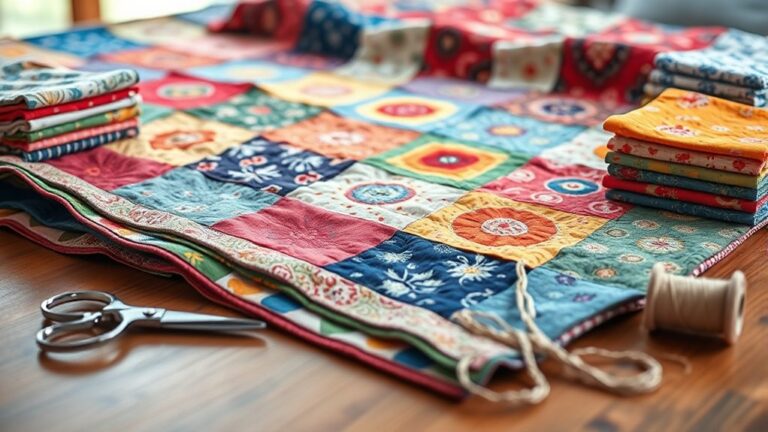
Simple Patchwork Designs
Creating a quilt can be an enjoyable and rewarding experience, especially when you start with simple patchwork designs. These beginner-friendly patterns let you explore patchwork inspiration and try out different color combinations without feeling overwhelmed.
Here are some ideas to get you started:
- Classic squares: Arrange squares in a grid for a timeless look.
- Half-square triangles: Create dynamic patterns with just two triangles.
- Scrappy patchwork: Use leftover fabric for a fun and eclectic design.
- Chevron pattern: Combine colors to form zigzag shapes that pop.
Striped Quilt Patterns
Striped quilt patterns offer a great way to build on the skills you’ve developed with patchwork designs. They’re beginner-friendly and allow you to experiment with various striped fabric combinations.
Start by selecting fabrics that complement each other in color and texture. Think about color scheme ideas that resonate with you, such as a bold, contrasting palette or soft, harmonious hues.
Once you’ve chosen your fabrics, decide on the width of your stripes. You can mix wide and narrow stripes for added interest.
Cut your fabric accordingly, and then sew the strips together, keeping your seams straight. As you quilt, you’ll find that striped patterns not only improve your skills but also create a visually stunning piece.
Enjoy the process!
Preparing Your Fabric: Cutting and Pressing
Start by gathering your fabric and tools, as preparing your fabric is an essential step in quilting.
Proper fabric preparation guarantees your quilt will look professional and last for years.
Proper fabric preparation ensures your quilt not only looks stunning but also stands the test of time.
Before cutting, wash and press your fabric to remove any wrinkles and shrinkage.
Here’s a quick checklist to help you get started:
- Freshly laundered fabric, soft and pliable
- A sharp rotary cutter for precise edges
- A sturdy cutting mat to protect your surfaces
- A reliable ruler for accurate measurements
Once you’ve got everything ready, focus on your cutting techniques.
Always cut along the grain to maintain fabric integrity, and use consistent measurements for uniform pieces.
Taking the time to prepare your fabric properly will set the foundation for a beautiful quilt.
Happy quilting!
Best Cutting Techniques for Quilting Fabric
With your fabric prepared and ready, mastering cutting techniques will improve your quilting game. Using a rotary cutter is one of the most efficient methods for cutting fabric accurately.
To start, always align your fabric with the grain. Cutting against the grain can lead to distortion.
When using a rotary cutter, apply even pressure and maintain a steady hand. Make sure to use a self-healing mat to protect your surfaces and extend the life of your blade.
For straight cuts, consider using a ruler to guide your cutter. This helps ensure you end up with precise edges.
Practice cutting simple shapes before tackling more complex patterns. It’s helpful to get comfortable with the basics first.
Remember to rotate your cutting mat if you find yourself twisting your body. This adjustment helps you maintain a comfortable position as you work.
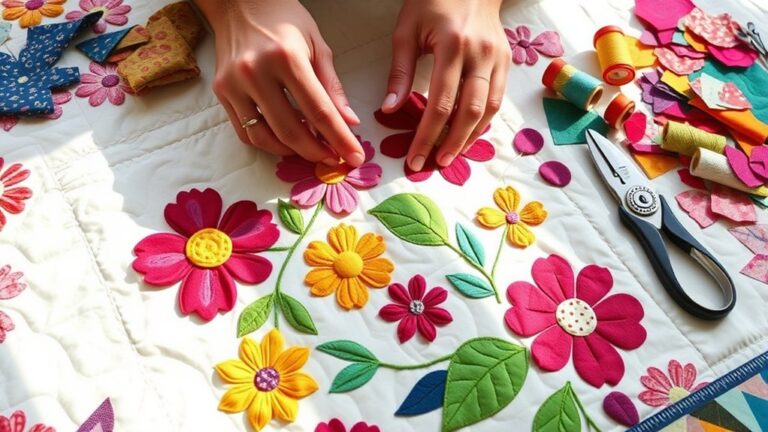
The Basics of Piecing Your Quilt Top Together: Quilting 101
Piecing your quilt top together is where your creativity truly shines. As you immerse yourself in quilt assembly techniques, you’ll begin to see how your chosen fabric color combinations come to life.
Start by laying out your pieces, playing with the arrangement until it feels just right.
Consider these elements to improve your design:
- Bright, vibrant florals that pop against a soft background
- Rich, earthy tones that evoke a rustic charm
- Bold geometric patterns that create visual interest
- Delicate pastels that offer a calming effect
As you stitch your pieces together, keep your seams precise and consistent. Don’t hesitate to experiment: rearranging blocks can lead to delightful surprises.
Hand vs. Machine Quilting Techniques
Choosing between hand and machine quilting techniques can greatly impact your finished quilt’s look and feel. Hand quilting offers a personal touch, allowing you to investigate various stitching techniques and quilting styles.
It often results in a softer drape, enhancing the quilt’s texture. However, it can be time-consuming, requiring patience and dedication.
On the other hand, machine quilting provides speed and efficiency, perfect for larger projects. With machine quilting, you can experiment with different design options and achieve consistent fabric tension quickly.
You’ll also have the advantage of selecting from a variety of thread choices, which can dramatically affect your quilt’s final appearance.
Ultimately, your decision may hinge on your quilting speed preference and the specific look you want for your quilt.
Whichever method you choose, both hand and machine quilting can yield beautiful results!
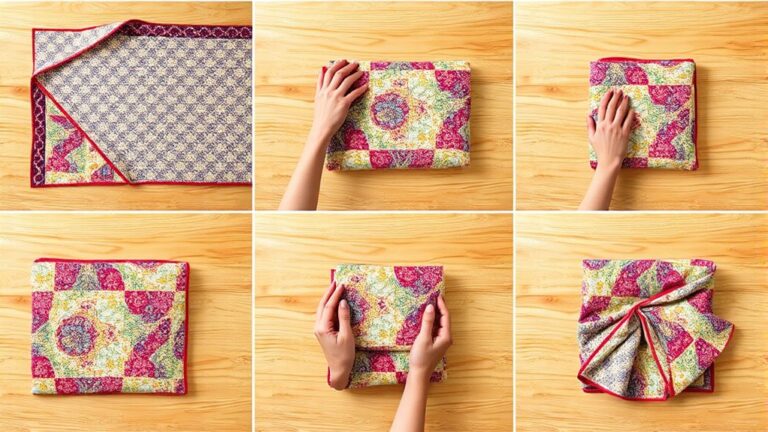
How to Construct a Quilt Sandwich
Making a quilt sandwich is a really important step if you want your quilt to turn out great. First, you’ll want to pick out your materials—think about the fabric for the top, the batting in the middle, and the backing fabric. Each layer plays a role, so it’s worth spending a little time choosing what works for you.
Once you’ve got your materials ready, it’s time to think about how you’ll stack them up. The order matters: your quilt top goes on the very top, batting in the middle, and your backing fabric on the bottom. Pay attention to how you line everything up so there aren’t any wrinkles or bunches. Taking a few extra minutes here can make a big difference in the finished quilt.
And that’s pretty much it! With your quilt sandwich layered and smooth, you’re all set for the next steps—pinning, basting, and quilting. Enjoy the process!
Selecting Your Materials
Creating a quilt sandwich involves selecting three essential materials: the quilt top, batting, and backing fabric. Start with your quilt top, choosing a fabric color that speaks to you.
For texture selection, consider how different fabrics will feel together. When picking batting, pay attention to quilting weight; lighter options are great for warmer quilts, while heavier ones add warmth.
Finally, select backing fabric that complements your design and can endure fabric care processes.
- Bright floral prints for the quilt top
- Soft cotton batting for comfort
- Warm flannel for the backing
- Striped patterns for fun pattern mixing
With these materials, you’ll create a quilt sandwich that’s visually appealing and functional. Enjoy the journey!
Layering Techniques Explained
To successfully layer your quilt sandwich, start by placing the backing fabric right side down on a flat surface.
Next, lay your quilt batting on top, smoothing it out to eliminate any wrinkles.
Finally, add your quilt top right side up.
Make certain all layers are aligned properly.
Pin or baste the layers together to keep them in place while you sew.
Here’s a quick reference table for the layering process:
| Step | Action | Purpose |
|---|---|---|
| 1. Backing | Place right side down | Forms the base of the quilt |
| 2. Batting | Lay on top of backing | Provides insulation and support |
| 3. Quilt Top | Add right side up | Creates the visible design |
| 4. Align | Adjust layers | Guarantees uniformity |
| 5. Secure | Pin or baste | Holds layers while sewing |
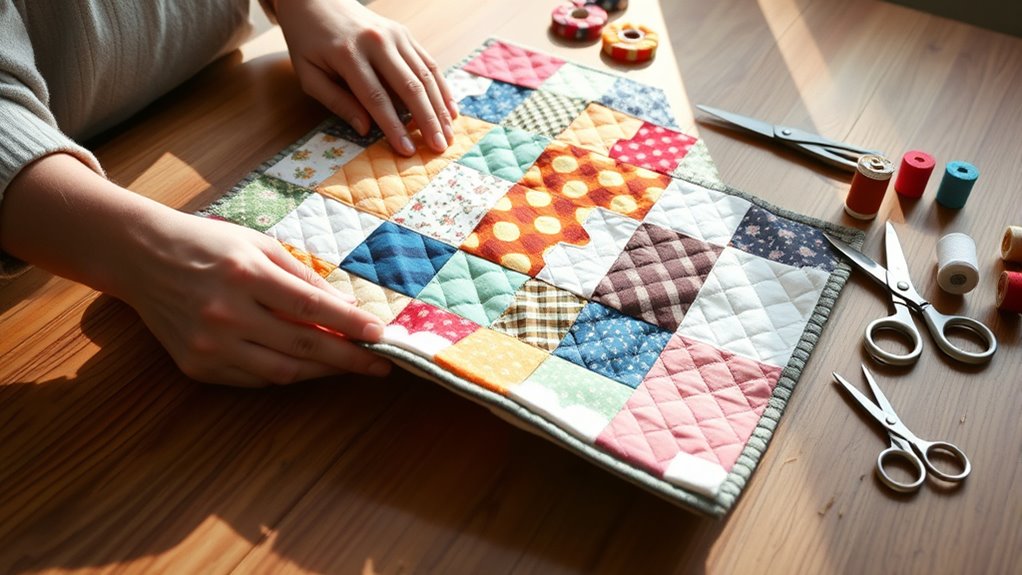
Binding Your Quilt: Easy Tips for a Polished Look
Binding your quilt can make all the difference in achieving a polished look. It’s not just about aesthetics. It’s the final step that completes your hard work.
Using effective binding techniques guarantees your quilt stays intact and looks professional. Here are some easy tips to take into account:
- Choose high-quality fabric for the binding that complements your quilt’s colors.
- Cut your binding strips at 2.5 inches wide for a sturdy finish.
- Use a consistent seam allowance to keep everything neat and even.
- Press the binding as you go to maintain crisp edges.
These finishing touches will enhance your quilt from homemade to handcrafted. Take your time with the binding process. It’s worth the effort.
With these tips in mind, you’ll achieve a quilt that not only showcases your creativity but also stands the test of time. Happy quilting!
How to Care for Your Quilted Creations
After putting so much effort into your quilt, it’s important to know how to care for it properly. Start with quilt washing; use a gentle cycle and mild detergent to preserve its colors and fabric.
Always air dry or tumble dry on low to prevent damage. For quilt storage, fold it neatly in a cool, dry place, avoiding dampness and direct sunlight to guarantee quilt preservation.
If you notice any wear or damage, don’t hesitate to perform quilt repair promptly to keep it in good condition.
Regarding quilt display, choose a location that’s not exposed to harsh light or moisture, as this protects your work from fading and deterioration.
Finally, investing in quilt protection, like a breathable cover, can help shield it from dust and pests, making sure your beautiful creation lasts for years to come.
Frequently Asked Questions
How Long Does It Take to Complete a Quilt?
Quilt completion time varies widely, typically ranging from a few days to several weeks. Factors affecting duration include the quilt’s complexity, your sewing skills, and the time you can dedicate.
If you’re working on a simple design with a few hours each day, you might finish quickly. However, intricate patterns or large quilts may require more patience and planning.
What’s the Best Way to Store Unfinished Quilts?
To keep your unfinished quilts in pristine condition, you’ve gotta treat them like treasures! For fabric preservation, store them in a cool, dry place away from direct sunlight.
Use acid-free boxes or bins to prevent damage and keep everything organized. Fold them neatly, avoiding sharp creases, and consider using cotton sheets to cover them.
These organization tips will help you maintain your fabric’s beauty until you’re ready to finish your masterpiece!
Can I Use Old Clothes for Quilting?
Yes, you can definitely use old clothes for quilting! Fabric selection is key; choose durable materials to guarantee your quilt lasts.
Incorporating sentimental value from your old clothes adds a personal touch. Use upcycling techniques to transform those garments into beautiful quilt pieces, making something new from what you already have.
Just make certain to reinforce seams for quilt durability. That way, your creation stands the test of time while holding cherished memories.
How Do I Fix Mistakes While Quilting?
Don’t stress if you make a mistake while quilting; it happens to everyone! To fix it, start by unpicking seams carefully. Use a seam ripper to avoid damaging the fabric.
If you’ve got holes, patch them with coordinating fabric, blending in your design. Taking a moment to correct your errors not only improves your quilt but also adds a personal touch.
Accept these challenges; they’re part of your quilting journey!
What Should I Do if My Quilt Shrinks After Washing?
If your quilt shrinks after washing, don’t panic! First, check your quilt care routine.
It’s essential to pre wash fabrics before you start quilting. This helps prevent future shrinkage.
For any existing shrinkage, you can try gently stretching the quilt while it’s still damp. Lay it flat and reshape it as needed.
Next time, consider using pre-shrunk fabrics or adjusting your washing method to avoid this issue altogether.
Conclusion
As you wrap your finished quilt around your shoulders, think of it as a warm hug. Each stitch is a memory woven into fabric.
Your journey through choosing fabrics, cutting, and binding mirrors life’s patchwork. Every piece contributes to a beautiful whole.
Cherish the imperfections, because they’re what make your quilt distinctly yours. Remember, just like a quilt, life’s best moments are crafted with care and creativity.
So, keep stitching your dreams and let your creativity shine. Learning how to do a quilt is more than a craft—it’s a celebration of your unique story and imagination.