Craft a Book and Quill: Step-by-Step Guide
Crafting your own book and quill can feel daunting. You’re not alone if you’ve ever struggled to find the right materials or techniques. Many aspiring writers desire a personal touch in their tools, but don’t know where to start.
To craft a book and quill, start by gathering materials like textured paper and ink options.
Fold your selected paper and sew it to create the book’s spine.
For the quill, choose a feather, shape the tip for smooth writing, and consider an ink reservoir for longevity.
Customize your creations to reflect your style.
Once you have your tools ready, you’ll gain access to tips for writing and enhancing your storytelling abilities in no time.
Key Takeaways
- Select your preferred paper type and ink options for a personalized writing experience before starting the crafting process.
- Fold and stack sheets of paper. Then sew along the spine to bind your book securely.
- Create a sturdy cover using heavier paper or cardboard to protect your book.
- Choose a feather and shape the tip for ink flow. Consider adding an ink reservoir for your quill.
- Regularly maintain your writing tools and replace any worn components to ensure a smooth crafting experience.
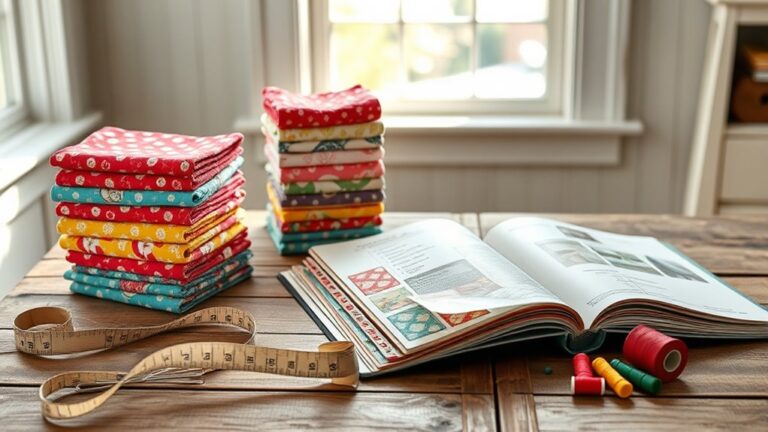
Gather Materials for Your Book and Quill
To create your own book and quill, you’ll need just a few essential materials. Start by selecting your paper types.
Consider using textured watercolor paper for a classic feel or smooth printer paper for a more modern touch. Each type offers a unique writing experience, so choose what feels right for you.
Explore the charm of textured watercolor paper or the sleekness of smooth printer paper to find your perfect writing experience.
Next, pick your ink options. You might go for traditional fountain pen ink for elegance or experiment with gel pens for vibrant colors.
The choice of ink can greatly influence the final look of your writing, so don’t hesitate to try different shades.
Lastly, gather a sturdy quill or a pen that mimics the quill’s charm. This combination of materials will set the stage for your creative journey.
With everything in hand, you’re ready to plunge into crafting your unique book and quill. Enjoy the process and let your imagination flow!
Craft Your Book: Step-by-Step
Creating your book is an exciting journey that starts with folding your chosen paper.
Begin by taking your sheets and folding them in half, ensuring the edges align perfectly. This fold creates the spine of your book, essential for solid book design.
Once folded, stack multiple sheets together to form the pages.
Next, use a needle and strong thread to sew the pages along the spine. This binding method keeps everything secure, so your story stays intact.
You can make small holes along the fold for easy stitching.
After binding, it’s time to add a cover. You can use heavier paper or cardboard for durability.
Cut it to size and attach it to your stitched pages.
Finally, consider personalizing your book with decorations or illustrations.
With these steps, you’ve crafted a beautiful book, ready for your thoughts and ideas, perfectly paired with your future quill materials.
Create Your Quill: Simple Techniques
Creating your quill is a fun adventure, and it all begins with picking the right feather. Trust me, this choice can totally change your writing experience!
Once you’ve got your feather, the next step is shaping the tip. This part is super important because it ensures a smooth ink flow. You want your writing to glide effortlessly, right?
And don’t forget about the ink reservoir! Adding one will really amp up your quill’s functionality. With a good reservoir, you can enjoy longer writing sessions without constantly stopping to refill. Happy quilling!
Selecting The Right Feather
How do you choose the perfect feather for your quill? Selecting the right feather involves understanding various feather types and their historical uses. Here are three key factors to take into account:
- Feather Types: Look for stiff feathers from geese or swans. They suit different writing styles well.
- Color Significance: The color can reflect personal crafting traditions. Choose one that resonates with you.
- Feather Sourcing: Verify your feather is ethically sourced. This helps maintain feather care and respect for wildlife.
Shaping The Quill Tip
Shaping the quill tip is essential for achieving the desired writing experience. Start by selecting the right crafting tools, as they’ll help you refine the feather’s end.
Focus on design aesthetics and personalization options, allowing you to create a unique quill.
Here’s a quick guide to help you shape the quill tip effectively:
| Technique | Description | Importance |
|---|---|---|
| Angle the Cut | Trim the tip at a slight angle | Affects ink flow |
| Create a Point | Sharpen the tip for precision | Improves writing techniques |
| Smooth the Edges | Use sandpaper to refine the tip | Boosts quill maintenance |
| Test the Tip | Dip in ink to check consistency | Guarantees historical significance |
With proper shaping, your quill will perform beautifully!
Adding Ink Reservoir
While you focus on crafting your quill, adding an ink reservoir is an essential step that improves its functionality. Here are some tips to guide you:
- Choose Reservoir Materials: Opt for lightweight options like glass or acrylic. This ensures durability and ease of use.
- Explore Ink Types: Experiment with various ink types. Consider their consistency and drying time for the finest writing experience.
- Master Filling Techniques: Use a syringe or dropper for precise filling. This helps prevent spills and ensures ideal ink storage.
Remember to mix colors for creative designs. Regularly clean your reservoir for maintenance. This way, you’ll keep your quill performing at its best while enjoying a smooth writing experience.
Combine Your Book and Quill
Combining your book and quill is where creativity truly sparks to life. Start with thoughtful book binding; you want your pages to hold together seamlessly.
Next, choose a feather that resonates with your style. Its color and shape can inspire your writing. Consider different ink types, as they affect how your words flow on the page.
Experiment with various writing styles to find what feels right for you. Use your crafting tools to add personal touches, making your book distinctly yours.
Draw design inspiration from historical significance. Ancient manuscripts can enrich your artistic vision. Implement personalization methods like embossing or distinctive illustrations to elevate your creative expressions.
Finally, don’t forget maintenance tips for both your quill and book. Proper care keeps them in top condition for future use. By combining these elements, you’ll create a beautifully functional tool that reflects your individuality.
Write Your First Entry: Beginner Tips
How do you capture your thoughts when you first sit down to write?
Embracing a beginner mindset can reveal the journaling benefits you’re seeking. Start with these tips to spark your creative expression:
Embracing a beginner mindset unlocks the journaling benefits you seek, fostering creativity and deeper self-reflection.
- Set a Writing Routine: Choose a specific time each day to write. Consistency helps you develop a habit that can lead to deeper reflection.
- Identify Inspiration Sources: Look around you. Nature, music, or even conversations can ignite ideas. Jot down anything that catches your attention.
- Use Reflection Techniques: Ask yourself questions like, “What did I learn today?” or “How did I feel?” This can guide your entry and provide clarity.
Explore Creative Uses for Your Book and Quill
Alright, so you’ve put in the effort to create your own book and quill—awesome! Now, let’s dive into some fun ways to really use them. Have you thought about personal journaling? It’s a great way to reflect on your day-to-day experiences. Just grab your quill and let those thoughts flow onto the pages.
And speaking of flow, how about using some creative writing prompts? They can really get your imagination buzzing! Just a few words can take you on a wild adventure or help you explore new ideas.
Oh, and don’t forget, these beautiful creations can make for unique gifts! Imagine giving a personalized book and quill set to a friend or family member. It’s thoughtful and shows you care. So, let’s get writing and make the most of what you’ve created!
Personal Journaling Techniques
Have you ever wondered how personal journaling can transform your thoughts into a creative outlet? By using your book and quill, you can investigate various techniques that improve your self-discovery.
Here are three methods to get started:
- Gratitude Journaling: Write down three things you’re thankful for each day to cultivate a positive mindset.
- Mindfulness Exercises: Dedicate time to reflect on your emotions and experiences. This helps you stay grounded and present.
- Goal Setting: Outline your aspirations and break them into actionable steps. This keeps you motivated.
Incorporate these practices into your daily logs or art journaling sessions. Whether it’s through travel journaling or creating vision boards, your book becomes a canvas for personal growth and emotional writing.
Creative Writing Prompts
While personal journaling offers a space for reflection, your book and quill can also spark creativity through imaginative writing prompts.
Use writing exercises to immerse yourself in character development, exploring who they are and what drives them.
Try world building by crafting unique settings that elevate your narrative style.
Experiment with dialogue prompts to bring your characters to life, allowing them to reveal their emotions and motivations.
For genre exploration, challenge yourself with unexpected plot twists that keep readers on their toes.
Engage in theme analysis to add layers of meaning to your stories.
These inspiration techniques will deepen emotional depth, making your writing more relatable and impactful.
Let your book and quill be the gateway to endless creativity!
Unique Gift Ideas
Looking for a thoughtful gift that sparks creativity? A book and quill set can be the perfect choice! Here are some unique ways to use them as personalized gifts:
- Customized Notes: Fill the book with heartfelt messages or quotes. Each page can hold a special memory keepsake.
- DIY Kits: Pair the book and quill with creative packaging, like inks or decorative papers. This can inspire an artistic journey.
- Unique Experiences: Organize a writing workshop or poetry night. Recipients can immerse themselves in creativity while using their handmade treasures.
These thoughtful gestures encourage creativity and create lasting memories. Give someone a gift that inspires imagination and connection!
Customize Your Book and Quill
To truly make your Book and Quill your own, you can investigate various customization options that reflect your personal style.
Start with your book design. Choose colors, patterns, and materials that resonate with you. Whether you prefer a rustic leather cover or a vibrant fabric, your choice sets the tone for your work.
Next, examine different quill styles. Consider the shape and size of the nib, as well as the material of the quill itself. A classic feather quill adds elegance, while a modern metal one offers durability.
Don’t forget to personalize the ink too. Select colors that inspire you or symbolize your creativity.
Fix Common Problems With Your Book and Quill
If you find yourself struggling with your Book and Quill, don’t worry. Common issues can be easily fixed. Here are some quick maintenance tips to improve your crafting experience:
- Ink Consistency: If your ink is too thick or thin, adjust the mixing process. Proper consistency guarantees smooth writing and vibrant colors.
- Feather Durability: Check the feather for frays or breaks. A sturdy feather is essential for a precise writing experience. Replace it if necessary to maintain quality.
- Parchment Quality: Make sure you’re using high-quality parchment. Poor quality can affect your binding techniques and the overall aesthetics of your book.
Enhance Your Storytelling in Minecraft
Sure! Here’s a more conversational version of your text:
—
If you’re looking to up your storytelling game in Minecraft, it’s a great idea to explore some unique story concepts that really grab your audience’s attention. You know, those ideas that make them want to dive right into your world!
And don’t forget about the cool crafting techniques you can use! They can really help bring your narratives to life. Plus, using quills effectively can make your writing feel seamless and engaging. So, let’s unlock the true potential of your in-game tales together!
—
How does that sound?
Unique Story Ideas
While exploring the vast landscapes of Minecraft, you can weave engaging narratives that improve your gameplay. Here are some unique story ideas to spark your creativity:
- Fantasy Worlds with Mythical Creatures: Create a domain where dragons guard treasure. Players must navigate moral dilemmas to earn their trust.
- Time Travel Adventures: Build portals to alternate realities. Players face epic battles against secret societies trying to alter history.
- Character Arcs with Plot Twists: Design quests that challenge your characters. They must evolve amidst unexpected betrayals and alliances.
These ideas not only enrich your storytelling but also make every adventure quest memorable. So grab your Book and Quill, and let your imagination run wild!
Crafting Techniques Explained
Crafting techniques can transform your storytelling in Minecraft, allowing you to create immersive experiences.
By exploring crafting history, you tap into artistic expression that reflects cultural significance. Modern adaptations of tools enable you to experiment with design inspirations, enhancing your narratives.
Use eco-friendly materials to emphasize sustainability, making your creations not just beautiful but also responsible. Tool variations offer distinctive possibilities, so don’t hesitate to mix and match for functional aesthetics.
Personalization techniques let you add your signature touch, making each story exclusively yours. Combine these elements with effective storytelling methods to engage your audience fully.
Ultimately, mastering these crafting techniques will raise your Minecraft storytelling, making it more vibrant and impactful.
Using Quills Effectively
Using quills effectively can improve your storytelling in Minecraft by allowing you to capture your adventures in detail. To make the most of your quill, follow these tips:
- Quill Maintenance: Regularly check your quill’s durability. A well-maintained quill writes smoother and lasts longer. This ensures your words flow effortlessly.
- Writing Posture: Sit comfortably with your screen at eye level. Good posture keeps you focused and helps you write for longer periods without strain.
- Plan Your Story: Before you start, outline key events or themes. This keeps your writing organized and engaging. It makes it easier for readers to follow your journey.
Share Your Creations With the Minecraft Community
Many players find joy in sharing their unique creations with the Minecraft community. By showcasing designs, you invite community feedback that can help you improve your skills.
Consider sharing stories behind your builds or participating in tutorial exchanges to promote creativity among fellow players. Creative collaborations can lead to exciting projects, so don’t hesitate to team up with others.
Organizing contests is another fantastic way to engage the community. It allows players to display their talents and inspire others.
Hosting events, whether online or in-game, can build networks and foster friendships that extend beyond Minecraft. Remember, each creation you share not only highlights your work but also contributes to a vibrant community.
Frequently Asked Questions
Can I Use Different Types of Paper for My Book?
Yes, you can use different types of paper for your book! Mixing various paper textures and thicknesses can add visual interest and a unique feel.
For instance, you might choose thicker paper for cover pages and lighter, textured sheets for the inner pages.
Just be mindful of how these choices affect the overall look and durability of your book.
Experimenting with different papers can lead to exciting and creative results!
What Materials Can I Substitute if I’m Low on Resources?
If you’re low on resources, you can substitute materials easily. For alternative binding, try using string or yarn instead of traditional thread.
For creative covers, consider cardboard or even sturdy paper bags; just decorate them to match your style. You can also repurpose old magazines or fabric scraps for added flair.
Get inventive with what you have on hand, and don’t hesitate to mix and match materials for a unique touch!
How Do I Delete or Edit My Book Entries?
To delete or edit your book entries, simply open the book you want to manage.
Use editing techniques like striking out text to remove unwanted content or rewriting sections for clarity.
If you want to delete an entry entirely, just close the book without saving changes.
Remember, you can also create new entries to replace outdated information.
This way, you keep your book organized and up-to-date with minimal effort.
Can I Use My Book and Quill in Multiplayer Mode?
You can absolutely use your book and quill in multiplayer mode, but it’s not as straightforward as you might hope.
Sure, you can jot down your thoughts, but sharing those literary masterpieces? That’s where the fun begins!
The multiplayer features allow you to show off your creativity, but only if your friends can read them.
Are There Any Crafting Shortcuts for Beginners?
Absolutely, there are some great beginner tips for crafting shortcuts!
First, familiarize yourself with basic crafting techniques. Knowing the recipes will speed up your process.
Use the crafting grid efficiently. Stack similar items together to save space and time.
Don’t forget to examine crafting tables, as they offer more options.
Finally, keep your inventory organized so you can quickly find what you need.
Happy crafting!
Conclusion
Now that you’ve crafted your own book and quill, you’re ready to pen your adventures like a true bard of old.
Think of your creations as pages in a grand epic, waiting to be shared with fellow players.
Whether you’re chronicling a heroic quest or a fanciful tale, every word brings your Minecraft experience to life.
So grab your quill, unleash your imagination, and let your stories echo through the blocky domains of your world!
Your book and quill are your tools for crafting these epic narratives.