Mastering Applique: Do It With This Step-By-Step Guide for Quilters
If you’ve ever found yourself frustrated by fabric fraying, uneven shapes, or applique pieces that just won’t stick, you’re not alone. Many quilters struggle to get their appliqué just right, longing for crisp edges and professional-looking results.
But mastering appliqué doesn’t have to be overwhelming—there are tools and techniques that make it so much easier.
Mastering appliqué adds depth to your quilting projects and lets your creativity shine.
You’ll need essential materials like fabric adhesives, quality scissors, and an iron for a polished look.
Choosing the right fabrics is key. Cotton blends are great, but vintage or eco-friendly options bring character.
Learn to create and transfer shapes precisely, and decide between hand and machine techniques.
Plus, solve common problems easily. Stick around to uncover more tips and techniques for stunning appliqué!
Key Takeaways
- Select quality fabrics and prewash them to prevent shrinkage. This also helps ensure longevity in your appliqué projects.
- Create precise templates using drawing or software. Utilize tracing methods for accurate shape transfers.
- Stabilize your fabric with interfacing or fusible web. This helps maintain shape and prevents misalignment during stitching.
- Choose appropriate stitching techniques, like zigzag or blanket stitches, to securely finish edges. These also enhance design depth.
- Incorporate embellishments like beads or embroidery to add visual interest. Just make sure to maintain balance with your overall design.
What Is Appliqué and Why You Should Learn It?
Appliqué is an enchanting technique that adds depth and dimension to your quilting projects. It’s more than just stitching fabric; it’s a form of creative expression that allows you to tell a story through your work.
With roots stretching back centuries, appliqué holds historical significance in various cultures. It showcases the artistry and traditions of different times.
Appliqué weaves together centuries of artistry, reflecting the rich traditions and cultural narratives of diverse eras.
By learning this technique, you can transform ordinary quilts into extraordinary masterpieces. Imagine layering vibrant fabrics and intricate designs, each piece enhancing your quilt’s narrative.
You’ll not only develop your skills but also connect with the rich heritage of quilting. Exploring appliqué opens doors to endless possibilities, whether you’re crafting playful designs or elegant motifs.
It encourages experimentation, pushing your creativity to new heights. So, plunge into the world of appliqué, and uncover how it can enhance your quilting journey!
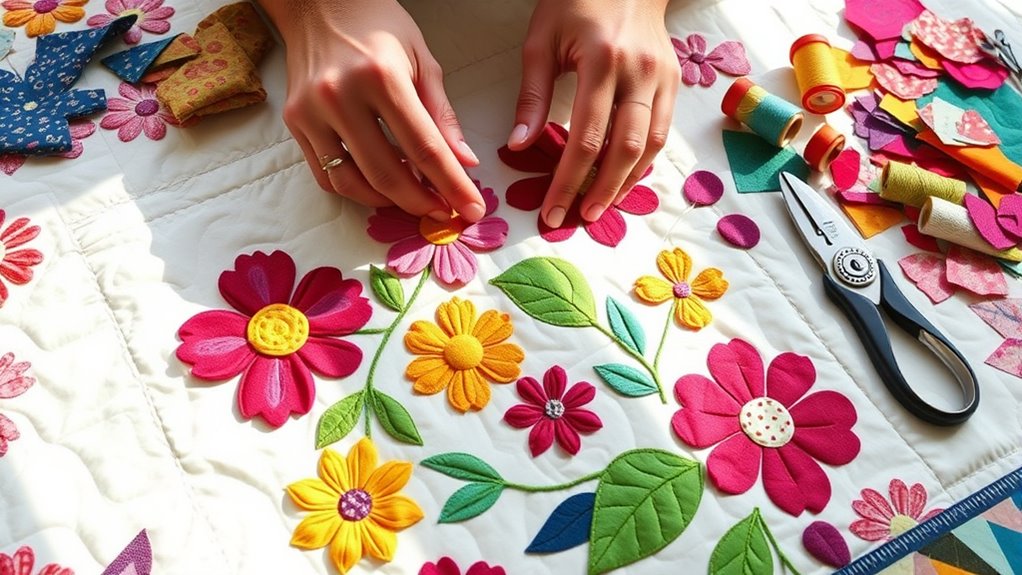
Essential Materials for Appliqué Success
To bring your appliqué visions to life, having the right materials on hand makes all the difference.
Start by gathering essential supplies that guarantee your projects run smoothly.
Here’s what you’ll need:
- Fabric Adhesives: These are vital for securing your pieces without the need for pinning.
- Appliqué Templates: Use these to create precise shapes and sizes for your designs.
- Scissors: Invest in a good pair for cutting fabric and templates accurately.
- Rotary Cutter and Mat: These tools help in achieving clean, straight cuts for your appliqué pieces.
- Iron: A reliable iron is necessary for pressing your fabric and confirming that your appliqué lies flat.
Having these materials ready will streamline your process and improve your creativity.
This way, you can focus on bringing your designs to life with confidence.
Happy quilting!
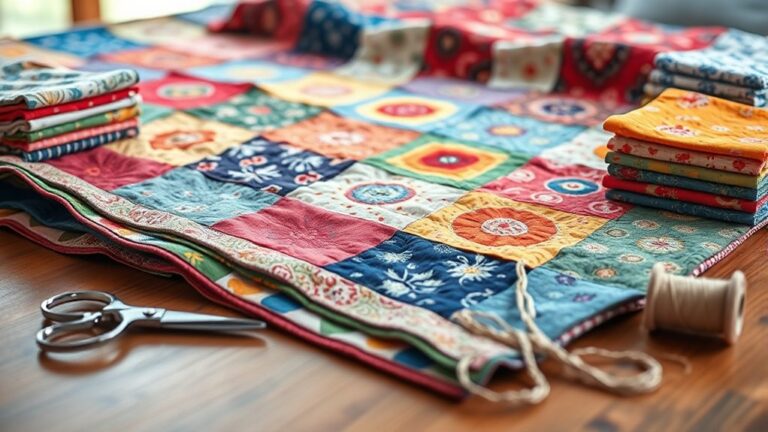
Choosing the Right Fabrics for Your Appliqué Projects
Choosing the right fabrics for your appliqué projects can really transform your finished piece. It’s not just about picking a fabric you like—you’ll want to think about different types of fabrics, how their colors play together, and the textures they bring to your design. Let’s chat about these key elements and see how they can elevate your appliqué work.
Fabric Types Overview
Selecting the right fabrics can make or break your appliqué projects.
Understanding different fabric types will help you achieve the best results.
Here are some options to take into account:
- Cotton Blends: Versatile and easy to work with, perfect for most projects.
- Specialty Fabrics: Add unique textures or finishes for a standout design.
- Vintage Textiles: Offer character and charm. Just check for wear before using them.
- Eco-Friendly Options: Sustainable choices that are gentle on the planet.
- Fabric Weights: Heavier materials provide stability, while lighter ones allow for delicate designs.
Remember to consider print patterns, fabric care, and colorfast materials.
This will help guarantee longevity and vibrancy in your appliqué creations!
Color Coordination Tips
How do you create a harmonious look in your appliqué projects? Start by understanding color wheel basics. Use contrasting colors to make elements pop, but guarantee they complement each other for true color harmony.
Think about seasonal palettes. Autumn tones can evoke warmth, while spring colors offer freshness.
When fabric pairing, choose shades that improve your design without overwhelming it. Keep an eye on color fading, too, as some fabrics may lose vibrancy over time.
Experiment with various combinations to see what resonates with you. Don’t hesitate to step outside your comfort zone, since sometimes, unexpected pairings yield the most stunning results.
Trust your instincts, and enjoy the creative process!
Texture Selection Insights
What makes the right fabric texture essential for your appliqué projects?
Selecting the perfect texture boosts your design and adds depth.
Applying effective texture selection techniques can greatly improve the visual appeal of your work.
Here are some tips to reflect on:
- Contrast: Use a mix of smooth and rough fabrics for a dynamic look.
- Weight: Balance heavier materials with lighter ones for stability.
- Pattern: Choose textured fabrics that complement or contrast with your main design.
- Layering: Implement texture layering strategies to create interesting dimensions.
- Durability: Select fabrics that withstand wear, especially for functional quilts.
How to Create and Transfer Appliqué Shapes
Creating and transferring appliqué shapes can be an exciting part of your quilting journey.
Start by selecting your design and creating shape templates. You can draw them freehand or use software to generate precise shapes.
Once you have your templates, it’s time to transfer them onto your chosen fabric. Use tracing methods like placing your template on the fabric and tracing around it with a fabric marker or chalk.
Once your templates are ready, trace them onto your fabric using a fabric marker or chalk for precise shapes.
If you prefer, you can also pin the template to your fabric and cut around it. Just verify you add a seam allowance if necessary.
For intricate designs, consider using lightweight fusible interfacing. This makes it easier to position and adhere your shapes to the background fabric later on.
With your shapes ready, you’ll be well-prepared to move on to the next exciting steps in your appliqué adventure!
Preparing Your Background Fabric for Appliqué
Before you plunge into your appliqué project, preparing your background fabric is essential for achieving a polished look.
Proper background preparation guarantees your fabric stays stable and supports your appliqué design.
Here’s how to get started:
- Choose the right fabric: Opt for a sturdy cotton or blend that can handle the appliqué process.
- Prewash your fabric: Remove any sizing or chemicals, and prevent future shrinkage.
- Iron your fabric: Smooth out wrinkles to create a flat surface for your appliqué.
- Stabilize your fabric: Use interfacing or fusible web to add structure and prevent distortion.
- Cut accurately: Confirm your background fabric is the right size and shape for your project.
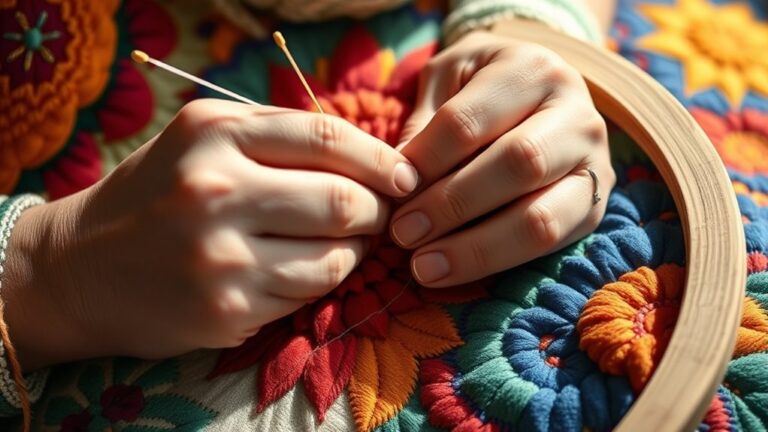
Learn Essential Stitches for Appliqué
As you immerse yourself in the world of appliqué, mastering essential stitches will enhance your skills and improve your projects.
Familiarize yourself with key stitch techniques like the blanket stitch, which outlines your appliqué pieces beautifully, and the zigzag stitch, perfect for securing edges while allowing some stretch.
Choosing the right thread choices is similarly important. Opt for cotton or polyester threads that complement your fabric’s texture.
Consider the color. Blending with your fabric can create a seamless look, while contrasting colors can add visual interest.
Practice these stitches on scrap fabric to build your confidence and refine your technique.
Remember, the more you experiment, the more comfortable you’ll become with these essential stitches. They’re the foundation that will advance your appliqué work, ensuring your projects not only look professional but also stand the test of time.
Hand vs. Machine Appliqué Techniques
Choosing between hand and machine appliqué can really shape your projects. Each method has its own unique benefits, so understanding the differences will help you decide what fits your needs best.
Hand Techniques
Hand appliqué offers greater detail precision, making it perfect for intricate designs. You’ll also find it allows for a more personal touch and lots of creative freedom.
Machine Techniques
Machine appliqué is considerably faster, so it’s ideal for larger projects. It also provides consistent stitches and can handle multiple layers with ease.
Advantages Comparison
Hand appliqué truly excels in artistry, while machine appliqué stands out for its efficiency.
Project Suitability
Use hand techniques if you’re working on small, detailed pieces. For quilts or larger items, machine techniques are often the better choice.
Speed Considerations
Think about your timeline: machine techniques can save you hours. On the other hand, hand techniques take more time but offer truly unique finishes.
Ultimately, go with the method that matches your project goals and personal style.
Common Appliqué Problems and How to Fix Them
When you’re working on appliqué, you might notice a few hiccups along the way, like fraying edges or shapes that just won’t line up right. But don’t stress—there are easy ways to get things back on track and make your project look great. Let’s chat about how you can handle these issues, and we’ll also cover what to do if your fabric starts to feel stiff or bunches up in places.
Fraying Edges Fixes
While fraying edges can be a common headache in appliqué projects, you don’t have to let them ruin your work. By using effective fraying prevention methods and edge finishing techniques, you can keep your pieces looking sharp and beautiful.
Here are some strategies to explore:
- Use a tight zigzag stitch around edges.
- Apply fray check or fabric glue to vulnerable areas.
- Choose fabrics with a tighter weave to minimize fraying.
- Pre-wash your fabric to reduce fraying post-application.
- Experiment with bias tape to finish edges neatly.
With these tips, you’ll tackle fraying edges like a pro. This way, your appliqué projects will remain polished and vibrant throughout their life.
Happy quilting!
Misaligned Shapes Solutions
Misaligned shapes can be frustrating, especially when you’ve poured so much effort into your appliqué project. To tackle this issue, first assess the areas where the shapes don’t line up.
You can use a seam ripper to carefully remove stitches in those spots. Once you’ve freed the misaligned pieces, reposition them for proper shape alignment.
Use pins or temporary adhesive to hold them in place before stitching again. For future projects, consider using a template to guarantee accurate placement.
Stiffness and Bunching Remedies
If you find your appliqué pieces feeling stiff or bunched up, it’s essential to address the issue early so it doesn’t affect your project’s overall look.
Here are some effective remedies you can try:
- Use fabric stabilization techniques: Choose stabilizers that support your fabric but won’t add extra bulk. The right stabilizer makes a big difference.
- Choose the right thread: Opt for a lighter thread to help reduce tension. This lets your fabric move and flex more naturally.
- Pre-wash your fabric: Giving your fabric a wash first helps shrink any extra fibers. This simple step can really cut down on stiffness.
- Iron gently: Use steam to carefully smooth out any bunching. Just be sure not to flatten your pieces too much while you’re at it.
- Pin strategically: Try to use as few pins as possible to hold your appliqué in place. This helps prevent puckering as you sew.
Adding Embellishments to Your Appliqué Projects
Adding embellishments to your appliqué projects can transform them from simple designs into stunning works of art. You can boost your creations by incorporating various embellishment techniques.
Consider adding beads, buttons, or even embroidery to improve the visual appeal. These creative accents not only add texture but also draw the eye to specific areas of your design.
Experiment with fabric paint or glitter to introduce color and sparkle, making your appliqué truly shine. You might also try layering different fabrics for a distinctive effect.
Try using decorative stitches along the edges to add interest as well. Don’t shy away from experimenting; your personal touch will make the project distinctly yours.
Just remember, balance is key. Too many embellishments can overwhelm your design, so choose a few standout pieces to complement your work without overshadowing the original appliqué shapes.
With these techniques, your projects will showcase your creativity and skill beautifully.
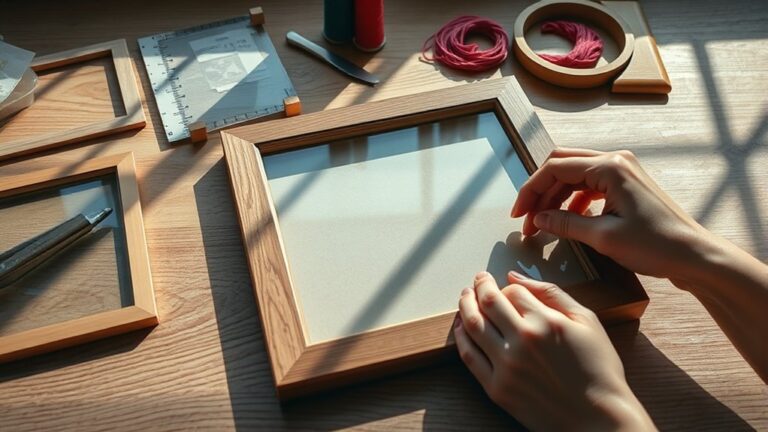
Showcasing Your Appliqué Projects: Presentation Tips
After improving your appliqué projects with striking embellishments, it’s time to reflect on how to showcase your creations effectively.
The right presentation can boost your work, engaging your audience and telling a visual story.
Here are some tips to ponder:
- Display Techniques: Use stands or hangers that complement your design.
- Unique Framing: Choose frames that improve your project’s theme and colors.
- Effective Lighting: Illuminate your pieces with soft, directed light to highlight details.
- Thematic Presentations: Align your display with seasons or events for added relevance.
- Seasonal Displays: Rotate your projects based on holidays or seasons to keep things fresh.
Frequently Asked Questions
How Do I Choose the Right Thread for Appliqué?
To choose the right thread for appliqué, consider thread types like cotton or polyester, depending on your project’s needs. Cotton’s great for a matte finish, while polyester offers durability.
For color matching, pick a thread that closely resembles your fabric, or use a contrasting thread for a bold look.
Test on scraps first to see how it blends. This way, you’ll guarantee your appliqué looks professional and polished.
Can I Use Recycled Fabrics for My Appliqué Projects?
Yes, you can definitely use recycled fabrics for your appliqué projects! In fact, mixing different fabric combinations can add unique textures and colors to your work.
Just make sure the fabrics are clean and compatible in weight and texture so they’ll sew well together.
Experimenting with recycled materials not only boosts your creativity but also promotes sustainability.
What Tools Are Essential for Precise Cutting in Appliqué?
Think of your cutting tools as a painter’s brushes, each essential for creating a masterpiece.
For precise cutting in appliqué, you’ll need sharp fabric scissors, a rotary cutter, and a cutting mat. These tools help you execute various cutting techniques with accuracy, regardless of fabric types.
A pair of tweezers can also assist in handling small pieces.
With the right tools, your fabric transforms into a beautifully crafted design, waiting to come alive.
How Do I Troubleshoot Uneven Edges in My Appliqué?
To troubleshoot uneven edges in your appliqué, start by ensuring your fabric stabilization is adequate. Use fusible interfacing or stabilizers to keep your fabric from shifting.
When cutting, employ precise appliqué techniques, like using a sharp rotary cutter. If edges still look uneven, consider adjusting your stitching technique. Sometimes, using a narrower stitch can help smooth things out.
Finally, practice patience. Slight imperfections can often be fixed during the finishing stages of your project, so don’t worry if it’s not perfect right away.
What Is the Best Way to Wash Appliqué Quilts?
You’d think washing an appliqué quilt is as simple as tossing it in the machine, right? Well, it’s not!
For proper fabric care, use cold water and a gentle cycle. Avoid harsh detergents that could fade your colors.
Instead, consider a mild soap. Air-drying is best to prevent shrinkage and maintain those delicate edges.
Conclusion
You’ve just opened the secret world of appliqué, where creativity knows no bounds! With every stitch, you’re not just sewing. You’re crafting masterpieces that could make even the finest art galleries weep with envy.
So, grab those fabrics and let your imagination run wild! Remember, every project is a chance to dazzle the world with your unique flair.
Immerse yourself, experiment, and watch as your appliqué skills transform your quilting game into pure magic. With this guide, you’ll find that mastering appliqué is truly within your reach!