How Can You Craft Your Own Cave Tablet?
Are you looking to add a personal touch to your home decor or gift something truly unique? You’re not alone! Many people struggle to find creative outlets that resonate with their individual style.
Crafting your own cave tablet can be a rewarding way to express yourself while also tapping into a sense of history and artistry.
To craft your own cave tablet, start by selecting materials like air-dry clay or natural stone.
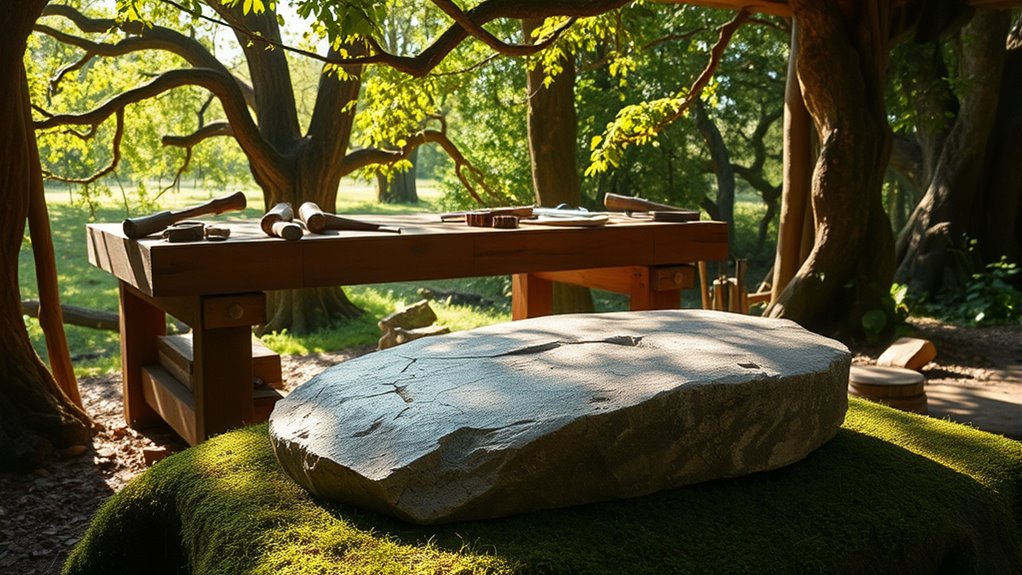
Set up a clean, well-lit workspace with your tools within reach.
Shape your tablet by rolling out clay or carving stone, then etch designs for authenticity.
Use natural textures and pigments for a unique look.
Finally, apply sealant for preservation and think about creative ways to display your masterpiece.
There’s plenty more to investigate to improve your crafting experience.
Key Takeaways
- Choose materials like air-dry clay or natural stone based on your desired durability and texture for crafting your cave tablet.
- Prepare a clutter-free workspace with good lighting. Ensure all tools and materials are easily accessible.
- Shape the tablet by rolling out clay or carving stone. Sketch designs beforehand to ensure precision.
- Utilize texturing techniques by layering natural materials and applying colors for an authentic, aged look.
- Finish and preserve your tablet with sealants. Store it in stable conditions and consider creative display options to showcase your work.
Essential Materials for Crafting Your Cave Tablet
To craft your own cave tablet, you’ll need a few essential materials to get started.
First, choose your clay types. Air-dry clay works well for beginners, while polymer clay offers durability and flexibility. Both options allow for easy carving and imprinting of designs.
Next, consider your stone options. Natural stones like slate or limestone can provide a rugged look, while smoother stones like marble offer a polished finish.
You’ll also need tools for etching or carving your designs, such as a wooden stylus or even household items like forks and knives.
Don’t forget a rolling pin to flatten the clay and a sturdy work surface to keep everything stable.
With these materials at hand, you’re ready to plunge into the creative process and bring your cave tablet to life!
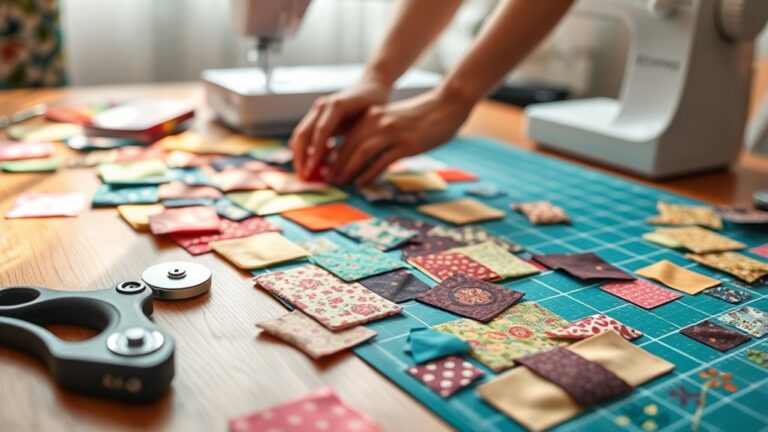
Getting Your Workspace Ready for Fun Crafting
Creating a fun crafting environment can make all the difference in your cave tablet project. Start by organizing your workspace; having everything in its place helps you focus on the creative process.
Clear off any clutter and designate specific areas for your materials and tools. This organization not only streamlines your crafting but also sparks inspiration as you easily see what you have at hand.
Next, consider your lighting. A well-lit workspace brightens your mood and improves your focus. Natural light is ideal, but good task lighting works too.
Add some personal touches, like inspiring artwork or cozy decorations, to make the space feel inviting.
Finally, gather your essential materials within reach. When your workspace is organized and tailored to your style, you’ll be ready to jump into your cave tablet project with enthusiasm and creativity!
Step-by-Step: Shaping Your Cave Tablet
Start by selecting the right material for your cave tablet. Depending on your preference, you can choose between clay for molding or stone for carving. Here’s how to get started:
Gather your tools: You’ll need a sculpting knife, rolling pin, and smoothing tools.
Prepare your workspace: Make sure it’s clean and well-lit for your project.
Shape your material: If you’re using clay, begin with clay molding. Roll it out evenly, then cut it to your desired size.
Carve your design: For stone carving, sketch your design first. Use a chisel to carefully carve out your image.
Smooth the edges: Don’t forget to smooth out rough areas for a polished look.
As you work, focus on getting the shapes and details just right. This step is essential for creating an authentic cave tablet that reflects your individual style!
Techniques for Creating Authentic Textures
To create authentic textures on your cave tablet, the first step is to choose natural materials that really capture the essence of ancient surfaces. It’s all about finding those elements that can transport you back in time, right?
Next up, you’ll want to explore different texturing techniques. These methods can truly elevate the overall look and feel of your creation. So, let’s dive into some exciting ways to bring your tablet to life!
Natural Materials Selection
While selecting natural materials for your cave tablet, you’ll want to reflect on both texture and authenticity. Choosing the right materials not only improves your tablet’s appearance but also aligns with sustainability practices.
Here are some options to explore for your project:
Clay: Easily moldable and offers a rustic finish.
Stone: Natural textures add durability and authenticity.
Wood: Provides warmth and unique grain patterns.
Animal Hide: Adds a tactile element and historical significance.
Natural Dyes: Use for coloring, sourced from plants or minerals.
Texturing Techniques Overview
Creating authentic textures for your cave tablet can improve its visual appeal and historical resonance. To achieve this, you’ll want to investigate various texturing mediums.
Natural materials like clay, sand, and crushed stone can add depth and realism. Start with a base layer, applying one of these mediums to establish an initial texture.
Then, use layering techniques to create complexity. For example, you might press leaves or stones into the wet medium to imprint patterns.
Once dry, you can add additional layers for contrast and detail, such as subtle washes of color or fine powders. Experimenting with these methods will help you develop a unique and authentic look.
This way, your cave tablet will truly be one-of-a-kind!
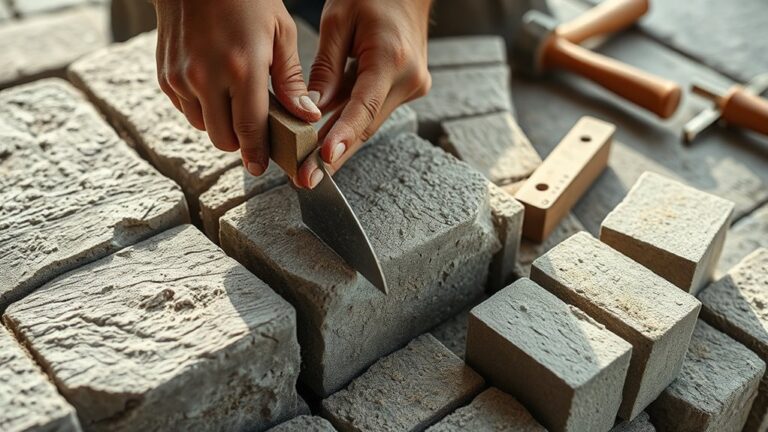
Choosing the Right Tools for Engraving
Choosing the right tools for engraving can make all the difference in your cave tablet project.
Selecting the appropriate engraving methods is vital, as each tool serves a unique purpose. Here’s what you’ll need to get started:
- Chisels: Ideal for precise, deep cuts.
- Gravers: Perfect for fine details and intricate designs.
- Dremel Tool: Great for speed and versatility.
- Hammer: Fundamental for driving chisels and creating impact.
- Sharpening Stone: Keeps your tools in top shape. Tool maintenance is essential for consistent results.
With these tools, you’ll be well-equipped to bring your vision to life. Don’t forget to practice and experiment with different techniques to find what works best for you.
The right tools combined with proper care will guarantee your cave tablet is both beautiful and durable. Get ready to release your creativity!
Creative Ideas for Inscriptions and Artwork on Your Tablet
Now that you’ve got the right tools ready for your engraving project, it’s time to think about what you want to inscribe and depict on your cave tablet.
Consider drawing inspiration from nature. Animals, plants, and landscapes can all hold cultural significance. You might want to depict a hunting scene or a sacred ritual that resonates with your heritage.
Drawing inspiration from nature can elevate your engraving, allowing you to connect deeply with cultural significance and personal heritage.
Look into ancient symbols or patterns that tell stories of your ancestors. These can add depth to your artwork. You could also incorporate personal symbols that represent your own journey or beliefs.
Don’t shy away from abstract designs. Geometric shapes or spirals can evoke meaning and connect with viewers on a deeper level.
Using Natural Pigments for Color
As you investigate the world of cave tablets, using natural pigments can improve your artwork and connect you more deeply to the earth.
By choosing sustainable options, you’ll create vibrant pieces that reflect the beauty around you. Here are some great pigment sources to think about for your artwork:
Charcoal: Produces deep blacks for outlines.
Ochre: Offers earthy hues ranging from yellows to reds.
Spirulina: A blue-green algae that gives a unique color.
Beets: A natural colorant for vivid reds.
Turmeric: Bright yellow pigment with a warm tone.
Experimenting with these natural colorants not only beautifies your cave tablet but also fosters a connection to the environment.
Tips for Finishing and Preserving Your Cave Tablet
Once you’ve crafted your cave tablet, sealing it properly is super important to keep your artwork safe. You definitely don’t want all that hard work to fade away or get damaged! Plus, let’s chat about the best storage conditions to make sure it sticks around for years to come.
Proper Sealing Techniques
To guarantee your cave tablet withstands the test of time, mastering proper sealing techniques is essential. Effective sealing methods not only protect your tablet but also ensure moisture control. This prevents damage over the years. Here are some tips to help you seal your creation properly:
Choose a high-quality sealant suitable for your material.
Apply multiple thin coats rather than one thick layer.
Allow each coat to dry fully before applying the next.
Focus on edges and corners, as they’re prone to moisture infiltration.
Store your tablet in a controlled environment to maintain its integrity.
Ideal Storage Conditions
Proper sealing techniques are just the start. How you store your cave tablet plays a significant role in its longevity.
To keep it in top shape, focus on temperature control. Ideally, aim for a cool, stable environment. Fluctuations can cause damage.
Pay attention to humidity levels too. A dry atmosphere helps prevent warping or cracking. Avoid direct light exposure, as UV rays can fade your design and weaken materials over time.
For best results, use sturdy storage containers that provide protection from dust and moisture. Consider materials that are acid-free to prevent any chemical reactions.
Displaying Your Finished Cave Tablet Creatively
While you might have poured your creativity into crafting a stunning cave tablet, displaying it in a way that captures attention is just as important.
A well-thought-out artistic presentation can uplift your tablet from mere decor to a focal point in your space.
Consider these creative display ideas:
Shadow Boxes: Create a layered effect by placing your tablet inside a shadow box. This adds depth and intrigue.
Wall Mounts: Use decorative wall mounts for a sleek, modern look that draws the eye.
Tabletop Stands: Place your tablet on a stand for easy viewing at different angles.
Natural Elements: Surround your tablet with stones or plants to enhance its organic feel.
Lighting: Illuminate your tablet with soft LED lights to highlight its details.
What to Expect From Your Cave Tablet Crafting Experience
As you dive into crafting your cave tablet, the first step is to gather some essential materials. Trust me, having the right supplies on hand can make all the difference! You’ll want to think about what you envision creating.
Next up, let’s explore some different techniques that can really enhance your artistic expression. There’s a whole world of methods out there, and experimenting can lead to some pretty amazing results. So, get ready to let your creativity flow and create something truly unique!
Materials You’ll Need
Creating your own cave tablet is an exciting adventure that comes to life with the right materials. To guarantee your crafting experience is smooth, gather the essential cave tablet materials and crafting supplies before you begin.
Here’s what you’ll need:
- Smooth, flat stones or wooden boards
- Sharp tools for carving, like chisels or knives
- Natural pigments, like charcoal or clay
- Brushes or sticks for applying pigments
- Protective gear, such as gloves and goggles
With these items, you’re set to express your creativity. Don’t forget to prepare a workspace that’s both comfortable and inspiring.
With the right materials at hand, you’ll be ready to plunge into the fascinating world of cave tablet crafting!
Techniques To Explore
Once you’ve gathered your materials, it’s time to investigate various techniques that will breathe life into your cave tablet.
Start by exploring symbolism, as every mark you make can tell a story. Think about the ancient techniques used by our ancestors, like carving with stones or using natural pigments.
You might also experiment with layering different media, perhaps combining charcoal with ochre for depth.
As you work, feel the connection to history. Each stroke can resonate with those who once created in caves.
Don’t be afraid to let your imagination run wild, but also honor traditional methods.
This blend of old and new will give your tablet a unique voice that echoes through time, making your crafting experience truly special.
Frequently Asked Questions
Can I Use Modern Materials for My Cave Tablet?
Yes, you can definitely use modern materials for your cave tablet!
By combining contemporary supplies like clay, plaster, or even wood with traditional crafting techniques, you create a unique piece.
Experiment with different textures and finishes to mimic ancient styles.
Don’t be afraid to incorporate tools like carving knives or stamps to add detail.
Just remember, the essence of your tablet should reflect your creativity while paying homage to historical methods.
Enjoy the process!
How Long Does It Take to Complete a Cave Tablet?
The cave tablet duration can vary based on your crafting techniques and materials. If you’re using simple tools and natural elements, it might take a few hours to a couple of days.
However, if you’re aiming for intricate designs or using modern methods, expect it to take longer. It’s all about the effort you put in and how detailed you want your tablet to be.
Enjoy the process and let your creativity flow!
Are There Age Restrictions for Cave Tablet Crafting?
There aren’t strict age restrictions for crafting cave tablets, but understanding the ancient techniques is essential.
Many believe that anyone can create one, regardless of age, as long as they grasp the historical context and methods.
Engaging in this craft can be a rewarding experience for both kids and adults. It fosters creativity and appreciation for cave tablet history.
What Are Some Common Mistakes to Avoid?
When crafting your cave tablet, avoid common mistakes like poor material choices or significant design flaws.
Make sure you select durable materials that can withstand time and elements.
Don’t rush the design process; sketch your ideas first to guarantee functionality.
Also, consider the size and weight to ensure it’s manageable.
Finally, test your tablet before finalizing it to catch any issues early. This way, you’ll ensure your creation stands the test of time.
Can I Create a Cave Tablet Indoors?
Absolutely, you can create a cave tablet indoors! Imagine the thrill as you gather your materials—clay or wood—and prepare to release your creativity.
Using various cave tablet techniques, you’ll carve or etch designs that tell your story. Just make sure you have adequate space and lighting to avoid mishaps.
As you work, feel the excitement build. You’re crafting your own piece of history, right in the comfort of your home!
Conclusion
Crafting your own cave tablet isn’t just a fun project; it connects you to an ancient tradition that dates back over 40,000 years.
Did you know that cave art has been uncovered on every continent except Antarctica?
As you shape and engrave your tablet, you’re tapping into a timeless form of expression.
So gather your materials, let your creativity flow, and enjoy this unique journey into the past.
Who knows what stories your tablet will tell as you explore the art of crafting your own cave tablet!