How to Do Quilt Binding: A Step-by-Step Guide
If you’ve ever felt overwhelmed by the final step of finishing a quilt, you’re not alone. Many quilters struggle with quilt binding, finding it tricky to get those edges neat and polished.
Whether you’re a beginner or have a few projects under your belt, getting the perfect finish can be a challenge—but with the right tips and tools, it doesn’t have to be.
To create beautiful quilt binding, start by trimming your quilt edges for a neat finish. Choose a medium-weight fabric that complements your quilt’s style.
Cut your binding strips to about 2.5 inches wide, then fold and press them in half. Attach the strips to the quilt front with a quarter-inch seam allowance, mitering corners for a polished look.
You can hand sew or machine sew the binding for durability.
Keep exploring to uncover more creative ideas and solutions for common issues!
Key Takeaways
– Trim quilt edges evenly and prepare binding strips for a neat finish
around the quilt perimeter.
– Choose binding fabric that complements the quilt. Make sure it’s
durable, but not too bulky, for the best results.
– Cut your binding strips at a width of 2.5 inches. This helps ensure
a consistent, professional-looking finish.
– For a polished look, use mitered corners. Fold and pin the fabric
accurately at 45-degree angles.
– You can attach your binding by hand or with a machine. Pick the
method that fits your time and precision preferences.
Understanding Quilt Binding: What It Is and Why It Matters
Quilt binding is the finishing touch that transforms your quilt from a simple project into a polished work of art.
It not only secures the edges but also adds a personal flair, making your quilt truly unique.
Understanding the various binding techniques is vital.
Whether you opt for double-fold, bias, or self-binding, each offers distinct aesthetics and durability.
Your fabric choices also play an important role.
Selecting a fabric that complements your quilt’s colors can improve its overall appearance.
Consider using a fabric that contrasts with the quilt top for a striking look, or one that blends in for a seamless finish.
Ultimately, quilt binding matters because it protects your hard work and beautifies your quilt’s charm.
Preparing Your Quilt for Binding: Essential Steps
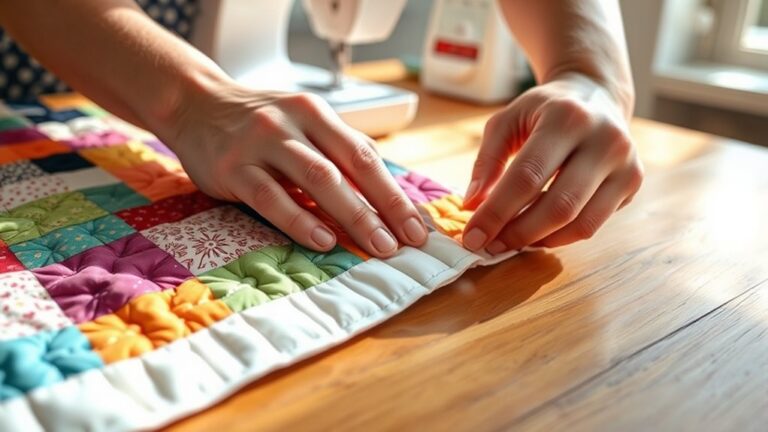
Before you bind your quilt, you’ll want to start by trimming the edges evenly—this really helps ensure your finished quilt looks neat and polished. Once that’s done, go ahead and get your binding strips ready so they’ll fit just right around the entire perimeter of your quilt. Taking care with these steps makes the rest of the binding process so much smoother and sets you up for a beautiful result!
Trim Quilt Edges Evenly
Start by ensuring your quilt edges are trimmed evenly for a polished finish.
Use sharp cutting tools like rotary cutters or fabric scissors for the best results.
Lay your quilt on a flat surface and check for any uneven areas.
Employ effective trimming techniques, such as measuring from a straight edge or using a ruler to guide your cuts.
Make small adjustments as needed, trimming away any excess fabric or stray threads.
This will help maintain a uniform shape and prepare your quilt for binding.
Remember, an even edge will make your binding process smoother and your finished quilt look more professional.
Taking the time to trim properly now will pay off in the end!
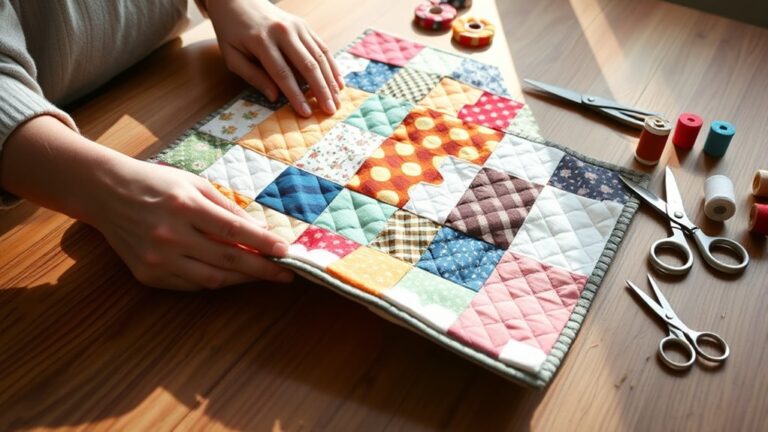
Prepare Binding Strips
Gather your fabric and cut it into binding strips to create a clean, finished edge for your quilt. Choose from various binding fabric options like cotton, linen, or blends, ensuring they complement your quilt’s design.
For binding width variations, consider whether you want a narrow 2.5-inch strip for a delicate look or a wider 3-inch strip for added durability.
Use a rotary cutter and ruler for precise cuts, and press the strips in half lengthwise for a crisp edge. If you’re piecing strips together, stitch them at a 45-degree angle to minimize bulk.
Once you’ve prepared your binding strips, you’ll be ready to attach them and finish your quilt beautifully.
Choosing the Right Fabric for Quilt Binding
When you choose fabric for quilt binding, considering the overall design and color scheme of your quilt can make a significant difference in its finished look.
You’ll want to make sure the fabric complements your quilt without overshadowing it.
Here’s a quick guide to help you select the right fabric:
| Aspect | Considerations |
|---|---|
| Fabric Color | Choose colors that harmonize or contrast effectively. |
| Fabric Texture | Consider smooth fabrics for easy handling. |
| Fabric Weight | Use medium-weight fabric for durability without bulk. |
Think about fabric patterns, too. Busy designs can distract, while solids can provide a clean finish.
Finally, pick a fabric type like cotton for ease of use and lasting quality. With these tips, you’ll improve your quilt beautifully!
Cutting Your Binding Strips for the Perfect Size
Cutting your binding strips to the right size is essential for achieving a polished finish on your quilt. Start by determining how wide you want your strips. Typically, 2.5 inches works well for most projects.
Next, consider your binding fabric selection. Choose a fabric that complements your quilt while being durable enough for frequent use.
When using cutting techniques, lay your fabric flat on a cutting mat and align the straight edge with the grid lines. Use a rotary cutter for clean, precise cuts.
Measure and mark the desired width, then cut your strips, ensuring you have enough length to cover all edges of your quilt. Don’t forget to include extra for mitered corners if you plan to use them.
Sewing Binding to Your Quilt: Tips for Success
As you begin sewing the binding to your quilt, keep in mind that precise alignment is key to achieving a clean finish. First, choose your fabric wisely; select a material that complements your quilt while being durable enough to withstand wear.
Precise alignment and thoughtful fabric selection are essential for achieving a clean finish when binding your quilt.
Cotton is a popular choice for its versatility and ease of use. When applying binding, consider various binding techniques.
For a straightforward approach, fold your binding in half and press it, making it easier to attach. Start sewing on the quilt’s front side, ensuring the raw edges align perfectly.
Use a quarter-inch seam allowance for consistency. As you sew, keep an eye on any puckering or shifting; adjusting your fabric as needed will help maintain that tidy look.
Finally, don’t rush the process. Taking your time will lead to a more polished result, making all your efforts worthwhile.
Happy quilting!
How to Sew Binding and Miter Corners
Now that your binding is ready, let’s attach it to your quilt and master those crisp mitered corners together. First things first, you’ll want to have your binding strips prepared and close at hand.
Next, we’ll walk through the steps to get your binding sewn on smoothly. Don’t worry—taking it one section at a time makes the process much less intimidating. As you turn each corner, I’ll share how to achieve those tidy mitered folds that really give your quilt a professional look.
Ready to get started? Let’s make your quilt edges look amazing!
Preparing Your Binding Strips
Preparing your binding strips is an essential step in achieving a polished quilt finish. Start by choosing binding fabric types that complement your quilt; cotton is a popular choice due to its durability and ease of use.
Next, cut your strips at 2.5 inches wide, making sure they’re long enough to go around your quilt. You can use a binding tool option like a bias tape maker to help create even folds.
Press your strips in half lengthwise, wrong sides together. This helps them lay flat and makes the next steps easier.
If you’re mitering corners, remember to mark where the folds will meet. This will set you up for smooth, professional-looking edges once you attach your binding.
Attaching Binding to Quilt
Once you’ve prepped your binding strips, it’s time to attach them to your quilt. Begin by choosing your preferred binding technique, whether you’re hand-sewing or machine-sewing. Each method has its advantages.
Lay the binding strip right side up along the edge of your quilt, leaving a few inches of overhang at the start. Use a ¼-inch seam allowance, sewing the binding to the quilt edge.
As you sew, be mindful of your fabric choices. Contrasting colors can add a pop of interest, while matching fabrics create a seamless look.
Keep an eye on your stitching, ensuring it’s even and secure. With these steps, you’ll set the stage for beautifully finished edges.
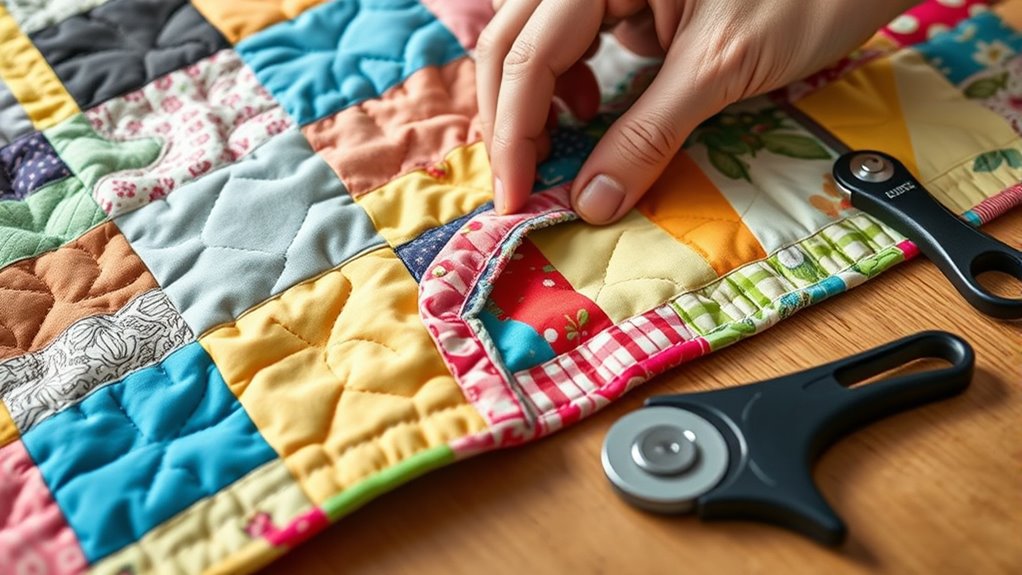
Mitering Corners Effectively
Mitering corners can improve your quilt’s finish, giving it a polished and professional look. To start, lay your quilt flat and fold the binding at a 45-degree angle at the corner.
Pin it in place, making sure the edge lines up with the quilt. Use mitering techniques by sewing down the binding, stopping a quarter-inch from the corner.
Next, lift the binding away from the quilt and create a fold, then bring it down to align with the next side. Pin this section, and sew it down to secure your corner finishes.
Repeat this process for all corners, taking your time for precision. With practice, you’ll achieve beautiful mitered corners that improve your quilt’s overall appearance.
Attaching Binding to the Quilt Back: Hand and Machine Methods
When you’re ready to attach the binding to the quilt back, you can choose between hand and machine methods, each offering its own advantages.
Hand sewing allows for a precise finish, giving you control over the final look. It’s perfect for those finishing touches that enhance your quilt.
You’ll enjoy the meditative aspect of hand stitching, making it a satisfying process.
On the other hand, machine binding techniques can save you time, especially if you’re working on multiple quilts. You can quickly secure the binding, ensuring it’s strong and durable.
To start, align the binding with the quilt back, then use a quarter-inch seam allowance for machine sewing.
Regardless of the method you choose, make sure to press the binding for a neat finish.
Both approaches yield beautiful results, so pick the one that suits your style and needs best.
Hand vs. Machine Sewing of Binding: Which Is Best?
Which method is best for attaching binding: hand or machine sewing? Both techniques have their merits, depending on your preferences and the project at hand.
Hand sewing offers a traditional, polished finish. On the other hand, machine sewing is quicker and can be just as durable.
Let’s break down some key factors to evaluate:
| Factor | Hand Sewing | Machine Sewing |
|---|---|---|
| Time | Takes longer | Faster completion |
| Stitch Options | Invisible stitch for a clean look | Straight or zigzag for durability |
| Skill Level | Requires practice | Easier for beginners |
| Flexibility | Ideal for curved edges | Best for straight edges |
Ultimately, your choice of binding techniques should align with your project needs and personal style.
Think about trying both methods to see which you prefer!
Creative Binding Ideas: Adding Decorative Touches
While binding may seem straightforward, adding decorative touches can elevate your quilt to a whole new level. One easy way to achieve this is by using bias tape in vibrant colors or unique patterns.
Instead of opting for a plain finish, choose a bias tape that complements your quilt’s theme. This will help you create a striking border without much extra effort.
You can also experiment with decorative stitches. Try using your sewing machine’s decorative stitch options to add flair along the binding’s edge.
This not only secures the binding but also adds a personal touch that reflects your style.
Consider layering different fabrics for a textured binding. Mixing prints or solids can create visual interest and contrast, making your quilt stand out.
Finally, think about embellishing your binding with small appliqués or embroidery. These little details add even more charm and personality.
Common Binding Problems and How to Fix Them
Even the most experienced quilters encounter binding problems occasionally, but don’t worry. Most issues have simple solutions.
Here are a few common problems and how to tackle them:
- Uneven Binding: This often happens due to inconsistent binding width options. Verify you measure accurately and trim any excess fabric to achieve a uniform look.
- Fabric Fraying Issues: If your quilt edges are fraying, consider zigzag stitching or using a fray check solution along the cut edges before binding. This will help keep your quilt looking sharp.
- Lumpy Corners: If your corners look bulky, trim the excess fabric before folding them over. You can also practice mitered corners to guarantee a smoother finish.
Frequently Asked Questions
How Long Should My Binding Strips Be for a Queen-Sized Quilt?
For a queen-sized quilt, your binding strips should be about 2.5 inches wide and around 300 inches long.
To get accurate binding strip calculations, measure the perimeter of the quilt and add extra for seams and mitered corners.
Remember, quilt size considerations can vary, so it’s always good to check your specific dimensions.
Once you have those calculations, you’ll be ready to create a beautiful finish for your quilt!
Can I Use Pre-Made Binding Instead of Making My Own?
Yes, you can definitely use pre-made binding instead of making your own. Pre-made options save time and come in various colors and patterns, allowing you to easily match your quilt’s design.
Just make sure you choose the right binding materials that are durable and suitable for your quilt. Using pre-made binding can simplify the finishing process, letting you enjoy your quilt sooner without the hassle of cutting and sewing strips.
What Type of Thread Is Best for Quilt Binding?
For quilt binding, you’ll want to use a strong, durable thread. Cotton thread is a popular choice because it blends well and offers good strength.
Look for thread types like 40 or 50 weight; they provide a nice balance between thickness and flexibility. You can also investigate polyester blends for added durability.
Just make sure your thread complements your fabric and doesn’t create unnecessary bulk in your binding seams. Happy quilting!
How Do I Store Leftover Binding Strips for Future Projects?
Think of your binding strips as treasures waiting for their moment. For effective binding strip storage, roll each strip neatly and secure them with a rubber band or clip.
You can also use clear plastic bins to keep them organized. Label each bin for easy access.
This method not only saves space, but also makes it simple to find what you need for future projects. Keep your fabric organized, and your creativity will flow!
Can I Use Bias Tape for Quilt Binding Instead?
Yes, you can use bias tape for quilt binding! Bias tape has advantages like flexibility and ease of application, making it perfect for curved edges.
While traditional quilt binding techniques involve wider strips, bias tape can give your quilt a unique finish. Just make sure it’s a fabric that complements your quilt.
Conclusion
In the world of quilting, binding is your final touch, just like the icing on a cake. By mastering these techniques, you not only protect your hard work but also give your quilt a polished, professional finish.
Whether you’re hand-stitching like a pioneer or zipping through it with a sewing machine, you’ll find joy in every stitch. So grab your fabric, channel your inner quilter, and let your creativity shine.
Your quilt is waiting for that perfect quilt binding to complete the look!