How to Make a T-Shirt Quilt Step by Step
Have you ever opened your closet and found a pile of old t-shirts you just can’t bear to part with? You’re not alone—many people struggle with letting go of shirts that hold special memories, but don’t know what to do with them.
The good news is, transforming those shirts into a cozy t-shirt quilt is a fun and meaningful way to repurpose your favorites. If you’ve been looking for a creative solution, you’re in the right place!
To make a t-shirt quilt, start by selecting your favorite shirts that hold memories. Wash and iron them, then cut the fabric into squares, ideally 12×12 inches.
Plan a layout that balances colors and patterns. Stitch the squares together to form the quilt top.
Choose between hand or machine quilting for the next step. Finally, bind the edges for a polished finish.
You’ll learn more tips to improve your quilting experience as you go!
Key Takeaways
- Gather meaningful t-shirts, ensuring they are large enough. Wash, dry, and iron them for easy cutting.
- Cut t-shirts into consistent squares (recommended size: 12×12 inches). Use fabric scissors to help maintain the integrity of each design.
- Plan a cohesive quilt layout by balancing colors, patterns, and textures. This will go a long way toward enhancing the visual appeal.
- Choose a suitable backing fabric that complements your t-shirts. Use basting techniques to secure all layers before you start quilting.
- Decide between hand and machine quilting. Then finish with binding, and care for your quilt by washing gently and storing it properly.
Select Your Favorite T-Shirts for Your Quilt
Selecting your favorite t-shirts is the heart of creating a memorable quilt.
Start by gathering shirts that evoke strong t-shirt memories, like those from concerts, vacations, or special events.
Each shirt tells a story, so choose ones that represent significant moments in your life.
Next, think about your fabric choices. Consider the colors, patterns, and textures that will complement each other in your quilt design.
You might want a mix of vibrant and muted tones to create visual interest.
Don’t forget the size and condition of your t-shirts; they should be large enough to provide ample fabric for cutting.
Lay them out to see how they fit together, making sure to balance the designs and colors.
This thoughtful selection process will guarantee that your quilt not only looks great but also holds cherished memories that you’ll enjoy for years to come.
Prepare Your T-Shirts for Cutting
Once you’ve chosen the t-shirts that hold special memories, it’s time to prepare them for cutting. Start by washing and drying each shirt to remove any dirt or residue.
This step guarantees your quilt will be clean and fresh. Iron the t-shirts to eliminate wrinkles, making it easier to work with the fabric.
Next, check for any logos or designs that may stretch when cut. If needed, consider stabilizing the fabric with interfacing, especially for more delicate shirts.
This helps maintain the integrity of the designs during the cutting process. Finally, decide on the cutting techniques you want to use.
You may prefer squares, rectangles, or even creative shapes that showcase your favorite graphics. Whatever you choose, make sure to plan your cuts carefully to maximize the use of each shirt.
Preparing now will set you up for success in the next steps of your quilt project!
How Do I Cut My T-Shirts Into Quilt Squares?
Cutting your t-shirts into quilt squares is an exciting step that brings your project to life. Start by laying your t-shirts flat on a cutting mat, ensuring there are no wrinkles.
Use fabric scissors for clean, precise cuts, as they’ll make a noticeable difference in your squares. Decide on the size of your squares, since 12×12 inches usually works well.
Measure and mark your squares on the fabric with a fabric pen or chalk, then cut along the lines. Be mindful of designs, logos, or graphics; you want to capture what’s important.
If you’re using multiple shirts, try to keep a consistent size for a cohesive look.
Once you’ve cut all your squares, you’re ready for the next stage of your quilt-making journey. Enjoy the process, and remember, each square tells a story!
Plan Your Quilt Layout and Design
Planning your quilt layout and design is an essential step
that can truly elevate the final look of your creation.
Start by choosing a cohesive color palette
that complements your t-shirt designs.
Think about how the hues will interact
and create visual interest.
Next, consider fabric contrast
to make certain squares stand out.
You can mix light and dark fabrics
or different textures to improve the overall appeal.
Here’s a simple table to help you visualize your layout:
| Color Palette | Fabric Contrast |
|---|---|
| Bright and Bold | Light vs. Dark |
| Pastels | Textured vs. Smooth |
| Earthy Tones | Patterns vs. Solids |
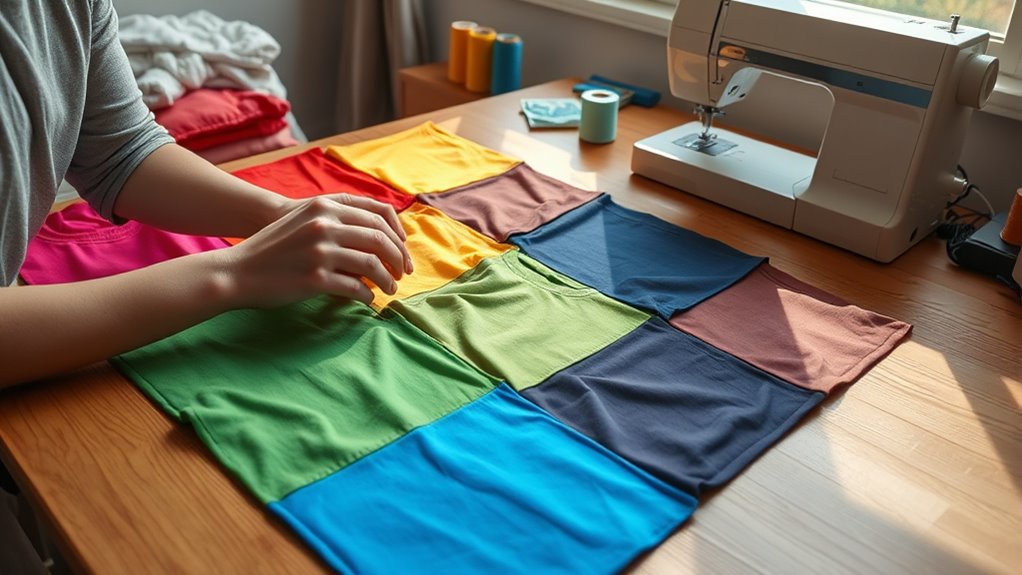
Assemble the Quilt Top by Stitching Squares Together
Now that you’ve planned out your quilt layout, it’s time to start putting it all together. This part is all about assembling the quilt top by stitching your t-shirt squares to each other. Don’t worry if you’re new to this—there are a few stitching techniques you can use, and I’ll walk you through them so your quilt ends up both sturdy and good-looking.
First, let’s talk about how to actually join the squares. You’ll want to place two pieces with their right sides facing each other, line up the edges, and sew along the seam—usually with about a quarter-inch allowance. It helps to pin the squares together before you start sewing, just to keep everything nice and straight.
As you keep adding more rows, remember to check your layout every so often to make sure everything is still in the right order. If you like, you can press the seams flat as you go; this makes the quilt top look neater and helps the pieces fit together better.
Once you’ve stitched all your squares into rows, the next step is to sew those rows together. It’s the same process—just line up the seams, pin, and sew straight across. Take your time and enjoy seeing your quilt come together, one row at a time.
Choosing T-Shirt Squares
How do you choose the right t-shirt squares to create a stunning quilt top? Start by selecting shirts that resonate with you. Think memories and emotions.
Next, consider color coordination tips. Lay out your squares to see how they complement each other.
Aim for a balanced mix of colors and patterns. Make sure no single hue overwhelms the design.
Furthermore, check for fabric compatibility. Using shirts made from similar materials will help your quilt maintain a cohesive look and feel.
Avoid mixing heavy and lightweight fabrics, as this can affect how the quilt drapes. By thoughtfully choosing your t-shirt squares, you’ll set the stage for a beautiful and meaningful quilt top.
Stitching Techniques Explained
With your carefully chosen t-shirt squares ready, it’s time to assemble your quilt top. Start by laying out your squares in a pattern that appeals to you.
Once you’re satisfied, begin stitching them together using a straight or zigzag stitch for durability. If you want to add some flair, consider incorporating applique techniques to showcase certain designs or logos.
This can create eye-catching quilt embellishments that tell a story. Be sure to press your seams flat as you go for a clean finish.
As you stitch each square, keep an eye on alignment to guarantee everything fits together seamlessly. Continue until all squares are joined, and you’ll have a beautiful quilt top ready for the next steps!
Add Backing and Batting to Your Quilt
Now that your quilt top is all put together, it’s time to add the backing and batting. These layers are what give your quilt its cozy warmth and help it hold its shape. You’ll want to pick out a batting material that suits your needs—there are lots of options, so think about how warm and fluffy you want your finished quilt to be.
Next up is the backing fabric. This is the layer that will show on the underside, so it’s a great chance to choose something that complements the colors and patterns on your quilt top. Have fun with it and try out different possibilities until you find one you love.
Once you’ve got your batting and backing ready, you’ll need to keep all three layers together while you sew. That’s where basting comes in. There are a few ways to do this, from using safety pins to temporary adhesive sprays, and each method has its own pros and cons. Experiment a little to see which technique feels most comfortable for you.
Choose Appropriate Batting Material
Choosing the right batting material is essential for achieving the desired warmth and texture in your t-shirt quilt.
There are several batting types available, each offering different benefits.
For example, cotton provides breathability and a soft finish. Polyester adds durability and loft.
If you prefer a warmer quilt, consider a thicker batting. Quilt thickness can greatly affect the overall feel.
When selecting, think about how you’ll use the quilt. Maybe it’s for cozy nights, or perhaps it’s just for decoration.
Your choice will influence not just comfort but also how well your quilt holds up over time.
Take the time to pick the best batting material, and you’ll guarantee your t-shirt quilt is both functional and beautiful.
Select Backing Fabric Options
Selecting the right backing fabric is crucial for enhancing the overall look and feel of your t-shirt quilt.
Consider fabric weight. Heavier fabrics like canvas offer durability, while lighter cottons can provide a softer touch.
Think about color coordination too. Choose shades that complement your t-shirts to create a cohesive design.
Texture selection plays an important role. A smooth backing can contrast nicely with the t-shirt patches, adding depth.
Don’t forget seasonal themes. Florals for spring or cozy flannels for winter can raise your quilt’s appeal.
Finally, make sure your backing fabric is durable enough to withstand repeated use and washing. This will keep your quilt looking great for years to come.
Basting Techniques Explained
Once you’ve chosen your backing and batting, it’s time to focus on basting, which secures all layers together before quilting.
You can use several basting methods, like spray basting, pin basting, or thread basting. Spray basting is quick and easy; just lay your backing down, apply the spray, and smooth the batting on top.
Pin basting involves using safety pins to hold the layers together, ensuring they stay aligned. Thread basting is another option, where you stitch long, loose stitches to temporarily hold everything in place.
Whichever method you choose, basting tools like quilting clips or a long ruler can help keep your layers flat and taut.
With everything secured, you’re ready to quilt!
Should You Hand Quilt or Machine Quilt?
When deciding whether to hand quilt or machine quilt your T-shirt quilt, consider the time you have and the look you want to achieve.
Hand quilting allows you to savor each stitch, creating a personal touch that many find rewarding. The hand quilting benefits include the ability to control the stitch size and depth, which can improve the overall aesthetic.
However, it can be time-consuming, especially for larger projects.
On the other hand, machine quilting offers impressive efficiency. You can finish your quilt much faster, which is a big plus if you’re keen to wrap up your project.
Machine quilting also provides a consistent stitch quality, making it easier to manage complex patterns.
Ultimately, your choice depends on your available time and the desired effect. Whether you choose the intimacy of hand quilting or the speed of machine quilting, both methods can create a beautiful T-shirt quilt.
Finish Your Quilt With Binding
After you’ve chosen your quilting method, it’s time to finish your quilt with binding.
This step not only completes your quilt but also gives it a polished look.
You can use various binding techniques to achieve the desired effect.
Here are some options to take into account:
- Bias binding: Creates a flexible edge that curves easily around corners.
- Straight grain binding: Offers a simple, straight finish, perfect for a less intricate look.
- Double-fold binding: Provides extra durability and a neat appearance.
To begin quilt finishing, cut your binding strips, then attach them to the quilt’s edges.
Begin the finishing process by cutting binding strips and attaching them to your quilt’s edges for a polished look.
Pin them in place, ensuring everything aligns nicely.
Once sewn, fold the binding over to the back and hand-stitch or machine-stitch it down.
This final touch not only secures your quilt but also improves its overall aesthetic.
Enjoy the rewarding feeling of completing your t-shirt quilt!
How to Properly Care for Your T-Shirt Quilt
To keep your t-shirt quilt looking its best, it’s essential to follow some simple care guidelines.
Start with the washing instructions: always wash your quilt in cold water to prevent fading and shrinkage. Use a gentle cycle to protect the fabric, and avoid bleach, as it can damage the prints.
When drying, opt for air drying or a low heat setting. High temperatures can warp the quilt’s shape and harm the t-shirt designs.
For quilt maintenance tips, store your quilt in a cool, dry place, away from direct sunlight to prevent discoloration.
If you notice any stains, treat them promptly with a mild detergent.
Regularly check for any loose threads or seams, and repair them to maintain your quilt’s integrity.
Creative Ways to Use Your T-Shirt Quilt
Your t-shirt quilt isn’t just a cozy keepsake; it can be a versatile piece that adds warmth and personality to your space.
Here are some creative ways to use it:
- Wall Art: Hang your quilt as a stunning focal point, showcasing t-shirt memories that spark conversations.
- Picnic Blanket: Take it outdoors for a comfy picnic, turning your sentimental projects into practical items for everyday enjoyment.
- Unique Gifts: Gift a smaller version to friends or family, sharing your cherished moments and making them feel special.
With these ideas, your t-shirt quilt transforms into more than just a memory holder. It becomes part of your lifestyle.
Whether it’s for creative displays or practical use, you can celebrate those t-shirt memories in innovative ways.
Appreciate the versatility of your quilt and let it tell your story!
Frequently Asked Questions
What Is the Best Fabric for the Quilt Backing?
The best quilt backing options are cotton and flannel. Cotton’s breathable and easy to care for, while flannel adds warmth and a cozy feel.
When choosing your fabric, consider how it’ll hold up after washing. Look for pre-shrunk materials to prevent future surprises.
You’ll want something durable, so it stands the test of time. Ultimately, pick a fabric that complements your t-shirt quilt and fits your personal style!
How Do I Choose the Right Batting Thickness?
Choosing the right batting thickness is like selecting the perfect pillow for a restful night’s sleep.
You’ll want to evaluate batting types like cotton, polyester, or blends, since they affect quilt density.
Thicker batting gives a lofty feel and warmth.
Thinner options create a flatter, more drapey quilt.
Think about how you’ll use your quilt. If it’s for snuggling, go thicker.
If you’re making a wall hanging, stick to thinner batting for a sleek look.
Can I Use Non-Cotton T-Shirts for My Quilt?
Yes, you can use non-cotton t-shirts for your quilt. Fabrics like polyester or blends offer durability and unique textures.
Just keep in mind that different fabric types can behave differently when sewn and washed. Mixing materials may affect the final look and feel, so consider how they’ll interact.
If you’re combining cotton with synthetic fabrics, it’s wise to pre-wash everything to avoid surprises later.
Enjoy your creative process!
How Long Does It Take to Complete a T-Shirt Quilt?
It typically takes about 10 to 20 hours to complete a t-shirt quilt, depending on your experience level and the complexity of the design.
You’ll first spend time on t-shirt selection, choosing which shirts to include. Once that’s done, quilt assembly might take a few more hours as you cut, sew, and assemble the pieces.
If you’re organized and focused, you can finish it in a weekend!
What Tools Do I Need for T-Shirt Quilting?
For t-shirt quilting, you’ll need a rotary cutter, cutting mat, and a ruler for precise cutting techniques.
Choose your fabric wisely; cotton blends work well as backing and sashing.
Don’t forget a sewing machine with a walking foot for smooth stitching.
You’ll also want pins or clips to hold everything together while you work.
Finally, a good iron makes a difference in achieving crisp seams and a polished final product.
Conclusion
Now that you’ve transformed your cherished T-shirts into a cozy quilt, it’s more than just a blanket. It’s a tapestry of memories, woven with love and nostalgia.
Each stitch tells a story, reminding you of moments that shaped your journey. These bits of fabric are snapshots of your life, lovingly stitched together.
So, snuggle up with your creation. It’s not just fabric, but a comforting hug of your past.
Ultimately, your t-shirt quilt isn’t finished until it’s filled with warmth. Let it wrap you in the memories it holds dear, and enjoy every moment you spend with your t-shirt quilt.