How Do You Bind a Quilt?
If you’ve ever finished a beautiful quilt top only to feel overwhelmed by the idea of binding it, you’re not alone. Many quilters—beginners and experienced alike—struggle with getting those final edges just right.
Binding a quilt can be the trickiest part of the process, but the good news is that the right techniques and tools can make all the difference.
Binding a quilt involves a few essential steps. First, choose a complementary fabric and trim your quilt edges neatly.
Cut binding strips, usually 2.5 inches wide, either on the grain for strength or on the bias for flexibility.
You can either hand-bind for a traditional look or machine-bind for efficiency.
Pay attention to details like mitering corners and pressing techniques for a polished finish.
There’s plenty more to investigate about techniques and troubleshooting to perfect your quilt binding!
Key Takeaways
- Select a binding fabric that complements your quilt. Think about durability and texture to get the best aesthetic result.
- Cut binding strips at 2.5 inches wide. Use a rotary cutter for clean edges and make sure you have enough length to cover the quilt perimeter.
- Choose between hand binding for a traditional finish or machine binding for a quicker, sturdy option. Go with what matches your preferences.
- Pay attention to binding width and pressing techniques. This helps you avoid gaps and achieve a polished finish on corners.
- Use quality materials like cotton or polyester for durability. If you run into issues, troubleshoot by reassessing your methods and techniques.
Understanding Quilt Binding: Importance and Basics
Quilt binding is the finishing touch that transforms a quilt from a collection of fabric pieces into a polished, complete work of art. It not only secures the raw edges but also frames your design, enhancing its overall aesthetic.
Understanding various binding techniques is vital for achieving a professional look. You might choose from options like straight grain, bias, or even binding with a flange, each offering a unique finish.
Mastering various binding techniques, such as straight grain or bias, is essential for achieving a polished, professional finish.
Your fabric choices also play a significant role in this process. Selecting a binding fabric that complements or contrasts your quilt can make a striking difference.
Consider using a solid color to highlight intricate patterns or a patterned fabric to add visual interest. By mastering these basics, you’ll boost your quilting skills and guarantee your finished piece is not just functional but a true expression of your creativity.
Preparing Your Quilt for Binding: Steps to Follow
Getting ready to bind your quilt? Let’s make sure it’s all set up for a beautiful finish. First, think about what kind of binding fabric you want to use—pick something that complements your quilt. Next, take a little time to trim those quilt edges so they’re nice and neat. Once that’s done, go ahead and prepare your binding strips, making sure they’re cut and joined just right. Doing these things now will help your finished quilt look clean and polished in the end.
Choose Binding Fabric Carefully
Choosing the right binding fabric is essential for your quilt’s overall aesthetic and durability.
You’ll want to evaluate various binding fabric types and consider how they coordinate with your quilt’s colors.
A well-chosen binding not only frames your quilt beautifully but also improves its longevity.
Here’s a quick guide to help you select:
| Binding Fabric Type | Pros | Color Coordination Tip |
|---|---|---|
| Cotton | Durable, easy to handle | Match with a dominant color |
| Satin | Luxurious look | Use a contrasting shade |
| Minky | Soft and cozy | Complement with a similar hue |
| Faux Leather | Unique texture | Balance with neutral tones |
Trim Quilt Edges Neatly
With the binding fabric selected, you’re ready to prepare your quilt for binding. Start by laying your quilt flat on a clean surface.
Carefully inspect the edges; any unevenness needs trimming. Use a rotary cutter and ruler to guarantee straight lines, taking off any excess fabric or batting that might disrupt your binding techniques.
Aim for a neat finish, as this will improve your quilt’s overall appearance. Don’t forget to check for any loose threads or frayed edges; cut those away too.
A well-trimmed quilt edge not only looks polished but also helps in achieving clean edge finishes when you attach the binding.
Once you’re satisfied with the edges, you can move on to preparing your binding strips efficiently.
Prepare Binding Strips Efficiently
To prepare binding strips efficiently, start by cutting your binding fabric into strips that are 2.5 inches wide.
This width is ideal for various binding techniques and helps ensure a sturdy finish.
Pay attention to fabric considerations, like the type of fabric and pattern.
These factors impact both appearance and durability.
| Fabric Type | Recommended Use |
|---|---|
| Cotton | General quilting |
| Bias-cut strips | Curved edges |
| Double-fold binding | Neat, professional finish |
| Pre-made binding | Quick and easy solution |
Choosing the Right Quilt Binding Fabric: Tips and Tricks
Selecting the right fabric for quilt binding can make a significant difference in your project’s overall look and durability. Start by exploring different binding fabric types, like cotton, which is both sturdy and easy to work with.
Choosing the right quilt binding fabric enhances both the aesthetic and durability of your project. Opt for sturdy cotton for ease of use.
You might also consider using a bias-cut binding for added flexibility around curves. This can make finishing your quilt much easier, especially if your edges aren’t perfectly straight.
When it comes to color matching, think about your quilt’s palette. A contrasting color can create an eye-catching frame, while a matching shade offers a seamless finish.
Don’t forget to test your chosen fabric against your quilt top. Sometimes, what looks good in the store may not translate well at home under different lighting.
Also, consider the weight of the fabric. Heavier fabrics can add bulk to your quilt’s edges, while lighter options can provide a sleek finish.
Ultimately, trust your instincts. Choose a fabric that resonates with your style and complements your quilt beautifully.
Comparing Hand and Machine Binding: Which Method Suits You?
Which method suits you better: hand binding or machine binding?
Hand stitching offers a traditional touch, allowing you to enjoy the process and add personal flair to your quilt aesthetics.
It’s perfect for those who appreciate the art of quilting and want to savor each moment. However, it can be time-consuming, especially if you’re aiming for intricate binding techniques.
On the other hand, machine binding is all about time efficiency. If you’re working with various fabric choices or need to finish a quilt quickly, machine quilting can speed things up without sacrificing quality.
The finishing touches can still look polished and professional, giving you a beautiful end result.
Ultimately, it comes down to personal preferences. Do you value the craftsmanship of hand stitching, or do you prioritize the speed of machine binding?
Your choice will shape the final look and feel of your quilt.
Cutting Binding Strips: Key Measurements
Now that you’ve decided on your binding method, it’s time to focus on cutting your binding strips. Start by determining the appropriate binding strip widths. Generally, 2.5 inches is a popular choice for quilt binding, but you can adjust based on your project’s needs.
Next, consider the fabric grain. Always cut your strips along the fabric’s grain to guarantee they’re strong and won’t stretch. If you’re using bias binding, cut your strips at a 45-degree angle to the grain for added flexibility around curves.
To measure accurately, use a rotary cutter and mat for clean edges. Remember to cut enough strips to cover the perimeter of your quilt, plus a little extra for good measure. About 10 to 20 inches extra should suffice.
With these key measurements in mind, you’re well on your way to preparing the perfect binding for your quilt!
Hand-Bind Your Quilt: Easy Steps to Follow
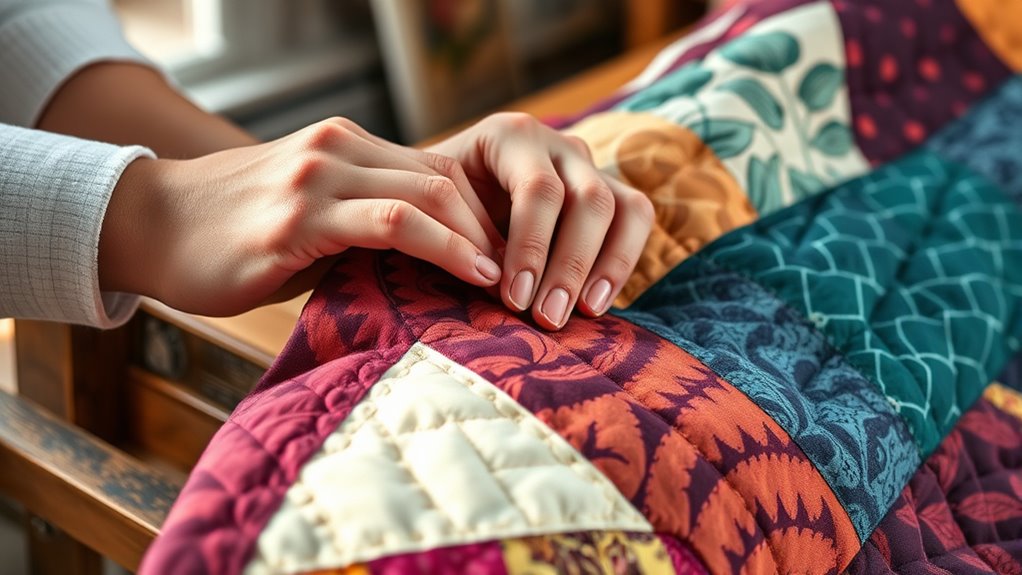
Grab your needle and thread, because it’s time to hand-bind your quilt!
This technique not only secures your quilt layers but also improves its aesthetics.
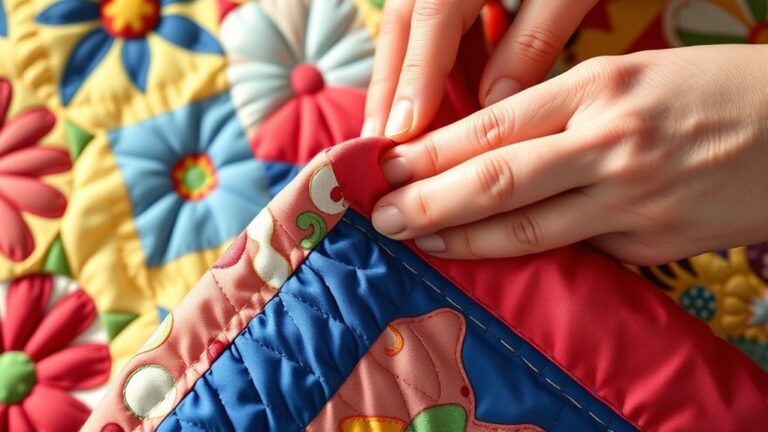
Start by folding your binding strip over the quilt edge and pinning it in place.
Begin by carefully folding your binding strip over the quilt edge and securing it with pins.
Choose a binding technique that suits your style.
A blind stitch is great for a nearly invisible finish, while a whip stitch adds a charming touch.
As you sew, make sure your stitches are even for a polished look.
Don’t rush—take your time to enjoy this meditative process.
When you reach the corners, fold the binding neatly to maintain a clean edge.
Once you’ve stitched all around, give your quilt a gentle press to set the binding.
This final step will boost your quilt’s overall appearance, making it a true masterpiece.
Now, step back and admire your handiwork!
You’ve successfully hand-bound your quilt with care.
Machine Binding Your Quilt: Pros and Cons
When you decide to machine bind your quilt, you’ll notice right away how much time you save—this method really speeds up the binding process. Plus, machine binding creates a sturdy edge, so your quilt can handle plenty of use and washing without coming apart.
On the flip side, you might feel a bit limited when it comes to design options. Machine binding doesn’t offer quite as much flexibility as hand binding, and that can influence the overall look and finish of your quilt.
Speedy Binding Process
Machine binding your quilt can greatly speed up the finishing process, letting you enjoy your creation much sooner. By using speedy techniques and quick tools, you can get a polished look without spending hours on hand-stitching.
Here are three tips to maximize your efficiency:
- Use a walking foot: This helps evenly feed multiple layers, preventing puckering.
- Pre-cut your binding: Measure and cut strips in advance to save time during assembly.
- Consider a binding tool: These handy gadgets help you fold and press your binding more efficiently.
Embracing machine binding not only saves time but also gives you more chances to experiment with fabric choices and design elements. So, jump in and enjoy the process!
Durable Finished Edge
While machine binding speeds up the finishing process, it also offers a durable edge that can withstand wear and tear. By using the right binding techniques and fabric choices, you can guarantee a resilient finished edge that complements your quilting styles.
| Aspect | Considerations | Tips |
|---|---|---|
| Binding Width | Choose between 2″ or 2.5″ | Wider for durability |
| Stitch Types | Straight or zigzag | Zigzag adds stretch |
| Fabric Durability | Cotton vs. polyester | Polyester lasts longer |
With proper color coordination and binding tools, you’ll improve not just the edge finishes but also the overall aesthetic appeal of your quilt. So, invest your time in selecting quality materials for a lasting result!
Limited Design Flexibility
Although machine binding offers speed and durability, it often comes with limited design flexibility.
When you choose this method, you might face certain design constraints that can hinder your creativity.
Here are a few points to reflect on:
1. Fabric Choices:
You may find yourself restricted to pre-made bias tape or fabrics that match your quilt, which can limit your color and pattern options.
2. Stitching Styles:
The machine’s stitch styles can sometimes impose creative limitations, since you might not achieve the same texture or look as you would with hand-binding techniques.
3. Edge Treatments:
Customizing edges becomes more challenging, and this might prevent you from exploring unique finishing techniques that could enhance your quilt’s overall look.
Finishing the Binding: Tips for a Neat Edge
To achieve a neat edge on your quilt binding, pay close attention to your final stitching. Start by selecting the right binding techniques that suit your quilt’s design and fabric.
A popular method is the invisible stitch, which keeps your binding secure without visible stitching on the front. When you’re ready for edge finishing, verify your binding is evenly pressed and tucked under.
This helps create a smooth, professional look. Use a walking foot for even feed while sewing, which prevents puckering and slipping.
As you sew, take your time around corners and miter them carefully for a polished finish. If you notice any excess fabric, trim it back before securing the binding.
Finally, check for any missed spots and make adjustments as needed. With these tips, your quilt will not only be functional but also beautifully finished, showcasing your hard work and creativity.
Personalizing Your Quilt Binding: Creative Ideas to Try
Personalizing your quilt binding can transform a simple project into a unique masterpiece.
Adding your personal touch not only improves the quilt’s appearance but also showcases your creativity.
Here are a few ideas to get you started:
1. Creative Embellishments: Consider adding decorative stitching or hand-sewn beads to your binding.
These small details can make a big impact.
2. Unique Fabric Combinations: Mix and match fabrics for your binding that contrast or complement the quilt top.
This can create visual interest and a cohesive look.
3. Themed Borders: If your quilt has a specific theme, choose binding fabrics that reflect it.
For example, use floral prints for a garden-themed quilt or geometric patterns for a modern design.
Experimenting with these techniques will not only make your quilt stand out,
but also give it a personal story that you and others can cherish.
Enjoy the creative process!
Troubleshooting Common Binding Issues: Solutions You Need?
As you investigate creative ways to personalize your quilt binding, it’s important to be aware of potential challenges that might arise during the process.
Binding mistakes can lead to fabric fraying or uneven edges, which can detract from your quilt’s overall appearance. To avoid these issues, pay close attention to your binding width; too narrow can cause stitching gaps, while too wide may overwhelm the design.
Utilize proper pressing techniques to guarantee your binding lays flat and smooth.
When it comes to color matching, choose hues that complement your quilt, enhancing its beauty.
Don’t overlook corner mitering. Mastering this technique can really heighten your quilt’s finish.
If you encounter any problems, take a moment to reassess your methods. With a little patience and practice, you can troubleshoot these common binding issues and achieve a polished, professional look for your quilt.
Frequently Asked Questions
What Tools Do I Need for Binding a Quilt?
To bind a quilt, you’ll need a rotary cutter, cutting mat, and a ruler for precise measurements.
Choose your fabric carefully; cotton works best for durability and ease.
Depending on your preferred binding techniques, you might also want bias tape or pre-made binding.
Don’t forget pins or clips to hold everything in place while you sew.
Having a good iron on hand can help you achieve crisp edges and a polished finish.
Can I Use Pre-Made Binding Strips?
Absolutely, you can use pre-made binding strips! Think of it like picking the perfect frame for a painting; the right fabric choices can enhance your quilt.
Just like a chef uses different binding techniques to create a dish, you can mix and match colors and patterns with those strips. They save time and add a professional touch, making your quilt look polished without the hassle of cutting your own fabric.
How Long Does Binding a Quilt Typically Take?
Binding a quilt typically takes about 1 to 3 hours, depending on your binding techniques and the quilt’s size.
If you’re using pre-made binding strips, it might go faster. For hand-sewn binding, factor in more time for precision.
If you’re new to it, you might want to budget extra time for practice. Regardless, with some experience, you’ll get quicker and find a rhythm that works for you.
What Is the Best Way to Care for Quilt Bindings?
To care for quilt bindings, you should use gentle washing techniques. Opt for cold water and mild detergent to preserve the fabric choices.
Avoid harsh chemicals or bleach, as they can damage your binding. After washing, air dry your quilt to maintain its shape and texture.
Regularly check for loose threads or fraying edges, and consider using different binding techniques, like double-fold or bias tape, for durability and a polished look.
Can I Bind a Quilt Without a Sewing Machine?
Yes, you can definitely bind a quilt without a sewing machine! While some might think it’s too time-consuming, hand stitching gives you control and precision for quilt finishing.
Simply cut your binding strips, fold them, and pin them in place. Then, use a needle and thread to stitch them down carefully.
You’ll find that the process can be quite meditative, and you’ll end up with a beautiful, personal touch on your quilt!
Conclusion
Binding your quilt is both an art and a necessity, ensuring your hard work lasts. Did you know that a well-bound quilt can add up to 30% more durability?
By choosing the right fabric and method, you can give your quilt a polished finish that reflects your style. Whether you opt for hand or machine binding, the satisfaction of completing your quilt is unmatched.
So, grab your supplies and give your quilt the perfect edge it deserves with a beautiful, sturdy binding.