5 Simple Steps to Perfectly End Quilt Binding
If you’ve ever felt frustrated trying to finish your quilt binding neatly, you’re not alone. Many quilters struggle with getting those final edges just right, often feeling like their hard work is let down by this tricky step.
The good news is, with the right tips and a little guidance, you can end quilt binding like a pro—no more bulky corners or uneven seams. We understand how important a polished finish is, and we’re here to help you achieve it.
To perfectly end quilt binding, start by choosing durable fabric and essential tools like a rotary cutter and walking foot. Attach your binding, folding at corners for sharp angles, and secure it tightly.
Master corner mitering for polished edges, ensuring your stitching is even.
Finally, overlap binding ends neatly for a seamless look.
By following these steps, you’ll achieve a professional finish, and if you want more tips, there’s plenty more to investigate!
Key Takeaways
- Overlap the binding ends by about 2 inches. This helps ensure a smooth transition without adding extra bulk.
- Trim excess fabric from the ends. Doing this will create a clean edge before you begin sewing.
- Fold the binding at a 45-degree angle at the corners. This simple step gives your quilt a neat, professional-looking finish.
- Pin the binding securely as you go. Keeping it taut while sewing around the quilt will help you get even, crisp edges.
- Press the binding gently after sewing. This final touch enhances the overall appearance and helps ensure your quilt’s durability.
What You Need to Know About Quilt Binding?
Quilt binding is the finishing touch that transforms your quilt from a simple project into a polished masterpiece. Understanding the binding basics is vital for achieving a professional look.
First, you’ll want to choose a binding method that suits your quilt’s style, whether it’s straight, bias, or double-fold. Each method has its advantages, so think about the overall aesthetic you’re aiming for.
Choosing the right binding method—straight, bias, or double-fold—can elevate your quilt’s aesthetic and finish.
Next, your fabric choices play an important role. Opt for a fabric that complements your quilt’s design while ensuring durability.
Cotton is a popular option due to its strength and ease of handling. Remember, the color and pattern of your binding can either improve or distract from your quilt’s overall appearance.
Select the Right Fabric and Tools for Binding
Choosing the right fabric and tools for binding can make a significant difference in your quilt’s final look.
Start by selecting binding fabric types that complement your quilt. Cotton is a popular choice due to its durability and ease of handling.
You might also consider bias tape for a different aesthetic, or even a contrasting fabric to add flair.
Next, gather your essential tools.
A rotary cutter guarantees clean edges, while a cutting mat protects your surfaces.
Don’t forget a ruler for accurate measurements!
A sewing machine with a walking foot can help you stitch smoothly, especially through multiple layers.
Finally, a good iron is crucial for pressing your binding, giving it a polished finish.
Step-by-Step Guide to Attaching Quilt Binding: Next, Master Your Corners
Mastering your corners is vital for a polished quilt binding. Start by folding the binding at a 45-degree angle at the corner.
This simple binding technique creates a neat triangle that lays flat.
Next, bring the binding down along the side, pinning it in place.
You’ll want to make sure the fabric is taut but not stretched, so it maintains a crisp look.
When you reach the next corner, repeat the folding method to form a sharp angle.
This corner solution not only improves the appearance of your quilt but also prevents puckering.
As you continue, keep an eye on your stitching; it should be even and secure.
Finish up by overlapping the ends of your binding neatly, guaranteeing a seamless look.
With these steps, you’ll confidently master your corners and boost your quilt’s overall presentation.
Happy quilting!
Techniques for Neatly Finishing Quilt Corners
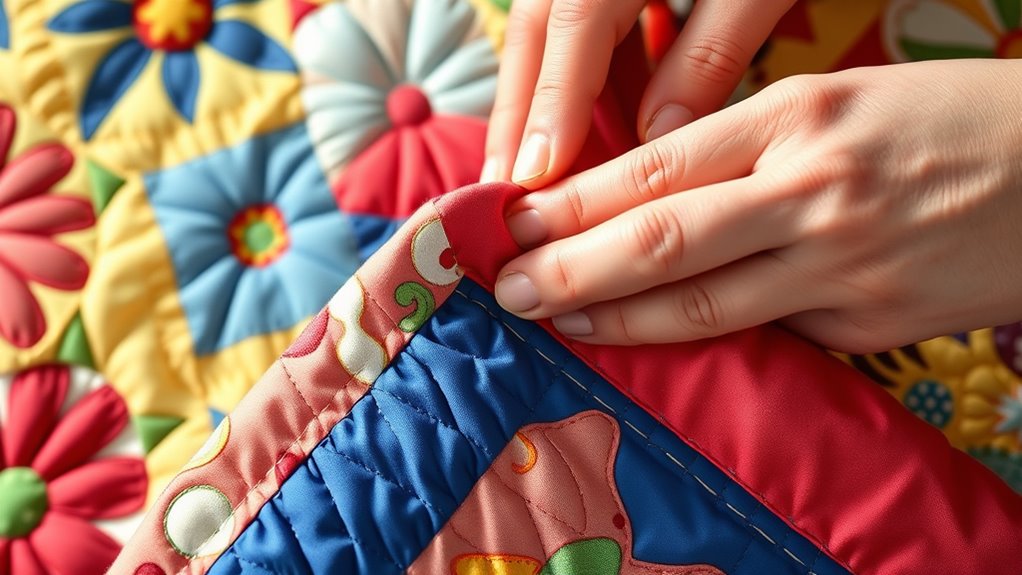
Finishing quilt corners neatly can improve the overall look of your project. To achieve that polished finish, you’ll want to master corner mitering techniques.
Start by folding the binding at a 45-degree angle at each corner. Then bring the next side of the quilt binding up to meet it. This creates a clean, crisp edge that looks professional.
Start with a 45-degree angle fold at each corner, then bring the next side up for a polished finish.
After you’ve mitered the corners, consider adding decorative binding finishes. You can use contrasting fabrics or trims to make your corners pop, adding a personal touch to your quilt.
Secure the binding with your preferred stitching method, ensuring it holds tightly without puckering.
Take your time with each corner, as they can make or break the overall aesthetic of your quilt.
By integrating these techniques, you’ll not only finish your quilt binding neatly but also boost its visual appeal.
Happy quilting!
Maintaining Your Quilt Binding: Tips for Longevity
While creating a beautiful quilt is rewarding, maintaining its binding is vital for ensuring longevity.
To start, always wash your quilt in cold water on a gentle cycle. This helps preserve the fabric and binding integrity.
When drying, opt for a low-heat setting or air dry to prevent shrinkage and damage.
For binding care, regularly inspect the edges. If you notice fraying or loose threads, mend them immediately to prevent further wear.
Try not to drag your quilt across rough surfaces, as this can cause the binding to wear out.
Storing your quilt properly also plays an important role.
Keep it in a cool, dry place, and avoid folding it in the same spot repeatedly to prevent creases.
Frequently Asked Questions
Can I Use Bias Tape Instead of Traditional Binding?
Yes, you can use bias tape instead of traditional binding. Bias tape has advantages like flexibility and ease of handling, making it great for curved edges.
However, it also has disadvantages; it might not provide the same durability or finish as traditional binding. If you’re looking for a quick and simple solution, bias tape works well.
Just keep in mind the trade-offs regarding appearance and longevity compared to classic quilt binding techniques.
How Do I Choose the Right Binding Width?
To choose the right binding width, consider your quilt’s style, the binding fabric types, and the overall finish you want.
If you’re working with thicker quilts, opt for wider binding, while narrower widths suit lighter fabrics.
Don’t forget about binding color options; they can improve your quilt’s design.
Ultimately, balance functionality with aesthetics, ensuring your choice complements your quilt’s dimensions and visual appeal.
You’ll achieve a polished look that showcases your hard work!
What Are Common Mistakes to Avoid in Quilt Binding?
To avoid common mistakes in quilt binding, focus on your binding techniques. Make certain you’re consistent with your seam allowances; uneven seams can lead to puckering.
When securing corners, guarantee you fold them neatly for a crisp finish. Don’t forget to press your binding thoroughly; it helps with alignment.
Finally, always check for any loose threads before you finish. These small details can make a big difference in your quilt’s overall appearance.
How Do I Fix Binding That’s Come Undone?
To fix binding that’s come undone, try these binding repair techniques. First, reattach the loose section by folding it over and stitching it down securely.
Use a slip stitch for a discreet look, maintaining quilt integrity. If the fabric is frayed, trim it neatly before sewing.
For added strength, consider using a fabric glue or adhesive to hold it in place while you stitch. Your quilt will look great again!
Is Hand-Stitching Binding Better Than Machine-Stitching?
Hand-stitching binding often offers more control and a polished finish, showcasing your craftsmanship.
It allows you to tuck in those edges neatly, enhancing the quilt’s overall appearance.
On the other hand, machine-stitching is all about efficiency; it saves you time, especially on larger projects.
Ultimately, it depends on your priorities. Whether you value the finesse of hand-stitching or the speed of machine-stitching, both methods have their unique benefits.
Conclusion
Now that you’ve mastered the art of quilt binding, remember: “Good things come to those who sew.” With the right fabric, tools, and techniques, your quilts will not only look beautiful but also last for years.
Keep practicing those corners, and don’t forget to care for your binding to guarantee it stays pristine. So grab your needle and thread, and let your creativity shine with every stitch you make!
Happy quilting, and enjoy perfecting quilt binding with every project you create!