How to Finish Quilt Binding With a Step-By-Step Guide
Let’s be honest—finishing quilt binding can feel like the most intimidating part of quilting. If you’ve ever stared at your unfinished project, worried about wavy edges or messy corners, you’re not alone.
Many people struggle with getting that final, professional touch, but the good news is that there are easy ways to master this step and end up with a quilt you’re proud to show off.
To finish quilt binding, start by choosing your binding fabric and cutting strips, usually 2.5 inches wide.
Trim your quilt edges evenly and mark a ¼ inch seam allowance for binding placement.
Attach the binding, either by hand or machine, and press it flat for a polished look.
Make sure everything aligns well to avoid mistakes.
If you encounter any issues, there are simple solutions to keep your binding process smooth.
You’ll find more tips and techniques as you go!
Key Takeaways
– Choose between hand-stitching for a subtle finish or machine-stitching for speed and durability.
Pick the method that best fits your project needs.
– Prepare binding strips by cutting fabric to 2.5 inches wide.
Press them so you get crisp, clean edges.
– Trim quilt edges evenly.
Mark a ¼ inch seam allowance to help with precise binding placement.
– Use binding clips to secure the fabric without damage.
This keeps everything aligned evenly while you attach the binding.
– Press the finished binding so it lays flat.
This final step really enhances your quilt’s appearance and helps it stay durable.
Understanding Quilt Binding Basics
Understanding quilt binding basics is essential for finishing your quilt with a polished look.
You’ll find that mastering various binding techniques can greatly improve your quilt aesthetics.
Start by choosing the right method for your quilt’s style, whether it’s single-fold, double-fold, or bias binding.
Each technique has its own charm and impact on the overall appearance.
Once you’ve selected your binding technique, cut your fabric strips to the appropriate width, generally 2.5 inches for most quilts.
Press the strips to create crisp edges, ensuring a neat finish.
When attaching the binding, use a consistent seam allowance to keep everything uniform.
Finally, practice your hand-stitched finish or machine approach, depending on your preference.
Remember, the way you bind your quilt can boost its beauty and durability, so take your time to get it just right.
Happy quilting!
Choosing the Right Binding Fabric
Choosing the right binding fabric can really make your quilt stand out. You’ll want to take a little time to consider both the type of fabric you’re using and the color or pattern, just to make sure everything works well together. It’s amazing how the right binding can pull your whole design together!
Let’s take a look at your options and figure out what will be the perfect match for your quilt.
Fabric Type Options
When selecting the right binding fabric for your quilt, think about how it works with your overall design. It’s also smart to consider how well it will hold up over time.
You’ve got a few choices. Cotton options are classic—they’re durable and have a soft feel. Polyester blends are great if you want a little stretch and resistance to fading. Specialty fabrics can bring in unique textures or finishes, making your quilt stand out.
Pre cut bindings can be a real time-saver and help keep everything consistent. They’re especially handy if you want to skip some prep work.
| Fabric Type | Pros | Cons |
|---|---|---|
| Cotton Options | Soft, breathable | Can fray easily |
| Polyester Blends | Durable, colorfast | Less breathable |
| Specialty Fabrics | Unique textures | Often more expensive |
| Pre Cut Bindings | Convenient, uniform size | Limited fabric choices |
Choose wisely to improve your quilt’s beauty and longevity!
Color and Pattern Selection
Selecting the right color and pattern for your quilt binding can make a significant difference in the overall aesthetic of your project.
Consider color combinations that complement or contrast the quilt top. If your quilt is vibrant, a solid binding in a neutral shade can provide a calming effect.
On the other hand, a bold pattern can add excitement, but make sure it maintains a good pattern balance with the quilt’s design. Think about how the binding will frame your quilt; it should improve, not overwhelm.
Test swatches against your quilt to see how they work together. Ultimately, choose a binding that reflects your style while harmonizing with the quilt’s colors and patterns.
Preparing Your Quilt for Binding
Before you jump into binding your quilt, take a moment to pick out fabric that really complements your quilt top. Think about color, texture, and how everything will look when it’s all together.
Next up, make sure to trim the edges of your quilt so they’re nice and even. This might seem like a small step, but it truly makes a difference in how finished and professional your binding will look.
Once you’ve done these simple prep steps, you’ll be ready to dive into the binding process with confidence!
Select Appropriate Fabric Materials
Choosing the right fabric materials for your quilt binding is vital to achieving a polished finish. Start by selecting fabric with good durability. You want your binding to withstand wear and tear over time.
Cotton is a popular choice due to its strength and softness, making it ideal for binding. Next, make sure you pick colorfast materials. This means the colors won’t bleed or fade after washing, keeping your quilt looking vibrant.
Check the fabric labels for terms like “pre-washed” or “colorfast” to confirm quality. By focusing on durable and colorfast fabrics, you’ll not only improve the overall look of your quilt but also make certain it lasts for years to come.
Happy quilting!
Trim Quilt Edges Evenly
Getting your quilt edges trimmed evenly is essential for a clean binding finish. When you’re ready to tackle this step, focus on proper edge alignment and effective trimming techniques.
Here are some tips to help you achieve that perfect finish:
- Use a rotary cutter for straight lines and consistent cuts.
- Align your quilt edges with a long ruler to guarantee precision.
- Trim any excess fabric that may have frayed or become uneven during the quilting process.
- Double-check your measurements before cutting to avoid mistakes.
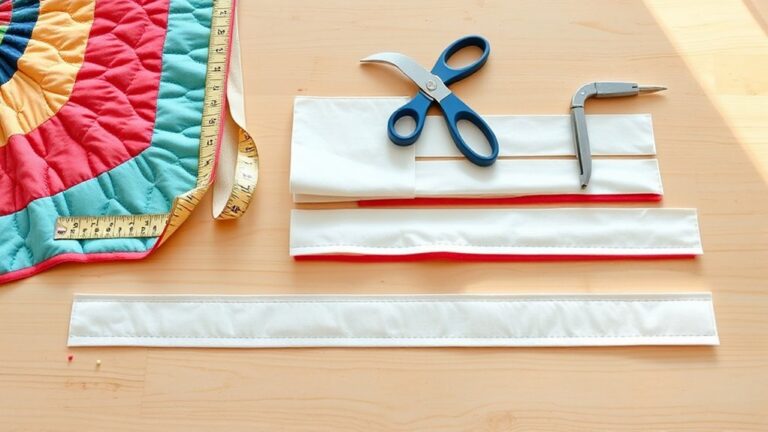
Cutting and Preparing Binding Strips
To guarantee your quilt binding looks polished, you’ll want to cut and prepare your binding strips carefully. Start by choosing your fabric, ensuring it complements your quilt.
Next, measure your binding widths; a common choice is 2.5 inches, but adjust based on your project’s needs. Using a rotary cutter and mat, cut strips across the fabric’s grain for strength and flexibility.
Explore different binding strip techniques, such as bias or straight grain cutting, depending on your quilt’s edges. If you’re using bias strips, remember they stretch more, which can help with curved edges.
For straight strips, make sure they align with the quilt’s edges for a clean finish.
Once you’ve cut your strips, press them to eliminate creases, making them easier to work with later.
With well-prepared binding strips, you’re one step closer to achieving that perfect quilt finish!
Joining Binding Strips Seamlessly
As you prepare to join your binding strips, it’s essential to guarantee a seamless connection for a polished finish.
Using effective binding strip techniques will make all the difference in your quilt’s appearance.
Here’s how to achieve those seamless joins:
- Align your strips: Place them right sides together, ensuring they overlap slightly.
- Pin carefully: Use pins to secure the strips in place, preventing any shifting while you sew.
- Sew with precision: Stitch diagonally from corner to corner, creating a triangle.
Trim excess fabric, leaving a quarter-inch seam allowance.
– Press open: Gently press the seam open for a flat finish, enhancing the seamless look.
How to Attach Quilt Binding
When you’re ready to attach your quilt binding, the first thing you’ll want to do is pick out a fabric that really complements your quilt. Take a little time here—it makes a difference! Once you’ve chosen your binding fabric, go ahead and get the edges of your quilt ready. Making sure those edges are straight and tidy will help you get a smooth, finished look in the end. This bit of preparation might seem small, but it truly lays the groundwork for a polished and professional quilt.
Choosing Binding Fabric
Choosing the right binding fabric can improve your quilt’s overall look. So, consider colors and patterns that complement your quilt top.
Think about how different binding fabric types can create unique effects. A good color contrast can really make your quilt pop!
Here are some tips to help you choose:
- Solid Colors: Great for a classic look and subtle contrast.
- Prints: Use patterns that echo your quilt’s design for cohesion.
- Bias Strips: These can add a stylish twist and flexibility.
- Texture: Fabrics with texture can add depth and interest.
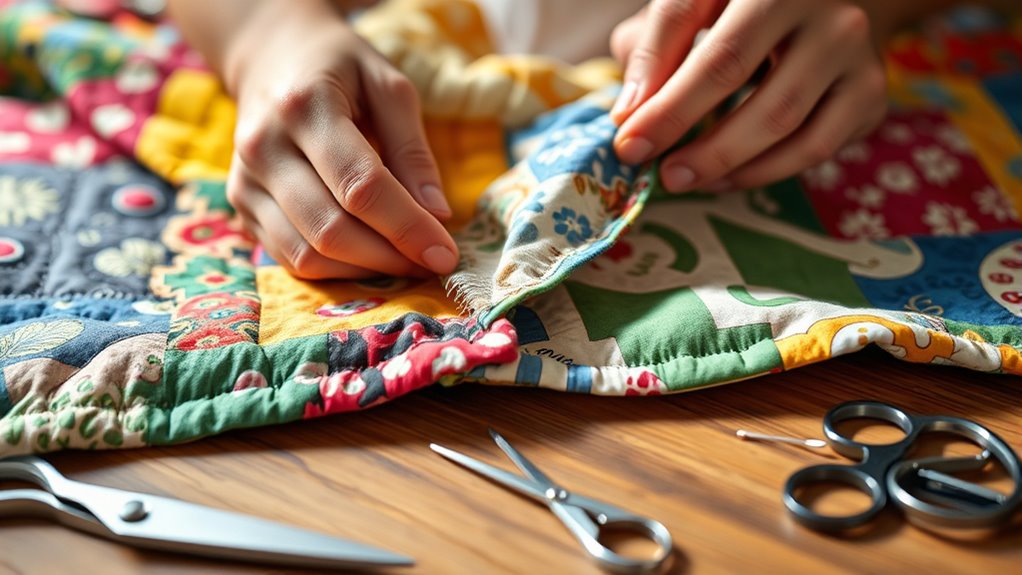
Preparing Quilt Edges
Start by trimming your quilt edges for a neat finish. Use sharp scissors or a rotary cutter to guarantee clean lines; this is essential for effective quilt edge preparation.
Check for any unevenness or excess fabric, and trim accordingly using straight trimming techniques. If your quilt has any frayed edges, now’s the time to tidy those up.
Next, lay the quilt flat on a clean surface, smoothing out any wrinkles. This guarantees your binding will attach evenly.
Finally, measure and mark ¼ inch from the edge all around the quilt to guide your binding placement.
With your quilt edges properly prepared, you’re ready to move on to attaching the binding, ensuring a polished and professional look.
How to Fold and Press Your Binding
To achieve a crisp and professional finish for your quilt binding, you’ll need to fold and press it properly.
Start by selecting your favorite binding techniques that suit your quilt’s style.
Grab your pressing tools, like a good steam iron and a pressing mat, to make this process easier.
Here’s how to fold and press your binding:
- Lay your binding strip flat, wrong side up.
- Fold each long edge towards the center crease and press.
- Fold the strip in half lengthwise and press again for a sharp edge.
- For extra neatness, use clips to hold the binding in place while you work.
Hand-Stitching vs. Machine-Stitching Quilt Binding
Deciding between hand-stitching and machine-stitching your quilt binding can considerably impact the final look and feel of your quilt.
Hand stitching offers a personal touch and allows for more precise control over the binding’s placement. You’ll appreciate the hand stitching benefits, like the ability to create a nearly invisible finish, enhancing your quilt’s overall aesthetic.
It also gives you a chance to relax and connect with your project.
On the other hand, machine stitching is all about speed. If you’re short on time or working on larger projects, machine stitching can quickly secure your binding, providing a sturdy finish that holds up well.
Plus, you won’t have to spend hours stitching by hand.
Ultimately, your choice hinges on whether you prioritize craftsmanship or efficiency. Consider your project’s needs and your personal preferences to make the best decision.
How to Securely Finish Quilt Binding?
Finishing quilt binding securely is essential for both the durability and appearance of your quilt.
To achieve this, you can use various binding techniques that guarantee your quilt looks polished and lasts for years.
Here are some simple finishing touches to keep in mind:
- Choose the right thread: Opt for a strong thread that matches your fabric for a seamless finish.
- Backstitch at the start and end: This adds extra security to your binding and prevents unraveling.
- Use a binding clip: Instead of pins, clips hold fabric in place without damaging it, making it easier to sew.
- Press your binding: A good press helps lay the binding flat, giving your quilt a neat, finished look.
Troubleshooting Common Quilt Binding Mistakes
While binding your quilt can feel straightforward, mistakes often pop up that can affect both the look and functionality of your project.
Common binding errors like fabric misalignment or uneven edges can ruin your hard work. To correct these issues, use binding tools such as clips or a ruler during assembly.
Common binding errors can undermine your quilt’s beauty; use clips or a ruler to ensure precise alignment and even edges.
If you notice a color mismatch, consider adding a narrow border to blend the fabrics better.
Pay attention to your stitch length; too short can cause puckering, while too long may lead to weak seams.
Utilize pressing techniques to guarantee that creases are sharp, allowing your binding to lie flat.
If you see any uneven edges after attaching the binding, don’t hesitate to trim them before finishing.
Frequently Asked Questions
What Tools Do I Need for Quilt Binding?
You’ll need a few essential tools for quilt binding. Start with a rotary cutter and mat to cut your fabric choices accurately.
A quilting ruler helps you measure precisely. You’ll also want pins or clips to hold your binding in place while you sew.
Finally, having an iron handy is vital for pressing your binding flat. With these tools, you can investigate various binding techniques and create a polished finish for your quilt.
Can I Use Bias Binding Instead of Straight Binding?
Absolutely, you can use bias binding instead of straight binding! In fact, 90% of quilters prefer bias binding for its flexibility around curves.
Bias binding benefits include a smoother finish and improved durability. By mastering bias binding techniques, you’ll find it easier to navigate those tricky corners.
Plus, it adds a unique touch to your quilts that straight binding just can’t match. So, grab that bias binding and give it a try!
How Do I Choose a Color for My Binding?
Choosing a binding color can elevate your quilt’s overall look. Start by considering binding color combinations that either match or contrast with your quilt’s main colors.
If you want to make a statement, opt for contrasting binding options that pop against the quilt’s design. Look at the fabric swatches together and trust your instincts.
Sometimes the boldest choice can be the most striking. Don’t be afraid to experiment until you find what feels right!
Is It Necessary to Pre-Wash Binding Fabric?
Pre-washing your binding fabric isn’t strictly necessary, but it’s a smart move.
Think of it as giving your quilt a protective shield against fabric shrinkage. By pre-washing, you’re ensuring your colors stay vibrant and consistent, like a well-tended garden.
The benefits include preventing any surprises after you’ve stitched it all together.
How Do I Handle Quilt Corners During Binding?
To handle quilt corners during binding, you’ll want to create mitered edges.
Start by folding the binding strip at a 45-degree angle, forming a triangle. Then, bring the binding down along the next side of the quilt.
Pin it in place and continue sewing. This corner folding technique guarantees a neat finish, giving your quilt a professional look.
Don’t rush. Take your time to get those corners just right!
Conclusion
You’ve conquered the quilt binding beast! With your newfound skills, you’re practically a quilting superhero.
Imagine wowing friends and family with your perfectly finished edges. They’ll think you’ve been sewing since the dawn of time!
You’ve mastered everything from choosing fabrics to flawlessly stitching. Now your quilts are ready to grace the halls of quilting fame.
So grab that needle and thread, and let your creativity soar. Your quilt binding is the finishing touch that makes your quilts truly shine.
Happy stitching!