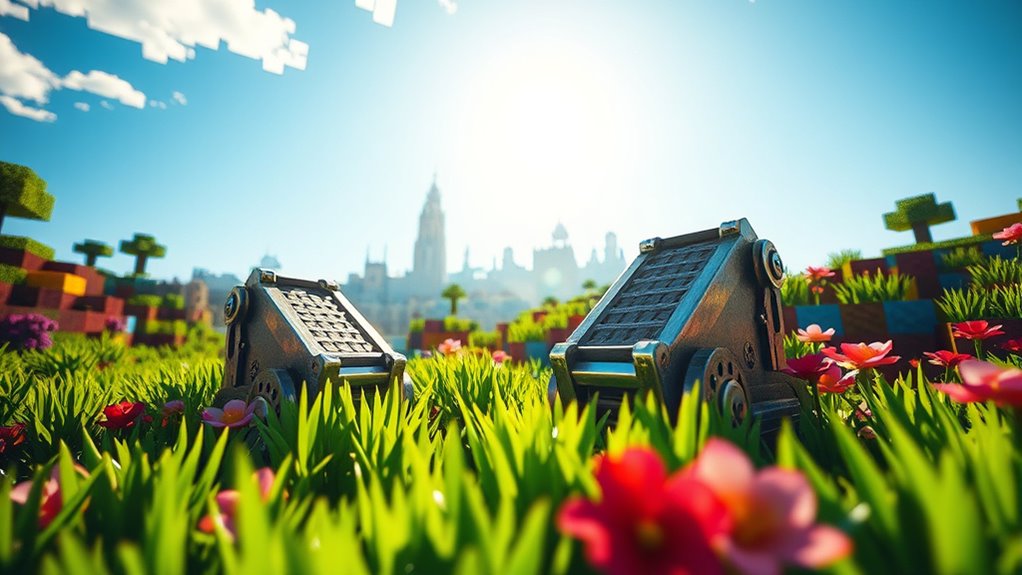
Craft Hoppers in Minecraft: Step-by-Step Guide
Crafting efficient systems in Minecraft can be a challenge. Many players struggle with organizing items and automating tasks. If you’re feeling overwhelmed, you’re not alone.
To craft hoppers in Minecraft, gather five iron ingots and one chest. Create the chest using eight wooden planks.
Open your crafting table, place the chest in the center, and surround it with the iron ingots. You’ll see the hopper appear in the result box.
Drag it into your inventory, and then you can place it anywhere you need.
Mastering hoppers opens up fantastic automation possibilities, so stick around to investigate advanced uses and tips!
Key Takeaways
Hoppers are essential for automating item transport and enhancing gameplay in Minecraft.
To craft a hopper, use five iron ingots and one chest.
Make sure you have enough inventory space before crafting the hopper.
Place hoppers strategically to create item sorting systems and automate resource collection.
Regularly check for blockages and misalignments to keep your hopper running efficiently.
What Are Hoppers in Minecraft?
Hoppers in Minecraft are essential tools for automating item transport within your builds. These compact devices allow you to move items seamlessly from one container to another, streamlining your gameplay.
Understanding hopper mechanics is key to maximizing their potential. When you place a hopper next to a chest or another storage block, it can pull items from that block and transfer them to another.
In hopper comparisons, you’ll find they differ from other transport methods like water streams or minecart systems. Hoppers provide a more controlled and efficient way to manage your items, especially in complex setups.
You can even chain multiple hoppers together to create intricate item sorting systems. By mastering these mechanics, you’ll boost your builds and improve your Minecraft experience.
Why Use Hoppers for Inventory Management?
Using hoppers for inventory management can really change the game for you in Minecraft. They’re super handy for streamlining resource collection, which means you won’t have to spend ages gathering items manually.
Plus, hoppers automate item sorting. So, instead of sifting through chests to find what you need, everything gets organized for you. How cool is that?
And let’s not forget about space optimization! Hoppers help you make the most of your storage systems, which is always a win. With all these benefits, you’ll find yourself spending less time managing your items and more time diving into the fun parts of the game. Enjoy!
Efficient Resource Collection
When managing resources in Minecraft, efficient inventory systems can make all the difference. Hoppers are essential for streamlining your item transportation and optimizing resource collection. By understanding hopper mechanics, you can automate tasks and reduce manual labor.
Consider these benefits:
- Automatic Collection: Hoppers can gather items from nearby blocks, ensuring you never miss a drop.
- Efficient Storage: You can funnel resources directly into chests, keeping your inventory organized.
- Reduced Clutter: With hoppers, you minimize the chaos of scattered items, making your workspace cleaner.
Utilizing hoppers not only saves time but also improves your gameplay. This allows you to focus on building and exploring instead of constantly managing your inventory.
Automated Item Sorting
While managing a large inventory can feel overwhelming, automating item sorting with hoppers simplifies the process considerably. By setting up a network of hoppers linked to chests, you can easily direct items from your automatic farms into designated storage. This saves you time and effort, allowing you to focus on building and exploring.
Using hopper upgrades improves your system’s efficiency, letting you manage more items at once. You can customize your sorting system to handle various materials, ensuring everything stays organized.
With the right setup, you’ll never have to sift through cluttered chests again. So, accept the power of hoppers for seamless inventory management. Watch your Minecraft experience transform into a more enjoyable adventure!
Space Optimization Strategies
Automated item sorting with hoppers not only streamlines your inventory but also maximizes your space. When you implement an efficient hopper design, organizing your items becomes a breeze.
Here are three effective storage solutions you can consider:
- Multi-layered chests: Utilize vertical space by stacking hoppers to connect multiple chests.
- Sorting systems: Create a compact setup that directs items into designated chests, reducing clutter.
- Furnace and crafting automation: Link hoppers to furnaces and crafting tables for seamless processing.
These strategies improve your gameplay and guarantee that every block has a purpose in your Minecraft world. Adopt hoppers for a more organized and efficient storage experience!
Required Materials to Craft a Hopper
To craft a hopper in Minecraft, you’ll need a few essential materials. First, gather five iron ingots and one chest.
Iron ingots are vital as they form the body’s structure of the hopper. The chest serves as the input or output point for items.
You can find iron ore underground, smelt it in a furnace, and craft it into ingots. For chests, combine eight wooden planks in your crafting grid.
As you examine hopper types, keep in mind that while the standard hopper is versatile, you might also encounter different variations like the trapped hopper.
A tip for crafting is to guarantee you have enough inventory space to collect your materials. Once you’ve gathered everything, you’ll be ready to move on to the crafting process.
With these materials on hand, you’re one step closer to enhancing your Minecraft experience!
Step-by-Step Guide: Crafting Your First Hopper
Alright, so you’ve got all your materials ready—great job! Now, let’s dive into crafting your very first hopper. It’s a pretty simple process, but trust me, this little device can really change the game in your builds.
Required Materials For Hoppers
Crafting your first hopper in Minecraft requires just a few essential materials. Understanding these items will help you master hopper mechanics and improve your inventory strategies.
- Iron Ingots: You’ll need 5 iron ingots, which can be mined or smelted from iron ore.
- Chest: A single chest is vital. You can craft one from 8 wooden planks, gathered from trees.
- Crafting Table: If you don’t have one yet, create a crafting table using 4 wooden planks.
Once you gather these materials, you’ll be ready to craft your hopper. With a hopper in hand, you can automate item transfers and make your gameplay smoother.
Get ready to elevate your Minecraft experience!
Crafting Process Explained
Once you’ve gathered the necessary materials, you can easily create your first hopper in Minecraft.
Start by opening your crafting table. Place five iron ingots in a “U” shape: three along the bottom row and one on each side of the middle row.
Finally, put a chest in the center square. This arrangement is essential for the hopper mechanics to work properly.
Once you’ve placed everything correctly, you’ll see the hopper appear in the result box. Drag it into your inventory, and you’re ready to go!
For additional crafting tips, remember to check your inventory for any missing materials before starting.
With this simple process, you’ll be crafting hoppers in no time!
Uses Of Hoppers
Having your first hopper crafted opens up a world of possibilities in Minecraft. Hoppers are essential for automating item transport and storage, making your gameplay smoother and more efficient.
Here are three key uses to contemplate:
- Item Sorting Systems: Create organized storage with specific items sorted into designated chests.
- Automatic Farms: Collect resources from farms without manual labor, ensuring a steady supply of crops or materials.
- Furnace Automation: Feed fuel and items into furnaces seamlessly, allowing for continuous smelting.
With these hopper crafting tips, you can investigate various hopper design variations. This enhances your builds and efficiency. Immerse yourself and start transforming your Minecraft experience today!
How to Craft and Place Hoppers
To create a hopper in Minecraft, you’ll need five iron ingots and one chest. Begin by gathering your materials. Iron ingots can be mined from iron ore, while chests are crafted from eight wooden planks.
Once you have everything, open your crafting table. Place the chest in the center slot. Next, arrange the five iron ingots in a “V” shape around the chest: one above, one below, and one on each side.
Open your crafting table, place the chest in the center, and arrange five iron ingots in a “V” shape around it.
Once you’ve done this, you’ll see the hopper appear in the result box. Drag it into your inventory.
Now that you’ve crafted your hopper, it’s time to place it. Simply select the hopper in your hotbar and right-click on the ground or any block.
If you’re using hopper redstone, remember to connect it with redstone dust for efficient hopper automation. This way, you can automate item transfers in your builds!
Common Uses for Hoppers in Minecraft
Hoppers play an essential role in enhancing automation in Minecraft. They allow for seamless item transfer between containers and machines. Understanding hopper mechanics can help you optimize your builds.
Here are three common uses for hoppers:
- Item Sorting Systems: Create efficient sorting systems that automatically organize items into designated chests. This saves you time and effort.
- Automatic Farms: Use hoppers to collect harvested crops or mob drops. They funnel these items into storage chests for easy access.
- Furnace Feeders: Feed fuel and raw materials to furnaces automatically. This ensures your smelting processes run smoothly without constant monitoring.
If you encounter issues, remember that hopper troubleshooting often involves checking connections. Make sure items are flowing correctly. With these uses, you can maximize your gameplay experience and harness the power of automation!
Understanding Hopper Automation
While you investigate the mechanics of hopper automation, it’s essential to grasp how they interact with other blocks in your builds. Hoppers excel in item transfer, allowing you to streamline your resource management efficiently.
Understanding their connections with chests, furnaces, and other containers is key to maximizing their potential.
Here’s a quick reference table for common hopper interactions:
| Block Type | Interaction Type |
|---|---|
| Chest | Item input/output |
| Furnace | Fuel or item input |
| Dispenser | Item dispensing |
How to Make Hoppers Work Better for You
By optimizing your hopper setups, you can greatly improve your resource management in Minecraft. Here are three effective strategies to make your hoppers work better for you:
- Combine Hopper Redstone: Use redstone to create automatic sorting systems. This allows you to control the flow of items, directing them to specific chests based on type.
- Maximize Hopper Inventory: Place hoppers beneath furnaces or dispensers to capture items efficiently. This ensures you’re not wasting time manually collecting resources and keeps your workflow smooth.
- Use Filters: Implement item filters in your hoppers. By crafting specific filter setups, you can isolate valuable resources and prevent unwanted items from cluttering your hopper inventory.
With these tips, your hoppers will become powerhouses of automation. They’ll enhance your gameplay and resource management. Happy crafting!
Fixing Common Problems With Hoppers
When you’re using hoppers, you might come across some common issues that can mess with your item flow. It’s frustrating, right? Things like blocked items, activation problems, and even redstone interference can all get in the way of your setup.
But don’t worry! Let’s dive into these challenges together and figure out how to optimize your hopper system effectively. We’ll sort through each problem one by one, so you can get everything running smoothly again.
Blocked Item Flow
If you’ve ever found your hoppers not functioning as expected, you might be dealing with blocked item flow. Common hopper blockage causes include items getting stuck, improper placement, or excessive items in the system.
To resolve these issues, try these hopper maintenance tips:
- Check for Obstructions: Verify nothing is blocking the hopper’s opening.
- Optimize Placement: Position hoppers so that they connect directly to the containers or other hoppers without gaps.
- Limit Item Quantity: Reduce the number of items flowing through a single hopper to prevent backups.
Hopper Activation Issues
While hoppers are essential for automating item transfer in Minecraft, they can sometimes fail to activate properly.
First, check for any nearby blockages; items should flow freely into the hopper. If that’s not the issue, examine your hopper’s connection to adjacent containers to confirm they’re properly aligned.
For effective hopper troubleshooting tips, always keep your hoppers clean and free from items that might clog them. Regular maintenance practices, like replacing any damaged blocks, can also help prevent activation problems.
Finally, verify your hoppers are powered correctly by the surrounding redstone components. Following these steps will keep your hoppers functioning smoothly, making your item transfer process efficient and hassle-free.
Redstone Interference Problems
Redstone interference can disrupt your hoppers’ functionality, causing them to misbehave or stop working altogether. To tackle these issues, focus on troubleshooting hopper connections effectively.
Here are three common sources of hopper redstone interference:
- Adjacent Redstone Dust: If redstone dust runs too close to your hopper, it can trigger unintended actions.
- Powered Blocks: Blocks powered by redstone can inadvertently affect the hopper, preventing it from accepting items.
- Signal Strength: A strong redstone signal might overpower the hopper’s input, causing it to ignore incoming items.
Next Steps: Advanced Uses for Hoppers
Release the potential of hoppers by exploring their advanced uses in Minecraft. By mastering advanced automation techniques, you can streamline your resource management and create efficient farms.
For instance, combine hoppers with chests to build automatic item sorting systems. This allows you to easily organize your inventory without manual effort.
Hopper redstone integration takes your builds to the next level. By connecting hoppers to redstone circuits, you can create complex machines like item elevators or automated farms.
Use comparators to detect item levels and control when to dispense or collect items.
Don’t forget about using hoppers with brewing stands or furnaces for seamless production. This way, you can keep your brewing or smelting processes running without interruption.
With these advanced techniques, you’ll truly harness the power of hoppers, making your Minecraft adventures more efficient and enjoyable.
Frequently Asked Questions
Can Hoppers Transport Items Vertically in Minecraft?
Yes, hoppers can transport items vertically in Minecraft! When you place a hopper facing downward into a container, it can pull items from above and drop them directly into that container.
This utilizes hopper mechanics effectively for vertical transportation. You can stack multiple hoppers vertically to create efficient item transfer systems.
This setup allows you to automate your workflows and manage your inventory better. Just make sure to connect them properly for the best results!
How Do Hoppers Interact With Redstone Components?
Hoppers interact with redstone components by using hopper redstone mechanics. When a hopper receives redstone power, it disables its ability to transfer items.
If a hopper is powered, it won’t push items into adjacent containers. You can use this interaction to create item sorting systems or automated storage solutions.
Just remember, if you want your hopper to work, avoid sending redstone power to it directly. This creates a strategic gameplay element!
What Happens if a Hopper Is Overloaded?
If a hopper’s overloaded, it’s like trying to fit a mountain into a backpack! The hopper functionality breaks down, causing item transfer to stop.
You’ll find items piling up and not moving to the next container. This can lead to chaos in your storage system, so keep an eye on your hopper’s capacity.
Managing your inventory wisely prevents this overload disaster and keeps everything flowing smoothly in your Minecraft world.
Can Hoppers Be Used in Multiplayer Servers?
Yes, hoppers can be used in multiplayer servers. However, keep in mind that hopper mechanics can cause multiplayer lag, especially if you have many hoppers working simultaneously.
When you use them efficiently, they can improve your gameplay, but overloading them might lead to performance issues.
To minimize lag, consider limiting the number of hoppers and ensuring your server can handle the extra load. Balance is key for a smooth experience!
Do Hoppers Work With All Item Types?
When it relates to hoppers, you can say they’re a jack of all trades! Hoppers work with most item types, but their mechanics can be a bit tricky.
You’ll find that while they can transport many items, filtering specific ones requires some setup. If you’re aiming for efficient item filtering, consider using filters or sorting systems to guarantee you’re only moving the items you want.
Conclusion
In Minecraft, hoppers are your secret weapon for seamless inventory management. With just a few materials and a bit of creativity, you can streamline your resource collection like a pro.
As you plunge into advanced uses, remember: the only limit is your imagination. Gather your supplies, craft that first hopper, and watch your world transform!
Don’t just play; master the game. Let every drop count with hoppers!