How to Craft a Stick Step by Step
Crafting Your Perfect Stick: A Simple Guide
If you’ve ever wanted to craft a stick but felt overwhelmed by the process, you’re not alone. Many people struggle with finding the right materials and techniques. The good news? Creating your ideal stick can be straightforward and rewarding!
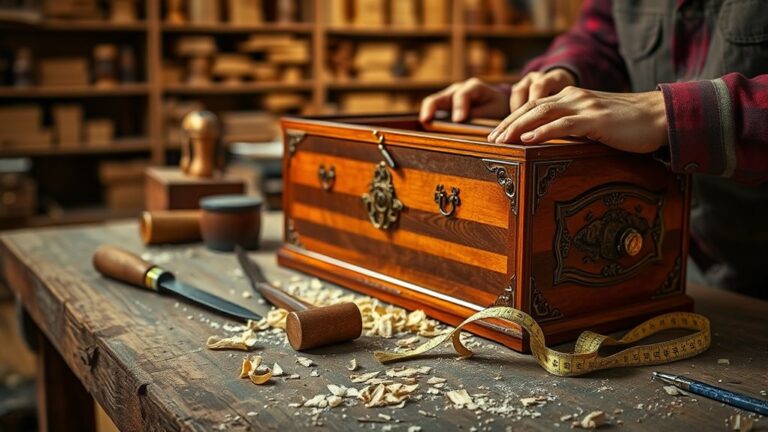
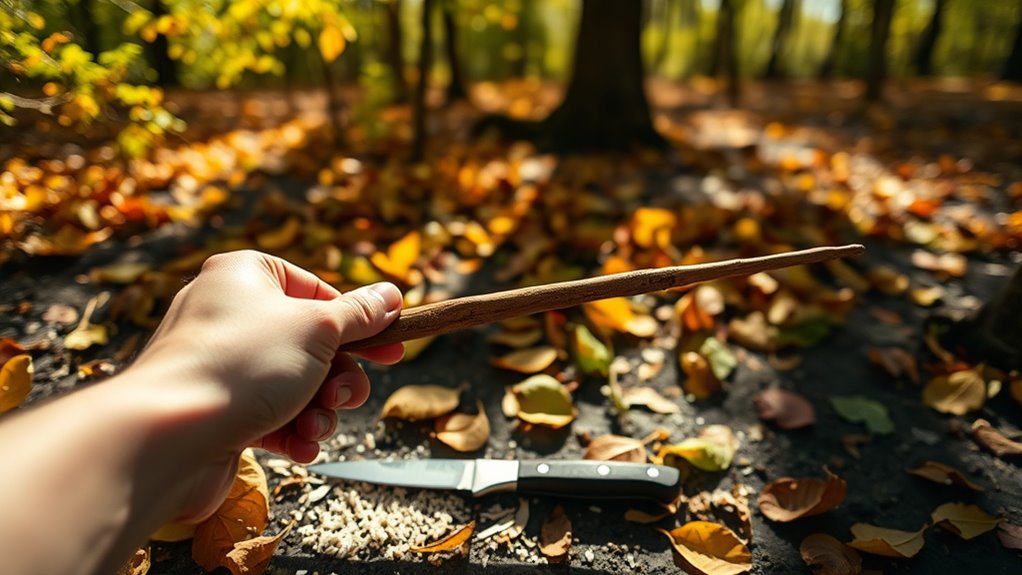
To craft a stick, start by choosing a sturdy branch that’s about 1 inch thick and free of cracks. Gather essential tools like a reliable knife and saw.
Clean your branch with a damp cloth. Then use carving techniques to shape it the way you want. Add grips or hooks for functionality and sand it for a smooth finish.
Don’t forget to treat the wood for protection. There’s so much more to learn about showcasing your crafted stick!
Key Takeaways
- Choose a sturdy branch, about 1 inch thick, with a smooth surface and minimal knots for optimal crafting.
- Use essential tools like a reliable knife, saw, and sandpaper for shaping and refining your stick.
- Clean the branch thoroughly with a damp cloth and a vinegar mixture to remove dirt and debris.
- Shape the stick using various carving techniques. Focus on design patterns and visualize the final product.
- Apply natural wood treatments and sand for a smooth finish. This enhances both durability and aesthetics.
Choosing the Right Branch for Your Stick
When you’re choosing the right branch for your stick, look for one that’s about an inch thick and sturdy enough to handle some wear and tear.
Examine the branch characteristics closely; you want a smooth surface without too many knots or cracks. A straight branch is ideal for functionality, while a slight curve can add an interesting twist to your stick aesthetics.
Consider the wood type, too. Hardwoods like oak or maple are durable and can withstand rough use, while softer woods may be more suitable for decorative sticks.
Pay attention to the color and grain, as these details contribute to the overall look.
Lastly, balance practicality and visual appeal. Your stick should feel good in your hand and look great.
Essential Tools for Crafting Your Stick
Sure! Here’s a more conversational version of your text:
—
If you’re planning to craft your stick, you’ll want to make sure you have some essential tools ready to go. Trust me, having the right gear makes all the difference!
And hey, let’s not forget about safety equipment—it’s super important. You definitely don’t want to overlook that.
Must-Have Tools
Crafting the perfect stick requires a few essential tools that can make the process smoother and more enjoyable.
Start with a reliable knife for precise shaping and carving. A good saw is also vital for wood selection, allowing you to cut your stick to the right length.
Don’t forget sandpaper or a file to smooth rough edges and improve grip. A sturdy workbench or a pair of clamps can keep your materials steady while you work.
Regular tool maintenance is key; keep your knife sharp and your saw clean to guarantee they perform well.
With these must-have tools, you’ll find stick crafting both efficient and rewarding. It really sets the stage for your creative expression.
Safety Equipment Essentials
Safety equipment is just as crucial as your crafting tools regarding making a stick. To protect yourself, you’ll need to prioritize safety gear alongside your crafting supplies.
Start by confirming your workspace is organized to prevent accidents. Here are three key items to keep handy:
- Protective eyewear: Shields your eyes from debris and splinters.
- Work gloves: Safeguard your hands while handling tools and materials.
- First aid kit: Be prepared for minor injuries with necessary supplies.
Remember to practice safe lifting techniques and proper hand positioning when using tools. Regular tool maintenance is essential for safety. Knowing emergency procedures guarantees you’re ready for anything.
Prioritize safety, and your crafting experience will be both enjoyable and secure.
Preparing Your Branch: Cleaning and Sizing
When preparing your branch for crafting a stick, start by selecting a clean, sturdy piece about 1 to 2 inches in diameter and at least 3 feet long.
Look for a branch that’s free of cracks and rot; this guarantees durability. Once you’ve made your branch selection, it’s time to clean it.
Select a sturdy branch free of cracks and rot to ensure durability before moving on to the cleaning process.
Use a damp cloth to wipe off any dirt, sap, or debris. If there are stubborn spots, you can employ a gentle scrub with a soft brush.
For a thorough clean, consider using a mixture of water and vinegar to remove any remaining grime. Rinse the branch well and let it dry completely before moving on.
Make certain it feels smooth to the touch; this will assist in the crafting process. Proper cleaning and sizing not only improve your stick’s appearance but also guarantee it’s ready for the next steps in your crafting journey.
Shaping Your Stick: Techniques and Tips
Alright, now that you’ve got your branch all set, let’s dive into shaping your stick! First things first, picking the right wood is super important. It really influences how durable your stick will be and how easy it is to carve.
Once you’ve chosen your wood, think about the different carving techniques you can use. These can really enhance your stick’s design and make it more functional. So, let’s get creative and make something awesome!
Selecting The Right Wood
Choosing the right wood is essential for crafting a stick that’s both functional and aesthetically pleasing.
You’ll want to reflect on various wood types and their unique characteristics. Look for wood with attractive grain patterns that amplify the beauty of your stick and contribute to its strength.
Oak: Known for its durability and distinct grain patterns.
Maple: Offers a smooth finish and light color, ideal for detailed work.
Cherry: Features rich hues that deepen with age, adding character to your stick.
Carving Techniques To Consider
Carve your stick with intention. The techniques you choose can dramatically influence its form and function.
Start by exploring various whittling methods. Basic knife cuts, slice cuts, and push cuts are essential tools in your carving arsenal. Each method offers unique possibilities for shaping your stick.
Consider incorporating design patterns like spirals or geometric shapes to add character. Visualize your final product before you begin; this helps guide your hand and keeps your cuts purposeful.
Don’t rush the process. Take your time to refine each detail. Regularly step back to assess your work and confirm you’re staying true to your vision.
With practice and patience, you’ll create a stick that’s not only functional but also a true reflection of your creativity.
Making Your Stick Functional: Adding Grips or Hooks
Improving your stick’s functionality can greatly boost its usability for various tasks. By adding grips or hooks, you’ll create a tool that’s both practical and comfortable to use.
Consider these options:
Consider enhancing your stick’s functionality with various grip materials, innovative hook designs, and ergonomic shapes for optimal comfort and versatility.
Grip Materials: Choose from rubber, foam, or textured wood for better handling.
Hook Designs: Implement simple hooks for bag carrying or more complex designs for specific tasks.
Ergonomic Shapes: Mold grips to fit your hand comfortably. This reduces fatigue during extended use.
Incorporate decorative grips to add flair while maintaining their functional features. If you need versatility, think about custom attachments that can adapt your stick for various applications.
With these improvements, your stick won’t just be a simple tool. It’ll become a reliable companion for any job you tackle!
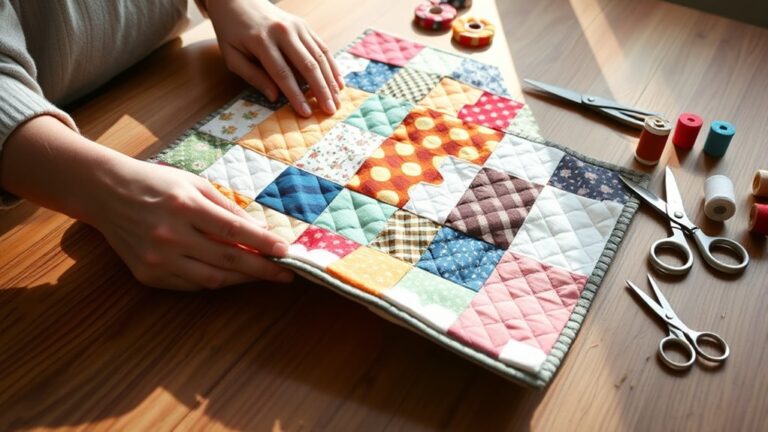
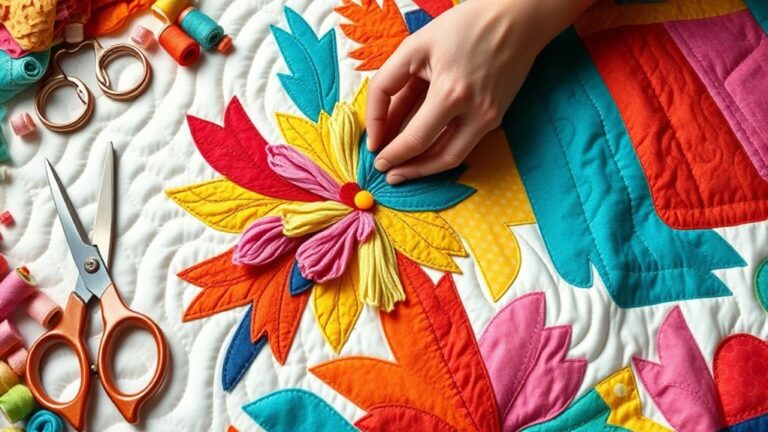
Personalizing Your Stick: Carving Techniques and Decoration Ideas
Transform your stick into a unique expression of your personality by exploring various carving techniques and decoration ideas.
Start by selecting carving patterns that resonate with you. Perhaps spirals or geometric shapes could speak to you. As you carve, think about incorporating personal symbols that reflect your interests or values.
Once you’ve carved your design, consider adding decorative elements like beads or leather wraps. Wood staining can improve the natural beauty of your stick. Natural finishes will protect it and highlight its texture.
Don’t forget to think about seasonal themes. You might want to carve autumn leaves or winter motifs, depending on the time of year.
Finally, use embellishment techniques like painting or burning to add depth and character. Remember, your stick can be both a functional design and a canvas for your creativity. Showcase your style in every detail!
Sanding and Smoothing for a Great Finish
Achieving a smooth finish on your stick is essential for both aesthetics and comfort. You want your stick to feel good in your hand and look great, too.
Start by using effective sanding techniques, moving from coarse to fine grit sandpaper. This gradual approach helps eliminate rough spots and prepares the surface for a sleek finish.
Begin with 80-grit sandpaper to remove any major imperfections. Shift to 120-grit for a smoother surface, then finish with 220-grit for that polished touch.
As you sand, always work in the direction of the grain to avoid scratches. Don’t rush the process; patience pays off here.
Once you’ve achieved a satisfying smoothness, wipe away any dust with a damp cloth. This simple step improves the overall look and feel of your stick, ensuring you enjoy every use.
Happy crafting!
Preserving Your Stick: Wood Treatment Techniques
After you’ve perfected the smoothness of your stick, it’s time to reflect on how to keep it looking and feeling great for years to come.
Wood preservation is crucial, and you have a few options to evaluate. Natural finishes, like beeswax or tung oil, improve the grain and protect against moisture.
Drying techniques are essential; make sure your stick is fully dry before applying any treatment to prevent mold.
| Treatment Type | Benefits |
|---|---|
| Natural Finishes | Eco-friendly and improves beauty |
| Chemical Treatments | Long-lasting protection |
| Drying Techniques | Prevents damage and warping |
Each method has its pros and cons, so choose what aligns with your values and needs.
Whichever you opt for, taking these steps will help guarantee your stick remains a cherished item for years to come!
Stay Safe While Crafting Your Stick
When you’re getting ready to craft your stick, safety really should be at the forefront of your mind. Seriously, it’s super important! First off, make sure you’ve got all the essential safety gear on. You know, things like gloves and goggles. They can make a huge difference.
And let’s not forget about your tools. Always handle them with care. I mean, it’s easy to get caught up in the excitement of crafting, but a little precaution goes a long way. Trust me, taking a moment to be safe can help keep your crafting experience both enjoyable and accident-free. So, let’s get crafty—but let’s do it safely!
Essential Safety Gear
While crafting your stick can be a fun and rewarding experience, it’s important to prioritize safety by equipping yourself with the right gear.
By practicing safety awareness, you can prevent accidents and enjoy your project worry-free. Here are three significant pieces of protective gear you shouldn’t skip:
Safety goggles: Protect your eyes from splinters and debris.
Gloves: These keep your hands safe from cuts and splinters while providing a better grip.
Dust mask: If you’re sanding or working with wood shavings, a mask helps keep you safe from inhaling harmful particles.
With these necessities, you’ll improve your crafting experience and guarantee a safer environment. So gear up and get ready to create!
Proper Tool Handling
To guarantee a safe crafting experience, mastering proper tool handling is vital. Start by ensuring an ergonomic grip on your tools; this helps reduce strain and improves control.
Always keep your hands dry and wear gloves if necessary. Regular tool maintenance is important too. A well-maintained tool performs better and is safer to use.
| Tool | Maintenance Tips |
|---|---|
| Knife | Sharpen regularly |
| Saw | Clean after each use |
| Chisel | Store in a protective case |
| Sandpaper | Replace when worn out |
How to Showcase Your Crafted Stick: Display Ideas
Once you’ve crafted your stick, showcasing it effectively can improve its beauty and uniqueness. Consider these display ideas to make your creation stand out:
Display Stands: Use a stylish stand to raise your stick. This allows it to catch the light and draw attention from all angles.
Wall Mounts: Hang your stick on a wall mount for a modern, artistic touch. This option is perfect for showcasing intricate designs or carvings.
Creative Arrangements: Combine your stick with natural elements like stones or plants for a themed display. This arrangement adds depth and context, making your stick a focal point in any room.
Experiment with these options to find the perfect way to display your crafted stick. The right showcase not only highlights your work but also adds character to your space. Enjoy the process and let your creativity shine!
Frequently Asked Questions
How Long Does It Take to Craft a Stick?
Stick crafting time varies based on your techniques and experience. If you’re just starting out, it might take you about 30 minutes to an hour to create a simple stick.
As you practice and refine your skills, you’ll likely speed up the process. If you’re using more intricate crafting techniques, like carving or adding details, expect to spend a few hours.
Enjoy the journey and let your creativity guide you!
Can I Use Any Type of Wood?
Yes, you can use various wood types for crafting your stick.
Hardwoods like oak or maple offer durability, while softer woods like pine are easier to work with and carve.
Consider your crafting techniques, too; some methods may require specific wood properties.
Experimenting with different woods can improve your skills and the final product.
Just make sure the wood’s dry and free from rot for the best results in your project!
What if My Stick Cracks During Crafting?
If your stick cracks during crafting, don’t worry. You’re not alone in this wood-wrangling adventure!
To prevent cracking, choose a wood type known for its durability, like oak or hickory. Proper drying techniques also help; keep your stick in a stable environment.
Accept the imperfections, though. Each crack tells a story. Sometimes, a few flaws can add character, making your creation even more unique.
Is It Safe to Use Power Tools?
Yes, it’s generally safe to use power tools, but you need to take safety precautions.
Always wear protective gear like goggles and gloves. Keep your workspace tidy.
Regular tool maintenance is essential, too. Check for any damage before use.
Make sure you understand how each tool works and follow the manufacturer’s instructions.
This way, you’ll minimize risks and enjoy crafting with confidence while using power tools effectively.
How Do I Clean My Stick After Crafting?
So, you think your stick’s too good for a bath? Think again!
For proper stick maintenance, grab a soft cloth and a mild soap solution. Gently wipe it down, making sure to get into any grooves.
Rinse it with clean water and dry it off, because nobody likes a soggy stick. You might even consider a wood conditioner for that extra shine.
Who knew cleaning techniques could make your stick the envy of the forest?
Conclusion
Crafting your own stick can be as rewarding as finding a hidden treasure. With the right branch, tools, and a bit of creativity, you transform something simple into a functional piece of art.
Whether you use it for hiking, decoration, or just as a conversation starter, your handcrafted stick carries a piece of you. So grab your tools and let your imagination flow.
Just like a river carving its path through the landscape, creating your own stick is a journey of personal expression. Embrace the process and enjoy every moment of crafting your unique stick!