DIY T-Shirt Quilt Instructions for Yourself
If you’ve ever opened your closet and wondered what to do with all those sentimental t-shirts, you’re not alone. Many people struggle with letting go of shirts that bring back cherished memories, but don’t want them to just collect dust.
The desire to preserve these moments while also reducing clutter is something we all share, and DIY t-shirt quilts have become a creative and meaningful solution.
Creating a DIY t-shirt quilt is a wonderful way to preserve memories and express your unique style. Start by choosing shirts that hold personal significance, ensuring they’re in good condition.
Prepare the shirts by washing and cutting them into squares, then lay out your design.
Assemble the quilt top, sew the layers together, and add borders for a polished finish.
Finally, care for your quilt to keep it vibrant. Keep going to uncover more detailed steps and tips!
Key Takeaways
- Choose t-shirts with personal significance and make sure they’re in good condition. This helps with durability and keeps your quilt looking great.
- Prepare your shirts by washing them first. Mark the areas you want to cut so you can avoid frayed edges later on.
- Cut your t-shirts into uniform squares, picking designs that will work together for a cohesive look throughout your quilt.
- Assemble the quilt by arranging the squares, then pin them in place. Sew the layers together, making sure everything stays evenly aligned.
- To care for your quilt, wash it gently with mild detergent. Store it in a cool, dry place to help preserve its quality over time.
Why Create a T-Shirt Quilt?
Creating a t-shirt quilt can be a meaningful way to preserve memories, especially if you’ve collected shirts from significant events or milestones in your life. Each shirt tells a story, capturing nostalgic memories that transport you back to those special moments.
Whether it’s a concert, a family reunion, or a memorable trip, your quilt becomes a tapestry of experiences.
Not only does making a t-shirt quilt serve as a sentimental keepsake, but it also allows for creative expression. You can choose how to arrange the shirts, mix and match colors, and add personal touches that reflect your style.
This project gives you the freedom to design something unique that resonates with you. As you sew each piece together, you’ll find joy in revisiting those cherished memories while crafting a beautiful, functional item that tells your story.
Choose the Right T-Shirts for Your Quilt
Picking out the right T-shirts for your quilt is a big deal—it’s what gives your quilt its personality and meaning. Start by looking for shirts that really mean something to you. Maybe they remind you of special moments, favorite places, or important milestones. That way, your quilt will tell your story, one square at a time.
It’s also a good idea to check that the fabric is in good shape. If your shirts are too worn out or thin, the quilt might not hold up as well over the years. So, choose the ones that are both meaningful and sturdy, and you’ll end up with a quilt you’ll treasure for a long time.
Personal Significance Of T-Shirts
The personal significance of t-shirts often transforms them into cherished mementos, making your quilt a tapestry of memories.
When choosing t-shirts for your quilt, think about the nostalgic memories they hold. Each shirt should represent a personal milestone, like graduations, vacations, or favorite concerts.
These garments capture moments that shaped your life. So, pick ones that evoke strong emotions.
As you sort through your collection, let your heart guide you. Consider how each shirt makes you feel and the stories behind them.
By selecting t-shirts that resonate with you, your quilt becomes more than just a blanket. It’s a celebration of your journey and the experiences that define you.
Treasure the memories, and let them inspire your creation.
Fabric Condition And Quality
When selecting t-shirts for your quilt, prioritize fabric condition and quality to guarantee longevity and comfort. Look for tees that show good fabric durability; they should feel soft yet sturdy.
Avoid shirts with significant wear, such as holes or fraying, as these can compromise your quilt’s structure. Pay attention to color fading. Vibrant colors will maintain their charm over time, while faded prints may detract from your quilt’s overall aesthetic.
If you’ve got t-shirts that have sentimental value but are worn out, consider using them sparingly, perhaps as patches or accents. By choosing wisely, you’ll create a beautiful, lasting quilt that tells your unique story while standing the test of time.
Essential Tools and Materials for Your T-Shirt Quilt
To get started on your t-shirt quilt, you’ll want to gather a few must-have tools and materials. Picking the right fabric is super important because it can really change how your quilt looks and feels. So, let’s walk through everything you’ll need to set yourself up for quilting success.
Necessary Tools Overview
Creating a T-shirt quilt requires just a handful of essential tools and materials to guarantee your project goes smoothly. First, you’ll need a sewing machine equipped for various sewing techniques, like straight stitching and zigzagging.
A rotary cutter and cutting mat will help you accurately trim your T-shirts and other fabric types. Don’t forget quality thread that matches your T-shirts for a seamless look.
You should also have fabric scissors and pins on hand for better precision. A ruler or quilting grid can assist with measurements, ensuring your blocks are uniform.
Finally, a pressing iron is vital for keeping everything neat. With these tools, you’re set to start transforming those cherished T-shirts into a cozy quilt!
Fabric Selection Tips
Choosing the right fabric for your T-shirt quilt is essential, as it can greatly impact the overall look and durability of your project.
Here are some tips to guide your fabric selection:
- Fabric color: Choose colors that complement your T-shirts and help create a cohesive design.
- Fabric texture: Mix textures for added visual interest. Just make sure they’re compatible for sewing.
- Weight: Opt for medium-weight fabrics. This helps balance sturdiness with a nice drape.
- Washability: Select fabrics that are machine washable. That way, your quilt stays looking great after every wash.
- Contrast: Use contrasting fabrics to highlight your T-shirts and really make the quilt pop.
Preparing Your T-Shirts for Cutting
Before you plunge into cutting your t-shirts, it’s vital to prepare them properly to guarantee your quilt turns out beautifully.
Start with a good wash to remove any dirt or residues. Avoid fabric softeners, as they can affect your cutting techniques later.
Once clean, lay each shirt flat and smooth out any wrinkles. This step is essential for accurate t-shirt preparation.
Next, decide which areas of the shirts you want to feature in your quilt. You might want to focus on logos, graphics, or specific colors.
Mark these areas lightly with fabric chalk or a pen that washes out easily. This will help you visualize your layout before cutting.
Finally, check for any frayed edges or damage. Address these issues to guarantee clean cuts.
Proper preparation not only improves the aesthetic but also ensures your quilt holds up over time.
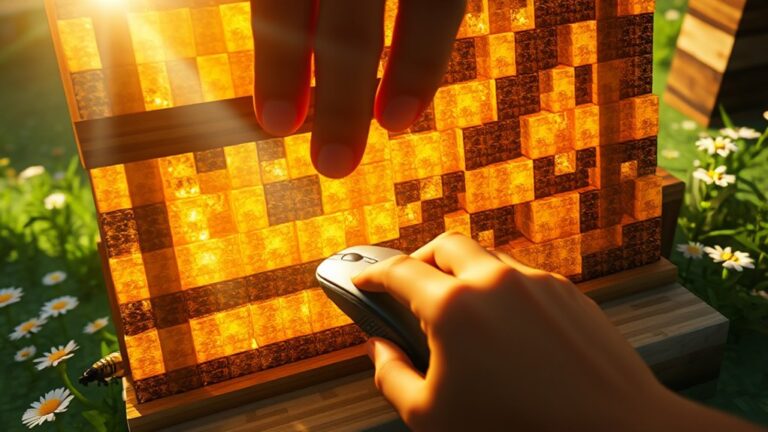
Cutting Your T-Shirts Into Squares
Now that your t-shirts are all prepped and ready to go, let’s start cutting them into squares. First, pick out which designs you really want to highlight in your quilt. Once you’ve got those picked, grab a ruler or a template and measure out your square sizes—whatever fits your shirts and your style best. Mark the squares carefully so you know exactly where to cut. Taking the time to do this step neatly will help your finished quilt look nice and cohesive.
Choosing T-Shirt Designs
As you immerse yourself in transforming your collection of t-shirts into a quilt, selecting the right designs is essential for creating a visually appealing piece.
Keep in mind the overall design aesthetics and aim for color coordination to guarantee harmony among the squares.
Here are some tips to guide your selection:
- Choose designs that evoke fond memories or significant events.
- Mix and match colors for a balanced look.
- Consider the size and placement of graphics on each shirt.
- Include a variety of styles (like logos, quotes, or patterns).
- Avoid overly busy designs that might clash.
Measuring Square Sizes
To create a cohesive quilt, accurately measuring and cutting your t-shirts into squares is essential.
Start by choosing a consistent square size. Common options are 10×10 or 12×12 inches.
Use measuring techniques like a fabric ruler or cutting mat for precision.
Lay the t-shirt flat, smoothing out wrinkles, and measure from the neckline or hem, depending on your design preferences.
Mark the square sizes lightly with fabric chalk or a pencil to avoid mistakes.
Once you’ve outlined your squares, cut carefully to guarantee clean edges.
Repeat this process for each t-shirt, keeping in mind that uniformity in size will create a polished look for your quilt.
Enjoy transforming your cherished tees into a beautiful keepsake!
Designing Your Quilt Layout
Designing your quilt layout is a crucial step that can make or break your project.
It’s where your creativity shines, so consider the following tips to create a stunning design:
- Choose a Color Scheme: Pick colors that complement each other and reflect your style.
- Mix and Match Patterns: Combine different t-shirt designs for visual interest and texture.
- Plan Your Layout Techniques: Think about alternating squares or using a grid pattern to achieve a sense of balance.
- Consider Size Variation: Use various square sizes to create depth and excitement.
- Test It Out: Lay your t-shirts on the floor so you can really visualize your layout before stitching anything together.
Taking the time to plan your quilt layout will guarantee that your final product is not just functional,
Careful planning of your quilt layout ensures your creation is both functional and a beautiful testament to your memories.
but also a beautiful representation of your memories.
Enjoy the process, and let your personal touch shine through!
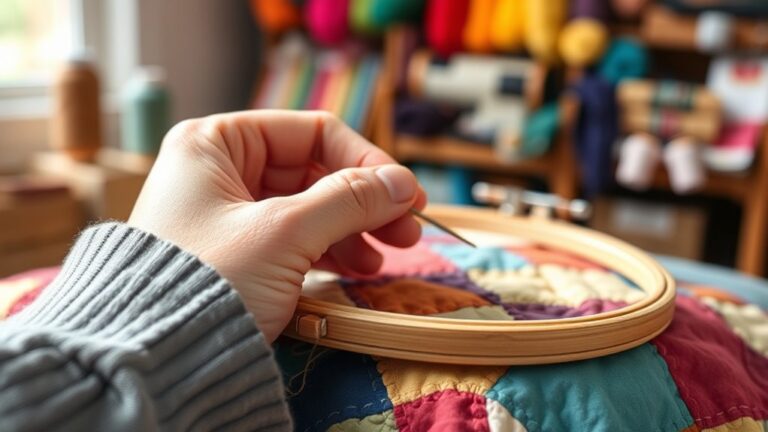
Assembling the Quilt Top
Gather your t-shirt squares and prepare for the exciting process of assembling the quilt top. Start by laying out your squares according to your chosen quilt pattern.
This step is essential; it lets you visualize the overall design and make adjustments for effective color coordination. Mix and match your t-shirts, balancing bold colors with more muted tones to create a cohesive look.
Once you’re satisfied with the arrangement, pin each square together to maintain alignment. Work row by row, ensuring that the edges are even and the seams align properly.
Don’t hesitate to step back and assess the overall feel of the quilt top as you go. This is your creative space, so let your personality shine through!
After you’ve assembled all the rows, secure them with pins, ready for the next step in your t-shirt quilt journey.
How to Sew Your T-Shirt Quilt Layers Together
Now that your quilt top is assembled, it’s time to sew your t-shirt quilt layers together. This step involves quilt layering, where you’ll stack your quilt top, batting, and backing fabric.
Here’s how to do it effectively using various sewing techniques:
- Prepare Your Workspace: Clear a large, flat surface for easy handling.
- Layer Carefully: Place the backing down first, right side facing the floor. Next, add the batting, and finally, place the quilt top on top.
- Pin or Baste: Use safety pins or basting stitches to secure the layers together. This helps prevent shifting while you sew.
- Sew the Layers: Start from one corner and use a walking foot to sew around the edges. Make sure to leave a small gap for turning.
- Trim Excess Batting: After sewing, trim any excess batting to reduce bulk.
That’s all it takes to get your quilt layers joined together and ready for the next steps!
Adding Borders and Finalizing Your Quilt
With your quilt layers securely sewn together, you can improve your t-shirt quilt by adding borders. This step not only elevates the overall look but also provides a nice finish.
You have several border options to choose from: solid colors, patterned fabrics, or even coordinating t-shirt scraps. Decide on a width that complements your quilt design, typically 2 to 6 inches.
To attach the borders, cut your chosen fabric to the desired length. Sew the borders to the top, bottom, and sides of your quilt, ensuring even seams.
Press the seams flat for a polished finish.
Once you’ve added the borders, you’ll want to finalize your quilt by trimming any excess fabric and giving it a good press. This will help smooth out any wrinkles.
You’re now ready to move on to caring for and displaying your beautiful t-shirt quilt!
Caring for and Displaying Your T-Shirt Quilt?
To keep your t-shirt quilt looking its best, it’s essential to follow proper care instructions.
Maintaining your t-shirt quilt’s beauty requires following essential care instructions for lasting vibrancy and longevity.
By taking a few simple steps, you can guarantee its longevity and maintain its vibrant colors.
Here are some quilt care tips:
- Wash your quilt on a gentle cycle in cold water.
- Use a mild detergent to prevent fading.
- Avoid bleach or harsh chemicals that can damage the fabric.
- Hang your quilt to dry, or tumble dry on low to minimize shrinkage.
- Store it in a cool, dry place to prevent mildew.
When it comes to display ideas, consider hanging your quilt on a wall or draping it over a couch.
This not only showcases your hard work but also adds a personal touch to your decor.
Frequently Asked Questions
How Long Does It Take to Make a T-Shirt Quilt?
It typically takes about 10 to 20 hours to make a t-shirt quilt, depending on your experience.
You’ll start with fabric selection, choosing shirts that hold significance for you. Once you’ve got your favorites, use effective cutting techniques to prepare the pieces.
If you’re new to quilting, it might take a bit longer, but the process is rewarding.
Enjoy each step, and soon you’ll have a cozy quilt that tells your story!
Can I Use Different Fabric Types With T-Shirts?
Absolutely, you can creatively combine different fabric types with your t-shirts!
Fabric compatibility is key, so guarantee your t-shirt blends well with other materials like cotton or flannel.
Mixing fabrics not only adds texture but also visual interest to your quilt.
Just remember to pre-wash everything to prevent shrinkage.
As you sew, keep an eye on the weight and stretch to guarantee a smooth finish.
Enjoy crafting your unique quilt!
What Is the Best Way to Store Leftover T-Shirt Pieces?
The best way to store leftover T-shirt pieces is by using clear bins or ziplock bags for easy visibility and access.
Label each container for better fabric organization, ensuring you know what you have on hand.
Keep the fabric flat to prevent wrinkles, and avoid stacking too many pieces together.
This way, your T-shirt storage remains neat and manageable, making it easier to find and use your materials for future projects.
How Do I Fix Mistakes While Sewing the Quilt?
When you spot a mistake, don’t panic; take a deep breath. Gently unpick the stitches, letting the fabric breathe as you work.
Use sewing techniques like backstitching to reinforce seams and guarantee durability. For small tears, fabric repair methods like patching can add a unique flair.
Picture your quilt coming together, vibrant and full of memories, as you smooth out imperfections. Each fix turns your creation into a true reflection of your journey.
Can I Wash My T-Shirt Quilt Regularly?
Yes, you can wash your t-shirt quilt regularly! For fabric care, use cold water and a gentle cycle to protect the t-shirts and batting.
Avoid bleach to keep colors vibrant. If you can, air dry or tumble dry on low heat to prevent shrinkage.
To maintain its shape, consider using a quilt bag when washing. Following these washing tips will keep your quilt looking great for years to come!
Conclusion
As you wrap yourself in your T-shirt quilt, think of it as a cozy hug from your treasured memories. Each patch tells a story, weaving together friendships, adventures, and milestones.
Just like a garden nurtured by love, your quilt blooms with warmth and nostalgia. So, hang it proudly or snuggle under it during chilly nights.
Either way, you’ve created a tapestry of your life. Your T-shirt quilt is a patchwork of joy that’s always ready to comfort you.