Step-by-Step Guide to Sew a Patchwork Quilt
If you’ve ever dreamed of creating a cozy patchwork quilt but felt overwhelmed by where to start, you’re not alone. Many people struggle with the process—choosing the right fabrics, getting the pieces to line up, and making everything come together smoothly can feel daunting.
But don’t worry! Whether you’re a total beginner or looking to hone your skills, this guide will walk you through the essentials of how to sew a patchwork quilt. We’ll make it simple and approachable, so you can enjoy every step of the journey.
To sew a patchwork quilt, start by gathering your essential tools like a sewing machine, cutting tools, and quality fabric. Choose fabrics that match your style, and wash and iron them before cutting.
Next, select quilt block patterns and lay them out, ensuring alignment. Assemble and pin the blocks using a quarter-inch seam.
Add borders, layer your quilt, and then choose quilting techniques, whether by hand or machine. Keep going to unveil the finishing touches that’ll bring your quilt to life!
Key Takeaways
- Gather essential tools like a sewing machine, cutting tools, thread, and pins for an effective quilting process.
- Select and prepare fabrics by washing, ironing, and cutting them accurately. This helps you achieve a cohesive design.
- Choose quilt block patterns that reflect your style. When you assemble blocks, use consistent seam allowances for best results.
- Add borders and sashing to enhance your layout. Make sure to use appropriate techniques when layering your quilt.
- Decide on quilting techniques that suit your preferences. You can opt for hand or machine quilting, depending on your skill level and project goals.
Essential Tools and Supplies Before You Quilt
Before you immerse yourself in quilting, gather the essential tools and supplies that’ll make your project smooth and enjoyable. Start with a reliable sewing machine; it’s a game changer for efficiency.
You’ll also need sharp fabric scissors and a rotary cutter for precise cuts. Don’t forget a cutting mat to protect your surfaces while you work.
Next, invest in quality thread and pins to keep everything securely in place. A ruler is vital for measuring, ensuring your patches fit perfectly.
Invest in quality thread and pins for secure stitching, and don’t forget a ruler to ensure perfect patch measurements.
Proper fabric storage is important, too. Organize your fabrics by color or type in clear bins so you can easily find what you need when inspiration strikes.
Finally, consider a design wall to lay out your quilt before you start sewing. This helps you visualize your project and make adjustments as necessary.
With these sewing essentials in hand, you’re ready to plunge into your quilting adventure!
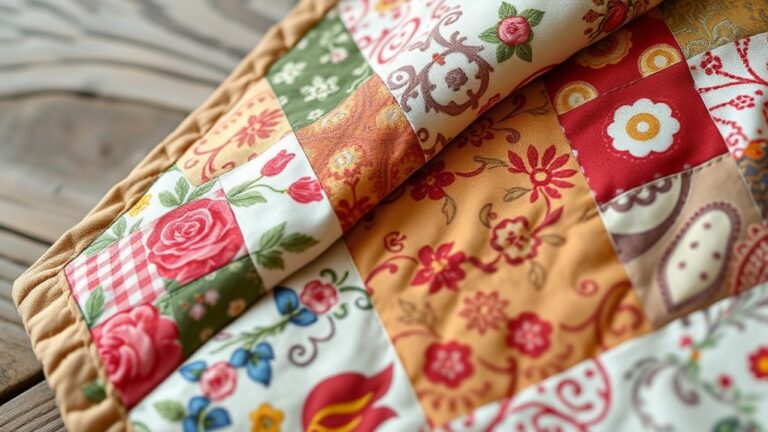
Choosing the Right Fabrics for Your Quilt
Choosing the right fabrics for your quilt can make all the difference in its overall look and feel.
Start by selecting fabric color combinations that resonate with your style.
Consider using a mix of bold and subtle hues to create depth and interest.
Don’t shy away from experimenting; contrasting colors can really make your quilt pop!
Next, think about texture variety.
Combining different fabric types, like cotton, flannel, and linen, adds dimension and tactile appeal.
A quilt with various textures feels more inviting and visually engaging.
When you’re at the fabric store, grab swatches and hold them together.
This hands-on approach helps you visualize how the colors and textures will interact in your quilt.
Remember, balance is key; ensuring that your fabrics complement each other will lead to a stunning final product.
Enjoy the process and let your creativity shine!
Understanding Quilt Block Patterns Before Cutting Fabric
Before you start cutting any fabric, let’s talk about quilt block patterns for a minute. It’s really important to choose your block designs thoughtfully, because each pattern has a big impact on the fabrics you’ll want to use and the look your finished quilt will have.
When you take the time to understand different block designs, it becomes so much easier to pick fabrics that work well together. This way, you can make choices that actually bring your creative vision to life, rather than just hoping everything matches in the end.
Choosing Block Designs
While you’re excited to plunge into your quilt project, understanding quilt block patterns is essential before you start cutting fabric. Choosing block designs sets the tone for your quilt.
You might prefer traditional patterns like log cabins or nine-patch designs, or lean towards modern designs featuring bold geometric shapes. Consider incorporating seasonal themes to reflect your favorite time of year.
Your quilt can tell personal stories by using fabrics that resonate with you, highlighting cultural influences and cherished memories. Experiment with color combinations and fabric textures to create depth and visual interest.
Fabric Selection Tips
As you immerse yourself in fabric selection, keep in mind that the right materials can improve your quilt design. Start by exploring fabric color combinations that reflect your theme.
Consider how different shades interact. Complementary colors can create striking effects, while analogous hues offer a soothing palette.
Next, think about texture contrasts. Mixing smooth fabrics with textured ones adds depth to your quilt.
For example, pairing cotton with flannel or silk can create visual interest and tactile variety.
Before cutting your fabric, visualize your quilt blocks and how each piece will fit together. This thoughtful approach guarantees your quilt not only looks beautiful but also feels inviting.
Trust your instincts, and enjoy the creative process!
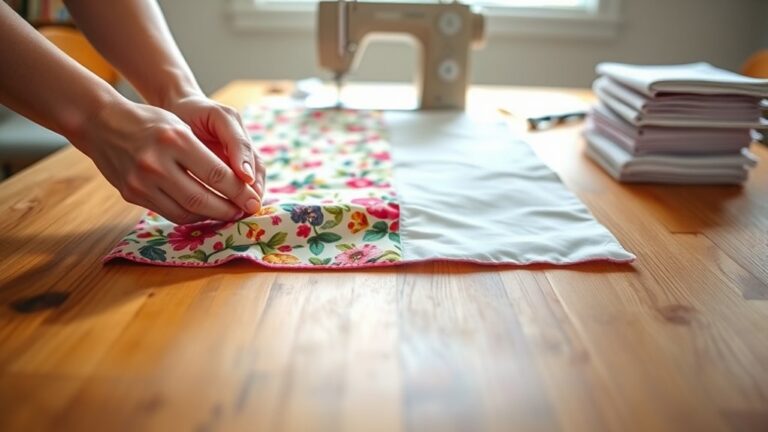
Prepping Your Fabric: Washing and Cutting
Preparing your fabric is an essential step in creating a beautiful patchwork quilt. Start by washing your fabric according to its specific fabric care instructions. This pre-washing helps prevent shrinkage and guarantees your quilt maintains its shape after you’re done.
Preparing your fabric by washing it properly ensures your quilt retains its shape and prevents unwanted shrinkage.
Use a mild detergent and avoid fabric softeners, as they can affect your fabric’s ability to hold stitches.
Once your fabric is clean and dry, it’s time to cut. Employ precise cutting techniques to ensure your pieces fit together perfectly.
Use a rotary cutter and mat for accuracy, and always measure twice before cutting once. This attention to detail will save you time and frustration later on.
Remember to iron your fabric before cutting to eliminate any wrinkles. Neat, flat pieces lead to better seams and a more polished final product.
With your fabric prepped, you’re ready to move on to assembling your quilt blocks!
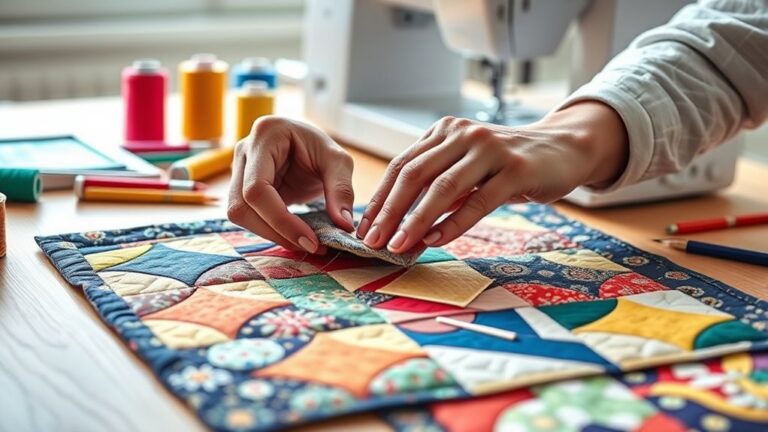
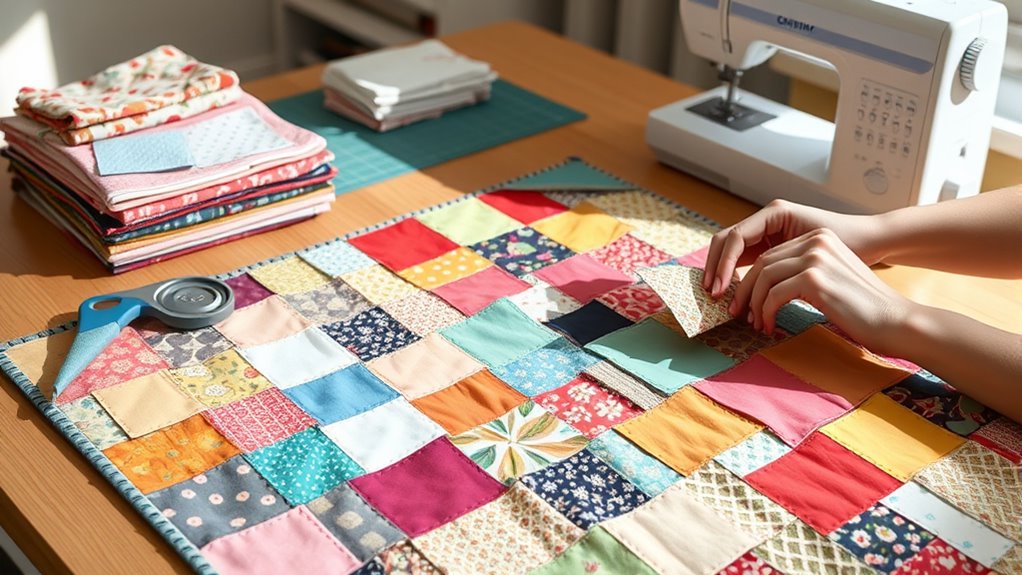
Assemble Your Quilt Blocks: A Step-by-Step Guide
Now that your fabric is prepped and ready, it’s time to assemble your quilt blocks. Start by laying out your squares according to your chosen block arrangement.
Take a moment for layout planning; this step is essential to visualize how your quilt will look.
Once you’re satisfied with the arrangement, begin sewing the blocks together. Pick a row and align the squares, right sides facing each other.
Pin them in place to prevent shifting while you sew. Use a quarter-inch seam allowance for consistent results.
After sewing the first row, press the seams open or to one side, depending on your preference.
Continue this process for each row until all blocks are assembled. Don’t forget to double-check your layout as you go, ensuring the colors and patterns align as you envisioned.
With all your blocks sewn together, you’re one step closer to a beautiful quilt!
Joining Your Quilt Blocks: Techniques You Need
Now that you’ve got your quilt blocks ready, it’s time to start joining them together so your quilt looks seamless and polished. There are a few things you’ll want to know before you get started, like the different kinds of seams you can use, some handy pressing tricks, and how to make sure all your points line up just right. Let’s walk through these essential skills together, so you can feel confident your finished quilt will look absolutely beautiful!
Seam Types Explained
As you immerse yourself in the world of quilt making, understanding seam types can greatly influence your finished project. Choosing the right technique guarantees your quilt looks professional and holds up over time.
Here are key seam types to examine:
- Flat seams: Great for reducing bulk.
- Quarter inch seams: Standard for patchwork, guaranteeing accurate block sizes.
- Bias seams: Used for curved seams, allowing flexibility without distortion.
- Seam finishes: Prevent fraying and improve durability.
- Stitch length: Adjusting it can affect the strength and appearance of your seams.
Pay attention to seam allowances and fabric grain to achieve the best results with your chosen sewing techniques.
With practice, you’ll master these seams and boost your quilting skills!
Pressing Techniques Overview
Mastering pressing techniques is essential for achieving crisp, flat quilt blocks that align perfectly.
Start by understanding the pressing order. Pressing seams to one side or open can greatly affect your quilt’s final appearance.
When you press, always consider the fabric grain. Pressing with the grain helps maintain the fabric’s integrity, ensuring your blocks don’t distort.
Use a hot iron and steam for stubborn seams, but be cautious with delicate fabrics. Remember to avoid pulling on the fabric while pressing, as this can lead to misalignment.
By following these pressing techniques, you’ll set a solid foundation for your quilt blocks, making the next steps much easier and more precise.
Happy pressing!
Matching Points Tips
To achieve beautifully joined quilt blocks, it’s vital to focus on matching points accurately.
Proper point alignment can make or break your quilt’s overall appearance.
Here are some tips to help you with this key step:
- Use a consistent seam allowance: This guarantees uniformity across all blocks.
- Pin strategically: Place pins at key intersections to hold fabric in place.
- Check color coordination: Confirm your fabric colors blend well to improve visual appeal.
- Align seams carefully: Match seams with precision to avoid gaps.
- Press after joining: This helps flatten seams and highlights your point alignment.
Adding Borders and Sashing
Borders and sashing can transform your patchwork quilt, adding a polished finish and a touch of personality.
Start by choosing your border styles; options like single, double, or pieced borders can improve your quilt layout.
Consider the fabric width for your borders to guarantee they complement your patchwork.
Next, think about sashing placement.
Using sashing techniques can create visual separation between blocks, enhancing color balance throughout the quilt.
Select fabrics that harmonize with your main pieces, and make certain they align with your chosen color palette.
As you stitch, keep an eye on the overall design, ensuring the sashing and borders flow well together.
Finally, add those finishing touches, such as topstitching along the borders, to give your quilt that extra flair.
With these elements, your quilt will not only be functional but also a beautiful piece of art you can proudly display.
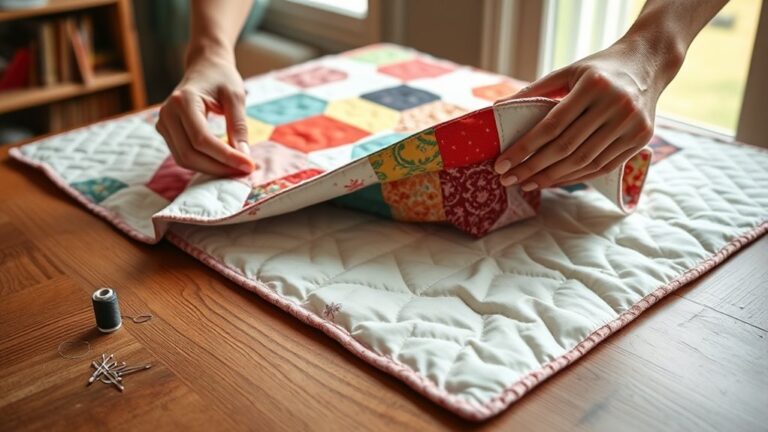
Layering Your Quilt: How to Make a Cozy Quilt Sandwich
Now that you’ve added borders and sashing, you’re ready for the fun part—layering your quilt for that extra cozy finish. First, let’s talk about materials. Choosing the right ones for your quilt sandwich really makes all the difference, so take a moment to pick out the best fabrics for your project.
Once you’ve got everything you need, it’s time to put the layers together. This is where your quilt really starts to feel warm and inviting, and you can see all your hard work coming together.
Choosing Your Quilt Materials
Creating a cozy quilt sandwich requires careful selection of materials to guarantee both comfort and durability.
Choosing the right fabric types and color combinations will not only improve the quilt’s appearance but also its functionality.
Here are five essential materials to take into account:
- Quilt Top Fabric: Choose cotton or cotton blends for softness and breathability.
- Batting: Opt for polyester or cotton batting, depending on warmth and weight preference.
- Backing Fabric: A sturdy cotton or flannel works well for the backing layer.
- Thread: Use high-quality cotton thread to secure strong seams.
- Binding Fabric: Select a fabric that complements your top for a polished finish.
With these materials, you’ll be well on your way to creating a cozy quilt sandwich!
Assembling The Quilt Layers
To make your quilt sandwich, you’ll need to layer your materials carefully for the best results.
Start with the backing fabric, right side down. Next, add the batting, ensuring it’s smooth without wrinkles.
Finally, place your quilt top right side up.
Now, let’s look at some layer types and basting methods to keep everything in place:
| Layer Type | Basting Method | Purpose |
|---|---|---|
| Backing Fabric | Safety Pins | Holds layers together |
| Batting | Spray Adhesive | Prevents shifting |
| Quilt Top | Hand Basting | Allows for easy adjustments |
Choose the method that works best for you, and you’ll create a cozy quilt sandwich ready for quilting!
Quilting Techniques: Hand vs. Machine
While both hand and machine quilting have their merits, choosing the right technique often depends on your personal preference and the desired outcome of your patchwork quilt.
Here’s a quick breakdown to help you decide:
- Hand Advantages: You’ll enjoy a personal touch and complete control over your stitches.
- Machine Efficiency: Quilting by machine is faster, allowing you to complete larger projects in less time.
- Detail and Texture: Hand quilting can create beautiful, intricate designs that add character.
- Accessibility: If you’re new to quilting, machine quilting might be easier to start with.
- Therapeutic Benefits: Hand quilting can be a calming, meditative process, helping you unwind.
Consider these factors when deciding.
Whether you choose the tactile experience of hand quilting or the speed of machine quilting, both techniques can lead to stunning results in your patchwork quilt.
Binding Your Quilt for a Polished Finish
As you near the completion of your patchwork quilt, binding it properly guarantees a polished finish that improves its overall appearance and durability.
Start by choosing your binding fabric, which should complement your quilt design. Cut strips about 2.5 inches wide and join them to create a long continuous piece.
When you’re ready to attach the binding, use your preferred binding techniques, like the bias or straight grain method. Fold the binding in half lengthwise and press it flat.
Align the raw edges with the quilt’s edge, then sew a quarter-inch seam. Pay special attention to the quilt corners; miter them for a neat look.
To do this, fold the binding at a 45-degree angle, then bring the next side up and continue sewing. Once you’ve sewn all around, flip the binding to the back and hand-stitch it down for a clean finish.
Your quilt is now beautifully bound!
Frequently Asked Questions
How Long Does It Take to Complete a Patchwork Quilt?
Completing a patchwork quilt can take anywhere from a few days to several weeks, depending on the quilt size and your time management skills.
If you’re working on a smaller quilt, you might finish it faster, while larger projects will require more time and effort.
Can I Use Old Clothes for Quilt Fabric?
You can definitely use old clothes for your quilt fabric.
It’s a fantastic way to practice upcycling techniques while giving new life to beloved garments.
When selecting fabric, consider the texture and durability of each piece.
This helps guarantee your quilt holds up beautifully.
Mix and match colors and patterns for a unique look that tells your story.
What’s the Best Thread Type for Quilting?
The best thread type for quilting is usually cotton or polyester. Cotton threads offer a natural look and feel, while polyester threads provide strength and durability.
You’ll want to guarantee your thread tension is just right. Too tight can cause puckering, while too loose can lead to unraveling.
Experimenting with different thread materials can help you find what works best for your specific quilt. Choose wisely for a beautiful finish!
How Do I Fix Mistakes While Quilting?
Mistakes in quilting can feel like a storm cloud over your sunny day. When you need to fix them, don’t fret!
Start by unpicking stitches gently, like peeling back layers of a delicate flower. Once that’s done, adjust seams to guarantee everything aligns perfectly.
Take your time and remember, every quilter faces hiccups. With patience and creativity, you’ll turn those blunders into beautiful blossoms in your patchwork masterpiece.
What Should I Do With Leftover Fabric Scraps?
You can turn leftover fabric scraps into fun scrap projects! Consider making patchwork coasters, small bags, or even a fabric wreath.
If you’ve got a lot of scraps, organize them in labeled bins for easy fabric storage. This way, you can quickly find what you need for future projects.
Don’t let those scraps go to waste. Get creative and enjoy the process of using every bit of fabric you have!
Conclusion
Now that you’ve stitched together a colorful tapestry of fabric, your patchwork quilt is ready to wrap you in warmth. Each square tells a story, woven with care and creativity.
As you snuggle under your handiwork, feel the love and memories stitched into every seam. Remember, this quilt isn’t just a blanket; it’s a cozy hug from your imagination.
So, grab a cup of tea, and let your patchwork quilt bring comfort and joy for years to come!