Hand Sew Quilt Binding – A Step-by-Step Guide
If you’ve ever struggled to finish a quilt because the binding just won’t cooperate, you’re not alone. Many quilters find that achieving a neat, durable edge is one of the trickiest parts of the process.
Whether your corners bunch up or your stitches show unevenly, it’s a common frustration—but the right tools and techniques can make all the difference.
Hand sewing quilt binding improves your project’s durability and aesthetic appeal.
Start by gathering essential materials like high-quality thread, a hand-sewing needle, and clips or pins.
Prepping your quilt edges guarantees a professional finish.
While attaching the binding, maintain even stitches, especially around corners.
Be mindful of common issues like puckering and uneven edges.
By following careful techniques, you’ll achieve a polished look.
Want to master the art of binding? There’s plenty more to investigate!
Key Takeaways
- Hand sewing quilt binding gives you better control over where each stitch goes. This leads to a more durable and attractive finish.
- Choose good-quality materials, such as cotton thread and a size 9 or 10 needle, to make your stitching more effective.
- Secure the binding with clips or pins. Keep your tension even as you sew, which helps you avoid puckering and keeps the look polished.
- When you get to corners, fold the binding at a 45-degree angle. This creates neat, mitered edges, and you can ease around curves gently for a smooth appearance.
- If you notice uneven edges or fabric bunching, check your alignment and keep your tension consistent. Taking your time here really helps prevent common issues.
Why Choose Hand Sew Quilt Binding?
When you consider finishing your quilt, hand sewing the binding offers a level of craftsmanship that machine sewing often can’t match. The meticulous nature of hand sewing provides several benefits, like ensuring that your quilt’s edges are beautifully finished and secure.
You’ll notice how this technique allows you to control the tension and placement of every stitch, resulting in a more polished look.
Additionally, hand sewing improves quilt longevity. By carefully sewing the binding, you minimize the risk of fraying and wear, keeping your quilt intact for years to come.
Hand sewing the binding enhances quilt longevity, reducing fraying and wear for lasting beauty and durability.
This method also allows you to bond with your quilt as you work, making each stitch feel meaningful.
Ultimately, choosing to hand sew your quilt binding not only raises your project’s aesthetic but also prolongs its life. It’s a truly rewarding choice for any quilting enthusiast.
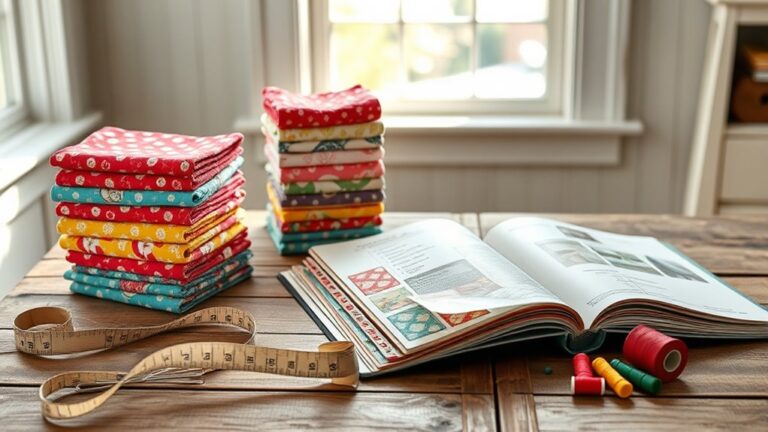
Essential Materials for Hand Sewing Binding
To achieve a beautifully finished quilt binding, you’ll need some essential materials that make the process smoother and more enjoyable. Start with your binding thread types; a high-quality cotton or polyester thread works best, as it provides strength and durability.
Choose a color that matches or contrasts your quilt for a polished look. Next, consider binding needle options. A size 9 or 10 hand-sewing needle is ideal for most bindings, allowing you to easily maneuver through multiple layers.
Keep some clips or pins handy to secure the binding as you sew, ensuring everything stays in place. Additionally, a pair of sharp scissors will help you trim any excess fabric neatly.
Finally, having a thimble on hand can protect your fingers during the process. With these materials ready, you’ll be well-prepared to start hand sewing your quilt binding!
Preparing Your Quilt for Binding
Before you start binding your quilt, it’s a good idea to pick out a binding fabric that goes nicely with your quilt top. Take a little time to lay your options next to the quilt and see what looks best—you want something that really ties everything together.
Once you’ve settled on your fabric, the next step is to trim the edges of your quilt. Try to get them as neat and straight as possible, since this will make attaching the binding a lot easier. Prepping the edges like this helps make sure your finished quilt will have that smooth, professional look you’re aiming for.
Choosing Fabric For Binding
Choosing the right fabric for your quilt binding can greatly improve the overall look of your project. Start by considering fabric color; it should complement your quilt’s main hues.
Pay attention to binding texture, as a smooth finish can elevate the quilt’s feel. Make sure to coordinate patterns; a subtle pattern can add interest without overwhelming the design.
Choose a fabric weight that matches your quilt’s style. Lighter fabrics work well for delicate quilts, while heavier options suit more robust designs.
Think about seasonal themes, too. Using seasonal colors can give your quilt a timely touch.
Finally, prioritize fabric durability. You want your binding to withstand wear and tear, ensuring your quilt lasts for years to come.
Trimming Quilt Edges
Trimming your quilt edges is an essential step in preparing it for binding
and guarantees a polished finish. Start by ensuring proper edge alignment,
as this will affect the overall appearance of your quilt.
Use sharp scissors or a rotary cutter for clean cuts.
Here are some effective trimming techniques to take into account:
| Technique | Description |
|---|---|
| Straight Cut | Follow the quilt’s edges precisely |
| Squaring Up | Trim corners to create a square shape |
| Layered Cutting | Cut through multiple layers at once |
Cutting and Preparing Your Binding Strips Made Easy
Cutting and preparing your binding strips is an essential step in creating a polished quilt finish.
Start by selecting the right fabric types. Cotton is a popular choice because it’s durable and easy to handle. Choose a fabric that complements your quilt top and is sturdy enough for everyday use.
Next, decide on your binding width. For most binding techniques, 2.5 inches is a common choice.
Use a rotary cutter and mat for clean, straight cuts. Align your fabric grain carefully so you avoid stretching or distorting your strips.
Cut your strips across the width of the fabric, making sure to cut enough to go all the way around your quilt.
Once you have your strips, join them together using diagonal seams. This creates a seamless look and helps your binding lie flat.
Press the seams open, and you’re ready to move on to the next step in your binding journey!
Attaching the Binding to Your Quilt
Now that your binding strips are ready, it’s time to attach them to your quilt. Start by laying your quilt flat, with the right side facing up.
Pick a binding technique that suits your style, whether you prefer a simple whip stitch or a more decorative option. Begin at the middle of one side, aligning the raw edges of the binding with the quilt.
Choose a binding technique that reflects your style, starting at the center and aligning the raw edges with your quilt.
Pin or clip it in place to keep everything secure. As you sew, make certain to catch both the binding and the quilt layers.
This step is essential for those finishing touches, because you want a clean, professional look. Continue along the edges, sewing until you reach the next corner.
Remember to keep your stitches even and consistent, as this guarantees durability and aesthetic appeal. With each stitch, you’re one step closer to completing your beautiful quilt!
Managing Corners and Curves With Ease
As you approach the corners and curves of your quilt, managing the binding can seem tricky, but it doesn’t have to be. Start with your corner techniques.
When you reach a corner, fold the binding at a 45-degree angle, creating a neat miter. Pin it in place before securing it with a few hand stitches. This method guarantees a crisp finish that looks professional.
For curves, you’ll need to make curve adjustments. Gently ease the binding around the curve, making small pleats if necessary to avoid puckering.
Use your fingers to guide the fabric and maintain its shape as you stitch, making sure the binding hugs the quilt smoothly.
Keep your stitches even and consistent, which will improve the overall appearance. With a bit of practice, you’ll find that managing corners and curves becomes second nature, adding a polished touch to your beautiful quilt.
Essential Tips for a Perfect Finish
Achieving a perfect finish on your quilt binding involves a few key tips that can make all the difference.
First, choose the right binding techniques. Whether you’re using straight or bias-cut strips, consistency is vital.
When hand sewing, make small, even stitches to guarantee both durability and a nice look.
Additionally, pressing your binding before attaching it will help create crisp edges.
Don’t rush the process; take your time to align everything neatly.
Here’s a quick reference table to help you remember essential tips:
| Tip | Description | Benefit |
|---|---|---|
| Use Quality Fabric | Choose fabric that matches well | Guarantees a polished look |
| Consistent Stitches | Opt for small, even stitches | Improves durability |
| Press Binding | Iron before sewing | Creates clean edges |
Fixing Common Binding Issues
When working on quilt binding, you’ll likely encounter a few common issues that can affect your project’s overall appearance.
One common binding mistake is uneven edges. If your binding isn’t straight, try pressing it with an iron to flatten and straighten it out.
Another issue is binding that’s too tight or too loose. For a snug fit, make sure you’re not pulling the fabric while sewing. If it’s loose, consider adding a few more stitches to secure it better.
Additionally, check for puckering. This can happen if you’re sewing too quickly. Slow down and take your time to avoid this issue.
Finally, if you notice your binding isn’t lying flat, you can use binding troubleshooting tips like gently pulling the fabric while you stitch, or adjusting the tension on your thread.
Avoiding Common Mistakes in Hand Sewing
How can you guarantee your hand sewing is flawless?
Start by paying close attention to your binding tension. If it’s too tight, your stitches will be visible on the front side of your quilt, detracting from its overall appearance.
Aim for a comfortable, consistent tension that allows your stitches to blend seamlessly into the fabric.
That way, your work looks smooth and professional.
Next, focus on your stitch visibility.
Use small, even stitches and alternate your needle’s entry point slightly for a more discreet look.
This prevents any noticeable gaps that can ruin your quilt’s aesthetic.
Always keep your fabric layers aligned as you sew; misalignment can lead to puckering and uneven binding.
Align your fabric layers meticulously while sewing to avoid puckering and ensure even binding.
Lastly, don’t rush.
Take your time to guarantee each stitch is placed carefully, making adjustments as needed.
What Are Common Binding Issues?
When you’re hand sewing quilt binding, there are a few hiccups you might bump into along the way. For example, maybe your edges aren’t lining up as neatly as you’d like, or you notice the fabric starting to bunch up in spots. Sometimes, it’s just a matter of using the wrong stitching technique, and that can really show in your finished quilt.
But don’t worry—these are all pretty common problems. Once you know what to look out for, it’s much easier to spot them and make adjustments. With a little practice and some simple fixes, you’ll be able to give your quilt a smooth, polished finish.
Uneven Binding Edges
Uneven binding edges can frustrate even the most seasoned quilters, but identifying the root of the problem can help you achieve a polished finish.
One common issue arises from inconsistent binding alignment techniques. If your fabric isn’t aligned correctly while sewing, you’ll end up with uneven edges that detract from your quilt’s overall look.
To avoid this, take your time, and use pins or clips to hold the binding in place as you sew.
Additionally, edge finishing tips can make a world of difference. Make certain to trim any excess fabric before attaching the binding.
This simple step guarantees a cleaner line and more even edges. With careful attention, you can transform those uneven edges into a professional finish.
Fabric Bunching Problems
Fabric bunching can be a frustrating issue, especially when you’re aiming for a smooth and polished quilt binding. One common cause of bunching is inconsistent fabric tension.
If you’re pulling too tightly or too loosely while sewing, it can lead to wrinkles and puckers. Another potential cause is using incompatible fabric types; heavier fabrics might not move as smoothly as lighter ones, causing unevenness.
To prevent this, make sure you’re working with similar weights and textures. Furthermore, keep an eye on your sewing speed, since rushing through can exacerbate tension issues.
Incorrect Stitching Technique
While you’re working on quilt binding, incorrect stitching techniques can lead to a range of common issues that detract from your project’s overall appearance.
One frequent problem is inconsistent binding stitch variations, which can create an uneven look. If you find your stitches are too tight or too loose, it’s essential to make fabric tension adjustments.
Tight stitches can cause puckering, while loose stitches may unravel or look sloppy. Moreover, skipping stitches can occur if you’re rushing or not paying attention to your technique.
To guarantee a polished finish, take your time, check your work regularly, and adjust your approach as needed. With practice, you’ll master the art of hand-sewn quilt binding and avoid these common pitfalls.
Frequently Asked Questions
How Long Does It Take to Hand Sew Quilt Binding?
It usually takes a few hours to hand sew quilt binding, depending on your sewing speed and the size of your quilt.
If you’re using efficient binding techniques, you might finish quicker.
Practicing will improve your speed, making the process smoother over time.
Don’t rush; enjoy the journey as you create a beautiful finish for your quilt.
Can I Use Different Fabrics for Binding?
Absolutely, you can use different fabrics for binding! It’s like mixing vinyl records at a party; the right fabric color combinations can make your quilt pop.
When selecting binding fabric choices, consider how the patterns and colors complement your quilt top. Just make certain the fabrics are similar in weight to guarantee a smooth finish.
Don’t shy away from creativity; your unique choices will add personality and flair to your project!
What Is the Best Thread Type for Hand Sewing Binding?
For hand sewing binding, a medium-weight cotton thread is your best bet, typically around 40-50 weight.
It provides the strength you need while remaining easy to work with.
As for thread color, match it to your binding fabric for a seamless look or choose a contrasting color for a pop of interest.
This way, your stitches will blend beautifully or stand out, depending on the effect you want to achieve.
Is Hand Sewing Binding Suitable for All Quilt Types?
Hand sewing binding can be a delightful choice for most quilt types, offering a charming, handcrafted finish.
Whether you’re using cotton, flannel, or even specialty fabrics, this technique works well with various binding techniques.
Just be mindful of your fabric choices; thicker materials may require a bit more effort.
Ultimately, if you enjoy the process and appreciate the details, hand sewing binding’s your perfect match!
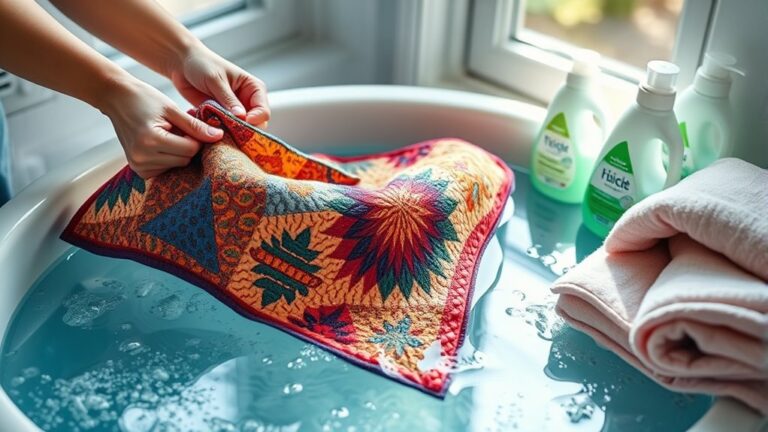
How Do I Care for My Quilt After Binding?
To care for your quilt after binding, wash it gently in cold water with mild detergent. Avoid harsh chemicals to preserve the fabric.
When it’s time to store your quilt, keep it in a cool, dry place, ideally folded loosely in a breathable cotton bag. This prevents creasing and protects it from dust.
Regularly check for any signs of wear or damage to guarantee your quilt stays beautiful for years to come.
Conclusion
In the world of quilting, hand-sewing your binding is like adding the final brushstroke to a masterpiece.
It brings warmth and character to your creation, wrapping it in a loving hug.
With the right techniques and a sprinkle of patience, you’ll turn your quilt into a cherished heirloom.
So, roll up your sleeves, let your creativity flow, and transform each stitch into a story that unfolds with every snuggle.
Happy sewing—and enjoy every moment as you hand sew quilt binding to finish your quilt with care and love!