Cut Perfect Quilt Squares: A Step-by-Step Guide
If you’ve ever tried to piece together a quilt, you know how frustrating it can be when your blocks just don’t line up. Many people struggle to cut perfect quilt squares, leading to uneven seams and a less-than-polished finish. You’re not alone—achieving those crisp, consistent squares is a challenge for beginners and seasoned quilters alike.
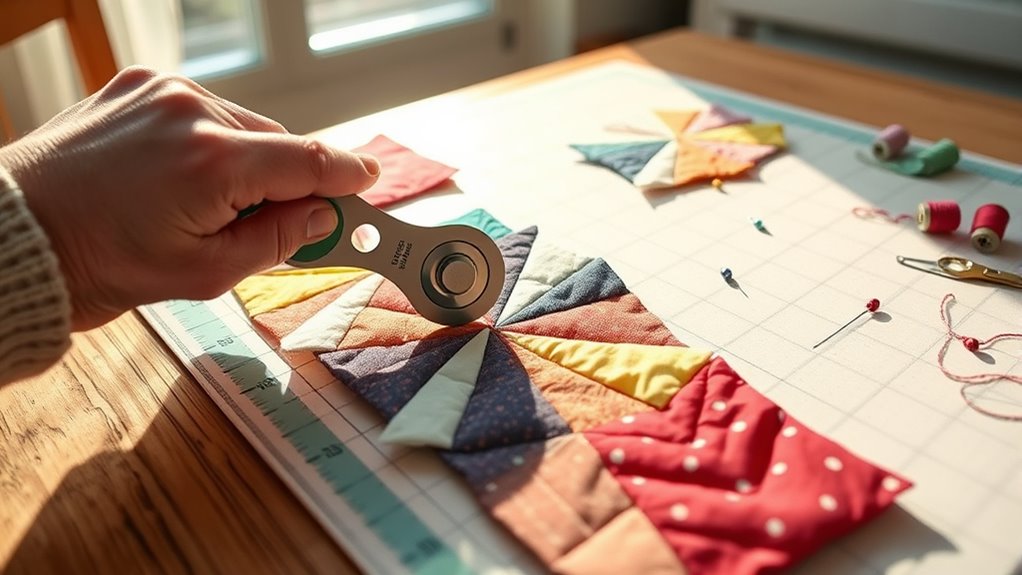
Cutting perfect quilt squares is essential for a polished quilt. Start by gathering quality tools like a rotary cutter, a self-healing mat, and a non-slip ruler.
Pre-wash and iron your fabric for smooth cutting. Measure accurately, and cut at a 45-degree angle for clean edges.
Avoid common mistakes, such as using dull blades and ignoring fabric grain, to guarantee precision.
By mastering these techniques, you’ll set a solid foundation for your quilt and improve your overall results.
Key Takeaways
- Use a high-quality rotary cutter and sharp blade for clean, precise cuts on fabric squares.
- Pre-wash, iron, and trim selvage edges of fabric to make sure you have a smooth cutting surface.
- Measure accurately and double-check your measurements before cutting. This helps you avoid mistakes.
- Align the fabric with the grain direction to keep its shape and prevent warping as you cut.
- Organize your cut squares in clear bins by color and size, so assembly and access are always efficient.
Why Cutting Perfect Quilt Squares Matters
When you cut perfect quilt squares, you set the foundation for a stunning finished project. The importance of precision can’t be overstated. Each square must match perfectly to create a harmonious design.
If your pieces are even slightly off, it can throw off the entire quilt. This leads to frustrating adjustments later on.
By prioritizing accuracy, you guarantee that your seams line up well. This makes the assembly process smoother and more enjoyable.
You’ll notice that well-cut squares allow for cleaner edges and sharper angles. These details really contribute to a polished look.
Plus, when you start with precise cuts, you save time and fabric. That means less waste overall.
Investing a little extra care in cutting can truly transform your quilting experience. You’ll not only improve the quality of your work but also elevate your satisfaction with the finished product.
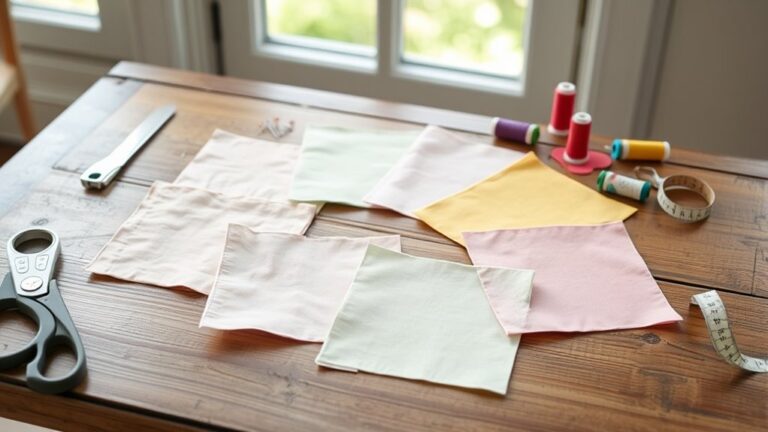
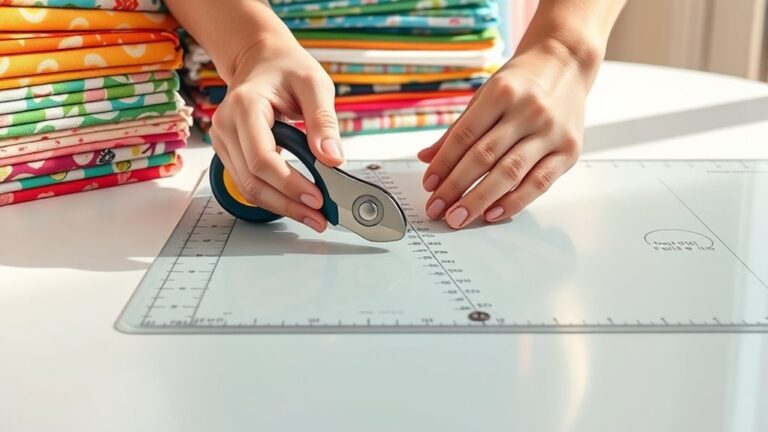
The Tools You Need for Perfect Cutting
To achieve perfect quilt squares, you’ll need a few essential tools that make the cutting process efficient and precise.
First, invest in a high-quality rotary cutter. There are various rotary cutter options available, so choose one that feels comfortable in your hand and suits your cutting style.
Invest in a comfortable, high-quality rotary cutter that suits your cutting style for optimal precision.
A sharp blade is essential for clean cuts, so replace it regularly.
Next, a self-healing cutting mat is important. Consider different mat sizes based on your workspace; larger mats provide ample room for bigger fabric pieces.
Make sure your mat has clear grid lines to help you measure accurately.
Finally, a ruler with a non-slip backing will help you maintain straight lines and even cuts.
With these tools in hand, you’ll be well on your way to cutting perfect quilt squares. Remember, quality tools improve your precision and make the cutting process a breeze!
Choosing the Best Fabric for Your Quilting Project
With your cutting tools ready, the next step is selecting the right fabric for your quilting project. Start by reflecting on the fabric types that suit your design.
Cotton is the most popular choice due to its durability and ease of handling. However, you might also investigate blends or specialty fabrics like flannel and batik for unique textures and patterns.
Once you’ve narrowed down your fabric types, focus on color selection. Think about the overall theme and mood you want to convey.
Use a color wheel to help you create harmonious combinations. Don’t forget to take into account the scale of prints; larger patterns can overwhelm smaller squares, while smaller prints may get lost in larger designs.
Finally, confirm your chosen fabrics coordinate well together. Take swatches and lay them out to visualize how they’ll interact, ensuring a cohesive look for your quilt.
Happy fabric hunting!
Preparing Your Fabric for Cutting
Before cutting your fabric, it’s vital to prepare it properly to guarantee clean, accurate squares.
Follow these steps for effective fabric preparation:
1. Pre-wash the fabric: This removes any sizing and prevents future shrinkage.
That way, your quilt maintains its shape down the road.
2. Iron or press the fabric: Smooth out any wrinkles to achieve a flat surface.
This makes cutting easier and much more precise.
3. Apply starch: A light starch application can help stiffen the fabric.
That extra crispness makes it easier to handle and cut accurately.
4. Trim the selvage edges: Remove the selvage to avoid distortion.
This also helps make certain your squares are nice and uniform.
Taking these steps not only sets the foundation for a successful project, but also improves the overall look of your quilt.
Proper preparation not only lays the groundwork for success but also enhances the beauty of your quilt.
Proper preparation saves you time and frustration later on, so don’t skip these essential tasks!
Step-by-Step to Cutting Perfect Quilt Squares
To cut perfect quilt squares, you’ll want to make sure you have the right tools on hand. Grab a rotary cutter, a sturdy cutting mat, and a clear ruler—these will make things a lot easier. Once you’ve got your supplies ready, it’s all about careful measuring. Take your time lining up the fabric, because accuracy here will make a big difference in your finished squares.
Now that you’re set up, you can try out a few different cutting methods. Some quilters like to stack their fabric and cut several layers at once, while others prefer working with one layer for extra precision. Either way, focus on keeping your cuts straight and steady. With a little practice, you’ll find the process gets smoother—and your quilt squares will come out just right every time.
Essential Tools Required
When you’re ready to cut perfect quilt squares, having the right tools makes all the difference.
Here’s what you’ll need for success:
1. Rotary Cutter:
Understand the rotary cutter basics to achieve clean, precise cuts.
2. Cutting Mat:
Use a self-healing cutting mat to protect your surfaces and keep blades sharp.
3. Ruler:
A clear acrylic ruler helps you measure accurately and aligns with fabric edges.
4. Fabric Weights:
These keep your fabric in place, preventing shifts while you cut.
Accurate Measuring Techniques
With your tools ready, accurate measuring techniques become key to cutting perfect quilt squares. Start by using your measuring tools, like a quilting ruler or a measuring tape.
Make certain to align your fabric properly. Lay it flat and smooth out any wrinkles before you measure from a straight edge.
| Action | Importance |
|---|---|
| Use a quilting ruler | Guarantees precise cuts |
| Align fabric edges | Prevents distortion |
| Double-check measurements | Confirms accuracy |
Cutting Methods Explained
Cutting perfect quilt squares requires a clear plan and the right methods. Using effective techniques will help you achieve accuracy and consistency.
Here’s how to get started:
- Choose Your Tools: Use a sharp rotary cutter and a cutting mat for smooth, precise cuts.
- Prepare Your Fabric: Iron your fabric to eliminate wrinkles and guarantee proper fabric alignment.
- Measure Twice: Double-check your measurements before cutting to avoid mistakes.
- Cut with Care: Apply rotary cutter tips by holding the cutter at a 45-degree angle, and make firm, steady passes.
Following these steps will improve your cutting process, leading to beautifully uniform quilt squares every time. Enjoy your quilting journey!
Measure and Mark Fabric Accurately
Accurate measuring and marking are essential for achieving perfect quilt squares.
Start by choosing the right fabric types, as each behaves differently when cut. For example, cotton is stable while knits stretch, so you’ll need to adapt your approach accordingly.
Use high-quality marking tools like fabric markers, chalk, or pencils that wash out easily. Begin by laying your fabric flat, ensuring there are no wrinkles.
Measure the desired square dimensions and mark clearly along the edges. When marking, keep your ruler straight and steady to avoid any slippage.
If you’re working with multiple layers, go ahead and pin them together to prevent movement. Always double-check your measurements before cutting.
It’s easier to fix a mistake at this stage than after you’ve cut your fabric. By carefully measuring and marking, you’ll set the foundation for perfectly squared quilt pieces.
Your attention to detail now will pay off later in your quilting project!
Best Cutting Techniques for Various Fabrics
Choosing the right cutting technique can make all the difference in achieving clean edges and precise quilt squares.
Here are some effective methods tailored to various fabrics:
1. Rotary Cutter Techniques:
Use a rotary cutter for straight, long cuts.
Make sure your blade is sharp for clean edges.
2. Fabric Pressing Tips:
Always press your fabric before cutting.
This eliminates wrinkles and helps maintain accuracy.
3. Scissors for Curves:
For intricate designs, use fabric scissors.
They allow better control when cutting curves.
4. Bias Cutting:
When working with stretchy fabrics, cut on the bias.
This technique helps prevent fraying and maintains shape.
Top Cutting Mistakes Every Quilter Should Avoid
When you’re cutting quilt squares, there are a few little things that are easy to miss—and they can end up causing a lot of frustration later on. For example, have you ever tried cutting with a dull blade? It usually leads to jagged edges that just don’t look right. And if you ignore the fabric grain, your pieces might end up stretched out or oddly shaped, which can throw off your whole project.
Using Dull Blades
Using dull blades can turn your quilting experience into a frustrating chore.
When your cutting tools aren’t sharp, it affects your cutting efficiency and the overall quality of your squares.
Here are four reasons to avoid using dull blades:
- Uneven Cuts: Dull blades create jagged edges, making your squares less precise.
- Increased Frustration: Struggling with a dull blade can slow you down and lead to mistakes.
- Fabric Damage: A dull blade can snag and tear your fabric, ruining your materials.
- Safety Risks: Using too much force with a dull blade increases the chance of accidents.
Keep your blades sharp to enjoy smooth, efficient cutting and achieve those perfect quilt squares!
Ignoring Fabric Grain
Cutting quilt squares isn’t just about having sharp blades; it’s also about understanding fabric grain. Ignoring the grain can lead to fabric distortion, which messes up your squares’ shapes and sizes.
When you cut against the grain, you risk stretching and warping, affecting your quilt’s overall look. Always align your fabric correctly to guarantee your pieces maintain their integrity.
This attention to detail not only improves your sewing experience but also boosts quilt longevity. If you want your finished product to withstand the test of time, pay close attention to how you cut.
Trust me, taking a moment to reflect on the fabric grain will pay off in the end. Your quilts deserve that extra care!
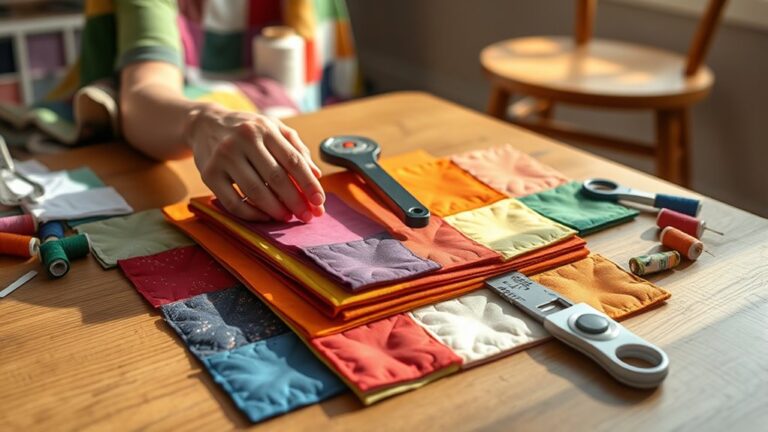
Storing and Organizing Your Cut Squares
To keep your cut quilt squares organized, consider investing in clear plastic bins or filing systems.
Investing in clear plastic bins or filing systems can help keep your cut quilt squares organized and your quilting process efficient.
These square storage solutions help you avoid chaos and make your quilting process smoother.
Here are some organizing techniques to try:
- Sort by Color: Group your squares by color to easily find the shades you need.
- Size Matters: Keep different sizes in separate bins for quick access.
- Label Everything: Use labels to identify each bin’s contents, which saves time during assembly.
- Create a System: Develop a consistent method for storing your squares, whether it’s by project or fabric type.
Next Steps: Assembling Your Quilt With Precision
Now that your quilt squares are organized and ready, it’s time to start the assembly process. Begin by laying out your squares in the pattern you want.
Use these quilt assembly techniques to help everything go smoothly:
| Step | Action | Tips |
|---|---|---|
| 1. Layout | Arrange your squares | Find a comfortable space |
| 2. Sew Rows | Stitch squares together | Use a quarter-inch seam |
| 3. Press | Iron seams flat | Press, don’t iron |
| 4. Join Rows | Connect rows carefully | Check fabric alignment |
As you sew, keep an eye on fabric alignment to avoid misalignment and puckering. Regularly check your progress and make adjustments when necessary.
With patience and attention to detail, your quilt will come together beautifully!
Frequently Asked Questions
What Is the Best Fabric Type for Beginners?
For beginners, cotton blends are your best bet. They’re forgiving and easy to work with, making your quilting experience smoother.
Look for medium-weight fabrics, as these provide the right balance of stability and flexibility. Lightweight fabrics can be tricky, while heavy ones might be cumbersome.
By choosing cotton blends in the right fabric weights, you’ll set yourself up for success and create beautiful quilt squares with ease.
Enjoy your quilting journey!
How Do I Fix Uneven Quilt Squares After Cutting?
If you’ve found uneven quilt squares after cutting, don’t panic! First, check your square alignment; they might just need a little adjustment.
Use a rotary cutter for precise cutting techniques, trimming the edges carefully. Lay them out flat and re-measure to guarantee accuracy.
If some squares still look off, consider squaring them up again. With patience and attention, you’ll transform those uneven squares into perfect pieces ready for your quilt!
Can I Use Scissors Instead of a Rotary Cutter?
Yes, you can use scissors instead of a rotary cutter for cutting quilt squares. Scissors have advantages like being more portable and easier to use for detailed cuts.
However, compared to a rotary cutter, they might not offer the same level of precision and speed. If you’re comfortable with scissors and don’t need perfectly straight edges, go for it!
Just remember to measure carefully to guarantee your squares are even.
What Size Ruler Is Best for Cutting Quilt Squares?
For cutting quilt squares, a 6.5-inch by 24-inch ruler is often best. This size gives you enough length for cutting larger pieces while still being manageable.
It helps guarantee cutting accuracy as you can easily align your fabric. If you’re working with smaller squares, a 6.5-inch square ruler can also be handy.
Ultimately, choose a ruler that feels comfortable for you and fits your cutting needs!
How Do I Maintain My Cutting Tools for Longevity?
You might think your cutting tools are invincible, but they’re not.
To keep them sharp and ready, regularly clean your tools to prevent gunk build-up. A little soap and warm water can work wonders!
Don’t forget to sharpen your blades. Dull blades are the arch-nemesis of precise cuts.
Doing these simple maintenance tasks guarantees your tools last longer, and you’ll avoid the tragic fate of struggling with frayed edges and uneven squares!
Conclusion
So, you might think cutting perfect quilt squares is too tricky, but with the right tools and techniques, it’s totally achievable!
Picture yourself effortlessly slicing through fabric, creating sharp, even squares that make your quilt come to life.
Trust me, once you master these steps, you’ll wonder why you ever hesitated.
Adopt the process, and soon you’ll be well on your way to crafting a stunning quilt that showcases your newfound cutting skills.
Happy quilting—and enjoy the satisfaction of cutting perfect quilt squares every time!