Crafting a Mace: A Step-by-Step Guide
Crafting a Mace: A Step-by-Step Guide
Many enthusiasts struggle with finding the perfect balance between functionality and creativity when it comes to crafting a mace.
You’re not alone in this journey. The desire to create a unique, effective weapon can feel overwhelming at times.
But fear not! Crafting a mace is a rewarding blend of artistry and skill.
Start by choosing durable materials like steel for the head and hardwood or fiberglass for the shaft.
Gather essential tools like a hammer, anvil, and chisels.
Design your mace’s shape, ensuring it balances well in your hand.
After forging the head, securely attach it to the handle.
Don’t forget to polish and maintain your creation for longevity.
There’s more to investigate about customization and care to make it truly yours.
Key Takeaways
- Research historical mace designs to inspire your crafting and understand various styles, shapes, and weights.
- Select durable materials like steel for the head and hardwood or fiberglass for the handle. Consider both aesthetics and functionality.
- Utilize essential tools such as hammers, anvils, chisels, and safety gear. This will help you shape and craft your mace effectively.
- Securely attach the mace head to the handle. Make sure there’s proper alignment and stability through testing before use.
- Polish and maintain your mace regularly. This enhances durability and aesthetics, so use appropriate cleaning and storage techniques.
How to Make Your Own Mace: A Comprehensive Guide
Creating your own mace can be a rewarding project. Whether you’re looking to improve your collection or craft a unique piece for display, it’s a fun endeavor.
Maces have a rich historical significance. They were often used in battles and ceremonial events. Understanding their martial techniques can add depth to your design, allowing you to reflect on their purpose throughout history.
Start by researching various styles of maces. Note their shapes and weights, and consider how these factors influenced fighting techniques in different eras.
Next, sketch your design. Incorporate elements that resonate with you, whether it’s a sleek, modern twist or a traditional look.
Gather your tools and supplies to ensure you’re equipped to execute your vision. As you work, think about the balance and grip. These are key aspects that affect usability and aesthetics.
With attention to detail, you’ll create a mace that honors its history and showcases your craftsmanship. Enjoy the process!
Choosing the Right Materials for Your Mace
In the context of crafting a mace, selecting the right materials is essential for both functionality and aesthetics. You’ll want to reflect on the material properties carefully.
For the head, metals like steel or brass offer durability and weight. Wood can provide a classic look that some may prefer.
The shaft can be made from hardwood for strength or lighter materials like fiberglass if you favor maneuverability.
Consider using hardwood for a strong, durable shaft, or opt for fiberglass for enhanced maneuverability.
Historical influences can guide your choices too. Ancient maces often combined heavy heads with sturdy shafts, designed for impact and balance.
Think about the style you want to emulate, whether it’s a medieval design or a more modern interpretation.
Ultimately, your material choices will affect not only the mace’s effectiveness in combat but also its visual appeal.
Make sure to balance these factors to create a weapon that’s both functional and striking. Choose wisely, and you’ll craft a mace that stands the test of time.
Must-Have Tools for Crafting Your Mace
When crafting a mace, having the right tools is essential for achieving precision and quality. Start with a sturdy hammer for shaping your materials. Keeping in mind the mace history can inspire your design.
A good anvil or workbench helps with weight distribution, ensuring your mace feels balanced. Safety precautions are vital, so don’t forget to use protective gear while working.
For cutting and shaping, invest in quality chisels and files that suit your chosen materials’ properties. Crafting techniques vary, so familiarize yourself with different methods to refine your skills.
Regular tool maintenance keeps your equipment in top condition, allowing for better results. Finally, consider sandpaper or finishing tools for those last touches.
These finishing touches can enhance your mace’s aesthetics and functionality. This ensures it meets your vision inspired by historical designs. With the right tools, you’ll craft a mace that’s both functional and visually striking.
Creative Mace Designs: Choosing Shapes and Styles
Choosing the right shape and style for your mace can improve its design and functionality. Investigate historical designs, like the classic flanged mace, or draw from fantasy inspirations, such as spiked or ornate styles.
Consider ergonomic shapes that guarantee comfort during use, making your weapon not just visually appealing but also practical.
Think about the cultural significance behind various designs. Some maces represent authority and power in different societies. Aim for weapon aesthetics that resonate with your vision, whether it’s sleek and modern or rugged and traditional.
Don’t forget modern adaptations that incorporate contemporary materials and techniques. This allows you to customize your mace further.
Finally, balance iconic styles with practical considerations. Your mace should look striking while remaining functional. This thoughtful approach will set your creation apart and make it a true reflection of your craftsmanship.
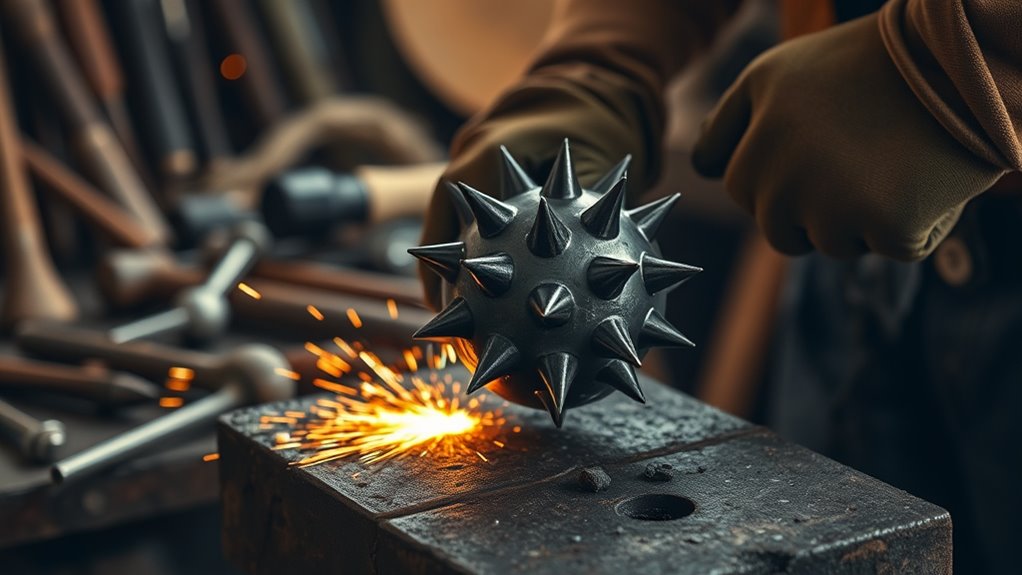
Forge the Mace Head: A Step-by-Step Guide
After settling on the design of your mace, it’s time to focus on one of its most important components: the mace head.
Start by selecting the right metal type. Steel is a popular choice due to its durability.
Use forging techniques like hammering or pressing to shape your mace head according to your design. Keep weight distribution in mind; a well-balanced head guarantees better handling during use.
Next, apply heat treatment to strengthen the metal. Heat the mace head until it’s red-hot, then quench it in oil or water for added toughness.
Always remember safety precautions. Wear protective gear and work in a ventilated area.
Finally, add the finishing touches. Smooth the edges and polish the surface to improve both aesthetics and functionality.
Your mace head should now be ready, combining strength and design to create a formidable weapon.
How to Shape a Strong Mace Handle
A sturdy mace handle is vital for wielding your weapon effectively. Start by selecting a durable wood or metal that can withstand impact.
When shaping the handle, focus on ergonomics to guarantee it fits comfortably in your hand. Use a lathe or hand tools to taper the ends and create a slight contour that promotes a natural grip.
Next, consider grip materials. For wooden handles, sand the surface smooth and apply a protective finish to improve grip and durability. If you’re using metal, think about wrapping it with leather or rubber for better traction.
This step is essential. A solid grip ensures you maintain control during battle or practice.
Finally, test the handle by holding it to see if it feels balanced and comfortable. Adjust as needed to create a handle that complements your strength and fighting style. This way, your mace becomes not just a weapon but an extension of yourself.
Securely Attach the Mace Head to the Handle
Alright, now that your handle is all set, let’s get that mace head attached securely. First things first, make sure you pick the right fasteners. It’s super important that everything aligns just right for balance.
Before you start swinging that mace around, take a moment to test its stability. You really want to ensure it won’t come apart while you’re using it. Trust me, a little extra checking now can save you a lot of hassle later!
Choose Appropriate Fasteners
When you’re ready to secure the mace head to the handle, choosing the right fasteners is essential for guaranteeing stability and durability. Fastener types can vary considerably, and using the appropriate installation techniques makes a big difference.
Here’s a quick comparison to help you decide:
| Fastener Type | Pros | Cons |
|---|---|---|
| Bolts | Strong, adjustable | Requires tools |
| Rivets | Permanent, durable | Harder to remove |
| Screws | Easy to install | May loosen over time |
Consider these options carefully. Each type offers unique advantages and disadvantages.
Choose based on your desired mace style and intended use. Secure fasteners will guarantee your mace withstands the test of time and usage.
Align Mace Head Securely
After selecting the right fasteners, the next step is to align the mace head securely to the handle.
First, position the mace head at the desired angle and make sure it sits flush against the handle.
Use a level or straight edge to check for proper mace head alignment.
Once you’re satisfied with the position, insert your fasteners through the pre-drilled holes in the mace head and into the handle.
Tighten them evenly to guarantee a secure attachment and prevent any wobble.
It’s vital to double-check that everything is aligned correctly before fully tightening the fasteners.
This attention to detail will improve the mace’s durability and performance, ensuring it’s ready for use when you need it.
Test Stability Before Use
Before you take your mace into action, it’s essential to test its stability to guarantee safety and performance.
Start by securely attaching the mace head to the handle, ensuring there are no gaps or loose fittings.
Once you’ve done that, conduct some stability testing.
Hold the mace firmly and give it a few controlled swings to check for any wobbling or dislodging.
This simple impact assessment helps you identify any weaknesses in your craftsmanship.
If you notice any instability, it’s important to make adjustments before proceeding.
Remember, a stable mace not only improves your effectiveness but also keeps you safe during use.
Trust your instincts, and don’t rush this step; your safety depends on it!
Polishing and Finishing Your Mace
Polishing and finishing your mace is crucial for both aesthetics and functionality. A well-polished mace not only looks impressive but also boosts durability.
Follow these steps to achieve a professional finish:
- Surface Treatments: Start with sanding the mace to remove any rough edges. Use progressively finer grits for a smooth surface.
- Buffing Techniques: Employ buffing techniques with a polishing cloth to bring out the shine. Use circular motions and apply consistent pressure to guarantee even coverage.
- Finishing Touches: Apply a protective coating to guard against wear and tear. This improves the aesthetic and prolongs the life of your mace.
Customize Your Mace: Adding Personal Flair
Now that your mace is all polished up, let’s dive into making it truly yours! This is where the fun really begins. You can pick unique materials that resonate with you, and don’t forget to think about symbols that reflect your identity.
You know, it’s all about those little details that make your weapon stand out. So, let’s explore how to add that personal flair to your mace. Ready? Let’s go!
Choose Unique Materials
While selecting the right materials for your mace, you can truly customize it to reflect your personality and style. Consider these unique options:
- Exotic Woods: Opt for woods like mahogany or ebony for their durability and rich aesthetic appeal. These woods also carry historical significance in various cultures.
- Metal Alloys: Choose alloys that balance weight and strength. This ensures your mace has the right weight balance and ergonomic design for comfortable use.
- Cultural Influences: Incorporate elements from different traditions. For instance, a Celtic knot or an Asian motif can add depth and personal flair to your mace.
Incorporate Personal Symbols
Adding personal symbols to your mace not only improves its uniqueness but also allows you to express your identity. By incorporating symbolic engravings and personal motifs, you create a connection to your heritage and beliefs.
Consider using meaningful tokens or spiritual icons that resonate with you. Custom emblems and unique patterns can reflect cultural influences, making your mace truly one-of-a-kind.
| Symbolic Type | Description | Example |
|---|---|---|
| Heritage Symbols | Represent family lineage | Family crest |
| Spiritual Icons | Reflect personal beliefs | Ankh or lotus |
| Custom Emblems | Unique designs for individuality | Personal logo |
| Meaningful Tokens | Items with personal significance | Good luck charm |
| Personal Motifs | Designs that tell your story | Favorite animal or plant |
Select Custom Finishes
Custom finishes can improve your mace from a simple weapon to a striking piece of art. By choosing the right combinations, you can create a unique look that reflects your personality.
Consider these options:
- Metallic Textures: Opt for finishes that mimic brushed steel or polished bronze. This adds depth and sophistication.
- Color Combinations: Mix bold colors like deep reds or vibrant blues with metallic accents for a dramatic effect.
- Surface Patterns: Incorporate intricate designs, like engravings or etchings. This gives your mace a personalized touch while ensuring finish durability.
These custom finishes not only boost the aesthetic appeal but also improve the overall structure. Make your mace a true masterpiece!
How to Care for Your Mace: Maintenance and Storage Tips
Caring for your mace is essential to guarantee its longevity and performance. Start by using effective mace cleaning techniques. After each use, wipe down the surface with a soft cloth to remove dirt and moisture.
For tougher grime, a mild soap solution works wonders. Just avoid harsh chemicals that could damage the finish.
Next, make sure you dry your mace thoroughly to prevent rust, especially if it has metal components.
When it comes to storage solutions, keep your mace in a cool, dry place, away from direct sunlight to avoid fading. A padded case or protective bag can shield it from scratches and dings.
Regularly inspect your mace for any signs of wear and address issues immediately. By following these maintenance tips, you’ll keep your mace in excellent condition, ready for action whenever you need it.
Frequently Asked Questions
What Safety Gear Should I Wear While Crafting a Mace?
When crafting a mace, you should definitely wear safety gloves and eye protection.
Safety gloves will protect your hands from sharp edges and heavy materials. Eye protection shields your eyes from flying debris and sparks.
It’s vital to keep yourself safe during the process, so make sure your gear fits well and is in good condition.
Don’t skip this step; it’s essential for a smooth and secure crafting experience.
Can I Use Recycled Materials for My Mace?
Absolutely, you can release your creativity with recycled materials! Think of them as treasure waiting to be transformed.
Using old pipes, wood scraps, or even metal bits, you can employ unique crafting techniques to create a one-of-a-kind mace. Just make sure the materials are sturdy enough to handle impact.
With a little imagination and resourcefulness, your recycled creation can pack a punch while being eco-friendly. You’ll be turning waste into a warrior’s weapon!
How Long Does It Take to Craft a Mace?
Crafting a mace typically takes a few hours to a couple of days. This depends on your mace design variations and the crafting techniques you choose.
If you’re using recycled materials, it might take a bit longer. You’ll need to ensure everything fits well.
Planning your design and gathering materials in advance can speed up the process. So, don’t rush—take your time to create something unique and sturdy!
Is It Legal to Own a Mace in My Area?
It depends on where you live. Mace ownership laws vary by state and even by city, so you need to check your local regulations.
Some places allow ownership with few restrictions, while others may have restrictions or outright bans.
It’s a good idea to research your local laws or consult with a legal expert to make certain you’re compliant.
Always prioritize safety and legality when considering owning a mace.
What Are Common Mistakes to Avoid When Making a Mace?
When making a mace, avoid common mistakes like poor material selection and design flaws.
Make certain you choose durable materials that can withstand impact. Using subpar options can lead to breakage.
Pay attention to the weight distribution in your design. An imbalanced mace can be ineffective and hard to wield.
Finally, double-check all measurements to ensure everything fits together properly. This prevents functionality issues down the line.
Conclusion
Now that you’ve crafted your very own mace, you’re ready to conquer the world.
Or at least impress your friends at the next medieval reenactment.
Just imagine wielding that gleaming weapon, a symbol of your hard work.
You’re not just a crafter, but a potential knight in shining armor.
Who knew a little DIY could lead to such a fierce accessory?
Just remember, it’s for show, unless you’re really into home defense!
In the end, having your own mace is not just about craftsmanship; it’s about embracing your inner warrior.