Mastering Quilt Binding – A Step-by-Step Guide to Attach
If you’ve ever felt frustrated by quilt bindings that end up messy, lumpy, or just don’t last, you’re not alone. Many quilters—beginners and seasoned pros alike—struggle with achieving that polished, professional edge.
The desire for a smooth, durable, and beautiful quilt finish is universal, but getting there can be tricky without the right tools and techniques.
Mastering quilt binding is key for a polished, durable finish. Start by choosing durable cotton fabrics that complement your quilt’s design.
Cut binding strips, typically 2.5 inches wide, and prepare your quilt edges by trimming excess batting.
Sew the binding securely, mitering corners for a clean look. Address common issues like puckering by adjusting stitch tension.
If you’re looking for more tips on hand-stitching techniques and machine options, there’s plenty more to investigate ahead!
Key Takeaways
- Choose durable cotton fabric for binding. Select coordinating colors to enhance the quilt’s aesthetics and functionality.
- Cut binding strips at least 2.5 inches wide. Press them in half for a crisp edge before attaching.
- Pin binding evenly along quilt edges. Make sure mitered corners are neatly folded for a polished finish.
- Use a blind stitch to secure the binding edges. This creates an invisible, clean look on the quilt’s back.
- If you notice puckering, try adjusting stitch tension. Using quality thread that matches your binding can also help.
Choosing the Best Quilt Binding Materials
When you’re choosing the best quilt binding materials, consider both functionality and aesthetics, as they’ll impact your quilt’s overall look and durability.
Start by selecting fabric types that complement your quilt’s main design. Cotton is a popular choice for its durability and ease of handling.
Pay attention to color coordination. Binding can either match or contrast with your quilt’s colors to create visual interest.
Investigate different binding styles, like straight or bias, to find what suits your project best.
Factor in durability, especially if your quilt will see regular use.
Texture variety can add depth. Think about incorporating fabrics with different feels, like smooth cotton or plush flannel.
Finally, don’t forget to reflect seasonal themes in your choices, whether it’s warm tones for fall or bright florals for spring.
Your binding materials can truly improve your quilt’s overall charm.
Cutting Binding Strips: The Perfect Size
When you’re cutting binding strips, the width of your fabric actually makes a big difference in how your finished quilt looks. It’s not just about the width, though—you’ll also want to figure out exactly how much length you need so that you don’t run short when you’re going around your quilt. Let’s walk through how to get those measurements just right, so your binding turns out perfectly every time.
Choosing Fabric Width
Choosing the right fabric width for your binding strips can make all the difference in achieving a polished finish on your quilt.
Think about factors like fabric weight, color combinations, and pattern considerations when picking your binding.
A wider strip works well with thicker textures, while a narrower one lets you add intricate detailing.
Here’s a quick reference table to help you choose:
| Fabric Width | Ideal Uses | Notes |
|---|---|---|
| 2.5 inches | Standard quilts | Great for most fabric weights |
| 2 inches | Lightweight fabrics | Good for delicate color combinations |
| 1.5 inches | Small projects | Best for coordinating prints |
| 3 inches | Heavier quilts | Provides durability for seasonal themes |
Don’t forget to pre-wash your fabric. This helps prevent shrinkage and keeps your finished quilt looking its best!
Determining Length Requirements
Now that you’ve selected the right fabric width for your binding, it’s time to figure out how much fabric you’ll need.
To determine the binding length, measure the perimeter of your quilt. Add about 10-15 inches for any adjustments or seams.
Once you have this measurement, divide it by the width of your fabric strips.
For example, if your quilt’s perimeter is 200 inches and you’re using 2.5-inch-wide strips, you’ll need 80 inches of fabric (200 ÷ 2.5 = 80).
Finally, multiply the number of strips by the width of the fabric to get the total yardage.
This way, you’ll guarantee you have enough fabric to create a sturdy and beautiful binding for your quilt.
Get Your Quilt Ready for Binding
Prepare your quilt for binding by giving it a thorough inspection.
Check for any loose threads, fabric snags, or uneven edges; addressing these issues now will save you time later.
Next, verify your quilt layering is secure.
Ensure your quilt layers are smooth and securely aligned for a polished finish before attaching the binding.
Smooth out any wrinkles and press the quilt to make sure the top, batting, and backing are neatly aligned.
Once you’re satisfied with the quilt’s condition, focus on fabric preparation for the binding.
Choose a fabric that complements your quilt and cut it into the appropriate strips.
Remember to measure accurately, as the right length will guarantee a smooth finish.
Finally, double-check that all layers are even and well-pressed.
This will help your binding attach more easily and look professional.
With these steps complete, you’re ready to move on to sewing the binding to your quilt edges.
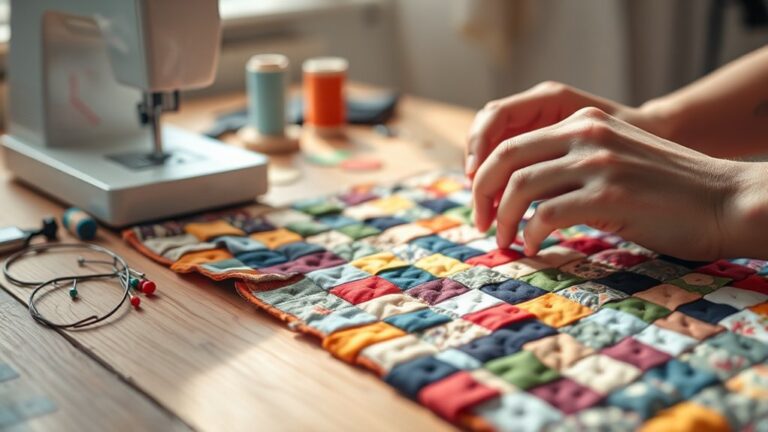
Sewing Binding to Quilt Edges
Now that your quilt is ready, it’s time to turn your attention to sewing the binding along the edges. First things first, you’ll need to pick the right fabric for your binding—something that complements your quilt and holds up well over time. Next, make sure your quilt edges are nice and smooth; trimming any excess batting or backing can really make a difference here.
Once you’ve prepped everything, it’s time to dive into attaching the binding itself. There are a few different techniques to try, so don’t worry if you’re new to this—just take your time and find what works best for you. With a bit of care, you’ll end up with a polished, professional-looking finish that really brings your quilt together.
Choosing Binding Fabric Type
How do you choose the right fabric for your quilt binding? Start by exploring various binding fabric types.
Look at weight differences. Lighter fabrics might not hold up as well as heavier ones.
Think about fabric durability. You want something that withstands wear over time.
Your fabric color choices should complement your quilt. Consider coordinating colors that improve the overall design.
Texture considerations are also crucial. A textured fabric can add depth.
Don’t shy away from print patterns, but make sure they don’t overwhelm your quilt.
Seasonal fabrics can offer a fresh look, too.
Ultimately, balance aesthetics with practicality to create a binding that looks great and lasts long.
Preparing Quilt Edges Properly
With your binding fabric selected, the next step involves ensuring your quilt edges are ready for sewing.
Proper edge preparation techniques are essential for a neat finish.
Here’s how to get your quilt edges prepared:
1. Inspect the Edges:
Look for uneven seams or frayed fabric.
2. Trim Excess Fabric:
Use sharp scissors to cut away any overhanging material, ensuring clean edges.
3. Press the Edges:
Iron the quilt edges flat to avoid bulkiness when attaching the binding.
4. Align the Edges:
Lay the quilt on a flat surface, making sure the edges are straight and aligned.
Taking these steps will set you up for success when you begin sewing the binding.
This approach leads to a polished and professional-looking quilt.
Techniques for Sewing Binding
Start by cutting your binding strips to the desired width, typically 2.5 inches, and sew them together to create one long strip.
Next, fold the strip in half lengthwise and press it to create a crease. Lay the binding along the quilt edge, aligning the raw edges, and pin it in place.
As you sew, you can investigate different binding stitch variations, like straight or zigzag stitches, to suit your style.
Remember to use fabric color combinations that complement your quilt design for a polished look.
When you reach a corner, miter the binding for a neat finish.
Finally, fold the binding over to the quilt back and secure it with a hand-stitched finish for a beautiful, professional touch.
Common Binding Problems and Their Solutions
Ever wondered why your quilt binding doesn’t lay flat or has unsightly puckers?
Let’s tackle some common issues you might face.
1. Binding Tension Issues:
If your binding pulls or puckers, try adjusting your stitch tension.
A looser tension often helps.
2. Fabric Fraying Solutions:
To prevent fraying, use pinking shears or a serger on raw edges before binding.
3. Uneven Edges:
Make binding width adjustments to guarantee all edges are covered evenly, especially on thicker quilts.
4. Stitch Visibility Concerns:
Choose a thread color that matches your binding for seamless integration and less visibility.
Remember to take into account quilt weight when selecting your binding tools.
Proper tools can make a significant difference, so don’t skimp on quality!
Using these tips, you’ll have a beautifully bound quilt that’s ready to show off.
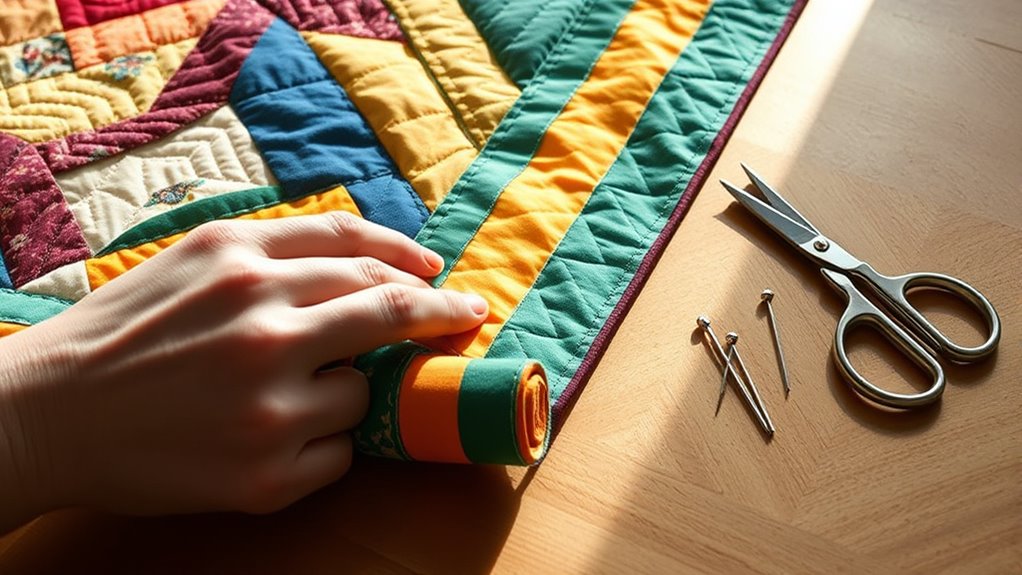
Creating a Seamless Mitered Corner Finish
Creating a seamless mitered corner finish really adds a polished touch to your quilt. First, you’ll want to get your quilt binding ready—it’s an important step you won’t want to skip. Once your binding is prepped, you can jump into learning how to make those crisp, mitered corners. Don’t worry, with a little practice, it gets easier! And when you’ve mastered the corners, you’ll finish up by securing the final seam. That way, your quilt will have a clean, professional look that you’ll be proud to show off.
Preparing Your Quilt Binding
As you prepare your quilt binding, achieving a seamless mitered corner finish can really elevate your project.
Start by gathering your binding tools and choose a fabric that complements your quilt.
Follow these steps:
- Cut your binding strips at least 2.5 inches wide for a sturdy hold.
- Press the strips in half lengthwise to create a crisp edge, ready for attachment.
- Join your strips with a 45-degree angle to avoid bulk at the corners.
- Pin the binding to your quilt, making sure it’s even along the edges.
These preparations will help guarantee that when it’s time to attach your binding,
you’ll achieve those perfect mitered corners effortlessly.
Mitered Corner Techniques
Mitered corners can transform your quilt’s finish and give it a polished look.
To master mitered corner techniques, start by folding the binding strip at a right angle, aligning it with the quilt’s edge.
Next, trim excess fabric, leaving a quarter-inch seam allowance. As you fold the binding over the corner, make sure you’re perfecting angles for a seamless finish.
Pin the binding in place, then stitch along the edge, securing the corner tightly.
When you reach the next side, fold the binding down, creating another right angle. Repeat this process for each corner, and you’ll achieve beautifully mitered corners that improve your quilt’s overall appearance.
Take your time; practice makes perfect!
Finalizing The Seam Finish
To achieve a seamless finish on your mitered corners, you’ll want to focus on the final touches
that guarantee everything looks polished. Here are some essential seam finishes to take into account:
1. Press Carefully:
Use a hot iron to press the seams open, ensuring no puckering occurs.
2. Trim Excess Fabric:
Snip any bulk at the corners to create a sharp mitered edge.
3. Hand Stitch the Edges:
Use a blind stitch to secure the binding, keeping it invisible from the front.
4. Double-Check Alignment:
Before finalizing, ensure all corners are aligned and the binding lays flat.
Hand-Stitched Binding: Tips and Tricks
While hand-stitched binding may seem intimidating at first, it’s a rewarding skill that improves your quilt’s finish.
You’ll find that mastering hand-stitched techniques enhances your binding aesthetics, giving your quilt a polished look.
Start with a quality thread that matches your quilt and a sharp needle for easy stitching.
Always press your binding before you start; this helps create a clean edge.
As you attach the binding, use a slip stitch for an almost invisible finish.
Don’t rush! Take your time to make certain each stitch is even and secure.
If you’re unsure, practice on a scrap piece of fabric first.
Remember, consistency is key; it’s the small details that make a big difference.
Finally, enjoy the process! Hand-stitching takes patience, but the satisfaction of a beautifully finished quilt is worth every moment spent.
Happy quilting!
Machine Binding Techniques for a Quick Finish
Ready to speed up your quilting process?
Machine binding is your best friend for a quick finish while still ensuring quilt durability.
Here’s how to make it work for you:
1. Prepare Your Binding: Cut your fabric strips, fold, and press them in half.
This is your binding ready for action.
2. Attach the Binding: Use a binding machine to sew the binding to the quilt edge.
This will help ensure a precise, even seam.
3. Fold and Press: Flip the binding over the edge, pressing it down to create a clean finish.
4. Secure the Back: Use your binding machine again to stitch the binding to the back.
This makes sure it’s securely in place.
With these techniques, you’ll not only save time but also improve your quilt’s durability.
You’ll find that machine binding gives your quilts a polished look, making them ready for display or gifting!
Adding a Personal Touch: Decorative Binding Options
When you want to elevate your quilt from ordinary to extraordinary, consider adding decorative binding options that reflect your personal style. One way to do this is by using appliqué techniques.
You can stitch on unique shapes or motifs along the binding edge, giving your quilt a customized look. Another option is to incorporate fabric embellishments, like beads or embroidery, to add texture and dimension.
Choose fabrics that complement your quilt’s design, and experiment with different colors and patterns for a truly unique finish. You might also investigate using contrasting or patterned fabric for the binding itself.
This can create a striking visual frame around your quilt. Whichever decorative binding option you choose, keep in mind it’s all about showcasing your creativity.
Caring for Your Quilt After Binding Completion
After putting the finishing touches on your quilt with decorative binding, it’s important to take care of it properly so it lasts for years to come. Here are some quilt maintenance tips to help keep your masterpiece looking great:
1. Washing Recommendations:
Wash your quilt gently in cold water with a mild detergent. This helps prevent color fading and maintains the fabric’s longevity.
2. Storage Solutions:
Store your quilt in a cool, dry place, and keep it away from direct sunlight. This helps you avoid discoloration and unnecessary wear.
3. Repair Techniques:
Check for loose threads or small tears on a regular basis. Use simple sewing techniques to mend them as soon as you notice any issues.
4. Pressing Methods:
When needed, press your quilt with a low-heat iron just to remove wrinkles. Take care not to scorch the fabric while doing this.
Frequently Asked Questions
How Do I Choose Colors for My Quilt Binding?
To choose colors for your quilt binding, start by considering color theory.
Look at your quilt’s main fabrics and identify their dominant colors.
Use fabric combinations that either complement or contrast these hues for a striking effect.
You might opt for a solid color that pulls from your quilt’s palette or a patterned fabric that adds interest.
Trust your instincts and play with swatches until you find a combination that makes your quilt shine!
Can I Use Bias Tape for Quilt Binding?
Yes, you can use bias tape for quilt binding! In fact, about 60% of quilters prefer bias tape for its flexibility and ease of application.
Bias tape benefits include reduced bulk and the ability to curve around edges smoothly. When you choose binding techniques, consider how bias tape can streamline your process, especially for intricate designs.
It not only improves the quilt’s edges but also adds a stylish finish to your work.
What Is the Best Thread for Binding Quilts?
The best thread for binding quilts is usually cotton or polyester, as they offer durability and a nice finish.
Choose a thread type that matches your fabric to keep everything cohesive.
Pay attention to thread tension while you sew. Proper tension prevents puckering and guarantees clean seams.
Always test on scrap fabric first to find the right balance. This way, you’ll achieve a polished and professional look for your quilt binding.
How Do I Fix Uneven Binding Edges?
Fixing uneven binding edges can feel like untangling a mountain of yarn, but it’s simpler than you think!
First, trim any excess fabric along the edges. Then, use binding techniques like pinning or basting to keep everything aligned.
If you notice puckering, try pressing the seams flat. For future projects, incorporate these troubleshooting tips during your initial binding process to avoid this issue altogether.
You’ll achieve that perfect finish in no time!
Is It Necessary to Pre-Wash Binding Fabric?
Yes, it’s a good idea to pre-wash your binding fabric. Pre-washing helps eliminate any chemicals and dirt
while also minimizing fabric shrinkage.
If you skip this step, your binding might become uneven or puckered after washing the finished quilt.
By pre-washing, you guarantee that your quilt stays looking its best over time, maintaining that perfect finish
you worked hard to achieve.
Conclusion
As you tie off your quilt with binding, think of it as weaving together memories and warmth, much like the threads that hold your life’s stories.
You’ve transformed fabric into a tapestry of love and creativity, each stitch echoing your journey.
Remember, this isn’t just a finish; it’s the final flourish, a protective hug that signifies completion.
Now, as you care for your quilt, let it remind you of the comfort found in both the art of creation and the bonds of home.
Mastering quilt binding is more than a practical step—it’s a celebration of your craft and the beauty of bringing everything together.