Mastering the Art of Sewing Quilt Squares Together
If you’ve ever felt frustrated by uneven seams or quilt squares that just won’t line up, you’re not alone. Many people struggle with mastering the art of sewing quilt squares together, especially when aiming for that perfect, professional finish.
Whether you’re a beginner or a seasoned quilter, finding the right tools and techniques can make all the difference—and it’s something every quilter faces at some point.
Mastering the art of sewing quilt squares together is all about precision and creativity.
Start by choosing the right fabrics, ensuring they complement each other.
Use essential tools like a rotary cutter and a quality sewing machine for clean cuts and stitches.
Pay attention to seam allowances and pressing techniques, as these impact your final look.
Avoid common mistakes, like mismatched seams or overwhelming patterns.
Ready to investigate expert tips that can enhance your quilting game even further?
Key Takeaways
- Use a consistent ¼-inch seam allowance to ensure perfect alignment and a professional finish when sewing quilt squares together.
- Pre-wash your fabrics to prevent shrinkage and color bleeding. This helps your quilt maintain its integrity over time.
- Lay out your quilt squares prior to sewing so you can visualize the final design and keep color harmony throughout the quilt.
- Pin or clip the edges of the squares to prevent shifting. This makes accurate seam matching easier and helps you achieve a seamless appearance.
- Press seams carefully toward the darker fabrics for better alignment and a polished look, which really enhances the overall quality of your quilt.
Understanding the Basics of Quilt Squares
Understanding the basics of quilt squares is vital for any aspiring quilter. You’ll find that quilt squares come in various sizes and shapes, but most commonly, they’re measured in inches.
Familiarizing yourself with quilt dimensions helps guarantee your project turns out as planned. When selecting fabric patterns, consider how they’ll work together visually.
Understanding quilt dimensions is essential for ensuring your project meets your vision, especially when choosing complementary fabric patterns.
A good mix of colors and designs can improve your quilt’s overall appeal. Aim for a balance between busy and solid fabrics to create depth and interest.
Cutting your fabric accurately is important, as even slight discrepancies can affect the final product. Use a rotary cutter for clean edges, and always double-check your measurements.
Choosing the Right Fabric for Your Quilt
Selecting the right fabric for your quilt can make all the difference in its final look and feel.
Understanding color theory helps you choose harmonious combinations that pop.
You’ll want to reflect on fabric weights too. Different weights can affect drape and durability.
Here’s a quick guide to help you decide:
| Fabric Type | Best Use |
|---|---|
| Cotton | Everyday quilts, easy to sew |
| Flannel | Cozy quilts, warmer feel |
| Batik | Colorful, unique patterns |
| Linen | Lightweight, modern look |
| Muslin | Practice quilts, low-cost option |
When you pick your fabrics, balance colors and textures for visual interest.
Don’t hesitate to experiment. Combining different fabric weights can create depth.
Ultimately, your fabric choices will shape how your quilt tells its story.
Essential Tools for Sewing Quilt Squares
To create beautiful quilt squares, having the right tools really makes all the difference. First off, it’s important to think about what features you want in a sewing machine—some have special stitches or attachments that can make quilting a lot easier.
Next, let’s talk about cutting tools. A good rotary cutter, a sharp pair of fabric scissors, and a sturdy cutting mat can help you cut your fabric cleanly and accurately, which is key for getting those squares to line up just right.
And of course, picking the perfect fabric is part of the fun! Try looking for materials that are easy to work with and colors or patterns that inspire you. With these basics in place, you’ll be all set to start your quilting journey.
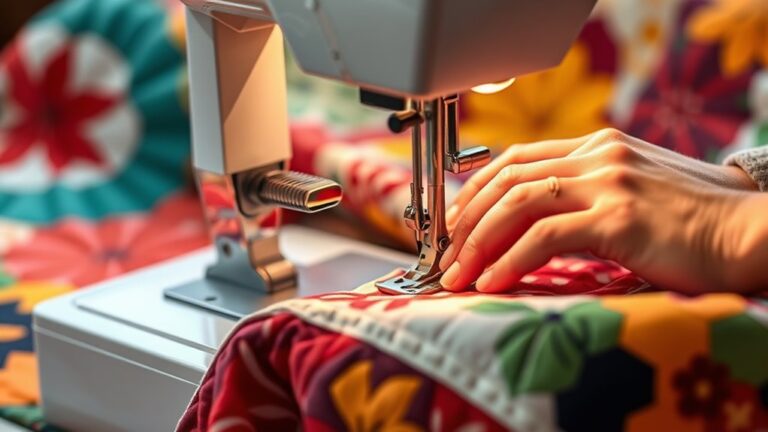
Sewing Machine Necessities
A reliable sewing machine is the heartbeat of your quilting project, making it essential to choose the right one for sewing quilt squares. Consider various machine types, from basic to advanced models, to suit your needs.
Look for stitch options that include straight, zigzag, and decorative stitches. Speed settings allow you to control your pace, while tension adjustments guarantee your seams are just right.
Don’t forget accessory necessities like quilting feet, which help with even stitching and ease of movement. Regular maintenance tips, such as cleaning and oiling, will keep your machine running smoothly.
Finally, familiarize yourself with troubleshooting issues to solve problems quickly, ensuring a seamless quilting experience every time.
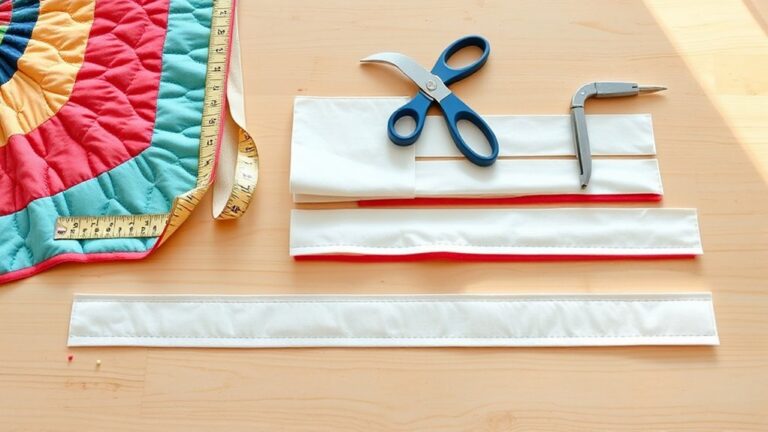
Cutting Tools Overview
Cutting tools are essential for achieving precision in your quilt squares. Start with rotary cutter basics; they offer clean cuts when paired with cutting mat essentials.
Invest in a good mat to protect your surfaces and maintain blade sharpness. A fabric shears overview reveals that sharp, well-balanced shears can handle intricate cuts.
A specialty rulers guide helps you achieve accurate measurements. Remember safety rules: always cut away from yourself and keep blades covered when not in use.
For cutting accuracy tips, pay attention to fabric grain importance. Cutting against the grain can lead to fraying.
Utilize trimming techniques and layout strategies to improve your design. Don’t forget cutting efficiency tips to streamline your process.
Happy sewing!
Fabric Selection Tips
Choosing the right fabric is key to creating beautiful quilt squares. Start by considering color theory; select colors that complement each other to improve your quilt’s visual appeal.
Don’t shy away from experimenting with contrasting shades to create depth and interest. Next, think about fabric textures. Mixing smooth cottons with textured fabrics like flannel or linen can add dimension to your quilt.
Be certain to choose fabrics that are compatible in weight and drape for easier sewing. Finally, always pre-wash your fabrics to prevent shrinkage and color bleeding.
Get Your Quilt Squares Ready for Assembly
When you’re getting your quilt squares ready for assembly, it really helps to think about which fabric combinations work well together. Choosing the right fabrics goes a long way in making your quilt look harmonious.
Once you’ve decided on your fabrics, the next step is to make sure your squares are prepped so they’ll fit together just right.
Let’s walk through how to choose your fabrics and get those squares ready for the next part of your quilting journey!
Choosing Fabric Combinations
When you start planning your quilt squares, the right fabric combinations can make all the difference in your project’s overall aesthetic.
Use color theory to choose coordinating colors that resonate with your personal style. Consider seasonal themes; warm tones evoke fall, while cool colors suit winter.
Mix fabric textures to add depth, but pay attention to fabric weight to guarantee they work together seamlessly.
Pattern mixing can create visual interest, so try different fabric prints while keeping an eye on fabric scale. Larger prints can overpower smaller ones, so balance is important.
Finally, build harmonious color palettes that draw the eye and make your quilt a true masterpiece. Trust your instincts, and enjoy the creative process!
Preparing Your Squares
Before you plunge into assembling your quilt, preparing your squares is essential for achieving a polished finish. Start with fabric pre-washing; this helps prevent shrinkage and sets your color coordination.
Next, consider the fabric textures and quilting patterns you’ve chosen. Lay out your squares according to your square arrangement, guaranteeing that your quilt sizing matches your design.
During layout planning, keep an eye on how different colors interact and how patterns flow together. Once everything looks good, focus on seam finishes to guarantee durability and a neat appearance.
With these steps, you’ll create a stunning quilt that reflects your vision and skill. Enjoy the process as you bring your masterpiece to life!
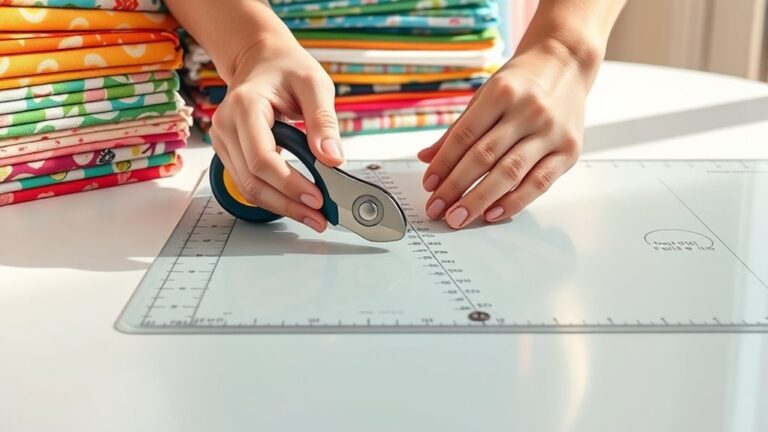
Precise Cutting Techniques for Quilt Squares
Achieving precision in cutting quilt squares is essential for creating seamless and professional-looking quilts. To improve your cutting accuracy, invest in a reliable rotary cutter and a self-healing cutting mat.
Start by placing your fabric on the mat, making sure it’s smooth and wrinkle-free. Use a clear ruler to measure and mark your squares accurately.
When you’re set, position the rotary cutter along the edge of the ruler. Apply firm, even pressure as you cut. This technique not only speeds up the process but also guarantees clean edges.
Always remember to replace your rotary blade regularly. A dull blade can compromise your cutting accuracy.
Practice makes perfect, so take your time and remeasure if necessary. By mastering these cutting techniques, you’ll set a strong foundation for your quilt, making the sewing process more enjoyable and efficient.
Happy cutting!
Master Seam Allowances for Perfect Quilt Alignment
Mastering seam allowances is essential for perfect quilt alignment, and a standard ¼-inch seam is your best friend.
This seemingly small measurement makes a huge difference in how your quilt squares fit together.
To achieve consistent results, use seam allowance techniques like marking your fabric with a ruler or using a seam guide on your sewing machine.
This helps guarantee that each square aligns perfectly with the next.
When sewing, keep your fabric steady and avoid stretching it, which can distort your seams.
Always measure twice and cut once to maintain accuracy, as uneven seams can lead to puckering or gaps.
After sewing, check your seam allowances to verify they’re uniform across all pieces.
Consistency here is key to achieving that desired polished look.
Expert Tips for Pressing Quilt Seams
Pressing quilt seams correctly can improve your quilting game markedly. Start by choosing the right pressing techniques; using a hot iron with steam can help achieve flat seams.
When you press, pay attention to the pressing order. Press seams toward the darker fabric or the side that’ll be visible for better fabric alignment.
Use pressing tools like a tailor’s clapper to keep those seams flat and crisp. For seam finishing, consider using a zigzag stitch to prevent fraying, followed by a gentle press.
Always remember the seam directions. Pressing open or to one side can impact the quilt’s overall look.
Lastly, don’t rush the process. Take your time to verify each seam is perfectly pressed, which will pay off in the final quilt.
Avoid These Mistakes When Sewing Your Quilt Squares
When sewing your quilt squares, avoiding common mistakes can make a world of difference in your final product. Pay attention to fabric care; pre-wash your fabrics to prevent shrinkage later.
Guarantee proper seam matching for a seamless look, and use effective pressing techniques to flatten seams.
Color balancing is crucial. Avoid overwhelming patterns by harmonizing colors in your quilt layout.
Be mindful of square orientation, since misalignment can disrupt your design’s flow. Pattern repetition can improve visual interest, but don’t overdo it.
Here’s a quick reference table for common mistakes:
| Mistake | Solution |
|---|---|
| Ignoring fabric weight | Choose compatible weights |
| Poor stitching tension | Adjust machine settings |
| Overlooking quilt layering | Plan layers carefully |
| Neglecting pressing | Use correct techniques |
| Misaligning squares | Double-check orientations |
With these tips, your quilt squares will come together beautifully!
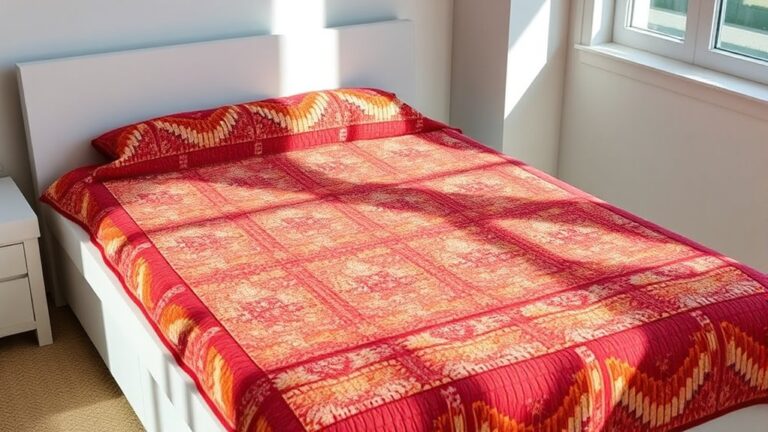
Joining Quilt Squares: Techniques You Need
Joining quilt squares is an essential step in creating a polished final product.
First, make certain your color coordination improves your quilt layout.
Lay out all your squares to visualize how they’ll come together. This will help you spot any color clashes or patterns that might not work well side by side.
When you’re ready to join, consider using a quarter-inch seam allowance for consistency. Start by sewing the squares in rows, pressing seams open or to one side as you go.
This not only helps with alignment but also reduces bulk in your quilt.
You can also use techniques like pinning or clipping the edges to prevent shifting as you sew.
If you encounter any mismatched edges, don’t hesitate to trim them for a better fit.
Binding Techniques for Quilt Edges
When it comes to finishing your quilt, picking the right binding technique really makes a difference. You’ll want to take a little time to prepare your binding strips so they’re neat and ready to go. Attaching them securely is important too, since it gives your quilt that polished, professional look.
Let’s chat about a few different methods you can use to enhance your quilt’s edges. Each one has its own perks, so you can choose what works best for your style and project.
Types Of Binding Methods
While selecting a binding method for your quilt edges, it’s essential to understand the various techniques available.
Each method offers unique benefits, depending on your quilt’s design and your preferences.
- Bias Binding: This technique creates a flexible finish, allowing for smooth curves around quilted edges.
- Double Fold: Folded corners finish neatly, providing a sturdy edge while hiding raw seams.
- Mitered Corners: These add a polished look, perfect for decorative finishes, ensuring corners are crisp and professional.
- Continuous Binding: This method minimizes seams, making it efficient for larger quilts.
It can be applied through machine binding or hand stitching for added durability.
Choose the method that best complements your quilt’s style!
Preparing Binding Strips
To prepare binding strips for your quilt edges, start by selecting your fabric and cutting it into strips that are 2.5 inches wide, which is a standard size for most binding methods.
When using binding strip techniques, consider cutting your strips on the fabric bias. This gives your binding more flexibility and helps it curve around corners smoothly.
If you’re working with a patterned fabric, align the strips to maintain a consistent look.
After cutting, join the strips end-to-end using diagonal seams to minimize bulk. Press the seams open, then fold each strip in half lengthwise for a neat finish.
This preparation sets the stage for a polished edge on your quilt, ensuring it looks professional and well-crafted.
Attaching Binding Securely
Securely attaching your binding is essential for a polished quilt finish.
It not only enhances quilt aesthetics, but also ensures binding durability for long-lasting projects.
Here are some techniques to consider:
1. Use binding tools: Invest in a binding clip to hold layers in place.
This guarantees precise fabric layering and makes the process smoother.
2. Choose stitch variety: Try out different stitches, like zigzag or straight, to give your quilt edge extra protection.
This can also add a decorative touch.
3. Focus on color coordination: Pick binding that complements your quilt design.
It’s a simple step that can really boost your quilt’s overall appeal.
4. Explore binding alternatives: Give bias tape or pre-made binding a try if you want a quicker option,
without sacrificing your quilt’s longevity.
With these finishing touches, you’ll boost your quilt’s beauty and durability.
Each piece you create will become a treasured creation.
Frequently Asked Questions
How Do I Fix Mistakes in Quilt Squares After Sewing?
When you spot mistakes in your quilt squares, don’t panic! Grab a seam ripper and carefully undo the stitches.
Once you’ve removed the error, assess if you can patch it. Use patch techniques by cutting a small piece of fabric to cover the mistake, ensuring it blends with your design.
Secure it with a straight stitch, and you’re back on track. Remember, every quilter makes mistakes. It’s all part of the process!
What Is the Best Thread Type for Quilt Sewing?
The best thread type for quilt sewing is usually cotton with a weight of 40 or 50. About 80% of quilters prefer this blend for its durability and ease.
Choose a thread color that complements your fabric, making sure it enhances your work rather than distracts from it.
Pay attention to thread tension; if it’s too tight or too loose, you might end up with puckering.
Experiment with different thread weights and blends to find what works best for your quilt’s design!
Can I Use a Sewing Machine for All Quilt Squares?
Yes, you can use a sewing machine for all quilt squares! Most machine types, whether basic or advanced, can handle quilt squares effectively.
Just make sure to choose the right stitch options. A straight stitch is often preferred for piecing, while a zigzag stitch works well for finishing edges.
Experiment with different settings to find what works best for your fabric and design, and you’ll create beautiful quilts in no time!
How Do I Choose a Quilt Backing Fabric?
Choosing a quilt backing fabric involves considering fabric color and backing options.
First, think about the overall color scheme of your quilt; you want a backing that complements it.
Cotton is a popular choice for durability and comfort.
You might also investigate flannel for a cozy feel or even a patterned fabric for added interest.
Don’t forget to verify the backing is large enough to cover your quilt comfortably!
What Is the Ideal Batting Thickness for Quilts?
The ideal batting thickness for quilts usually ranges from 1/8 inch to 1/2 inch, depending on your needs.
If you want lightweight insulation, choose a thinner batting type, like cotton. For cozy warmth, thicker polyester batting works well.
Remember, your project’s purpose matters, whether it’s for warmth or decoration. So, consider the final look and feel; it’ll guide your choice and improve your quilting experience.
You’ll love the results!
Conclusion
In the grand tapestry of quilting, each square is a stitch in your story.
As you weave them together, keep in mind that patience and practice are your guiding threads.
Cherish the journey, and learn from the knots along the way.
Soon you’ll craft a masterpiece that wraps you in warmth and memories.
So gather your fabric, thread your needle, and let your creativity flow.
Remember, your quilt isn’t just a project; it’s a reflection of you, stitched with love and care.
By truly mastering the art of sewing quilt squares together, you turn simple pieces into something extraordinary—filled with meaning, beauty, and warmth.