How Do You Quilt?
If you’ve ever felt overwhelmed by the idea of quilting, you’re not alone. Many people want to create beautiful quilts but aren’t sure where to start, or feel intimidated by all the tools and techniques out there.
Quilting’s all about stitching layers of fabric together to create functional and beautiful pieces.
Start by gathering essential tools like a rotary cutter, rulers, and a cutting mat.
Choose your fabric wisely, mixing patterns and colors for a unique look.
Learn basic techniques for cutting, piecing, and basting your quilt for stability.
Decide whether you’ll hand or machine quilt based on your comfort.
There’s so much more to discover, so keep going to improve your skills!
Key Takeaways
- Gather essential tools like a rotary cutter, rulers, and a self-healing mat for accurate cutting and measuring.
- Select high-quality fabrics and mix patterns. Think about seasonal themes, and consider pre-washing your fabric to prevent issues later.
- Master basic stitching methods and binding techniques. This helps ensure your quilt has a polished finish.
- Use basting techniques such as pins or spray. They help keep your quilt layers stable while you work.
- Choose between hand quilting for more intricate designs, or machine quilting if you want to work more efficiently. Go with whichever feels most comfortable for you.
What Is Quilting and Why Should You Try It?
Quilting, at its core, is the art of stitching layers of fabric together to create a warm, functional piece. This craft has a rich quilt history, tracing back centuries, where it served not just practical needs but also artistic expression.
As you immerse yourself in quilting, you’ll uncover its deep roots in various cultures and communities. That makes it more than just a hobby.
Joining the quilting community can be incredibly rewarding. You’ll find support and inspiration from fellow quilters who share your passion.
Joining the quilting community offers unparalleled support and inspiration from fellow enthusiasts who share your passion.
They’ll introduce you to techniques, patterns, and tips that can enhance your skills. Plus, participating in local or online quilting groups can spark friendships that last a lifetime.
Trying your hand at quilting not only allows for creativity but also connects you to a tradition that spans generations. So why not investigate this fulfilling craft and become part of something bigger?
Begin Your Quilting Journey: Essential Tools You Need
Starting your quilting journey is really exciting, and it all begins with having the right tools by your side. You don’t need a ton of fancy equipment, but a few essentials will make the whole process much smoother—and a lot more fun, too.
Let’s talk about fabric for a moment. The fabric you choose can totally transform your projects, so it’s worth spending a little time picking out colors and patterns you love. Ready to dive in? Let’s look at the basics you’ll need to get started.
Must-Have Quilting Tools
Before diving into quilting, it’s important to gather the right tools that will make your journey smoother and more enjoyable.
Start with a rotary cutter, as it’s essential for cutting fabric accurately. Understanding rotary cutter basics will help you choose the right blade and handle for your projects.
Next, invest in various quilting ruler types, which are crucial for measuring and cutting your fabric pieces precisely. A clear acrylic ruler with grid markings is ideal for beginners.
Don’t forget to include a self-healing cutting mat to protect your surfaces and keep your blades sharp.
With these must-have tools in hand, you’ll be well-equipped to tackle your first quilt with confidence!
Fabric Selection Tips
Choosing the right fabric is essential for your quilting success.
It can make or break your project, so take your time selecting.
Here are some tips to guide you:
– Mix and Match:
Experiment with different fabric patterns to create visual interest.
Don’t be afraid to combine florals, stripes, and solids!
– Consider Seasonal Themes:
Think about the time of year.
Warm colors for fall and cool tones for winter can elevate your quilt’s appeal.
– Quality Matters:
Invest in high-quality fabrics.
They’ll withstand wear and tear, ensuring your quilt lasts for years.
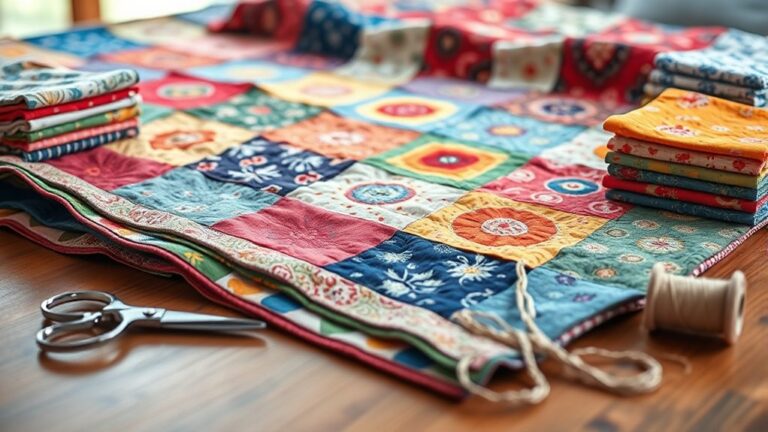
Choosing the Right Fabric for Your Quilt
Choosing the right fabric for your quilt really makes a difference in how your project turns out. First, it’s a good idea to explore different fabric types—each one brings its own texture and feel to your quilt, so don’t be afraid to look around and see what catches your eye.
Once you’ve got a few fabrics in mind, think about how the colors work together. Coordinating colors doesn’t have to be intimidating—just lay your fabric choices side by side and see what combinations you love.
And here’s another tip: consider pre-washing your materials. It might seem like an extra step, but pre-washing can help prevent colors from bleeding and fabrics from shrinking later on. Taking a little time with these details now will help you create a quilt you’ll be proud of.
Fabric Types Overview
In relation to quilting, selecting the right fabric is vital for both the look and durability of your project. You’ll want to take into account various fabric types to guarantee your quilt turns out beautifully.
- Cotton blends are popular for their versatility and ease of care.
- Specialty fabrics like batik or flannel can add unique textures and seasonal flair.
Pay attention to fabric weights. Lighter fabrics work well for summer quilts, while heavier ones are great for winter.
Don’t forget about sustainable materials if you’re aiming for an eco-friendly option!
Proper fabric sourcing and storage are also important to maintain your fabrics’ quality until you’re ready to sew.
Choosing wisely will make your quilting experience both enjoyable and satisfying.
Color Coordination Tips
Selecting the right colors can make all the difference in your quilt’s overall appeal. Start by consulting a color wheel; it’s a great tool for finding contrasting colors that pop.
Aim for a color balance by mixing mood colors with tonal variations. Consider using seasonal palettes to evoke specific feelings, like warm tones for autumn or cool shades for winter.
When choosing fabric combinations, think about how different colors interact. Don’t forget to incorporate accent shades to highlight key areas of your quilt.
Pre-Washing Considerations
Before diving into your quilting project, it’s important to think about pre-washing your fabrics.
This step offers various pre-wash benefits that can save you headaches later.
By washing your fabrics before you cut and sew, you can minimize potential fabric shrinkage.
This helps guarantee your quilt maintains its finished size.
Here are a few things to keep in mind:
- Color bleeding: Pre-washing helps prevent colors from running into each other.
- Texture: It softens the fabric, making it easier to work with.
- Dirt removal: You’ll eliminate any chemicals or dirt from the manufacturing process.
Taking the time to pre-wash will lead to a more durable and beautiful quilt.
It also gives you peace of mind as you create your masterpiece!
Key Quilting Techniques Every Beginner Should Know
Quilting opens up a world of creativity, and mastering a few key techniques can make your journey enjoyable and successful.
First, get comfortable with basic stitching methods, like straight and zigzag stitches. These are foundational for any quilting project.
Mastering basic stitching methods, like straight and zigzag stitches, is essential for any successful quilting project.
Next, investigate various quilting patterns. They can add unique flair to your work, so don’t hesitate to experiment.
One essential skill is mastering binding techniques. Whether you choose single-fold or double-fold binding, it’s vital for finishing your quilt neatly.
Practice makes perfect, so don’t be afraid to try these methods on scrap fabric before moving on to your main project.
Lastly, learn to accurately cut and measure your fabric. Precision is key in quilting, and it’ll save you time in the long run.
Create a Simple Quilt Design
Creating a simple quilt design can be an exciting way to release your creativity.
You don’t need to overcomplicate things; focus on using simple patterns and effective patchwork techniques to bring your vision to life.
Here are a few tips to get you started:
– Choose a Color Palette: Select colors that speak to you.
Stick to a few shades for a cohesive look.
– Incorporate Basic Shapes: Use squares, triangles, or rectangles.
These shapes are easy to work with and create visually appealing designs.
– Experiment with Layouts: Try different arrangements.
You might uncover a unique layout that brings your quilt to life.
Embrace the process and keep in mind that simplicity can lead to stunning results.
With these tips, you’ll be well on your way to creating a beautiful quilt that showcases your creativity!
Step-by-Step Guide to Cutting Fabric Pieces
Cutting fabric pieces is an essential step in bringing your quilt design to life. Start by gathering your materials: fabric, a rotary cutter, cutting mat, and a ruler.
Before you begin, make sure your fabric is pre-washed and pressed for accuracy. Taking the time to prepare your fabric helps a lot with clean cuts later on.
Next, organize your fabric by color and pattern. This will not only streamline your cutting process, but also improve your cutting accuracy.
Lay out your fabric flat on the cutting mat, making sure it’s wrinkle-free. Use the ruler to measure and mark your cutting lines, being precise to avoid wasted fabric.
When you cut, keep your fingers clear and use firm, smooth motions with the rotary cutter. After cutting, stack your pieces neatly according to your design layout.
This organization will help you later when it’s time to assemble your quilt. Following these steps guarantees you achieve clean, accurate cuts, setting a solid foundation for your quilting project.
Seamlessly Piece Fabric Together
Once you’ve got your fabric pieces cut, it’s time to piece them together seamlessly. This guarantees your quilt takes shape beautifully.
Start by paying attention to fabric alignment and seam allowances. These details set the foundation for your quilt top.
Use effective piecing techniques that create smooth transitions between blocks.
- Always match corners precisely for a polished look.
- Press your fabric after each seam to eliminate bulk and maintain the fabric grain.
- Be cautious with bias edges, as they can stretch easily.
As you assemble your blocks, confirm that each seam is pressed open or to one side. Choose whichever method best suits your design.
This attention to detail helps with corner matching and maintains the integrity of your quilt.
With patience and practice, you’ll create a stunning quilt top that truly showcases your hard work and creativity!
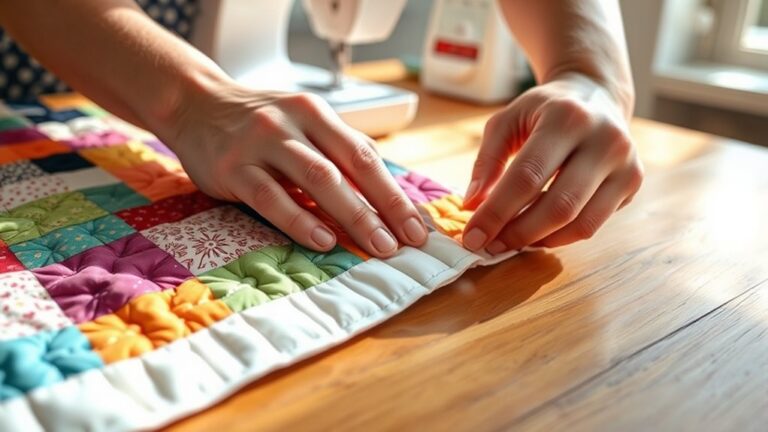
Baste Your Quilt for Stability
Now that you’ve got all your fabric pieces sewn together, it’s time to baste your quilt so everything stays put. Basting is what keeps your quilt layers from shifting around while you work, and there are a few ways to do it. You might want to look into different basting techniques—like pin basting, spray basting, or even traditional hand basting—to see which one feels best for your project.
Choosing the right materials is also a big deal here. The right pins, thread, or spray can make the whole process a lot smoother and help your quilt stay nice and flat. So, let’s dive into the basics of basting and talk about what you’ll need to make sure your quilt top, batting, and backing all stay perfectly aligned while you quilt. With a little prep, you’ll set yourself up for quilting success!
Basting Techniques Overview
Basting your quilt is an essential step that guarantees stability and precision
throughout the quilting process. Choosing the right basting methods ensures
your quilt sandwich stays intact while you sew.
Here are some popular techniques you might consider:
– Spray Basting: Quick and easy, this method uses temporary adhesives to
hold your layers together.
– Pin Basting: You insert pins to secure the fabric layers, guaranteeing
proper fabric alignment without shifting.
– Thread Basting: This involves using a long thread to hand stitch your
layers, making it easy to remove later.
Remember to follow the proper basting order for best results. Each technique
has its pros and cons, so experiment to find what works best for your project!
Choosing The Right Materials
Selecting the right materials for your quilt is essential for ensuring stability and durability. Start by considering fabric weights; heavier fabrics provide structure, while lighter ones add softness.
Choose seasonal fabrics that reflect your style and mood. Also, don’t overlook the importance of quilt backing. It should complement your top while adding support.
Investigate different fabric prints and patterns to improve your design. Mix in a variety of textures for visual interest.
When fabric sourcing, look for eco-friendly options that are sustainable and safe for your home.
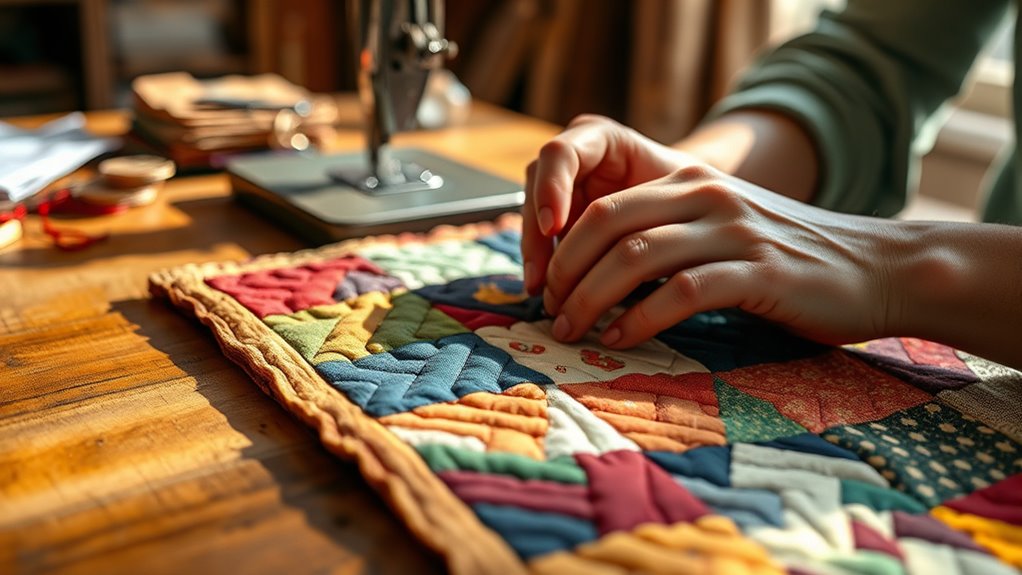
Explore Hand vs. Machine Quilting Techniques
Whether you prefer the tactile experience of hand quilting or the speed of machine quilting, each method offers unique benefits that cater to different preferences and skill levels.
Hand techniques allow for intricate stitching patterns and a personal touch, making each quilt feel unique.
On the other hand, machine advantages include faster completion times and consistency, which is perfect for larger project types.
Here’s a quick comparison:
- Comfort levels: Hand quilting can be meditative, while machine quilting often feels more efficient.
- Learning curve: Hand techniques may take longer to master, while many find machine quilting easier to grasp.
- Thread choices: Both methods offer diverse thread options, but the finish may vary based on your chosen technique.
Ultimately, whether you’re looking for detailed finishing touches or a speedy finish, both quilting styles have something special to offer!
Caring for Your Quilt: Maintenance Tips
After you’ve poured your heart and soul into creating your quilt, caring for it becomes essential to guarantee its longevity.
Start by focusing on quilt storage. Choose a cool, dry place away from direct sunlight. Use breathable cotton or muslin covers to protect against dust and pests.
Avoid plastic bags, since they can trap moisture and lead to mold.
When it comes to cleaning methods, always check the care label first. For minor stains, spot clean with a gentle detergent and a soft cloth.
If your quilt needs a deep clean, consider hand washing it in cold water or using a front-loading washing machine on a delicate cycle.
Air dry it flat or hang it up to maintain its shape.
Regularly check for signs of wear and repair any small issues promptly to keep your quilt looking beautiful for years to come.
Frequently Asked Questions
How Long Does It Take to Complete a Quilt?
It usually takes anywhere from a few days to several weeks to complete a quilt, depending on your fabric selection and the quilting techniques you use.
If you’re working with intricate patterns or hand-sewing, it’ll take longer. On the other hand, if you’re using simple designs and a sewing machine, you can finish it quickly.
Just remember to enjoy the process and let your creativity shine through!
Can I Quilt Without a Sewing Machine?
Absolutely, you can quilt without a sewing machine! You’ll just need to master some hand quilting techniques.
Grab a needle, thread, fabric, and a thimble to protect your fingers. A rotary cutter and cutting mat can help you prepare your pieces.
As you stitch, you’ll find that hand quilting offers a personal touch and can be quite meditative.
What Is the Best Batting for Quilts?
The best batting for quilts depends on your needs. Cotton batting is popular for its softness and breathability, while polyester batting offers durability and is lightweight.
If you want warmth without bulk, consider a thin batting type. For a thicker feel, go for a high loft option.
Always choose batting thickness based on your quilt’s purpose. Thicker is great for warmth, while thinner gives a more delicate finish.
Experiment to find what works best for your project!
How Do I Fix Mistakes in My Quilt?
To fix mistakes in your quilt, start by identifying the error. If it’s a sewing mistake, carefully unpick the stitches and resew with accurate alignment.
For fabric choices, consider adding a patch or decorative element to cover any flaws. You can also accept imperfections, because sometimes they add character!
Don’t hesitate to experiment; your quilt can evolve into something distinctly yours through mistake correction.
Where Can I Find Quilting Communities or Classes?
You’ll find quilting communities blooming all around you! Check out online forums where fellow quilters share tips and inspiration.
Join local workshops to meet enthusiasts face-to-face, or immerse yourself in social media groups filled with vibrant discussions.
Don’t forget about quilting bees; they’re a fantastic way to bond and learn.
Look for beginner groups if you’re just starting, or seek out advanced techniques to enhance your skills.
The quilting world’s waiting for you!
Conclusion
Quilting is like weaving your memories into a cozy tapestry.
As you set out on this creative journey, keep in mind that each stitch brings you closer to a unique masterpiece.
Don’t hesitate to experiment and let your imagination roam free.
Whether you’re hand-stitching or using a machine, every quilt tells a story.
So gather your tools, choose your fabrics, and plunge into it.
Your quilting adventure awaits, and it’s bound to be a warm and rewarding experience—especially as you discover how do you quilt your own story into every piece.