How to Craft a Mechanical Worm – Step-by-Step Guide
Crafting a mechanical worm can be an exciting yet daunting task. If you’ve ever felt overwhelmed by the idea of building your own robotic creations, you’re not alone. Many enthusiasts struggle to get started and often feel lost in the process.
Thankfully, with the right guidance, you can transform that challenge into a rewarding experience.
To craft a mechanical worm, start by gathering a sturdy base and small electronic components like motors and sensors.
Design your worm’s body and movement style, then cut tubing and assemble the structure while securing wiring.
After wiring the components, thoroughly test for smooth movement. If you run into issues, check connections and gear alignment.
You can also get creative with unique designs or colors.
Keep going to uncover exciting variations and more detailed steps to improve your project!
Key Takeaways
Gather essential materials like motors, tubing, and a sturdy base, along with tools for assembly and safety gear.
Design the worm’s movement style and aesthetics. Integrate sensors for enhanced functionality.
Assemble the body by connecting tubing and securing electrical components. This ensures stability and proper wiring.
Test the mechanical worm for responsiveness, speed, and functionality. Address any issues with power or alignment.
Explore creative variations and refine the design based on performance metrics. This helps improve user engagement and mechanics.
What You’ll Need to Get Started
Before you immerse yourself in crafting your mechanical worm, you’ll want to gather a few essential materials.
First, grab a sturdy base, like a plastic or wooden platform, to support your creation.
Start with a solid foundation, using a plastic or wooden platform to ensure your mechanical worm has the support it needs.
You’ll also need various small electronic components, such as motors, wires, and sensors to bring your worm to life.
For the body, consider flexible tubing or lightweight materials that mimic a worm’s natural movement.
When it comes to tool recommendations, a soldering iron, wire cutters, and a screwdriver are must-haves for assembling your components.
Don’t forget safety precautions: wear goggles while soldering to protect your eyes and work in a well-ventilated space.
Lastly, keep a small toolkit handy for any adjustments during assembly.
With these materials and tools, you’re set to immerse yourself in the exciting world of mechanical worm crafting!
Understanding the Mechanics of Your Mechanical Worm
To create a functional mechanical worm, you really need to understand its basic components first. It’s like building a puzzle—each piece has its own role to play. Once you get a grasp on how each part works together, you’ll be well on your way to mastering its movement mechanism.
Basic Components Overview
Building a mechanical worm requires a solid understanding of its basic components. Each part plays a crucial role in its movement and functionality.
Start with the worm anatomy, which typically includes a body, head, and tail. The body houses the internal mechanisms, while the head often contains sensors or control features.
Next, consider gear types; you’ll need an assortment for different functions. Gears transfer power from the motor to the body, enabling motion.
Common gear types include spur gears for straightforward movement and worm gears for increased torque. Understanding these components helps you design a worm that moves smoothly and efficiently.
This sets the foundation for more complex mechanisms later on.
Movement Mechanism Explained
Understanding the movement mechanism of your mechanical worm is essential for creating a fluid and functional design. The right gear types and motion principles will determine how smoothly your worm moves.
Here’s a quick overview to guide you:
| Gear Type | Functionality | Motion Principle |
|---|---|---|
| Spur Gears | Basic rotation | Linear motion |
| Bevel Gears | Change axis of rotation | Angular motion |
| Worm Gears | High torque transmission | Slow, controlled motion |
| Rack and Pinion | Converts rotational to linear | Precise positioning |
| Planetary Gears | Compact, multi-directional | Versatile motion |
Designing Your Mechanical Worm
While designing your mechanical worm, it’s crucial to envision both its functionality and aesthetics. Start by deciding how you want your worm to move, whether it’ll slither, wiggle, or crawl. This choice will directly influence its overall design.
Next, think about worm aesthetics. You might want a sleek, futuristic look or a more organic feel. Choosing colors and materials can amplify its visual appeal, so consider how these elements reflect its purpose.
Now, focus on balancing functionality. Confirm that the design supports the movement mechanism you’ve selected. The body should be lightweight yet sturdy, allowing for smooth operation.
Integrate any sensors or components seamlessly to maintain a cohesive look. Remember, a well-designed mechanical worm isn’t just about appearance; it should perform effectively while looking great.
Keep iterating on your design until you achieve the perfect blend of style and function.
Gathering Your Materials
To bring your mechanical worm to life, you’ll need to gather a variety of materials. Start with your material selection. Think about lightweight options like plastic tubing for the worm’s body and metal wire for its internal structure.
You’ll also want small gears or motors for movement, and rubber bands for flexibility. Next, don’t forget the electronic components, such as batteries and a microcontroller, which will power your creation.
Small gears or motors add movement, while rubber bands provide flexibility; don’t overlook essential electronic components like batteries and a microcontroller.
Once you’ve got your materials, shift your focus to tool preparation. Make sure you have a soldering iron for electrical connections, scissors for cutting, and a screwdriver for assembly.
Organize everything in a workspace where you can easily access your materials and tools. This will streamline your process and make it easier to focus on crafting your mechanical worm.
Being well-prepared sets the stage for a successful build!
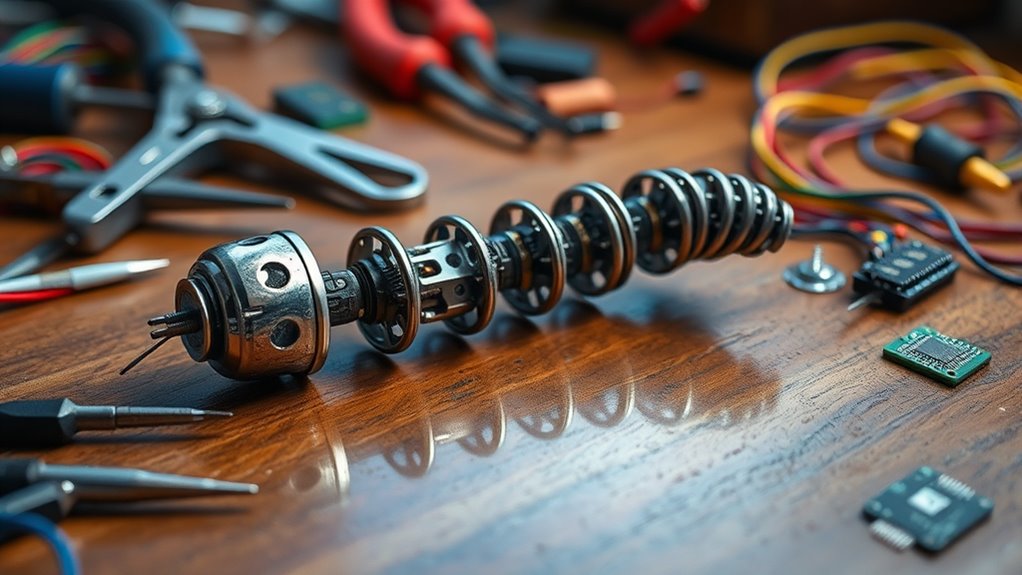
Constructing the Body
As you plunge into constructing the body of your mechanical worm, start by cutting the plastic tubing to your desired length. Choose body materials that are lightweight yet sturdy, ensuring your worm can withstand movement and manipulation.
Once you’ve cut the tubing, think about the structural design. This will determine how your worm looks and functions. Next, you’ll want to connect segments of tubing together using connectors or adhesive. Make sure these joints are secure to maintain the body’s integrity.
If you’re adding features like sensors or lights, plan their placement now. This will help integrate them smoothly into the design. Consider wrapping the tubing in a flexible material, like fabric or rubber, for added texture and realism.
Finally, confirm the body is balanced. This will be vital for future movement. With a solid body in place, you’re one step closer to bringing your mechanical worm to life!
Incorporating a Simple Movement Mechanism
With the body of your mechanical worm securely constructed, it’s time to focus on how it will move. Start by selecting a simple movement mechanism, like a cam or crank system.
These systems convert rotational motion into linear motion, perfect for your worm’s undulating movement.
Next, consider gear ratios. By adjusting the gear ratios, you can control the speed and torque of your mechanical worm.
A higher gear ratio will increase speed but reduce torque, while a lower ratio will do the opposite.
Choose the motion types that best fit your design—oscillating or continuous. Oscillating motion creates a more lifelike movement, while continuous motion can give a smoother, faster crawl.
Once you’ve chosen your components, assemble them carefully. Ensure everything aligns properly.
Test the movement to refine the mechanism. Make adjustments as needed to achieve the desired motion for your mechanical worm.
Wire the Electrical Components
Begin by gathering all the necessary electrical components, including your motor, battery, and wires. Before you start wiring, make sure to follow essential safety precautions.
Wear gloves and goggles to protect yourself from any accidental shorts or sparks.
Next, choose effective wiring techniques to connect your motor to the battery. Strip the ends of the wires to ensure a clean connection.
Twist the wire ends together securely and use electrical tape to insulate the connections. If your motor has specific terminals, check the manufacturer’s instructions for guidance on which wire goes where.
Once you’ve connected everything, double-check your wiring. Confirm there are no loose ends or exposed wires, as this step is vital for preventing short circuits.
Finally, secure your components neatly within the body of your mechanical worm. Make sure everything is snug and won’t move during operation.
Testing Your Mechanical Worm
Testing your mechanical worm is a crucial step to guarantee it operates as intended. Begin by conducting mechanical testing to assess its movement and responsiveness.
Verify all joints are functioning smoothly, and the motor powers the worm effectively. Next, perform a performance evaluation to check how well it meets your design criteria.
This includes measuring speed, agility, and overall functionality. Here’s a simple table to help you track your testing results:
| Test Type | Expected Outcome | Actual Outcome |
|---|---|---|
| Movement Test | Smooth, continuous motion | |
| Speed Test | 10 cm/s | |
| Battery Life Test | 2 hours of operation | |
| Response Test | Immediate reaction |
Use this information to refine your design and verify your mechanical worm performs at its best.
Troubleshooting Common Issues With Your Mechanical Worm
Even the most carefully crafted mechanical worms can run into issues during operation. You may encounter common malfunctions like motor issues or sensor failures.
Start by checking the power supply. Make sure it’s delivering the right voltage. If the motor isn’t responding, inspect the wiring for loose connections or frayed wires.
For gear alignment problems, verify that the gears mesh properly without excessive friction. Misalignment can hinder movement, so adjust them as needed.
If your worm seems sluggish, consider performance tweaks. Sometimes, a simple lubrication can improve efficiency.
If you notice erratic movements, re-evaluate your sensors and their calibration. Sensor failures can greatly impact functionality.
By following these troubleshooting tips, you’ll keep your mechanical worm in ideal condition, ready for whatever task it’s designed to perform.
Creative Variations to Try
There are countless creative variations you can investigate to improve your mechanical worm project. By experimenting with different elements, you can make your creation truly unique. Here are some ideas to ponder:
Creative colors: Use vibrant paints or LED lights to give your worm a striking appearance.
Unique shapes: Try designing it in unusual forms, like a spiral or zigzag, to stand out.
Alternative materials: Examine using biodegradable plastics or recycled components for an eco-friendly option.
Themed designs: Create a worm inspired by a specific theme, like outer space or underwater creatures.
Interactive features: Incorporate sound effects and programmable movements to engage users and enrich playability.
These variations can elevate your project, making it not just functional but also a delightful experience. Delve into these ideas and let your creativity shine!
Frequently Asked Questions
Can I Use Recycled Materials for My Mechanical Worm?
Yes, you can use recycled materials for your mechanical worm! Utilizing recycled components not only gives your project a unique character but also promotes environmental benefits.
You’ll reduce waste and lower your carbon footprint, making your creation eco-friendly. Look for items like old electronics, plastic bottles, or scrap metal.
What Tools Are Essential for This Project?
For your mechanical worm, you’ll need various tool types, contrasting the precision of a soldering iron with the brute force of pliers.
Essential tools include a soldering iron for electronic assembly techniques, a screwdriver for fastening parts, and wire cutters for fine adjustments.
A hot glue gun can provide quick fixes, while a multimeter helps guarantee everything’s working smoothly.
Gather these tools, and you’ll be well-prepared to bring your creation to life!
How Long Does It Take to Complete?
It typically takes you around 10 to 20 hours to complete the mechanical design, depending on your experience and the complexity of your project timeline.
If you’re familiar with the tools and materials, you might finish quicker.
However, if you run into challenges or need to refine your design, it could take longer.
Plan for some extra time to troubleshoot and perfect your mechanical worm for the best results.
Are There Safety Precautions to Consider?
When creating mechanical projects, nearly 30% of hobbyists report experiencing accidents due to neglecting safety precautions.
Always wear safety gear like goggles and gloves to protect yourself from sharp tools and debris.
Be mindful of electrical hazards. Verify all components are properly insulated and powered down when working on them.
By prioritizing these precautions, you’ll not only safeguard yourself but also improve your overall project experience.
Stay safe and enjoy the process!
Can Kids Participate in This Project?
Absolutely, kids can participate in this project! By using kid-friendly techniques, you’ll guarantee they stay engaged and safe.
This hands-on experience fosters creativity and problem-solving skills, providing educational benefits that last. Encourage them to brainstorm ideas and help with assembly, making it a fun bonding activity.
Plus, they’ll learn about basic mechanics and electronics, which is invaluable for their development. Just supervise closely to ensure everything runs smoothly!
Conclusion
Now that you’ve crafted your mechanical worm, picture it slithering smoothly across your workspace, its gears whirring in harmony.
You’ve transformed simple materials into a mesmerizing creation that dances to your command.
As you watch it glide, let your imagination run wild.
Envision it exploring new terrains or sparking curiosity in others.
With each twist and turn, you’ve not just built a worm; you’ve birthed a little marvel of engineering.
It’s ready for adventure, showcasing the brilliance of your mechanical worm.