How Do You Craft a Brewing Stand in Minecraft?
Are you tired of stumbling through your Minecraft adventures, wishing you could brew powerful potions to enhance your gameplay? You’re not alone; many players struggle with mastering potion-making.
Luckily, crafting a Brewing Stand is a straightforward process that opens the door to a world of possibilities.
To craft a Brewing Stand in Minecraft, you need one blaze rod and three cobblestones.
Start by placing the cobblestones in a row at the bottom of the crafting grid.
Then position the blaze rod in the middle slot.
After that, you can grab the Brewing Stand and add it to your inventory.
Once you’ve got it, you’ll be ready to brew potions that can greatly improve your gameplay.
There’s so much more to explore about potion-making!
Key Takeaways
- Gather one blaze rod and three cobblestones as the required materials for crafting a Brewing Stand.
- Open the crafting table interface to begin placing your materials.
- Arrange the blaze rod in the center and the three cobblestones in the bottom row.
- Once crafted, drag the Brewing Stand into your inventory to complete the process.
- Optionally, collect water bottles to use for brewing potions once the stand is crafted.
What Is a Brewing Stand in Minecraft?
A Brewing Stand is an essential tool in Minecraft that allows you to create potions. Understanding the brewing stand mechanics is key to mastering potion-making.
You’ll need blaze rods and cobblestones to craft one, which opens up a world of possibilities for enhancing your gameplay.
Historically, potion brewing has evolved considerably in Minecraft. Initially, it was a simple process, but as the game progressed, new ingredients and recipes emerged, enriching the experience.
The brewing stand lets you combine water bottles with various ingredients, like nether wart and glowstone dust, to brew different potions.
Why You Need a Brewing Stand for Potion-Making
A brewing stand is a must-have if you want to dive into potion-making in Minecraft. Seriously, it’s essential! With the right potions, you can really amp up your gameplay and enhance your survival strategies.
Imagine this: you’re in a tough spot, and those potions could give you just the edge you need. Without a brewing stand, though, you’re missing out on some powerful effects that can totally turn the tide in those challenging moments. So, if you want to level up your game, getting one of these stands is definitely the way to go!
Essential for Potions
Creating potions in Minecraft transforms gameplay, offering players valuable improvements and abilities. A brewing stand is essential for crafting various potion types, allowing you to mix and experiment with different brewing ingredients.
Without it, you can’t access the magical world of potions. These potions can boost your strength, speed, and even health.
You’ll need water bottles, nether wart, and other specific ingredients to create each potion type. For example, using a ghast tear can yield a Potion of Regeneration. A blaze powder will fuel your brewing process.
Boosts Gameplay Experience
While exploring the vast world of Minecraft, you’ll quickly realize that having a brewing stand improves your gameplay experience considerably. It elevates your gameplay immersion by allowing you to craft potions that can boost your abilities and give you an edge in various situations.
Whether you’re heading into a dangerous cave or battling hostile mobs, effective potion strategies can make all the difference. Imagine crafting a speed potion to outrun foes or a healing potion to recover quickly after a tough fight.
With a brewing stand, you can experiment with different ingredients, tailoring your potions to suit your needs. This not only enriches your gameplay but also encourages creativity and experimentation, making your Minecraft adventure even more engaging.
Enhances Survival Strategies
Without a doubt, having a brewing stand is essential for enhancing your survival strategies in Minecraft.
With it, you can create potions that provide critical survival benefits, like health boosts and resistance to damage.
These potion strategies can turn the tide in dangerous situations, whether you’re battling mobs or exploring treacherous terrain.
Imagine sipping a Strength Potion right before facing a horde of zombies or using a Night Vision Potion to navigate dark caves.
The ability to craft various potions gives you tactical advantages, allowing you to adapt to different challenges.
Ultimately, a brewing stand transforms your gameplay, making survival not just possible but enjoyable.
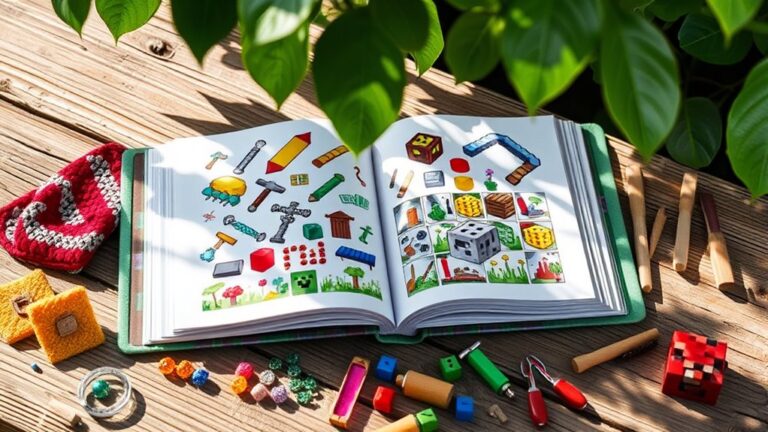
What You Need to Make a Brewing Stand
To craft a Brewing Stand in Minecraft, you need just three essential materials. You’ll require a Blaze Rod and three Cobblestones. The Blaze Rod is vital as it’s the main component for your stand, while the Cobblestones form the base.
Once you’ve gathered these items, you’re ready to create your Brewing Stand.
Here’s a quick reference table for the materials:
| Material | Quantity | Purpose |
|---|---|---|
| Blaze Rod | 1 | Main component |
| Cobblestone | 3 | Base for the stand |
| Water Bottle | Optional | For brewing materials |
After crafting the Brewing Stand, consider its placement. Choose a location that allows easy access to water and your brewing materials. With everything in hand, you’re set to start brewing exciting potions!
Step-by-Step Guide to Craft Your Brewing Stand
Crafting your Brewing Stand is a straightforward process that only takes a few steps. First, gather your crafting materials: three wooden planks and one blaze rod. You can use any type of wood, like oak or spruce, for the planks.
Once you have these items, head to your crafting table. Open the crafting interface, and arrange the materials in a specific pattern. Place the three wooden planks across the top row. Then, put the blaze rod in the center square. This arrangement will create a Brewing Stand.
Once crafted, drag your Brewing Stand into your inventory. Now you’re ready to use it for brewing recipes! Remember, you’ll need additional items like water bottles and ingredients to create various potions.
With your Brewing Stand in hand, you’re one step closer to mastering potion-making in Minecraft!
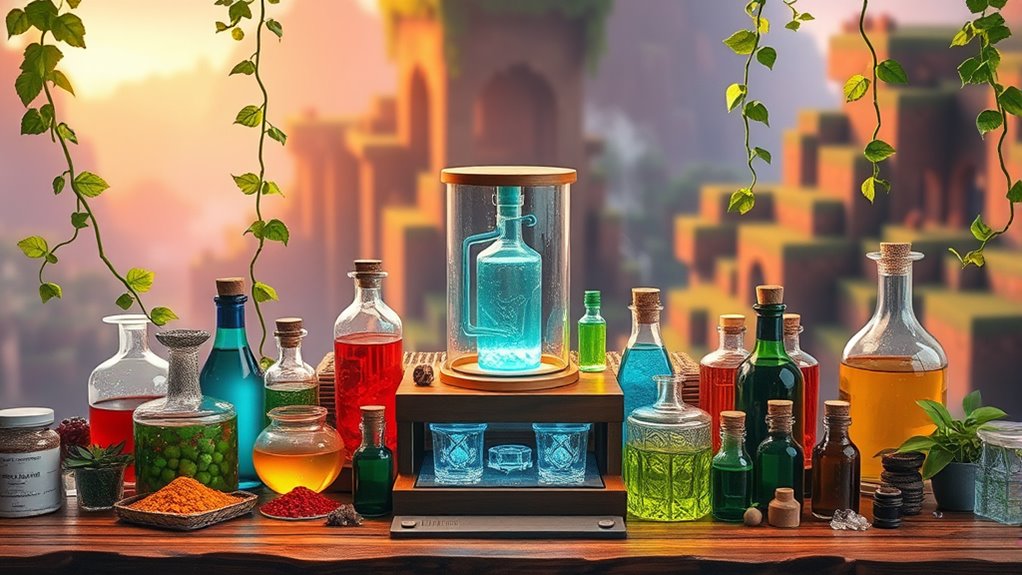
How to Use Your Brewing Stand Effectively?
Now that you’ve crafted your Brewing Stand, it’s time to put it to good use. Start by gathering your ingredients, like Nether Wart and various potions.
Pay attention to brewing timing; each potion takes a specific amount of time to brew. Keep an eye on the progress, and remember you can brew up to three potions at once, so plan accordingly.
Once you’ve created your potions, proper potion storage is essential. Use glass bottles to store them, and keep them organized in your inventory or chests.
Label your storage if you have multiple types of potions to avoid confusion later.
What Ingredients You Need for Popular Potions?
Potions can transform your gameplay in Minecraft, granting you powerful effects. To craft healing potions, you’ll need a nether wart and a glistering melon.
For fire resistance, combine nether wart with magma cream. If you’re looking to boost your speed, use nether wart and sugar for speed potions.
To see in the dark, craft night vision potions with nether wart and golden carrots. For strength potions, mix nether wart with blaze powder.
Invisibility potions require a bit more: nether wart, a fermented spider eye, and a golden carrot. If you want to investigate underwater, water breathing potions can be made with nether wart and a pufferfish.
Each potion has specific ingredients that affect its duration and effectiveness, so pay attention to your potion crafting. Mastering these recipes will improve your adventures immensely!
Tips for Brewing Different Potion Types
When you’re brewing potions, knowing your essential ingredients really makes a difference. I mean, it’s like having the right spices when you’re cooking! You’ll want to master the right techniques to get the effects you’re after—whether it’s healing or strength.
So, let’s dive into how to create various potions effectively. It’s all about understanding what each ingredient brings to the table and how to mix them just right. Plus, once you know the basics, you can really start to experiment and find what works best for you!
Using potions to your advantage can be a game changer. Whether you’re gearing up for battle or just trying to heal up after a tough day, having the right potion at hand can make all the difference. So, grab your cauldron, and let’s get brewing!
Essential Ingredients For Potions
To brew effective potions in Minecraft, you’ll need to gather specific ingredients that boost their effects. Each potion type requires unique brewing materials.
Here’s a quick guide to get you started:
| Potion Type | Essential Ingredient |
|---|---|
| Healing Potion | Ghast Tear |
| Strength Potion | Blaze Powder |
| Speed Potion | Sugar |
| Regeneration Potion | Nether Wart |
| Night Vision Potion | Golden Carrot |
Collect these ingredients to improve your potions. The right brewing materials can make all the difference in your gameplay.
With the basics down, you’re ready to investigate more advanced techniques!
Brewing Techniques To Master
Mastering brewing techniques can greatly improve your gameplay, especially if you want to create powerful potions. To elevate your potion strategies, consider these brewing styles:
- Basic Potions: Start with a simple recipe using water bottles, Nether Wart, and your chosen ingredient. This is the foundation for most potions.
- Enhanced Potions: Add glowstone dust to boost potency or redstone dust to extend duration. Experiment with different combinations for unique effects.
- Specialized Potions: Use rare ingredients like Dragon’s Breath or fermented spider eye for advanced brews. These can yield unique effects, making them invaluable in tough situations.
Potion Effects And Uses
Understanding potion effects and their uses can transform your gameplay in Minecraft. Each potion offers unique benefits, from health regeneration to speed boosts. Knowing what you need is essential.
When potion crafting, start with base potions like Awkward Potions. Then add ingredients to create desired effects. For instance, adding a Nether Wart produces a basic potion, while Redstone extends its duration.
Use specific potion strategies for combat. Splash potions of healing can support teammates, while harming potions can damage foes.
Don’t overlook brewing improvements like fermented spider eyes. These can alter effects for more tactical advantages.
Experimenting with different combinations not only broadens your potion repertoire but also boosts your overall gameplay experience. Happy brewing!
Avoid These Common Brewing Mistakes
Even if you’re excited to experiment with brewing in Minecraft, it’s easy to fall into common pitfalls that can ruin your potions.
To avoid brewing errors and guarantee success, keep these tips in mind:
- Ingredient Miscalculations: Always double-check your ingredients. Using the wrong items can lead to potion misfires and wasted resources.
- Timing Issues: Pay attention to brewing times. Leaving potions too long can alter their effects or create unwanted results. Set a timer if you need to!
- Stand Placement: Make sure your brewing stand is in a well-lit area and free from distractions. Poor placement can lead to recipe misunderstandings and equipment neglect.
Advanced Techniques for Brewing
Now that you’ve got the basics down, let’s dive into some advanced brewing techniques! This is where the real fun begins. You can start experimenting with unique combinations of potion ingredients to uncover some seriously powerful effects.
Plus, it’s all about maximizing your brewing stand’s efficiency. Why not make the most of your resources, right? So, let’s explore how you can enhance your potions and take them to the next level. You’ll be crafting truly exceptional brews in no time!
Potion Ingredient Combinations
While experimenting with potion ingredient combinations, you can access powerful effects that improve your brewing skills. Mastering these combinations allows you to create unique potion recipes and helps you utilize rare ingredients effectively.
Here are three potent combinations to try:
- Nether Wart + Blaze Powder: This combo creates a base potion, essential for most recipes.
- Ghast Tear + Awkward Potion: Use this to brew a potion of regeneration, perfect for healing during battles.
- Dragon’s Breath + Potion of Fire Resistance: Combine these to make splash potions that can protect you and your allies from fire damage.
Experiment with these ideas, and you’ll soon find yourself crafting exceptional potions!
Brewing Stand Efficiency Tips
To maximize your brewing efficiency, it’s vital to understand the unique features of the brewing stand and how to utilize them effectively.
First, consider your brewing stand placement. Position it near a water source and your ingredient storage for quick access. This reduces downtime and keeps the brewing process smooth.
Next, pay attention to potion brewing timing. Each potion takes a specific amount of time to brew, so plan accordingly. If you’re brewing multiple potions, start with the longest brew first.
Using Blaze Powder efficiently as fuel is essential too. Ensure you have enough for continuous brewing. By optimizing both your setup and timing, you’ll create potions faster and keep your adventures well-stocked!
Advanced Potion Effects
Mastering advanced potion effects can improve your gameplay in Minecraft. This allows you to tailor each potion to suit specific challenges. By understanding potion duration and employing effective brewing strategies, you can create powerful concoctions that provide significant advantages.
Here are three key techniques to evaluate:
- Extended Duration: Use redstone dust to increase potion duration. This makes effects last longer in critical situations.
- Enhanced Potions: Add glowstone dust to amplify potion effects like strength or speed. This ensures you’re even more formidable against foes.
- Combining Effects: Brew potions that stack effects, such as a fire resistance potion with a speed potion. This allows you to tackle complex challenges efficiently.
With these strategies, you’ll be well-equipped for any adventure!
FAQs on Brewing Stands
Have you ever wondered how brewing stands work in Minecraft? These essential tools let you create potions using various ingredients.
Understanding the brewing mechanics can greatly improve your gameplay. First, you’ll need blaze powder as fuel. This powers your brewing stand.
Mastering brewing mechanics enhances your gameplay; start by fueling your brewing stand with blaze powder.
Then, use water bottles as a base for your potions. When it comes to potion strategies, think about what effects you want. Combining specific ingredients can yield powerful results.
For example, adding nether wart to a water bottle creates an awkward potion, the foundation for many other brews. You might also ask about the duration of potion effects.
Generally, you can extend effects by adding redstone dust. You can also increase potency with glowstone dust.
Frequently Asked Questions
Can I Use a Brewing Stand in Survival Mode?
Yes, you can use a brewing stand in survival mode! This handy tool lets you create various potions with unique effects.
You’ll need blaze powder to fuel it. Then, combine water bottles with ingredients like Nether wart, glowstone dust, or spider eyes to craft different potion effects.
Experimenting with these ingredients can give you everything from healing potions to fire resistance. This will enhance your adventures in the game.
Enjoy brewing!
How Many Potions Can a Brewing Stand Create at Once?
A brewing stand can create up to three potions at once. You just need to fill the stand with water bottles and add brewing ingredients like Nether Wart, Blaze Powder, or other specific items depending on the potion types you want.
Each ingredient affects the potion’s properties, so experiment to find the combinations that suit your needs.
Do Brewing Stands Require Fuel to Operate?
No, brewing stands don’t require fuel to operate. You just need water bottles and the right ingredients for your potions.
Understanding brewing mechanics is key. You’ll combine items like Nether Wart or blaze powder to create various potion effects.
Just place your ingredients in the brewing stand, and it’ll do the rest. So, gather your supplies and start experimenting with different combinations for exciting results!
Can Brewing Stands Be Moved Once Placed?
Yes, brewing stands can be moved once placed, much like a traveler shifting their campfire for warmth.
Understanding brewing stand mechanics is key. Just break the stand with a tool or your hand, and it’ll drop as an item.
When you’re ready to brew potions, remember these potion brewing tips: keep your workspace organized and have ingredients handy. This way, you’ll always create the best brews wherever you choose to set up!
What Happens if I Break a Brewing Stand?
If you break a brewing stand, it drops itself as an item, so you can pick it up and place it elsewhere. You’ll lose any ongoing potion effects in the process, but the brewing stand mechanics remain intact when you place it again.
Just remember to have blaze rods handy to get it brewing potions again! So, don’t worry; you can always retrieve and reuse your brewing stand later.
Conclusion
Now that you know how to craft and use a brewing stand, you’re well on your way to becoming a potion master in Minecraft.
Don’t forget, practice makes perfect. Experiment with different ingredients to uncover unique effects.
With a little patience and creativity, you’ll be brewing up a storm in no time. So, roll up your sleeves and plunge into the magical world of potions.
Happy brewing with your brewing stand!