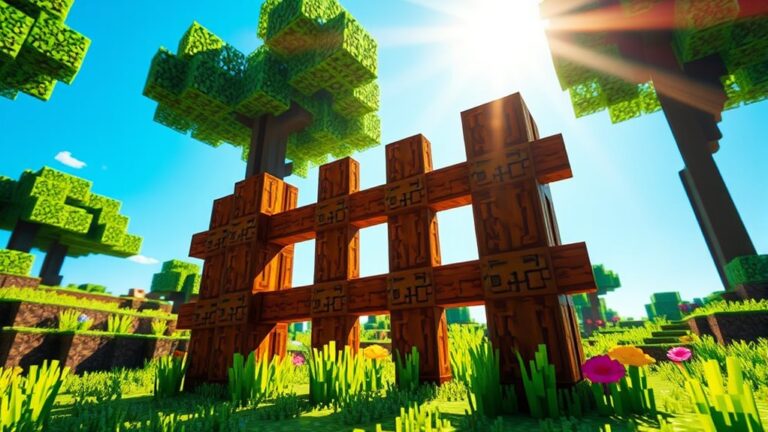
Step-by-Step Guide to Craft a Brewing Stand
Are you struggling to create the ultimate brewing setup in Minecraft? You’re not alone! Many players find it tricky to gather the right materials and figure out the best way to craft a brewing stand.
But don’t worry, we’ve got you covered with a simple guide to help you brew powerful potions in no time.
To craft a brewing stand in Minecraft, gather three cobblestones and one blaze rod.
Open your crafting table and place the cobblestones in the bottom row, with the blaze rod in the middle slot.
You’ll need blaze powder as fuel, obtained from the blaze rod.
Once crafted, position your brewing stand near a water source for easy access.
Now you’re set to create powerful potions that can improve your gameplay—stick around to uncover more brewing tips!
Key Takeaways
- Gather essential materials: 1 blaze rod, 3 cobblestones, and glass for crafting the brewing stand.
- Open the crafting table and arrange materials: cobblestones in the bottom row, blaze rod in the center.
- Place the brewing stand near a water source for convenient potion-making.
- Use water bottles and ingredients like nether wart to brew potions effectively.
- Maintain the stand and ensure blaze powder is in the fuel slot for optimal brewing.
What Is a Brewing Stand in Minecraft?
A brewing stand is an essential tool in Minecraft that lets you create potions. With its roots in brewing history, this stand plays a crucial role in your adventures.
You’ll find it incredibly useful for brewing various potions that grant different potion effects, like invisibility, healing, or speed.
To use a brewing stand, you’ll need blaze powder as fuel, which you can obtain from blaze rods. Once you’ve got your ingredients, simply place them in the stand’s interface alongside water bottles.
Each ingredient interacts distinctly, allowing you to experiment with combinations to uncover new potions.
Understanding how potion effects work is key to enhancing your gameplay. Whether you’re gearing up for a challenging battle or exploring new terrains, mastering the brewing stand equips you with powerful advantages.
Why You Need a Brewing Stand for Potion-Making
While you can gather various ingredients in Minecraft, having a brewing stand is essential if you want to craft powerful potions effectively.
This tool allows you to combine ingredients and create various potions that provide significant potion benefits, like healing, strength, and speed boosts.
Without a brewing stand, you’d miss out on these advantages, leaving you at a disadvantage during battles or explorations.
Using a brewing stand, you can employ different brewing strategies to maximize your potion-making efficiency.
You’ll learn how to mix ingredients in specific combinations to produce the desired effects, whether it’s enhancing your abilities or aiding your friends.
Plus, you can extend potion duration or potency by adding modifiers.
Overall, a brewing stand not only enhances your gameplay but also opens up a world of magical possibilities.
It’s a must-have for any serious Minecraft player.
Welcome the art of potion-making and watch your adventures flourish!
Gathering the Essential Materials for Your Brewing Stand
To craft a brewing stand, you’ll need three essential materials: blaze rods, cobblestone, and glass.
First, gather blaze rods by defeating blaze mobs found in the Nether. These rods are fundamental as they’re your primary source for brewing.
Gather blaze rods by defeating mobs in the Nether; they are essential for your brewing adventures.
Next, collect cobblestone, which you can easily mine from stone blocks. You’ll need at least three pieces for your stand’s base.
Finally, obtain glass by smelting sand in a furnace. This adds a polished look to your brewing stand and helps you keep an eye on your potions as they brew.
With these materials in hand, you’ll have the essential tools to create a brewing stand. Remember, each of these ingredients plays a significant role in your potion-making journey.
Once you gather them, you’ll be ready to start crafting your brewing stand and plunge into the exciting world of brewing materials. Happy crafting!
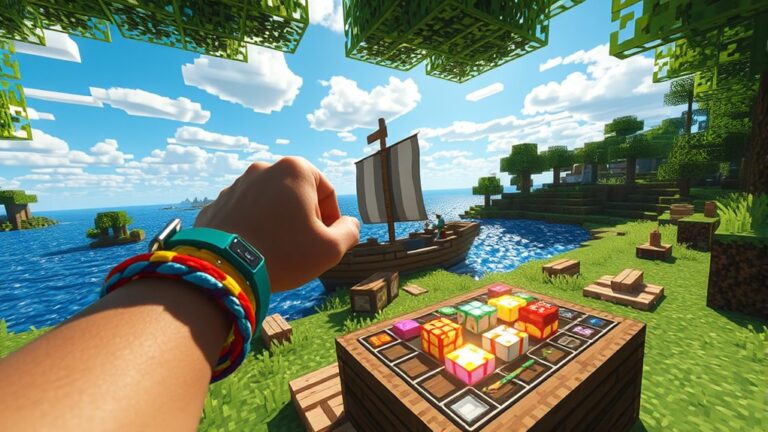
How to Craft Your Brewing Stand Step-by-Step
Crafting your brewing stand is a straightforward process that only takes a few minutes. First, gather three cobblestones and a blaze rod.
Open your crafting table and place the cobblestones in the bottom row. Next, put the blaze rod in the center slot. This simple arrangement activates the brewing stand mechanics, allowing you to create potions later.
Once you’ve crafted your brewing stand, place it in your desired location. You’ll notice that it has a unique interface, perfect for brewing various potions.
Understanding this setup is essential for experimenting with different ingredients and achieving specific potion effects.
Now that your brewing stand is ready, you can start preparing for your potion-making adventures. Remember, the right ingredients will improve your brewing experience, so keep them handy.
Enjoy crafting and exploring the magical world of potions!
How to Use Your Brewing Stand for Potion-Making
Now that you’ve got your brewing stand, let’s dive into the exciting world of potion-making! You’ll need a few essential ingredients, and understanding the brewing process is key to crafting some really effective potions. So, let’s break it down together!
First things first, gather your ingredients. You’ll need items like nether wart, various plants, and some special ingredients depending on the potion you want to create. Don’t worry; it sounds more complicated than it is!
Once you’ve got everything ready, it’s time to get brewing. Just remember to follow the steps closely, and you’ll be mixing up some magical brews in no time. Let’s make it happen!
Essential Ingredients Needed
A successful potion begins with the right ingredients. To kick off your potion-making adventure, you’ll need a few essential potion ingredients.
Start with water bottles, as they serve as the base for your brews. Next, gather Nether Wart; it’s vital for most potions and acts as a primary ingredient.
Depending on the potion you want to create, you’ll also need various other ingredients like ghast tears, blaze powder, or spider eyes. Each one brings unique effects, so choose wisely based on your desired outcome.
Familiarize yourself with different brewing techniques to maximize your results. With the right ingredients on hand, you’re ready to explore the exciting world of potion-making and uncover new concoctions!
Brewing Process Steps
With your ingredients gathered, it’s time to put your brewing stand to work. Start by placing the water bottles in the bottom slots of the stand.
Next, add your chosen ingredient in the top slot to create various potion types. For example, using a nether wart will give you an awkward potion, the base for many recipes.
Now, apply different brewing techniques to improve your potions. Add glowstone dust for stronger effects or fermented spider eye to create a splash potion.
Once brewing is complete, you’ll see the potions ready in the bottles. Don’t forget to label your potions to avoid confusion later.
Enjoy experimenting with different combinations and uncover the magic that each potion type offers!
Where to Place Your Brewing Stand for Optimal Use
When you’re setting up your brewing stand, consider where you place it for the best experience. You really want it to be close to a water source. This makes things so much easier when you’re in the middle of potion-making.
Plus, having it easily accessible means you won’t have to make unnecessary trips back and forth. It really streamlines the whole process, letting you focus on creating those awesome potions!
Ideal Room Placement
Choosing the right room for your brewing stand can considerably improve your brewing efficiency. Think about the overall brewing aesthetics and how the room ambiance can enrich your experience.
A well-placed brewing stand not only boosts functionality but also transforms your space into a delightful brewing hub.
Create a cozy corner that invites creativity. Enjoy the scent of your brews filling the air. Share memorable moments with friends in a warm atmosphere.
Consider areas with good lighting and enough space for ingredients. Avoid cramped spots and opt for a well-ventilated room that reflects your style.
This thoughtful placement will inspire you to brew more often and elevate your craft. Happy brewing!
Proximity to Water Source
Placing your brewing stand near a water source is essential for maximizing efficiency and convenience. When you set up your stand close to water, you guarantee quick access, making the brewing process smoother.
This proximity improves water accessibility, allowing you to refill your bottles or cauldrons without wasting time. You’ll find that having a reliable water source nearby greatly boosts your brewing efficiency, as you won’t need to travel far for supplies.
It’s smart to contemplate areas like rivers or lakes, or even build a small water feature nearby. This strategic placement not only streamlines your brewing sessions but also keeps your workspace organized. You can focus on crafting potent potions instead of running back and forth.
Accessibility During Brewing
How can you guarantee your brewing stand is easily accessible during potion-making?
To improve your brewing accessibility, place your stand near a water source and storage for ingredients. This way, you won’t waste time running back and forth, keeping your focus on crafting the perfect potion.
Consider these tips:
Keep it organized: A clutter-free workspace boosts your creativity and efficiency.
Create a cozy corner: A designated brewing area can make the process feel special and inviting.
Ensure easy movement: Space around your stand allows for quick shifts, so you can mix, add, and brew without hassle.
With these strategies, you’ll enjoy seamless potion accessibility. This makes your brewing experience both enjoyable and productive!
Common Potions to Brew With Your Brewing Stand
A brewing stand opens up a world of possibilities for crafting potions in your Minecraft adventures.
One of the most essential potions you can create is the healing potion. With just a nether wart and a glistering melon, you can brew a potion that restores your health in critical situations. It’s a lifesaver during battles or when exploring dangerous areas.
Another useful potion is the fire resistance potion. This one’s vital if you’re facing lava or fighting blazes in the Nether. Combine nether wart with magma cream to make this potion, and you’ll be immune to fire damage for a limited time.
Experimenting with various ingredients allows you to create different types of potions, enhancing your gameplay. Whether you need to heal quickly or brave the fiery depths, these common potions will make your adventures smoother and more enjoyable.
Best Practices for Efficient Potion Brewing
While brewing potions can be a fun activity, efficiency is key to maximizing your resources and time. To improve your potion efficiency, consider these brewing strategies:
Plan Your Brews: Know which potions you need and gather all necessary ingredients beforehand.
Use Nether Wart Wisely: Always start with Nether Wart for base potions. It sets the stage for most brews.
Batch Brew: Brew multiple potions at once. This reduces downtime and helps you make the most of your ingredients.
How to Troubleshoot Common Brewing Stand Issues
Troubleshooting common brewing stand issues can save you time and frustration during your potion-making adventures. If your brewing stand isn’t functioning, first check if it’s powered.
Verify you have blaze powder in the fuel slot; without it, your stand won’t work. If the potions aren’t brewing, confirm you’ve added the correct ingredients.
Potion brewing tips suggest using the right base and following the recipe closely. Sometimes, your brewing stand might overheat or produce unexpected results.
Regular brewing stand maintenance, like cleaning and checking for any blockages, can help prevent these issues. If you notice any discrepancies in potion effects, double-check your ingredient quantities.
Too much or too little can lead to failure.
Taking Your Potion-Making Skills to the Next Level
To improve your potion-making skills, focus on experimenting with different ingredient combinations and brewing techniques. Immerse yourself in advanced potion techniques that can raise your brews from mundane to magical.
Use creative brewing strategies to reveal unique effects and flavors, making each potion a masterpiece.
Consider these ideas to inspire your journey:
Explore new ingredients: Uncover how rare items can alter a potion’s properties.
Modify brewing times: Adjusting the simmering duration can drastically change outcomes.
Combine effects: Blend potions to create multi-functional brews that surprise and delight.
Frequently Asked Questions
Can I Use a Brewing Stand in Multiplayer Mode?
Yes, you can use a brewing stand in multiplayer mode! It’s a great way to improve your gameplay.
You and your friends can collaborate on potion-making, sharing resources and strategies. Consider assigning roles during potion collaboration. One player can gather ingredients while another brews.
What Happens if My Brewing Stand Is Destroyed?
If your brewing stand gets destroyed, you’re in for a challenge. Without it, your potion recipes go out the window, and your brewing plans fall apart.
You might scramble to gather the materials to craft a new one. Recalling essential brewing tips could help you get back on track.
But the clock’s ticking, and those valuable potions won’t brew themselves. Will you rush to replace it, or find another way to keep your alchemy alive?
Are There Any Decorative Uses for Brewing Stands?
Absolutely, brewing stands can improve your brewing stand aesthetics! You can use them for decorative potion displays, showcasing your colorful potions in a creative way.
Placing them on shelves or tables adds a magical touch to your space. You could even arrange them with other brewing-related items, like cauldrons and glass bottles.
Creating a charming alchemist’s corner is a great way to blend functionality with style in your Minecraft world!
How Long Does It Take to Brew a Potion?
Brewing a potion usually takes about 20 seconds, but it can vary based on the potion types and brewing ingredients you use.
You’ll find that each ingredient influences the process, so experimenting can yield surprising results.
While you’re waiting, consider how the aroma of the brewing concoction fills the air, hinting at the magic about to unfold.
Just keep an eye on the brewing stand to guarantee everything’s going smoothly!
Can Brewing Stands Be Moved Once Placed?
Yes, you can move brewing stands once they’re placed. Just break the stand with your tool, and it drops as an item. This allows you to place it elsewhere.
Understanding brewing stand mechanics can improve your potion brewing strategies. It makes it easier to set up your potion production wherever you want.
Conclusion
So, you’ve mastered the art of brewing, huh? Congratulations! You’re now a potion-making wizard, ready to impress your friends.
They probably still think crafting wooden planks is a challenge. Just remember, with great power comes great responsibility.
Don’t turn your enemies into slimes just yet; save that for when you really want to ruin a friendship.
Now go forth and brew, because nothing says “I’m a serious Minecraft player” quite like a shelf full of questionable potions!
Get your brewing stand ready, and let the potion-making adventures begin!