Tips and Tricks for Beginners: How to Baste a Quilt?
If you’ve ever found yourself frustrated with shifting quilt layers or wrinkled backing fabric, you’re not alone. Many beginners—and even experienced quilters—struggle with learning how to baste a quilt properly.
It can be tricky to keep everything smooth and secure, but mastering this skill makes a huge difference in your finished project.
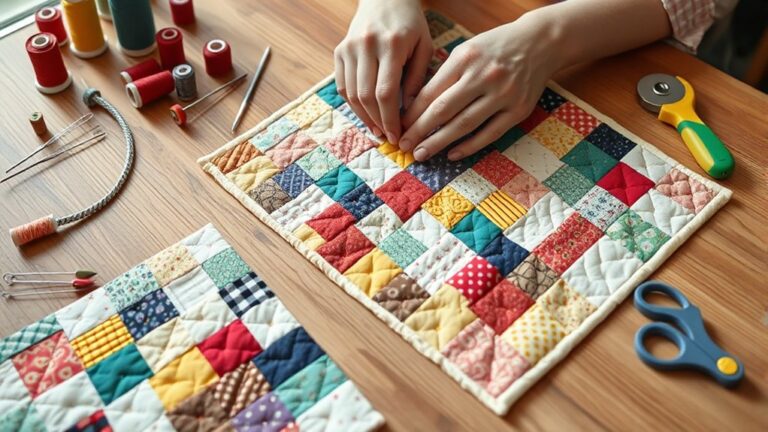
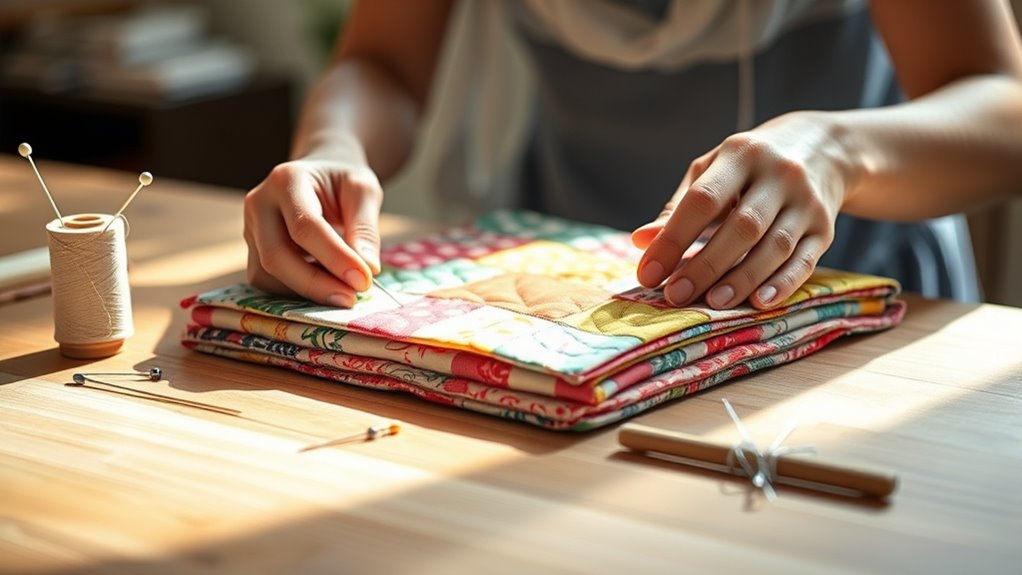
Basting a quilt is essential to keep your layers aligned and secure while sewing. Start by laying your backing fabric flat, adding batting, and then placing your quilt top on top.
You can use safety pins, basting spray, or thread basting based on your comfort. Make sure to smooth out any puckers and maintain even tension.
Watch for common pitfalls like fabric shifting. There’s more to mastering basting techniques that can improve your quilting experience!
Key Takeaways
- Pre-wash and iron your fabrics. This helps prevent shrinkage and keeps your layers smooth before you start basting your quilt.
- Choose a basting method that fits your project. You can use pin, spray, or hand basting to keep your layers aligned.
- Work on a flat, clean surface to lay out the backing, batting, and quilt top. Make sure to keep even tension across all the layers.
- Baste in manageable sections, starting from the center and moving outward. As you go, check for any misalignments or puckers.
- Secure the edges and seams with pins or clips. This keeps your layers stable and ready for quilting.
What Is Basting and Why Is It Important?
Basting a quilt is an important step that sets the foundation for your entire project. It involves temporarily holding your quilt layers together, guaranteeing they stay aligned while you sew.
Without proper basting, you risk shifting fabrics, leading to uneven seams and a less polished final product.
Without proper basting, your fabrics may shift, resulting in uneven seams and a less polished quilt.
There are several basting techniques you can choose from, including pin basting, spray basting, and hand basting. Each has its advantages, so you can pick what works best for your quilt preparation.
For instance, pin basting offers stability, while spray basting is quick and convenient.
Regardless of the method you choose, taking the time to baste carefully will save you from headaches later on. It guarantees that your quilt layers remain secure, resulting in a beautifully finished quilt.
Preparing Your Quilt Layers: Essential Materials
To effectively prepare your quilt layers, you’ll need a few essential materials.
Start with your fabric selection. Choose high-quality cotton or blends that suit your project’s theme and purpose.
Remember, the fabric should be pre-washed to prevent shrinkage later on.
Next, select your batting types. You’ll find options like cotton, polyester, or a blend of both. Each type offers different warmth, weight, and loft, so consider how you want your finished quilt to feel.
Cotton batting is breathable, while polyester provides extra loft and is often more affordable.
Once you have your fabric and batting, gather tools like scissors, safety pins, or basting spray.
Having everything ready will streamline the basting process. With these materials in hand, you’re well on your way to preparing your quilt layers for successful basting!
Choosing the Right Basting Method for Your Project
When it comes to basting your quilt, picking the right method really can make a big difference. You’ve got a couple of good options here, and each has its own perks. For instance, spray basting is super quick and gives you even coverage without much fuss. On the other hand, if you want a bit more control over how your layers stay together, pin basting might be more your style.
Spray Basting Advantages
While choosing the right basting method can feel overwhelming, spray basting offers unique advantages that make it a popular choice among quilters.
One of the main spray basting benefits is its speed. You can quickly adhere layers without the hassle of pins or tacks.
This method also guarantees an even distribution of adhesive, preventing shifting during quilting. Plus, it’s easy to reposition your fabric if needed.
When considering spray basting safety, always work in a well-ventilated area and use a mask to avoid inhaling fumes.
By opting for spray basting, you’ll save time and achieve a neat finish. This makes your quilting experience more enjoyable without sacrificing quality.
Give it a try. You might find it’s your new go-to method!
Pin Basting Techniques
Pin basting secures your quilt layers with precision and reliability. That’s why it’s a favored technique among many quilters.
To get started, you’ll need the right basting tools and a solid plan for pin placement. Here are some tips to help make your pin basting process smoother:
- Choose the Right Pins: Use long, sturdy basting pins that can hold multiple layers without bending.
- Evenly Space Pins: Place pins about 4-6 inches apart to keep everything securely in place.
- Pin at Intersections: Focus on corners and seams where layers may shift more easily.
- Remove Pins as You Sew: Take out pins just before your sewing machine foot reaches them to avoid any accidents.
With these techniques, your quilt layers will stay perfectly aligned!
Step-By-Step Guide to Basting With Safety Pins
Basting a quilt with safety pins can streamline your quilting process and guarantee everything stays in place.
Start by laying out your backing fabric on a flat surface, ensuring it’s smooth and wrinkle-free. Next, place the batting on top, followed by your quilt top.
Begin by laying your backing fabric flat and wrinkle-free, then layer with batting and quilt top for perfect alignment.
Make sure everything aligns properly during your quilt preparation.
Now, grab your safety pins. Begin pinning in the center and work your way outwards, spacing the pins about 4-6 inches apart.
This will help secure all three layers effectively. Be cautious not to pin too close to the edges, as you’ll need that space for quilting later.
Once you’ve pinned the entire quilt, double-check for any puckers or misalignments. Adjust as necessary before moving on.
Using safety pins is one of the best basting techniques to keep your quilt layers secure while you sew. Happy quilting!
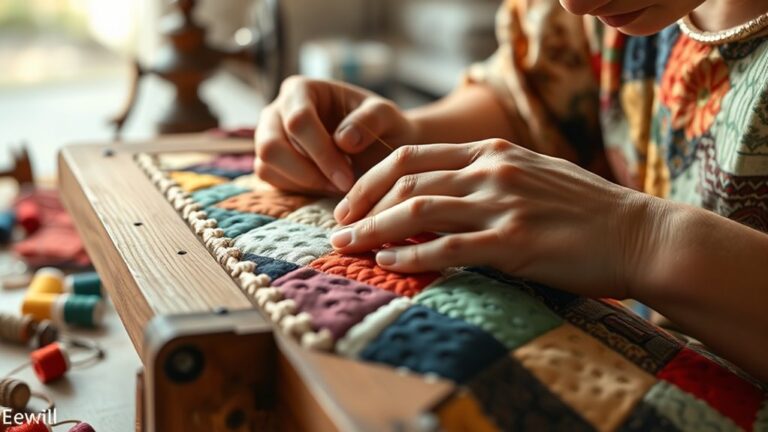
How to Baste a Quilt Using Thread
If you prefer a different method for securing your quilt layers, basting with thread offers a reliable alternative to safety pins. Here’s how to get started:
1. Choose Your Thread:
Select thread choices that complement your fabric types. Cotton is a great option for most quilts.
2. Gather Basting Tools:
Use a long needle and scissors. A thimble may help with thread tension.
3. Layering Techniques:
Lay your backing, batting, and quilt top flat. Smooth out any wrinkles so your quilt stays stable.
4. Basting Patterns:
Stitch in a grid or diagonal lines, and adjust your pattern based on the quilt size. Try to keep your stitches about 4 to 6 inches apart to hold everything together.
Basting with thread might take longer, but it guarantees your quilt layers stay in place while you sew. Enjoy the process, and watch your quilt come together beautifully!
Why Use Spray Baste for Quilting?
Using spray baste for quilting can really speed up your process, which means you get to spend more time focusing on your design and less time wrestling with layers. Plus, it gives you nice, even adhesion, so your quilt sandwich stays securely in place as you work. A lot of quilters love this method because it makes basting so much simpler and less stressful. It’s easy to see why it’s become such a favorite in the quilting community!
Quick Application Process
Spray basting is a game-changer for quilters looking to save time and achieve a smooth finish. Unlike traditional basting techniques, spray basting improves fabric stability. This guarantees everything stays in place during the quilting process.
Here’s how to make the most of it:
- Choose the Right Spray: Opt for a temporary fabric adhesive that won’t gum up your needle.
- Prepare Your Workspace: Lay down a drop cloth to protect surfaces from overspray.
- Layer Carefully: Position your quilt top, batting, and backing. Then, spray in sections for even coverage.
- Smooth It Out: Use your hands or a brayer to eliminate bubbles and guarantee a flat surface.
With these steps, you’ll streamline your basting process and can focus on creating your masterpiece!
Even Adhesion Benefits
While traditional basting methods can lead to shifting and puckering, spray basting guarantees even adhesion across your quilt layers. This technique assures your fabric stays in place, allowing you to focus on your stitching rather than constant adjustments.
Spray basting works well with various fabric types, offering excellent fabric compatibility that traditional methods sometimes lack. By using this adhesion technique, you minimize the risk of uneven seams and distortions, leading to a more polished final product.
Plus, the quick application saves you time, making it ideal for beginners. You’ll appreciate how easy it is to achieve a smooth, flat surface, guaranteeing your quilt comes together beautifully without the hassle of manual basting methods.
Tips for Maintaining Even Tension When Basting Your Quilt
To achieve an even tension when basting your quilt, start by ensuring your fabric layers are smooth and flat.
Proper fabric alignment is essential for preventing puckering. Here are some tips to help you maintain that even tension:
- Check Your Setup: Make sure your basting area is clean and spacious, allowing for easy movement.
- Use the Right Tools: Opt for safety pins or basting spray that suits your fabric type. This helps ensure a secure hold.
- Adjust Tension Regularly: As you work, periodically check your tension adjustment. This will help you avoid any slackness.
- Work in Sections: Baste in smaller sections, starting from the center and moving outward. This way, you can maintain control over your layers.
Common Basting Pitfalls to Watch Out For
When basting a quilt, it’s easy to overlook common pitfalls that can lead to frustration down the line. One major issue is fabric shifting. If your layers aren’t secured properly, you might end up with uneven layers that ruin your quilt’s appearance.
Watch out for safety pin issues. If pins aren’t spaced correctly or are too close to the edges, they can cause problems during quilting.
Timing errors can also creep in. Rushing through the basting process often results in careless basting mistakes.
Finally, keep an eye on workspace clutter. A chaotic area can distract you and lead to misaligned layers or forgotten steps.
Basting Large Quilts Made Easy
Basting large quilts can feel intimidating,
but with the right approach, it becomes a manageable task.
Here’s how to simplify the process:
Simplifying the basting process can make tackling large quilts much more manageable and enjoyable.
1. Fabric Preparation:
Pre-wash and iron your fabric to prevent shrinkage
and guarantee smooth alignment.
2. Choose Basting Tools:
Use safety pins, basting spray, or long stitches with your sewing machine.
Pick what suits your style and quilt size.
3. Layer Alignment:
Lay your backing, batting, and quilt top on a flat surface.
Make sure everything is smooth and aligned to avoid basting challenges.
4. Time Management:
Break the basting process into manageable sections.
Baste a little at a time to maintain quilting stability and reduce overwhelm.
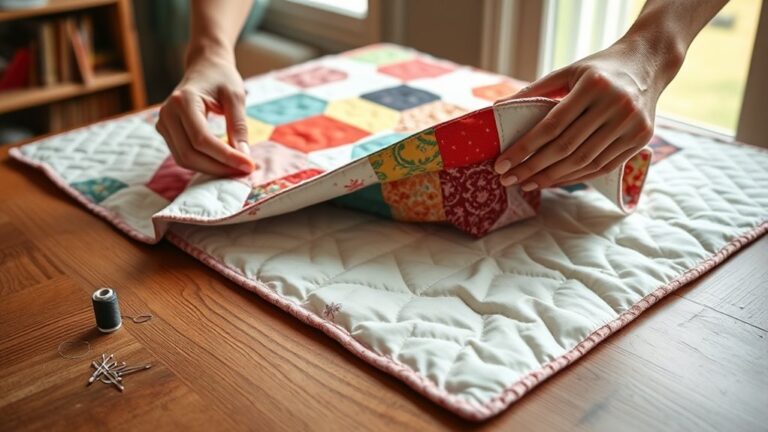
Last Steps to Secure Your Quilt Layers
Once you’ve finished basting your layers, securing them properly is key to achieving a polished quilt. Start by using quilt layering techniques that help maintain alignment.
Pin or clip the edges of your quilt to prevent shifting while you work. This is especially important if you’re sewing a larger quilt, as any movement can lead to uneven layers.
Next, sew a few lines through the quilt sandwich, focusing on the center and edges. This not only secures the layers but also gives you a guide for quilting later.
If you notice any puckering, adjust the fabric gently as you sew. Finally, take a moment to check your edges; they should be smooth and even.
With these last steps, you’ll guarantee your quilt layers are secure, setting you up for a beautiful finished project. Happy quilting!
Frequently Asked Questions
Can I Baste a Quilt Without a Designated Workspace?
Yes, you can definitely baste a quilt without a designated workspace! Consider using your dining table, floor, or even a large bed as your basting area.
Just make sure you have enough room to spread out your layers. For basting techniques, you can use safety pins or basting spray to hold everything in place.
With a little creativity, you’ll find the perfect alternative space to get your quilt basted smoothly!
How Long Can I Leave My Quilt Basted Before Quilting?
You can leave your quilt basted for about a week before quilting,
but it’s best to keep it shorter if possible. The basting duration
affects how well your quilt layers stay aligned during stitching.
For ideal quilt preparation, try to quilt within a few days to
prevent shifting or puckering. If you need more time, consider
storing it flat and in a cool, dry place to maintain its quality.
Is Basting Necessary for Small Quilt Projects?
Basting isn’t strictly necessary for small quilts, but it’s definitely beneficial.
You’ll find that even a quick basting helps keep your layers aligned, preventing shifting while you quilt.
This can save you from headaches later on.
Plus, it gives you a chance to catch any puckering or unevenness early.
Can I Use Fabric Glue Instead of Basting Methods?
Yes, you can use fabric glue as an alternative technique instead of traditional basting methods. Fabric adhesive provides a strong hold, keeping your layers together while you quilt.
Just make sure to choose a washable, fabric-friendly glue to avoid issues later. While it’s a convenient option, keep in mind that some prefer basting with safety pins or thread for flexibility.
Experiment and see what works best for you and your projects!
What Should I Do if My Quilt Layers Shift While Basting?
If your quilt layers shift while basting, think of it like a dance where partners lose their rhythm.
To regain that harmony, use quilt alignment techniques like pinning or spray basting.
Consider basting tool options like safety pins or temporary adhesive sprays to hold everything in place.
Take your time, adjusting each layer gently, ensuring they’re snug and secure.
This way, your quilt can glide smoothly into the finished masterpiece you envision.
Conclusion
Basting your quilt doesn’t have to be intimidating. With the right techniques and a bit of practice, you’ll create a sturdy foundation for your masterpiece.
Isn’t it exciting to see your fabric layers come together? Remember to take your time, maintain even tension, and avoid common pitfalls.
By following these tips, you’ll be well on your way to a beautifully basted quilt, ready for quilting. So grab those materials and let your creativity flow—basting a quilt is just the first step in bringing your vision to life!