7 Simple Steps to Assemble a Quilt
Quilting is a wonderful hobby, but if you’ve ever felt overwhelmed by where to start, you’re not alone. Many people struggle with turning a pile of beautiful fabrics into a finished quilt. It can be hard to know which steps to follow or which tools you really need.
Luckily, with a little guidance, assembling a quilt can be straightforward and fun!
Assemble a quilt in seven simple steps: first, choose fabrics that reflect your style and skill level. Next, set up a well-lit workspace and gather your essential tools.
Cut your fabric pieces accurately, then assemble quilt blocks with attention to detail.
Join those blocks for a seamless finish, and don’t forget to add batting and backing for comfort.
Finally, complete your quilt by applying binding and stitches to give it a polished look.
There’s so much more to discover!
Key Takeaways
- Choose a consistent color palette and plan the block layout to help you visualize your quilt design more effectively.
- Lay the backing fabric right-side down, place the batting on top, and position the quilt top right-side up for proper alignment.
- Secure all the layers using pins or basting spray. This prevents shifting during quilting, so be sure to check for wrinkles or folds as you go.
- Sew the quilt layers together, taking care to keep the seams aligned. Then, press them flat for a polished finish.
- Attach the binding by cutting strips, sewing them to the edges, and folding them over. This gives your quilt a clean and secure edge.
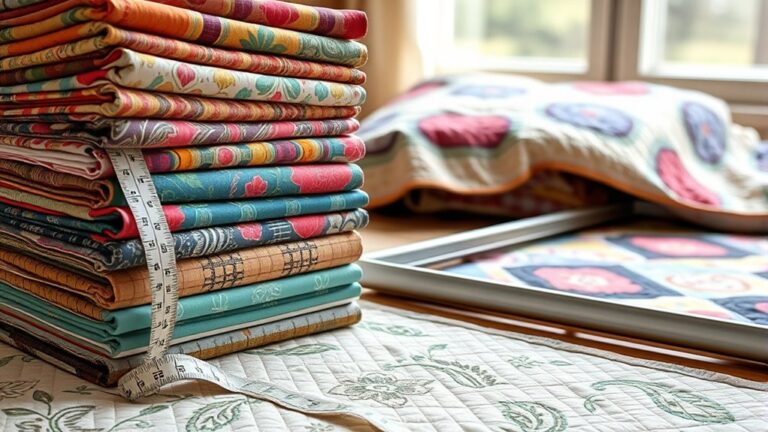
How to Choose Fabrics That Match Your Style and Skill Level
Choosing fabrics for your quilt is an exciting step that can really reflect your personal style and skill level.
Start by considering fabric color; vibrant hues can energize your design, while softer tones lend a calming effect.
Consider fabric color carefully; vibrant hues energize your quilt, while softer tones create a soothing ambiance.
Think about pattern coordination, too. Mixing patterns can create visual interest, but make sure they complement each other.
Texture variety adds depth, so don’t shy away from different materials.
Consider your personal preferences and any seasonal themes you want to incorporate. For instance, bright florals work well in spring, while cozy plaids fit autumn beautifully.
Pay attention to fabric weight and print scale. Lighter fabrics are easier to handle, and larger prints can dominate a quilt.
Finally, practice fabric blending. Combine fabrics in a way that feels harmonious to you.
This process is all about expressing yourself while honing your skills. Enjoy the journey!
Set Up Your Workspace and Gather Essential Tools
To get started on your quilting project, first choose a workspace that feels comfortable and has plenty of good lighting—trust me, your eyes will thank you later! Once you’ve found the perfect spot, go ahead and gather up all the essential tools you’ll need, like scissors, pins, and anything else on your supply list.
After you’ve got everything together, take a little time to organize your supplies so they’re easy to grab when you need them. Having everything within reach really makes the whole assembly process smoother and a lot more enjoyable.
Choose Your Workspace Location
Finding the right workspace is essential for a successful quilt assembly.
You’ll want a location that combines good lighting considerations and workspace ergonomics to keep you comfortable and focused.
Here are a few tips to help you choose:
- Choose a well-lit area to avoid straining your eyes.
- Ensure the workspace is clutter-free to help you stay organized.
- Select a comfortable chair that supports your back during long sessions.
- Keep your materials within reach to minimize unnecessary movement.
- Consider a large table for ample space to spread out your fabric.
Gather Essential Tools
Gathering essential tools is crucial for a smooth quilt assembly process. Start by collecting a rotary cutter, cutting mat, and quilting ruler; these will help you cut your fabric accurately.
Don’t forget your sewing machine, as well as needles and thread that match your fabric. You’ll also need a seam ripper for those unexpected mistakes.
For fabric storage, consider using clear bins to keep your materials organized and easily accessible. This way, you can quickly grab what you need while employing various sewing techniques.
Finally, have an iron and ironing board handy to guarantee crisp seams, which will enhance your quilt’s overall look. With the right tools at your fingertips, you’re ready to jump into your quilting project!
Organize Your Supplies Efficiently
With your tools in hand, it’s time to set up your workspace for maximum efficiency.
Effective fabric organization and supply management will streamline your quilt assembly process.
Start by designating a clean, flat surface where you can spread out your materials.
Next, gather essential items and keep them within reach.
Consider using the following:
- Clear storage bins for fabric
- A cutting mat and rotary cutter
- Measuring tools, like a ruler and tape measure
- Pins and a pincushion
- A sewing machine and thread
Cutting Fabric Pieces Accurately: Tips for Success
When you’re ready to cut fabric pieces for your quilt, accuracy is essential to achieving a polished final product. Start by double-checking your fabric measurements; even a small error can throw off your entire quilt.
Use a reliable ruler and a rotary cutter for precise cutting techniques. Lay your fabric flat on a cutting mat to avoid any shifting during the process.
To guarantee uniformity, stack multiple layers of fabric when cutting similar pieces. This saves time and maintains consistency across your quilt.
Stacking multiple layers of fabric while cutting similar pieces ensures time efficiency and consistent results in your quilt.
Always cut with the fabric’s grain to prevent distortion. If you’re using a pattern, adhere closely to the provided cutting dimensions, and don’t hesitate to make a test piece first.
Lastly, keep your cutting tools sharp. Dull blades can lead to jagged edges and inaccuracies.
Following these tips will help you cut fabric pieces accurately, setting a solid foundation for your quilt assembly.
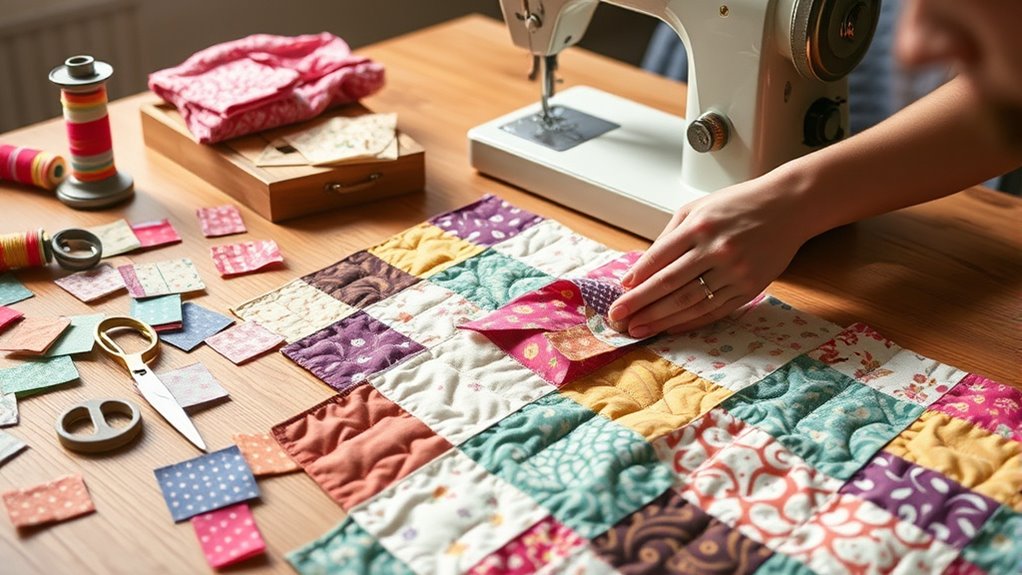
How to Assemble Quilt Blocks Like a Pro?
After cutting your fabric pieces accurately, the next step is assembling those quilt blocks like a pro.
To create a stunning quilt, pay close attention to your block layout and apply color theory effectively.
Here are some tips to help you assemble your quilt blocks:
- Choose a consistent color palette: Stick to colors that complement each other.
- Plan your block layout: Visualize how your blocks will come together before sewing.
- Align seams carefully: Confirm that your pieces line up for a polished finish.
- Press your seams: This helps to flatten the blocks and maintain their shape.
- Use a design wall: It’s an excellent tool for adjusting your layout without commitment.
Joining the Quilt Blocks Together: Techniques for a Seamless Finish
While you might think that assembling quilt blocks is straightforward, achieving a seamless finish requires attention to detail. Start by verifying you have consistent seam allowance throughout your blocks; this is essential for proper fabric alignment.
Use joining methods like the “butt” or “overlap” technique, depending on your quilt layout. When you sew, keep an eye on your fabric tension since fabric that’s too tight or too loose can lead to puckering.
For matching seams, pin carefully, and consider pressing techniques that open or set seams flat. If you prefer, hand sewing can provide more control, especially around corners where precision matters.
When you’re ready to connect rows, take your time to verify each seam aligns perfectly. This meticulous approach will help you create a polished quilt that showcases your hard work and creativity, making all the difference in your finished piece.
Add Batting and Backing to Your Quilt
Now that your quilt blocks are all joined together, it’s time to give your quilt that cozy finish by adding batting and backing. Choosing the right batting is important, so think about how you want your quilt to feel and what it will be used for. Once you’ve picked out the perfect batting, the next step is to add the backing fabric. This is what completes your quilt “sandwich” and gets it ready for quilting.
Choosing The Right Batting
Choosing the right batting for your quilt is essential,
as it affects both the finished look and feel.
Consider these factors to make an informed choice:
- Batting types: Cotton, polyester, or wool. Each offers unique characteristics.
- Thickness considerations: Thicker batting provides more warmth,
but may affect drape.
– Insulation properties: Look for materials that retain heat
without adding bulk.
– Quilt durability: Choose batting that withstands wear
and tear for longevity.
– Washing ease: Confirm it’s machine washable and won’t shrink excessively.
Attaching The Backing Fabric
Attaching the backing fabric is an essential step in quilt assembly. It sets the foundation for your project and helps everything come together smoothly.
You’ll want to choose the right backing fabric types to guarantee durability and style. This choice can make a big difference in the finished feel of your quilt.
Lay your backing fabric right-side down on a flat surface. Then, place the batting on top, followed by your quilt top, right-side up.
Now it’s time for securing the quilt layers. Pin or use basting spray to hold everything together, making sure no shifting occurs during quilting.
Here’s a quick reference table for backing fabric types:
| Fabric Type | Characteristics |
|---|---|
| Cotton | Soft, breathable |
| Flannel | Warm, cozy |
| Polyester Blend | Durable, wrinkle resistant |
Now you’re ready to proceed!
Finishing Your Quilt: Binding and Stitches
Wrap up your quilt with the perfect binding and finishing stitches to give it that polished look.
Choosing the right binding techniques and stitch options can really enhance your project and take it from good to great. Here’s a quick guide to help you finalize your quilt beautifully:
- Select Your Binding: Choose between single-fold, double-fold, or bias binding.
- Cut and Prepare: Cut your binding strips at 2.5 inches wide for ideal coverage.
- Attach the Binding: Sew the binding to the quilt edges, leaving a little overhang.
- Choose Your Stitch: Opt for hand stitches, machine stitches, or decorative stitches based on your style.
- Finish with Care: Fold the binding over to the back and secure it neatly, making sure you have a clean finish.
Frequently Asked Questions
How Much Fabric Do I Need for a Queen-Sized Quilt?
You’ll need about 8 to 10 yards of fabric for a queen-sized quilt, depending on your design and fabric types.
Start with fabric calculations for the quilt top, backing, and binding. If you’re using larger prints, you might need less yardage, while smaller patterns could require more.
Don’t forget to account for seams and any borders you might add. Planning ahead guarantees you have enough fabric to create a beautiful quilt.
Can I Mix Different Fabric Types in One Quilt?
Yes, you can mix different fabric types in one quilt! Just keep fabric compatibility in mind to guarantee your quilt holds up over time.
For example, combining cotton with flannel or polyester can create a cozy texture balance. Be mindful of how each fabric behaves when sewn and washed.
Experimenting with various textures can add depth and interest, making your quilt distinctively yours while still maintaining functionality.
Enjoy the creative process!
What’s the Best Way to Store My Fabric?
The best way to store your fabric is to keep it dry and organized. You wouldn’t want your precious materials to gather dust or become wrinkled, right?
Use clear bins for fabric storage, ensuring you can easily see what you’ve got. It makes sorting through your collection much easier when inspiration strikes.
Consider folding rather than rolling to save space. This simple step can help you fit more fabric into each bin.
Label each bin for quick access. That way, you won’t waste time searching for the perfect piece.
With proper fabric organization, you’ll find inspiration strikes without the clutter stealing your creative spark!
How Do I Fix Mistakes in My Quilt?
To fix mistakes in your quilt, start by identifying the common quilting errors like uneven seams or fabric puckering.
Use quilt repair techniques such as removing stitches with a seam ripper, then re-sew the sections carefully.
If you’ve got a fabric snag, patch it with a similar fabric piece. Don’t hesitate to trim any excess fabric for a clean finish.
What Tools Are Essential for Quilt Maintenance?
You’ll want a few essential tools for quilt maintenance to keep your work in top shape.
A gentle fabric cleaner is vital for quilt care, helping remove stains without damaging your fabric.
Invest in a lint roller to keep dust at bay, and have a soft brush handy for delicate spots.
Don’t forget high-quality scissors for trimming threads.
With these tools, you can guarantee your quilt stays beautiful and well-preserved for years to come.
Conclusion
Now that you’ve mastered these steps, you’re ready to create beautiful quilts that reflect your personal style.
Just like a smartphone changed communication, your newfound quilt assembly skills will enhance your quilting experience in ways you might not expect.
Don’t be afraid to experiment and make mistakes along the way; they’re part of the journey.
Remember, every quilt tells a story. Yours just got a whole lot more interesting now that you know how to assemble a quilt with confidence.
So grab your fabric and start stitching your next masterpiece!