How Are Quilts Made?
If you’ve ever felt overwhelmed by the thought of starting your first quilt, you’re not alone. Many people struggle with knowing where to begin or which materials to choose.
Finding the right guidance on how quilts are made can make all the difference, especially when you want your finished piece to last for years.
To make a quilt, you start by choosing the right fabrics, typically cotton for durability. You then prepare your materials and cut the fabric accurately.
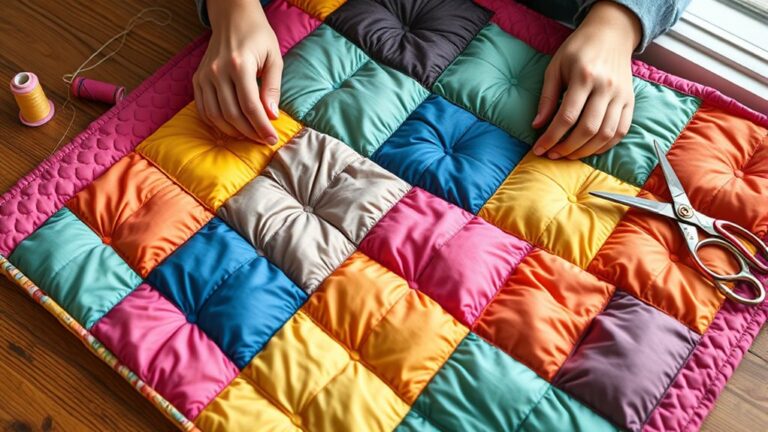
Next, you assemble the quilt by sewing blocks together, adding layers of batting and backing. Once that’s complete, you use various stitching methods to secure the layers.
Finally, finish the quilt with binding and take care of it properly.
With these basics in hand, there’s even more to uncover about the craft!
Key Takeaways
- Choose high-quality fabrics, such as cotton or flannel, based on durability and the quilt’s intended purpose.
- Prepare by organizing your workspace and picking a pattern that matches your skill level.
- Cut fabric accurately using a rotary cutter, ruler, and cutting mat. This helps ensure all your pieces are precise.
- Layer the quilt by placing the backing, batting, and top fabric together. Then, use hand or machine quilting methods to stitch everything in place.
- Finish by trimming the edges and binding the quilt securely. Be sure to care for it properly to help maintain its quality over time.
What Materials Do You Need for Quilting?
When you’re diving into quilting, you’ll need a few essential materials to get started.
First off, you’ll want to gather various fabric types. Cotton is the most popular choice due to its durability and ease of handling.
Gathering different fabric types is essential; cotton stands out for its durability and ease of handling.
You can also investigate flannel or batik fabrics for unique textures and patterns.
Next, you’ll need basic quilting supplies. A rotary cutter and mat are fundamental for cutting your fabric accurately, while a ruler helps guarantee straight lines.
Don’t forget quality thread; it holds your quilt together and can add a decorative touch.
Needles are another important supply, especially quilting needles designed to handle multiple layers.
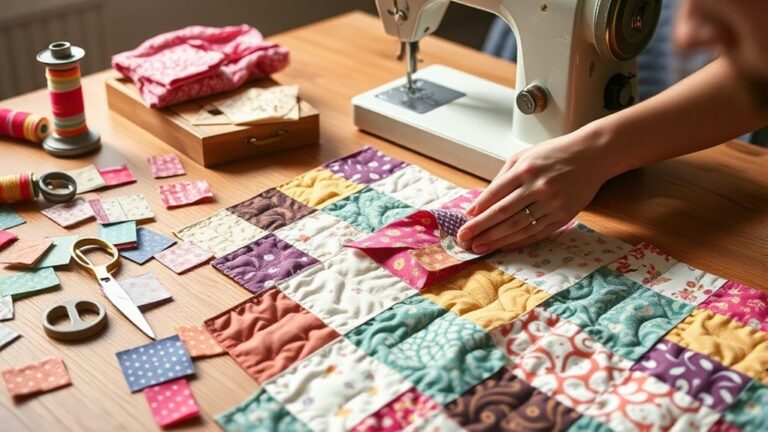
Finally, consider a good sewing machine, as it streamlines the process and gives you more control.
With these materials in hand, you’re well on your way to creating beautiful quilts!
How to Choose the Right Fabric for Your Quilt
Choosing the right fabric for your quilt can make all the difference in its overall look and feel. Start by exploring different fabric types, such as cotton, flannel, or polyester blends.
Cotton is the most popular choice due to its durability and ease of handling. Flannel can add warmth and softness, while polyester blends offer vibrant colors and wrinkle resistance.
Next, think about color combinations. Selecting a cohesive palette can improve your quilt’s visual appeal. Use a color wheel to find complementary or analogous colors that work well together.
Don’t shy away from mixing patterns; just make sure they harmonize with your chosen colors.
Finally, consider the quilt’s purpose. If it’s for a child, opt for durable fabrics that can withstand wear and tear.
For a decorative piece, you might choose luxurious fabrics that showcase your creativity. Make your selections with intention, and your quilt will shine!
Steps for Quilting Preparation
Before you start quilting, it’s a good idea to spend some time picking out your fabrics. The colors and patterns you choose really set the mood for your whole project, so have some fun with it! Once you’ve got your fabrics, you’ll want to look for a pattern that matches your style and skill level. This will give you a clear direction and help everything come together nicely.
After that, make sure you have all the tools you’ll need on hand. Things go much more smoothly when you’re not hunting around for a missing ruler or pair of scissors in the middle of your project. With everything ready to go, you’ll be all set to jump in and start quilting!
Choosing Fabrics Wisely
As you begin your quilting journey, the selection of fabrics plays an essential role in the overall success of your project.
Start by considering fabric color; choose shades that complement each other and reflect the mood you want to convey. Don’t shy away from experimenting with contrasting hues to add depth and interest.
Next, think about fabric texture. Mixing different textures can create a dynamic visual appeal and improve the tactile experience of your quilt.
For instance, pairing smooth cotton with cozy flannel or luxurious velvet can uplift your design.
Remember, the right combination of fabric color and texture not only improves your quilt’s beauty but also guarantees it feels great to use.
Happy quilting!
Selecting a Pattern
How do you decide on a pattern that truly resonates with your vision? Start by seeking pattern inspiration from various sources, such as books, online galleries, or even nature.
Think about the themes or colors that speak to you. Next, consider design considerations like the skill level required and the size of your quilt.
Do you want something intricate or straightforward? Also, think about how the pattern will complement your chosen fabrics.
Visualize how the colors and shapes will interact. Don’t hesitate to sketch your ideas or use quilting software to see how different elements come together.
This process will help you select a pattern that not only fits your aesthetic but also aligns with your quilting goals.
Gathering Essential Tools
Selecting the perfect pattern sets the stage for your quilting project, but having the right tools is just as important.
To guarantee your quilting experience goes smoothly, gather these essential tools:
- Sewing Machine: A reliable sewing machine is vital for stitching quilt layers together efficiently.
- Rotary Cutter: This tool will help you cut fabric accurately, saving time and effort.
- Cutting Mat: A self-healing cutting mat protects surfaces while offering a grid for precise measurements.
- Quilt Patterns: Having a variety of quilt patterns on hand can inspire creativity and guide your design choices.
With these tools at your disposal, you’ll be well-prepared to bring your quilt vision to life.
Happy quilting!
How to Cut Fabric for Your Quilt Efficiently
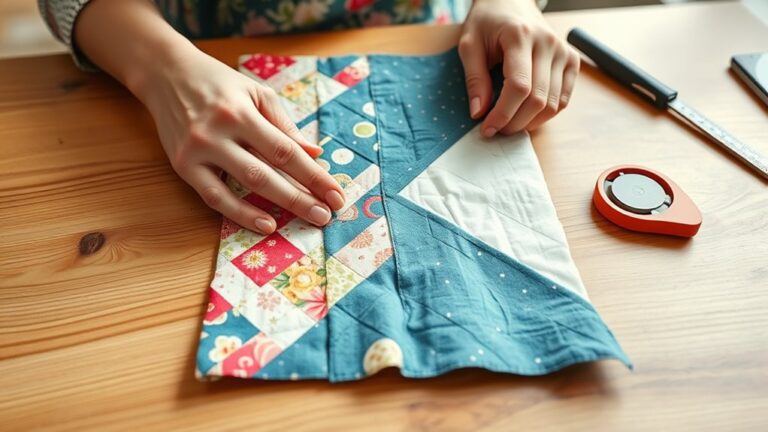
Cutting fabric for your quilt doesn’t have to be stressful! First, gather a few essential tools like a sharp rotary cutter, a sturdy ruler, and a cutting mat—these will make the whole process much smoother. Once you have everything ready, it’s all about using the right techniques to keep your cuts straight and accurate.
When you take your time to measure carefully and cut with confidence, you’ll notice how much easier it is to piece your quilt together later. Plus, being precise now saves you from headaches down the road. With a little practice, you’ll find that cutting fabric can actually be one of the most satisfying parts of quilting!
Essential Cutting Tools
Regarding quilting, having the right cutting tools can make all the difference in achieving precise and efficient results.
Here are some essential tools you’ll want in your quilting kit:
1. Rotary Cutter Basics:
A sharp rotary cutter allows for clean, straight cuts and speeds up the process.
2. Cutting Mat Essentials:
Invest in a high-quality cutting mat to protect your surfaces and guarantee your blades stay sharp.
3. Ruler:
A clear acrylic ruler helps you measure and cut accurately, especially for intricate designs.
4. Scissors:
Keep a good pair of fabric scissors handy for detail work and snipping threads.
With these tools, you’ll streamline your fabric cutting. This sets the stage for a beautifully crafted quilt.
Fabric Cutting Techniques
Efficient fabric cutting is essential for any quilting project, as it guarantees that your pieces fit together perfectly.
Start by using a rotary cutter, which provides clean, straight edges and speeds up the process. Lay your fabric flat, and if you’re working with larger pieces, consider fabric folding techniques.
Folding your fabric in half or quarters can help you cut multiple layers simultaneously, saving you time and ensuring uniformity. Always use a cutting mat to protect your surfaces and keep your blades sharp.
Measure twice before you cut, and align your ruler with the fabric edges for accuracy. With these techniques, you’ll cut your fabric efficiently, making your quilting experience more enjoyable and successful.
Common Techniques for Assembling a Quilt
As you immerse yourself in the world of quilting, you’ll uncover several common techniques for assembling a quilt that can improve your craft.
Understanding these methods not only connects you to quilting history but also refines your patchwork techniques.
Here are four essential assembly techniques:
1. Sewing Blocks Together: Arrange and stitch your quilt blocks in a desired pattern.
Take care to ensure seams align for a polished look.
2. Joining Rows: After creating blocks, sew them into rows.
This approach helps maintain a consistent design throughout the quilt.
3. Using Sashing: Adding sashing strips between blocks can provide definition.
It also enriches the overall aesthetic of your quilt.
4. Incorporating Borders: Finish your quilt with borders to frame the design.
Borders add an extra layer of visual interest as well.
These techniques are a great starting point, whether you’re new to quilting or building on your skills.
Adding Batting and Backing: A Simple Guide
While you may have perfected your quilt top, the next essential step is adding batting and backing to bring your creation to life.
Choosing the right materials can greatly impact the final look and feel of your quilt.
Here’s a simple guide to help you understand your options:
| Batting Types | Backing Options |
|---|---|
| Cotton | Solid Color Fabrics |
| Polyester | Print Fabrics |
| Bamboo | Flannel |
| Wool | Minky |
| Cotton-Poly Blend | Specialty Fabrics |
Start by selecting the batting type that suits your needs, whether you’re looking for warmth, weight, or loft.
Next, choose a backing option that complements your quilt top.
Lay your batting on a flat surface. Place the backing right side down, and finally, add your quilt top.
Smooth everything out, and you’re ready for the next steps!
Quilting Stitching Methods You Can Use?
When you’re ready to bring your quilt together, choosing the right stitching method is essential for both function and style.
You can opt for different techniques based on your preferences and the quilt’s design.
Here are four popular methods:
1. Hand Quilting: This traditional approach allows for intricate stitch patterns and a personal touch.
It’s perfect for those who enjoy a slower, more meditative process.
2. Machine Quilting: Fast and efficient, this method is great for larger projects.
You can use various stitch patterns easily, achieving a polished look.
3. Quilting Knots: These can add texture and are often used to secure layers together.
They’re simple yet effective.
4. Free-Motion Quilting: This creative technique lets you design your own patterns, offering endless possibilities.
Experiment with these methods to find the one that suits your style and improves your quilt!
How to Finish and Bind Your Quilt Properly
Finishing and binding your quilt properly is essential for a polished final product.
Start by trimming the quilt edge, ensuring it’s even and free of excess fabric.
Begin by trimming the quilt edge to achieve a neat, even finish without any excess fabric.
Choose a binding technique that suits your style, whether it’s single-fold, double-fold, or bias tape.
Cut your binding strips to the desired width and length, and sew them together to create one long continuous strip.
Next, attach the binding to the quilt edge. Align the raw edges and sew with a quarter-inch seam allowance.
When you reach the corners, fold the binding to create a mitered corner and continue sewing.
Once you’ve stitched all around, fold the binding over to the back and secure it with hand stitches or by machine.
This gives your quilt a clean finish and protects the edges.
With these steps, your quilt will look beautiful and be ready for display or use!
Tips for Caring for Your Finished Quilt
Caring for your finished quilt is essential to keeping it looking beautiful and lasting for years.
Here are some tips to help you maintain your quilt:
1. Regular Quilt Cleaning:
Spot clean any stains immediately and use a gentle detergent for occasional washes.
Always check the care instructions specific to your quilt.
2. Avoid Direct Sunlight:
Prolonged exposure can fade colors and weaken fabrics.
Store your quilt in a shaded area when not in use.
3. Use Proper Storage Solutions:
Fold your quilt neatly and store it in a breathable cotton bag to protect it from dust and pests.
Avoid plastic bags, as they can trap moisture.
4. Rotate Usage:
If you have multiple quilts, rotate them to prevent wear and tear.
This also allows each quilt to “rest” and maintain its shape.
Troubleshooting Common Quilting Problems
As you’re working on your quilt, you might notice a few hiccups along the way—maybe your fabric starts to bunch up, your stitches look uneven, or your thread keeps breaking. Don’t stress! These are really common quilting problems, and there are some simple ways to fix them.
Let’s take a look at a few easy solutions that can help you smooth out these issues and keep your quilting project moving forward.
Fabric Bunching Issues
One common issue quilters face is fabric bunching, which can disrupt the flow of your project.
To tackle this problem effectively, consider the following tips:
- Check Fabric Tension: Verify your machine’s tension settings are appropriate for the fabric type. Incorrect tension can cause bunching.
- Use a Walking Foot: This helps feed multiple layers evenly, reducing the chance of fabric shifting.
- Quilt Smoothing: Gently smooth the fabric layers as you sew to keep everything aligned and flat.
- Pinning: Secure your layers with enough pins to prevent movement, especially in larger sections.
Uneven Stitching Solutions
While quilting can be a rewarding craft, uneven stitching often frustrates quilters at all skill levels. To tackle this issue, first check for uneven seams in your fabric.
Verify your pieces are cut accurately and aligned properly before stitching. Next, make stitch adjustments on your sewing machine; a simple change in stitch length can make a big difference.
Pay close attention to fabric tension as well. If it’s too tight or too loose, it can lead to uneven results.
Experiment with different quilting techniques, like using a walking foot or trying free-motion quilting, to improve your overall stitching.
With a little practice and patience, you’ll find that consistent, even stitches are within your reach.
Thread Breakage Fixes
If you’ve ever experienced thread breakage while quilting, you know how disruptive it can be to your creative flow.
Fortunately, there are several fixes you can try to keep your project moving smoothly.
- Check Thread Tension: Verify both upper and lower tensions are balanced. If the tension is too tight, it can cause breaks.
- Adjust Needle Size: A needle that’s too small can strain the thread. Make sure to choose the right size for your fabric.
- Use Quality Thread: Low-quality thread is more prone to breakage. It’s a good idea to choose a reliable brand.
- Replace Your Needle: A dull or damaged needle can snag the thread. Change your needle regularly to prevent issues.
Frequently Asked Questions
How Long Does It Typically Take to Make a Quilt?
It typically takes anywhere from a few weeks to several months to make a quilt, depending on your skill level and the complexity of the quilt patterns.
If you’re hand quilting, the process can be more time-consuming, as each stitch requires careful attention.
You might find that simpler patterns speed up the process, while intricate designs can extend it.
Enjoy the journey, and remember, the time spent adds to the quilt’s charm!
Can I Quilt Without a Sewing Machine?
Absolutely, you can quilt without a sewing machine! In fact, hand quilting can be a delightful adventure, turning your living room into a cozy workshop.
With just a needle and thread, you’ll master various quilting techniques, stitching together fabric like a pro. Sure, it takes longer, but the satisfaction of creating each stitch by hand is priceless.
What Is the History of Quilting?
Quilting has a rich history, rooted in traditional techniques passed down through generations. You’ll find that it often reflects cultural significance, with different patterns symbolizing unique heritage and stories.
In various cultures, quilts served practical purposes, like warmth, while also becoming art forms that celebrate identity. As you investigate quilt history, you’ll appreciate how these handcrafted pieces connect communities and preserve memories.
Each quilt is a demonstration of creativity and resilience.
Are Quilts Machine Washable?
Yes, quilts are generally machine washable, but you should follow some fabric care guidelines. Use a gentle cycle with cold water to prevent fading and damage.
It’s best to use a mild detergent and avoid fabric softeners. Always check the care label for specific instructions.
For washing tips, consider using a mesh laundry bag to protect your quilt. After washing, tumble dry on low or line dry to maintain its shape and quality.
How Do I Store My Quilts Properly?
Storing your quilts properly is like protecting a treasure chest of memories! First, make certain your quilt storage area is cool, dry, and away from direct sunlight.
Use cotton or acid-free storage bags for fabric preservation. Avoid plastic, as it can trap moisture.
Lay the quilts flat if possible, or roll them gently to prevent creasing. Always check on them periodically to guarantee they’re in perfect condition for your next cozy night!
Conclusion
Creating a quilt is like weaving together memories, each stitch telling a story. You’ve gathered your materials, chosen your fabrics, and mastered the techniques. Now you’re equipped to craft something truly special.
As you finish and care for your quilt, remember it’s not just a blanket; it’s a labor of love that warms both body and heart. Welcome the journey, and don’t shy away from imperfections. They’re what make your quilt distinctively yours.
Happy quilting, and enjoy every step of how quilts are made!